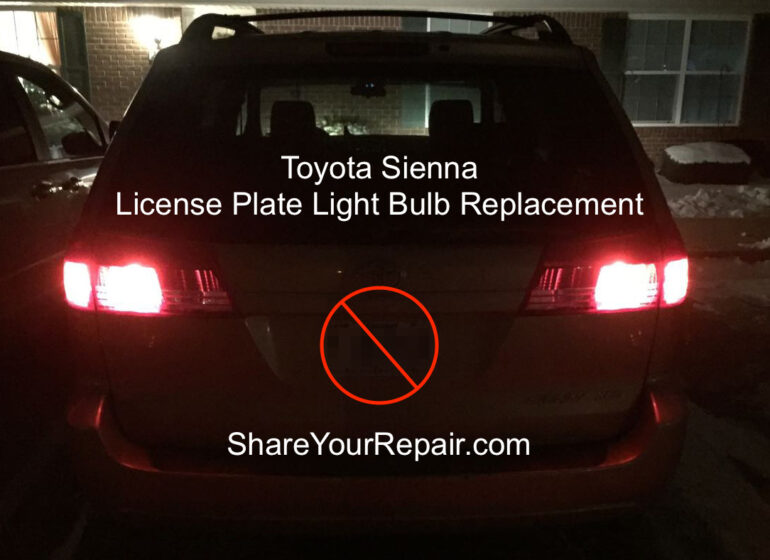
Replacing your Toyota Sienna license plate light bulbs is not a trivial thing to do but with my help you can do it yourself. The light bulbs that light our Sienna’s license plate are both burnt out and I know we could get pulled over for that so it’s been on my list to replace them. Unfortunately you cannot access them from the outside of the van. Replacing them requires the removal of the internal panels from the lift gate door. You can do it with my detailed instructions on Toyota Sienna license plate light bulb replacement…
Toyota Sienna License Plate Light Bulb Replacement
Parts Required:
- Two 2825 LED Equivalent Bulbs
- Toyota Trim Panel Retainer Clips 90467-10188
(because you likely will break some when removing the inner door panels)
- Electrical Tape (for wrapping your screwdriver so you don’t scratch your van’s paint)
Tools Required:
- 10mm socket and ratchet (I recommend having a good all-around tool set like this)
- Flat screw driver (for prying out clips that don’t come out)
Step 1: Pop the lift gate hatch.
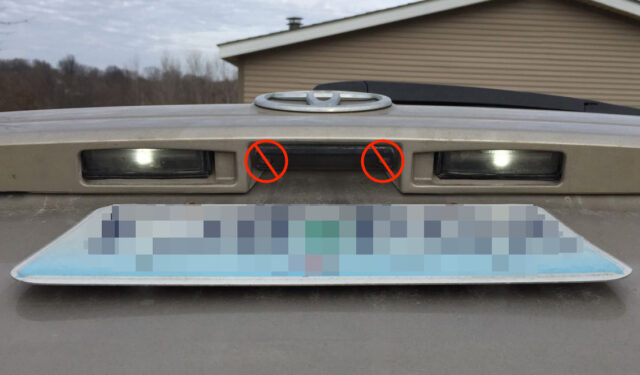
Tip: Don’t bother removing those two screws on the outside of the van above the license plate, they won’t help you (BTW: the picture below was taken after the light bulbs were replaced).
Step 2: Remove the top center trim piece.
This is the piece above the rear window:
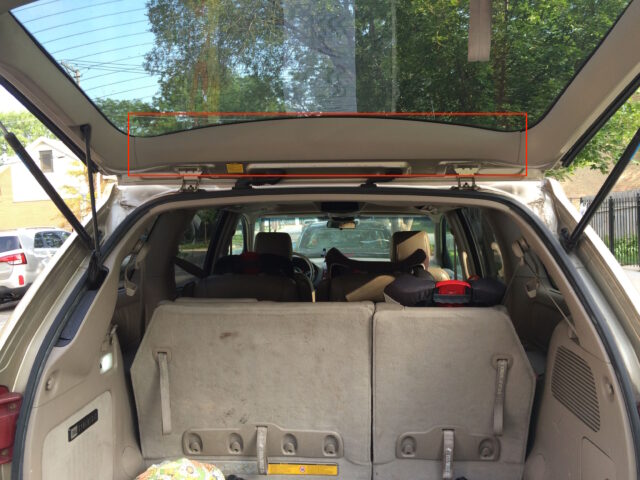
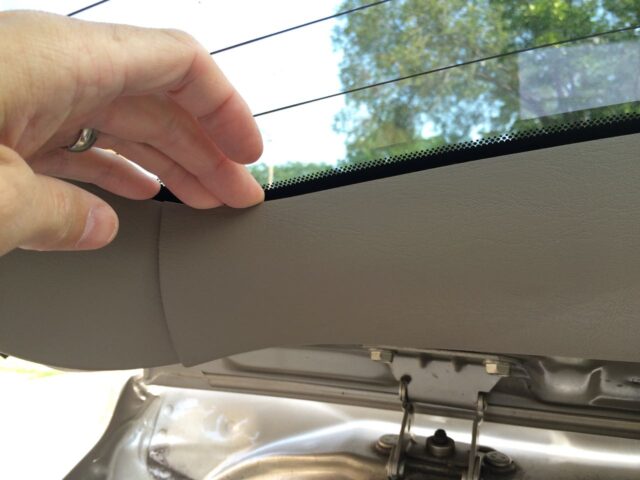
This piece is held in place by five clips. I just used my fingernails and grabbed along the window’s edge and began to pop them free:

Step 3: Remove the right lift gate window side trim.
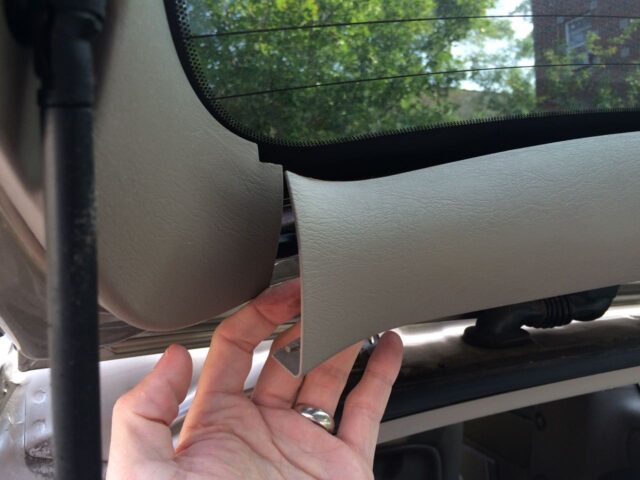
Pull the side trim pieces towards the centerline of the van, away from the post where they are attached.
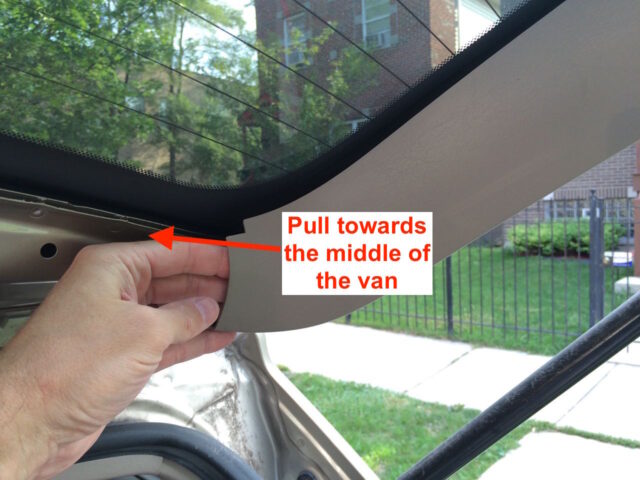
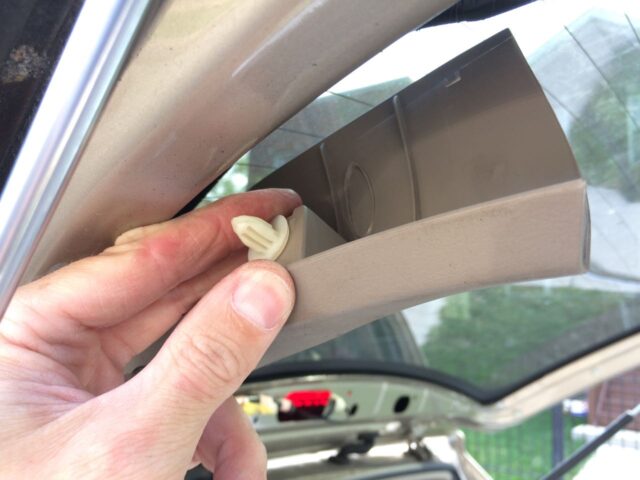
I pulled down and two of the clips did not come off with the trim piece:
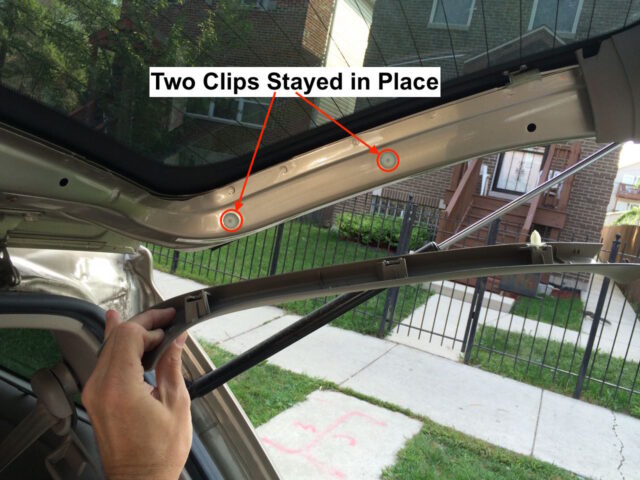
You will need to remove those clips from the door before reinstalling that piece. I did it right before reinstalling it.
Step 4: Pop the left lift gate window-side trim piece free.
I don’t say “remove” it because the rod for the automatic lift gate door goes through it and I didn’t want to mess with disconnecting the rod so I could completely remove the trim piece.
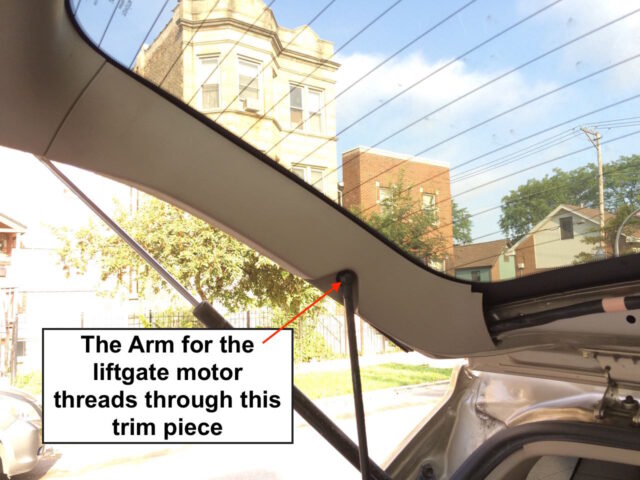
Pop this piece free just like I showed you for the right side. I was able to feed it over and down the power door rod:
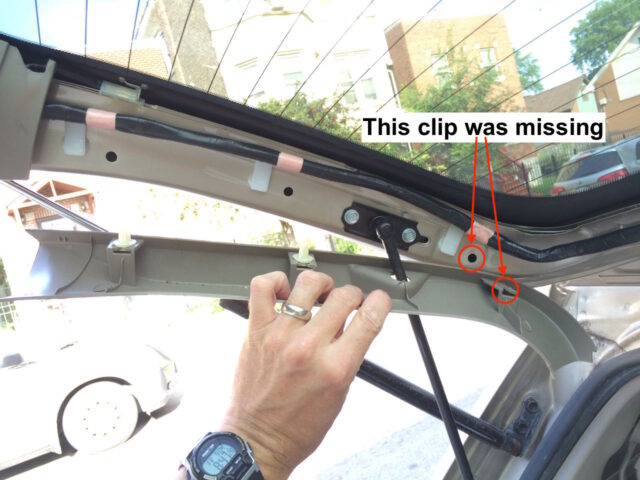
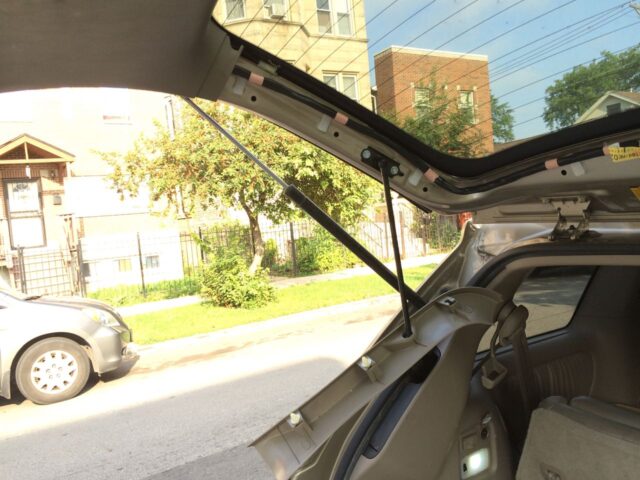
IMPORTANT NOTE: Since we are leaving this driver’s side window post plastic cover hanging on the shock, you want to make sure and DO NOT CLOSE THE LIFT GATE or you may damage that plastic panel.
Step 5: Remove the back door pull strap
Push the cover towards the back window:
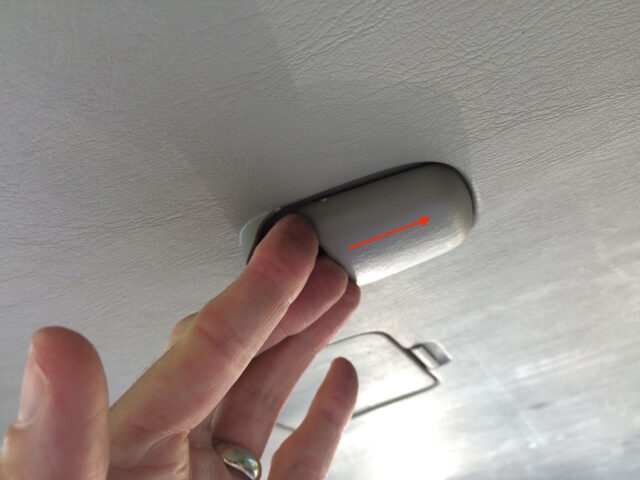
Here is the cover removed:
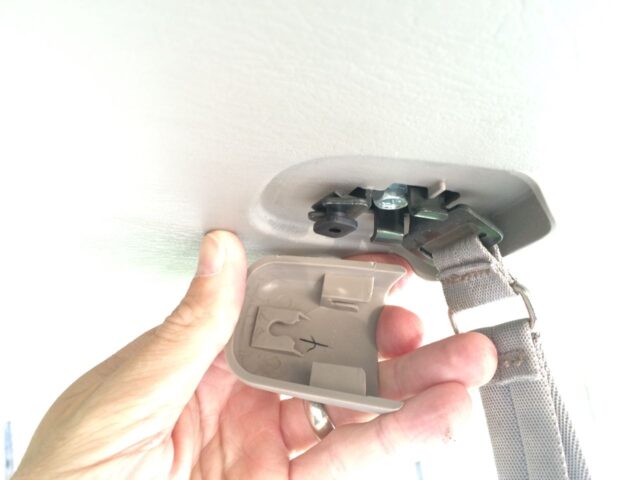
Remove the 10mm headed bolt:
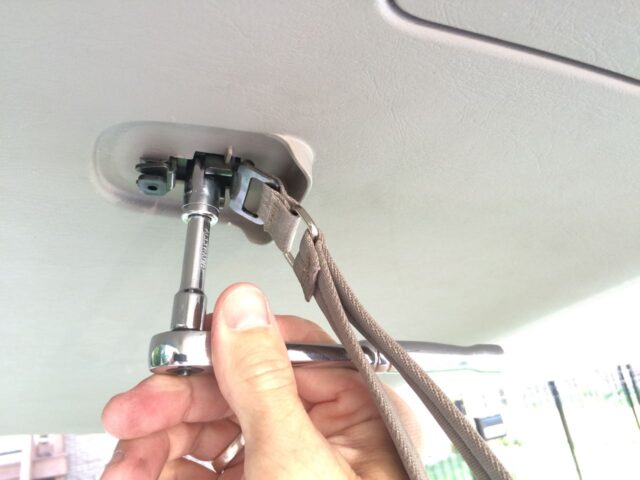
Make sure that the plastic clip is retained and set the pull strap and bolt aside for reinstallation when we are done:
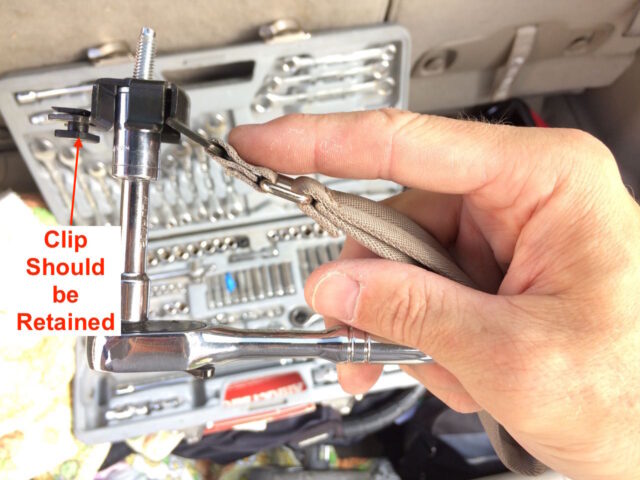
Step 6: Remove the back door main trim board assembly
This is the large plastic panel that the pull strap was in the middle of. There are 14 clips and two plastic catches that hold this panel on. You will want to start on the window edge because there are “catches” at the bottom (latch) edge that cannot be pulled free.
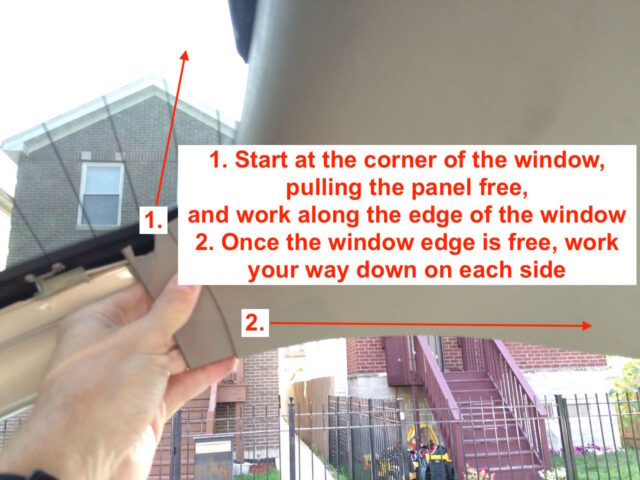
Once you have the 14 clips popped free you can lift the trim board assembly up and off the lower catches:
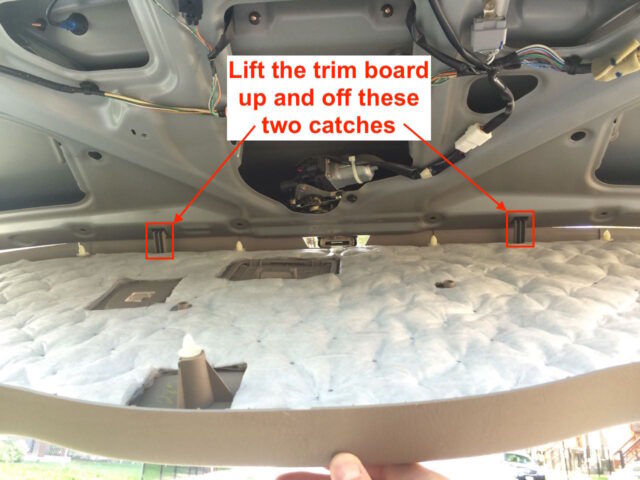
Here’s a look at the back door trim board removed from the van:

Step 7: Locate the license plate light fixture locations.
With the door open, look up at the inside of the open door. They are on the inside of the lift gate door, inside a rectangular opening in the sheet metal, above where the license plate is on the other side:
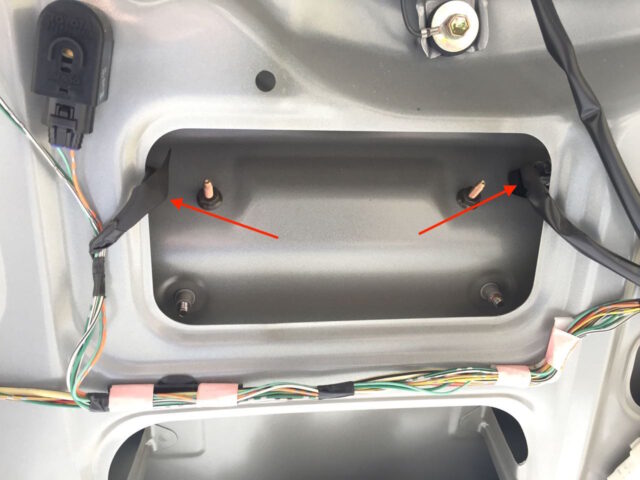
Here’s a close up of the left (driver’s side) fixture:
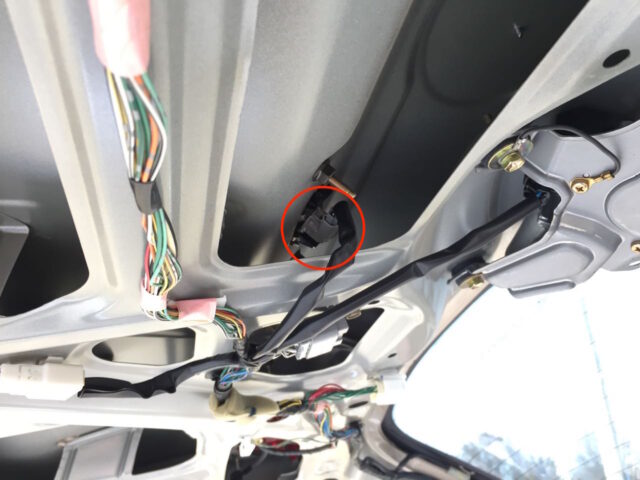
And here’s the right (passenger’s) side light fixture:

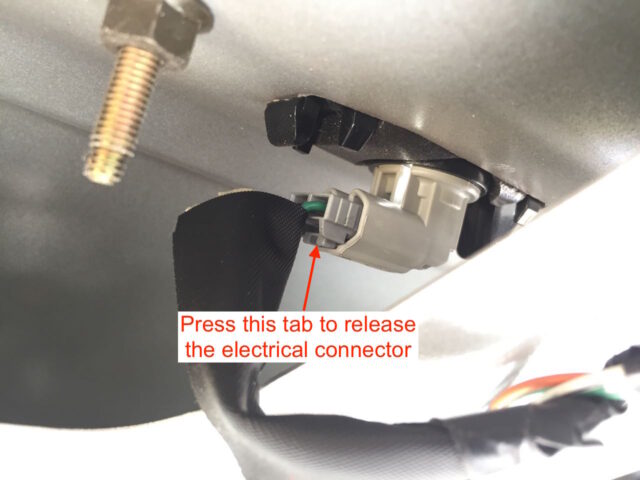
Step 8: Remove the electrical connectors from each light.
There is a tab on each electrical connector that must be pressed in order to disconnect the connector:
Here I am pressing it with my finger:
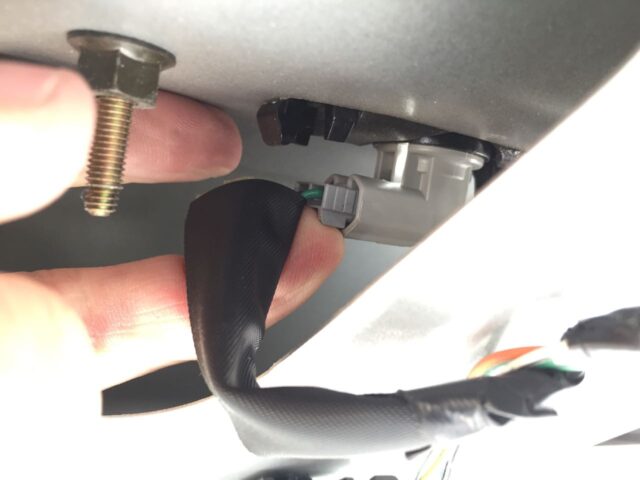
Be careful you are not pulling by the wires as you can pull the wires out of the connector and then you will have worst problems to deal with.

Repeat this process for the other license plate light electrical connector.
Step 9: Unlatch the license plate light bulb fixture.
This may be the most helpful part of this article as it is difficult to determine how to get these fixtures out and you don’t want to break them. To release the light fixture, turn it 30-degrees counter-clockwise:
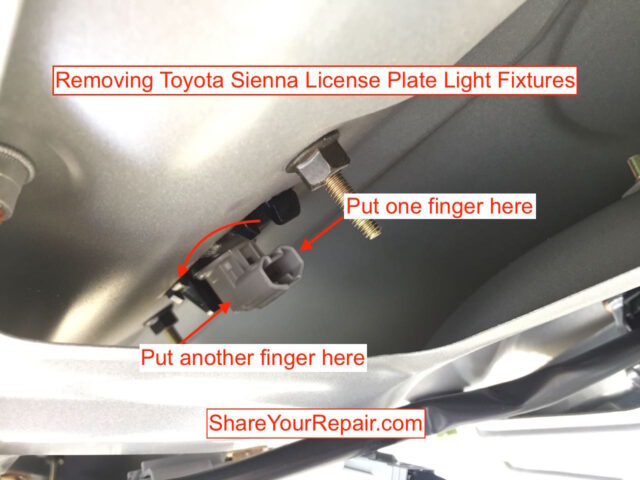
I had to use an unusual amount of force to get them to release. This is true about the lift gate tail light bulb sockets as well. Make sure you are turning them counter-clockwise, with counter-clockwise being when you are looking up at the inside surface of the sheet metal (the side that faces into the inside of the van). Carefully turn them and they will pop free. Note: There is NOT any tab to depress to release them. Here’s what the fixture looks like removed:
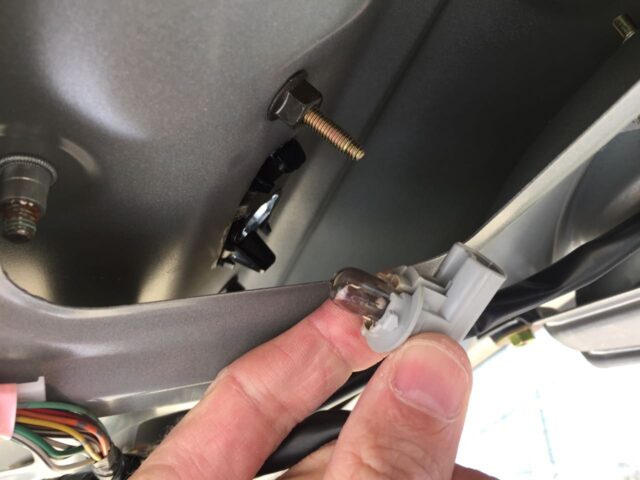
Repeat this for the other light fixture.
Here are what the sockets look like when the fixtures are removed:
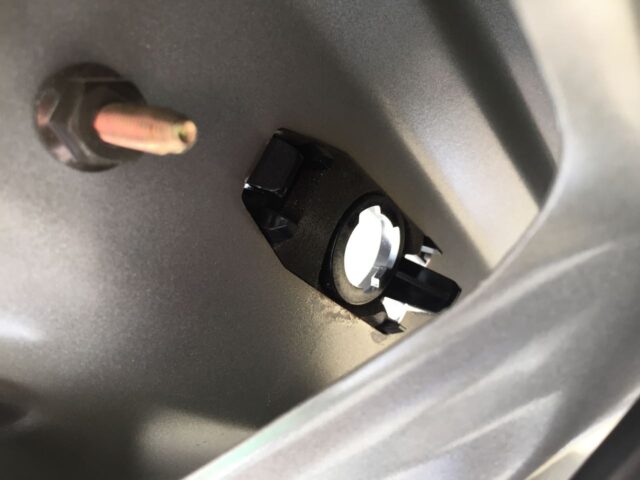
Step 10: Remove the light bulbs from the light fixtures.
The bulbs pull straight out of their sockets. You can pull them out with your fingers. I would NOT use a pliers as you will likely break the bulb.
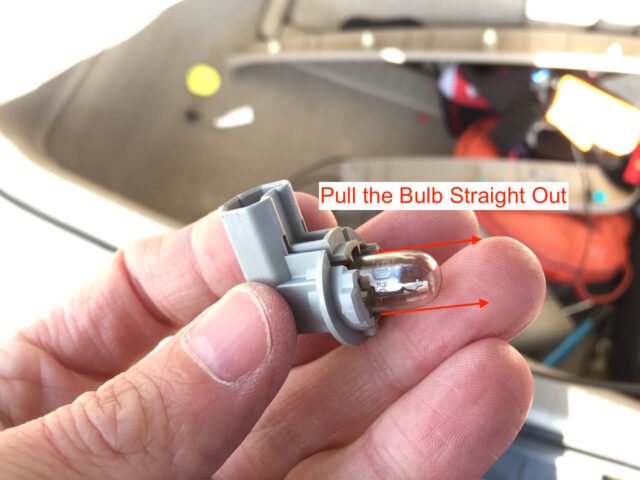
Here is what they look like when they are out:
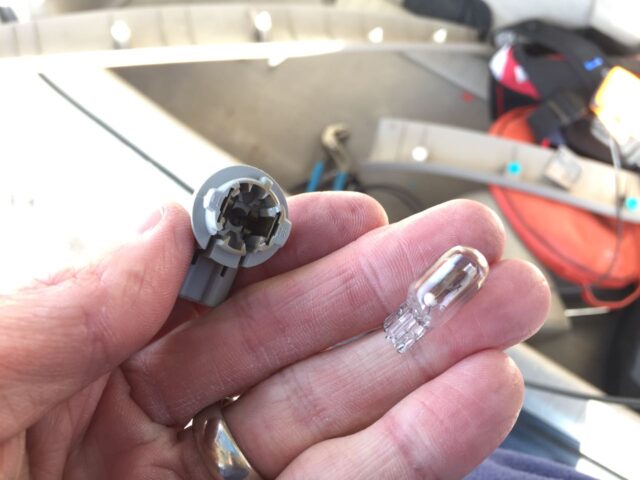
Step 11: Verify the correct polarity of your LED bulbs.
I would highly recommend that you replace your bulbs with LED equivalents like I have linked at the top of this article. They are more expensive but you don’t want to have to repeat this repair any time soon and LEDs will last longer than incandescent bulbs. If you are installing incandescent (old-fashioned filament bulbs) there is no polarity to them and you can insert them either way–insert them and skip to the next step. If they are LEDs the polarity matters. You won’t ruin them if you insert them backwards but they will not work. Don’t wait till the end to test them–test them now. What I did was insert both bulbs into the sockets and connect the fixtures to the electrical connectors. Then turn the ignition to the on position and turn on your headlights and verify they work. I luckily had them both correct the first time but switched one around for illustration purposes and you can see that the left bulb did not come on below:
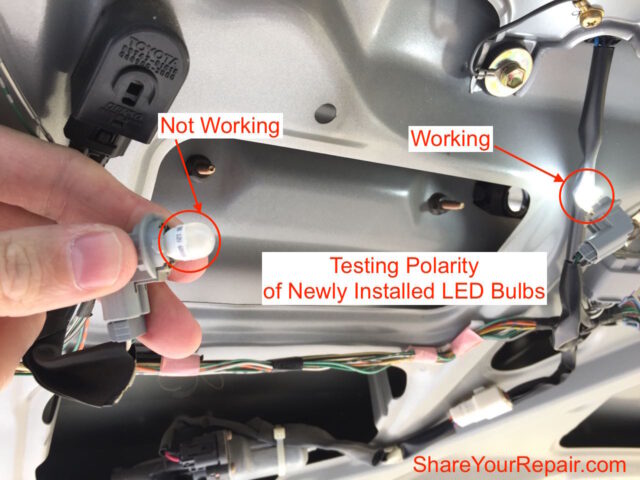
Pull the bulb out that was not working and turn it 180 degrees and re-insert it into the socket. Here they both are working:

Step 12: Reinstall the light bulb fixtures.
It is much easier to reinstall the fixtures if the electrical connectors are disconnected so if you just tested your LED bulbs, disconnect the electrical connectors. The connectors will only go in one way so there’s no worry to get the polarity mixed up from this point forward. You will need to insert the fixture into the socket so that the tabs fit in the slots. Make sure the fixture is all the way in the socket and flush before you proceed or you could break the fixture.
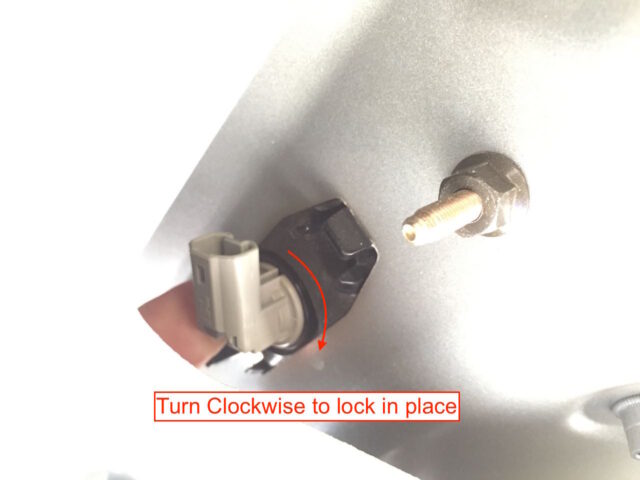
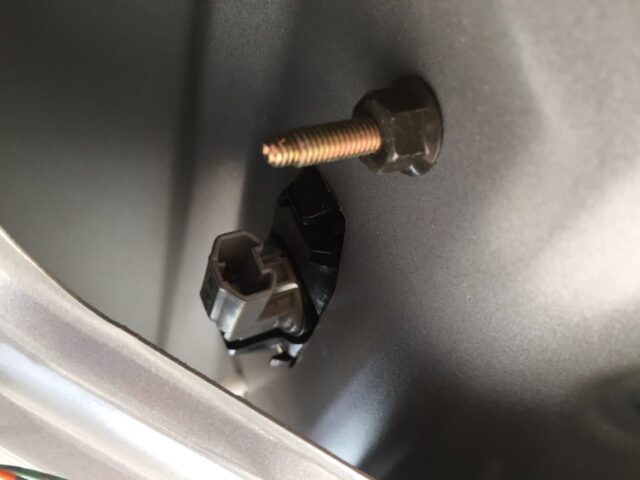
Repeat the process for the other light fixture.
Step 13: Reinstall the electrical connectors.
Insert the electrical connector into each of the two light fixtures. You should hear a click when the latch catches, which will tell you that the connector is all the way in. The tab goes on the side away from the door:
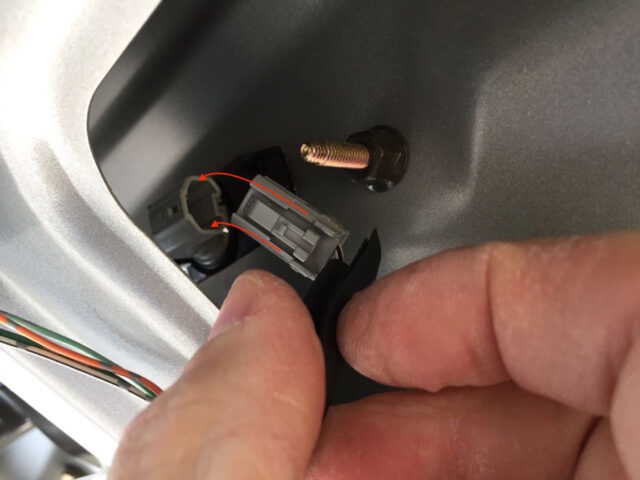
Repeat this for the other fixture too.
Step 14: Verify your installation.
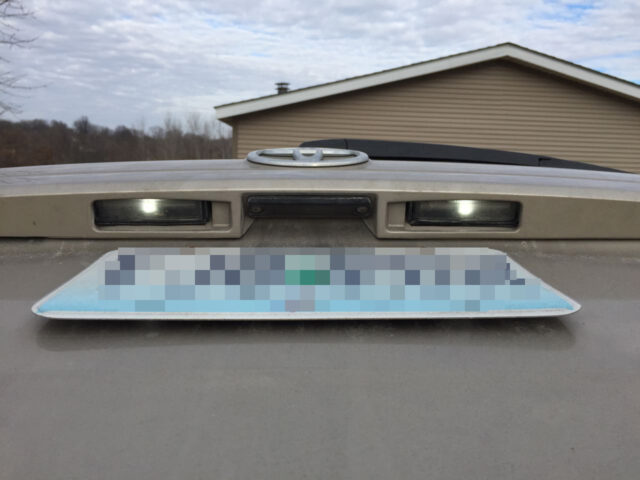
Before you put your door back together you should check to make sure the bulbs are working. Turn the ignition to the on position (if it’s not already) and turn on your headlights and verify that both bulbs work. Important: DO NOT LOWER YOUR TAILGATE since you have one of the plastic panels threaded onto the driver’s side shock and it will be crunched if it is closed. Peak up at the headlight bulbs to verify they are still on:
Step 15: Check for trim clips that pulled free from their panels.
Before we can reinstall the plastic door panels we need to remove all clips that stayed on the door and replace them on the plastic door panel pieces. I didn’t reuse the clips that came off but used new ones. One of them broke off so it was good I had replacement ones on hand. You could probably reuse them if they are in one piece though. Here I am prying off one of them:
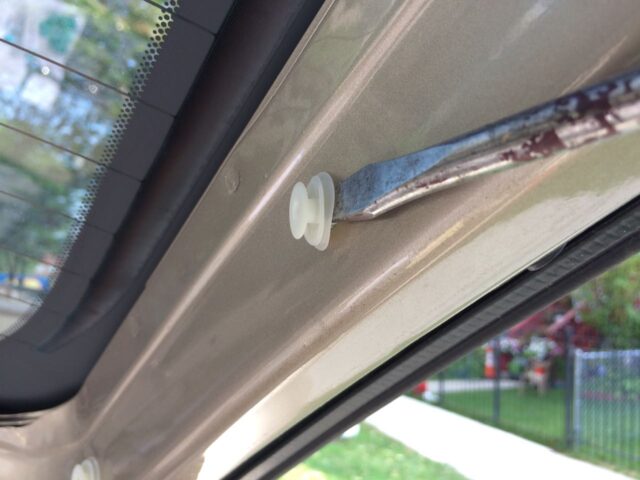
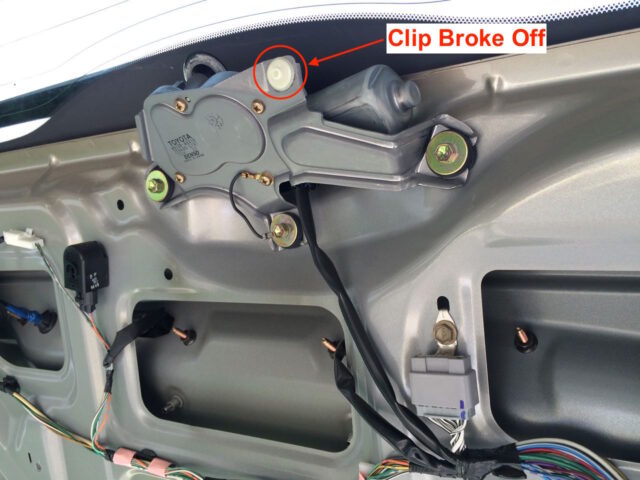
There’s a lot of opportunity to stab yourself int the hand when prying these out with a screw driver so be careful. The last time I did this repair I wrapped my flat head screwdriver in electrical tape to protect the paint job. The top clip broke into two pieces when I removed the door panel:
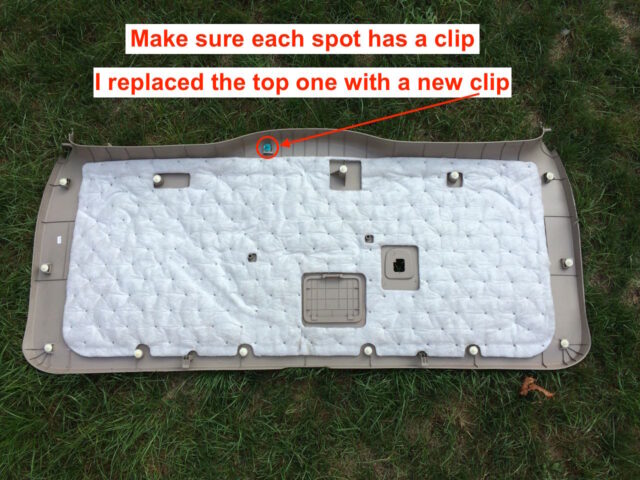
Make sure all the clips are snapped all the way into their slots so they line up correctly when we go to put the panel back on:

Step 16: Reinstall the back door trim board.
Start by inserting the hooks on the bottom and then carefully make sure the snaps line up with the holes in the door that they go into and begin snapping them in place.

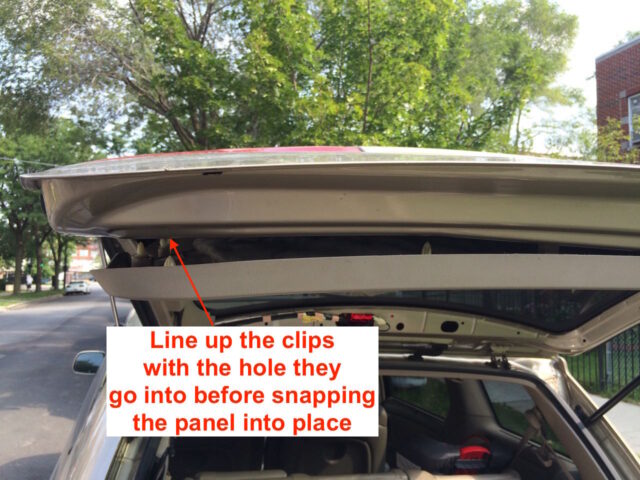
I use the palm of my had to snap the panel into place.
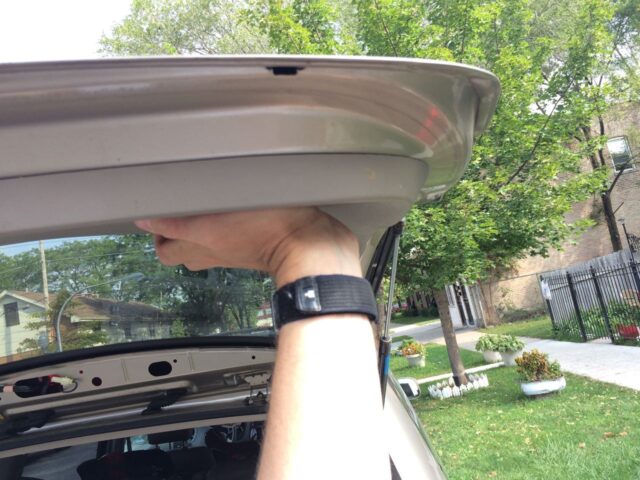
Work your way around the edge remembering where the clips are located:
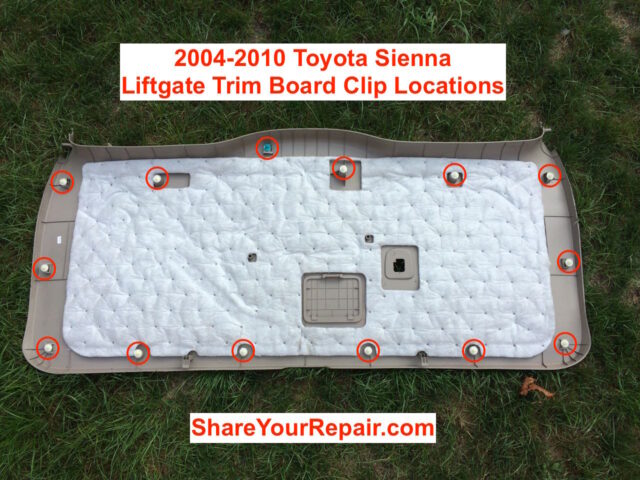
Step 17: Reinstall the side trim pieces.
The left one was a little tricky since I decided not do disconnect the power door rod. I found that if you put the piece at the angle I have pictured below, you can feed it up and over the control rod connection and put it into place. Be careful not to break the trim as I felt like it was cracking as I put pressure on it at one point. It will go back on so take your time and work it over the elbow of the shock:
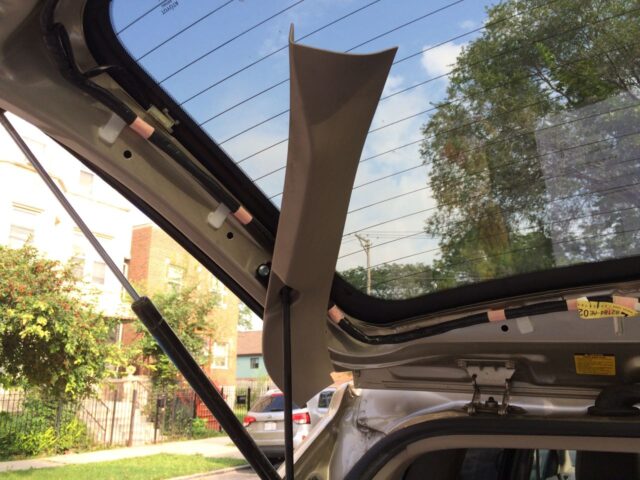
The clips on this piece will come off when you are feeding it up and over the control rod so I reinstalled them afterwards (3 total):
Reinstalling the right trim piece. You can see that I replaced the two clips (blue) that didn’t come off when I originally removed it:
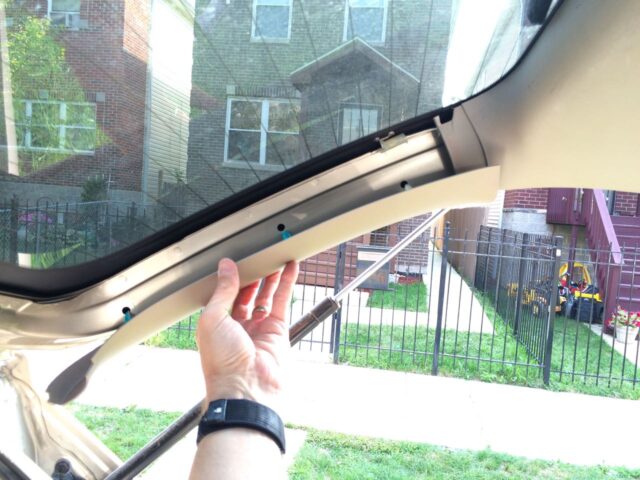
These trim pieces should fit flush with the metal of the door if you have them installed correctly:
Step 18: Reinstall the back door pull strap.
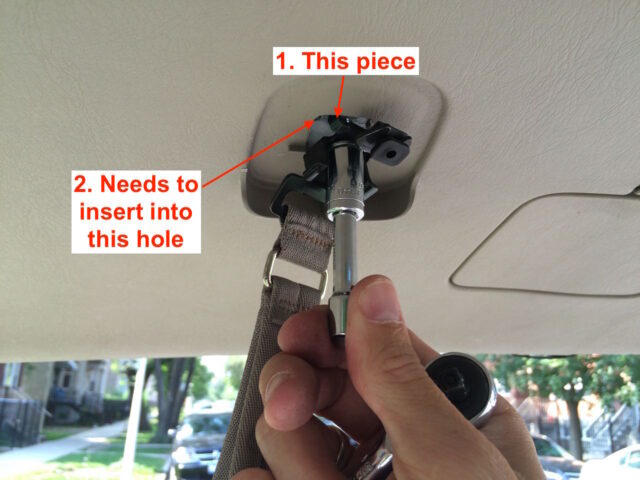
Bolt the pull strap in place. It has a 10mm head on the bolt. There is a part of the metal bracket that must line up and insert into a hole in the door:
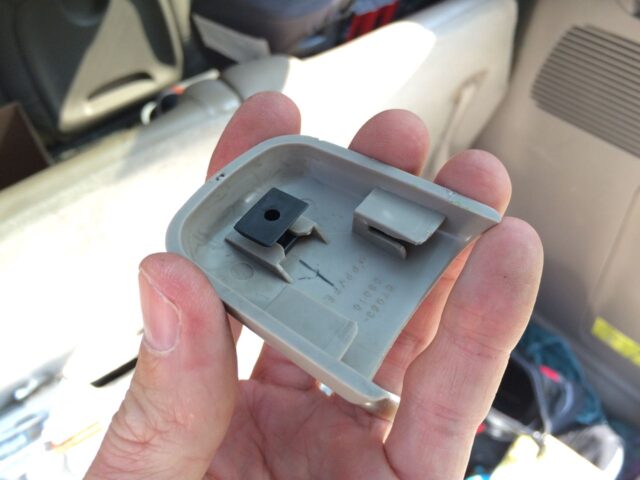
I found that it is easier if you transfer the black clip from the metal bracket of the pull strap and put it on the cover before reinstalling:
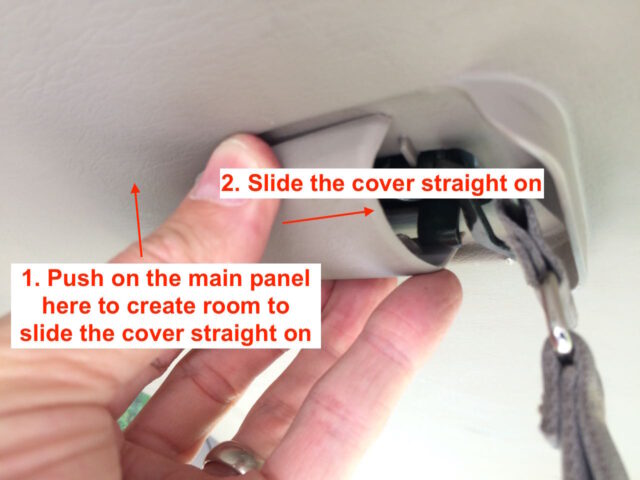
I found that the space I needed to get the cover started would only be available if I pressed hard on the main trim board as shown below:
Step 19: Reinstall the top trim piece.
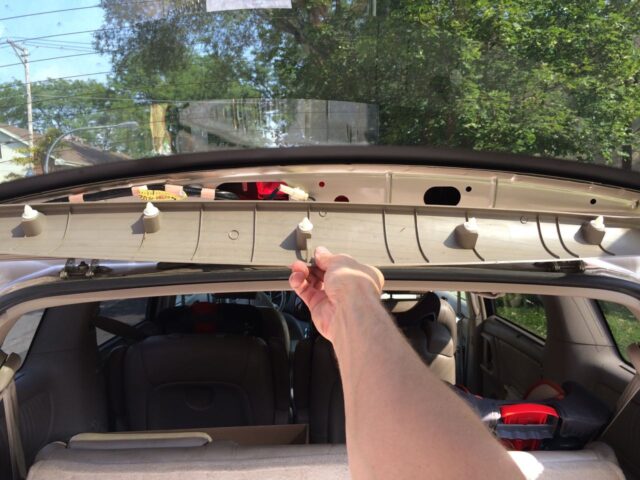
This one is pretty easy. Line up the holes and snap into place:
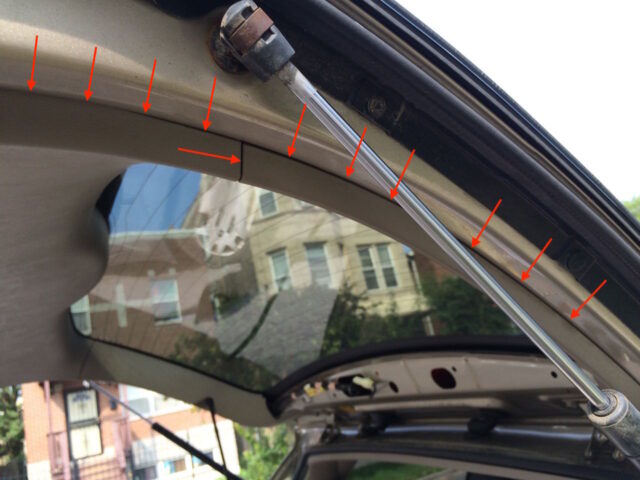
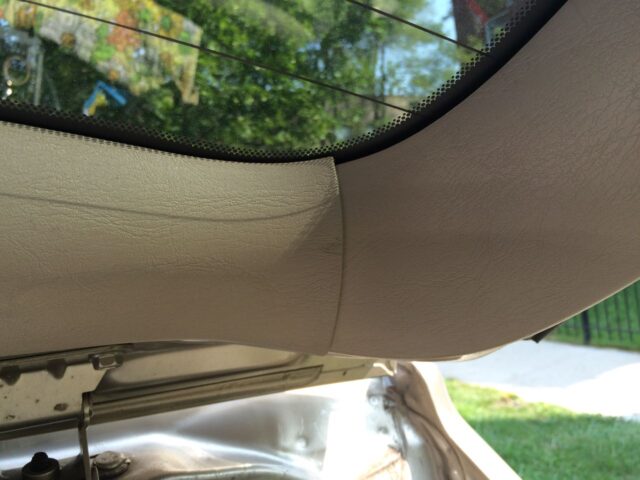
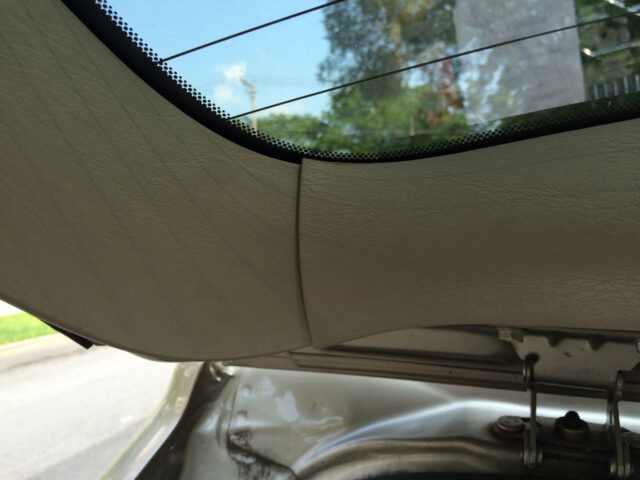
This piece overlaps the two side pieces:
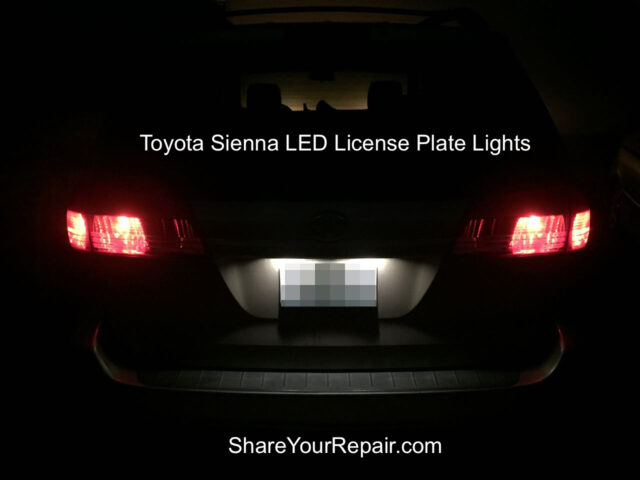
Now you are done! I’m sure they are going to charge you for at least a half hour of labor if you get this done at a dealer so now you have saved yourself at least $50 and now you can change out your lift gate tail lights as well as it is nearly the same process. Here’s a picture of my new LED license plate lights:
Amazon Associate Disclosure: As an Amazon Associate I earn from qualifying purchases. This means if you click on an affiliate link and purchase the item, I will receive an affiliate commission. The price of the item is the same whether it is an affiliate link or not. Regardless, I only recommend products or services I believe will add value to Share Your Repair readers. By using the affiliate links, you are helping support Share Your Repair, and I genuinely appreciate your support.


Thank you so much for posting this video! You made a daunting task MUCH easier with your step-by-step instructions and accompanying photos. I could NEVER have done it without your online guidance!
Well Don, I don’t even have a video in this article but I know what you mean–I think a detailed set of picture- and diagram-filled instructions is often better than a video.
Thank you so much, John! Your instructions and pictures are excellent and I just replaced the license plate bulbs on my 2010 Sienna. 😀
Those light bulb fixtures turn easier with a 14mm or 9/18 open wrench.
With a wrench you can easily break the plastic fixture so you must be careful to know for sure you have the little tab depressed, which allows it to turn.
John, many thanks for the straight forward instructions on how to replace the plate lights. All panels came off fairly easily, and only two clips needed to be popped out and returned to the panel. The hardest part for me was turning the lamp fixture counter clockwise. They wouldn’t budge, so I had my husband do that part for me. Everything popped back into place during reassembly.
My next task is to figure out how to remove water that is sitting behind the lens of a rear light….and keep it out. I guess something is wrong with the seal. I need to get the water asap out so it doesn’t present with electrical issues. Can you direct me to a tutorial ?
I have written instructions on replacing the brake light bulbs and tail light bulbs, but have not dealt with water in the back light housings. For how to get into these lights, see these articles: How To Replace Toyota Sienna Liftgate Tail Lights
How to Replace Toyota Sienna Brake Light Bulbs
OK, I’m about to attempt this with help from my 13 y/o grandson. I’ll comment again when done. As a female, the shops would probably charge me double because they think women are ignorant. Thanks to you, I’m not now! :>)
Perfect instructions. I found this after looking at several videos. I found the still photos combined with the detailed instructions to be what I actually needed to accomplish what turned out to be a 15-minute or less job. (I didn’t even break any clips.) Light bulbs were $7 with tax. I would have had to pay the dealer $50. Thanks so much, John
Thanks for the feedback Geoff! Good work on fixing your van yourself and saving your hard-earned money.
Awesome instructions. Exactly what I needed. Thank you! I need the courage to turn the electrical connectors with that much force. I really appreciate the step by step detail.
Thanks for the feedback Tom, glad you were able to get that bulb replaced. Sometimes we just need reassurance that what we are doing is right.
Nice tutorial, but way too much work for that. Try this next time:
https://www.amazon.com/Universal-Bolt-12-LED-License-Plate/dp/B0083Y0WL2/ref=sr_1_6/161-6276090-3927345?s=automotive&ie=UTF8&qid=1483326982&sr=1-6
A lot easier and much nicer than all the work described.
Where do you prescribe that a Toyota Sienna owner connects the power to the 12-volt lighting circuit that automatically comes on when the headlights are on? That’s going to require work too, and on the tailgate where the license plate is mounted, the path to that wiring is by doing nearly the same procedure as I lay out here (removing the interior panels). Why not just keep a clean installation, versus adding penetrations in the exterior of the van (which can introduce water into the lift gate) for third-party wiring, when you can just replace the bulbs?