If you changed the batteries but your wireless garage keypad still will not work then I think I have a solution for you. My friend had a wireless garage remote keypad that would not work and they thought it was just low batteries. I put new AAA batteries in it but it still didn’t work. Follow along to learn how to fix wireless garage keypad not working…
How to Fix Wireless Garage Keypad Not Working
Hardware:
Tools Needed:
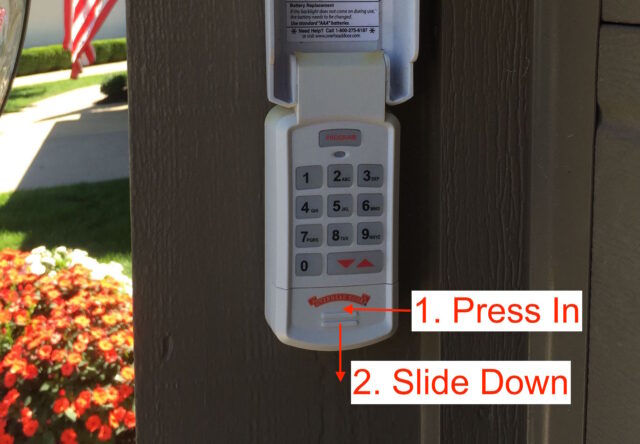
Step 1: Open up the battery compartment.
Press in and slide the battery compartment down.
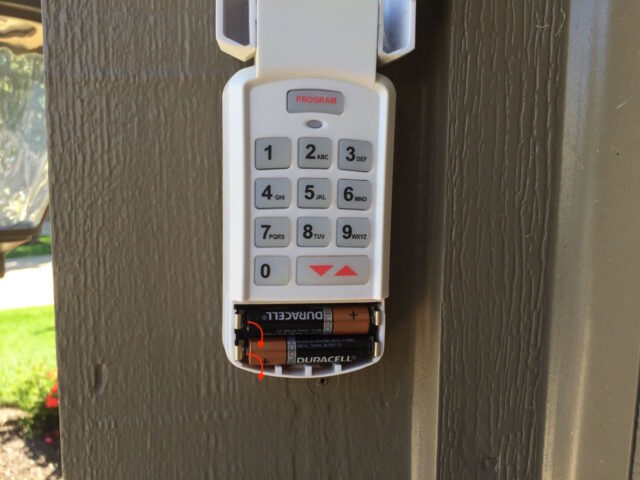
Step 2: Remove the batteries.
Pop out the batteries:
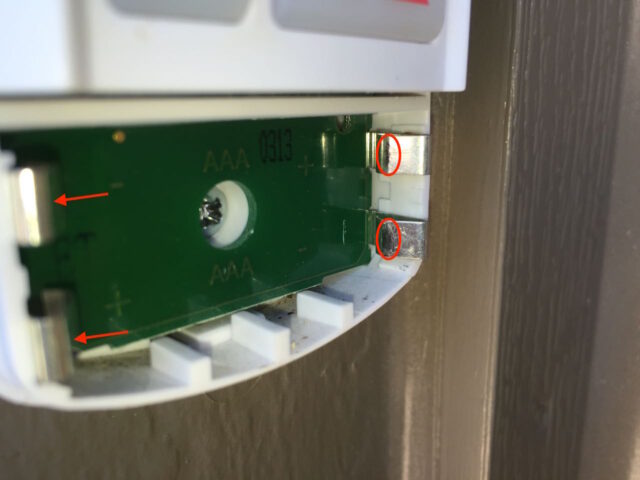
Step 3: Check the remote’s battery contacts for corrosion.
Look at the place where the ends of the battery come into contact with the remote and look for signs of corrosion. In the picture below, the top right one still has dark corrosion on it but I had already started scraping off the lower right terminal:
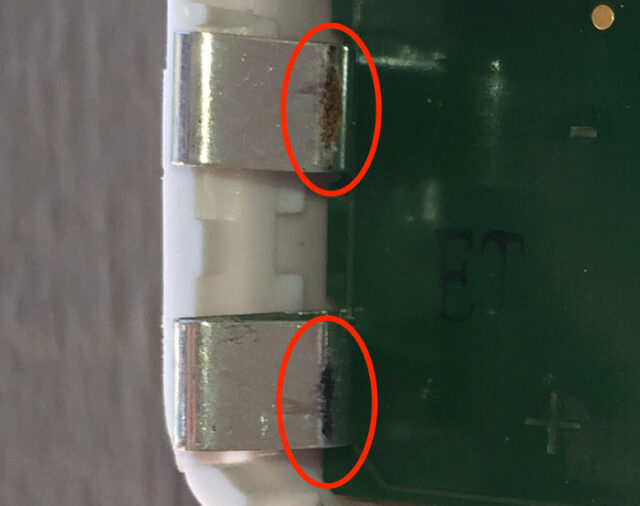
The battery contacts should be shiny and silver but as you can see from this close-up, there is corrosion on there:
Step 4: Sand/scrape the corrosion off the battery contacts.
I used a utility knife to carefully scrape the corrosion off the contacts:
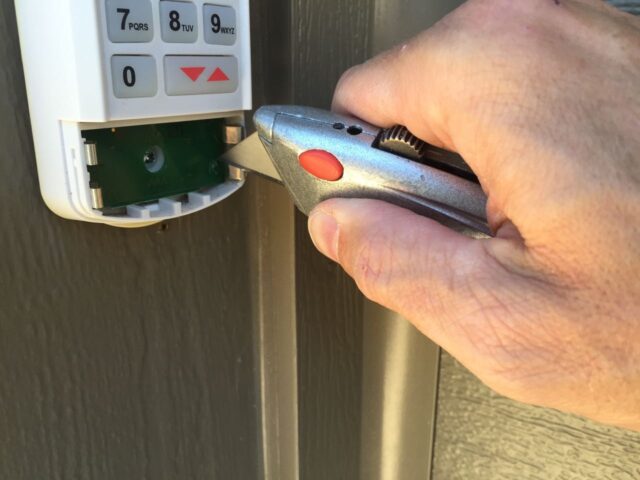
You also could use a piece of fine sandpaper (220 grit or higher). When you are done the contacts should be shiny:
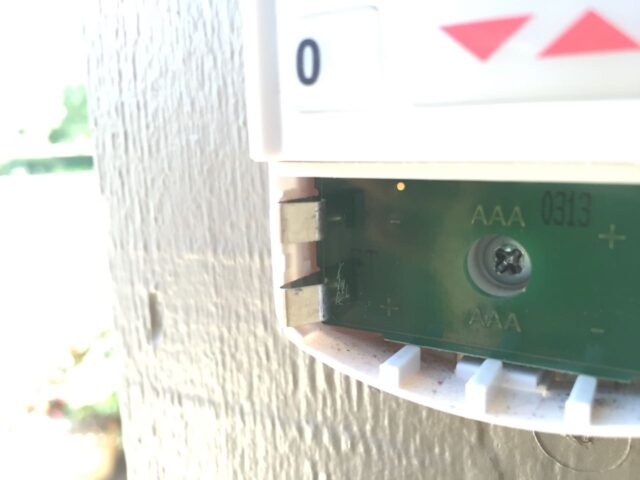
Step 5: Reinstall the batteries.
The polarity of the batteries is printed on the circuit board:
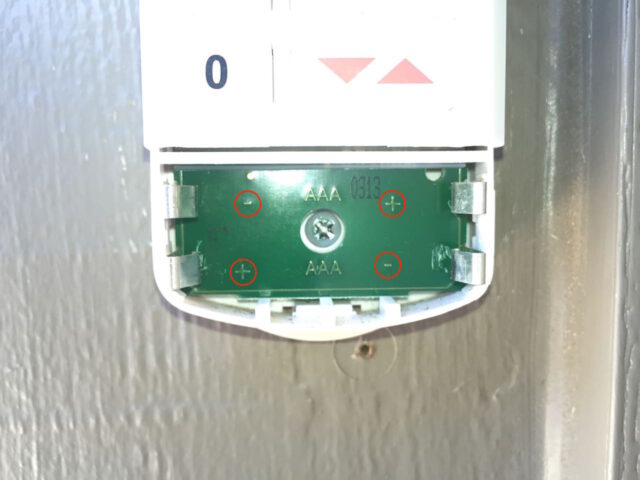

Step 6: Test the remote.
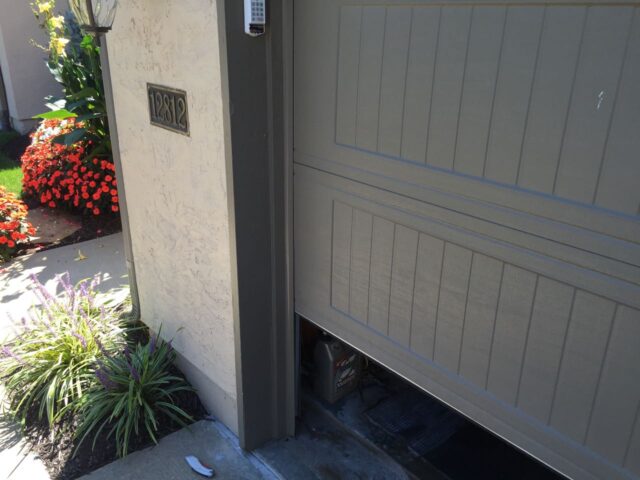
Before you put the cover back on go ahead and test the remote. If you have an Overhead Door brand remote it will remember the code you have programmed into it. Once I cleaned the contacts this remote worked the first time:
Step 7: Reinstall the remote battery cover.
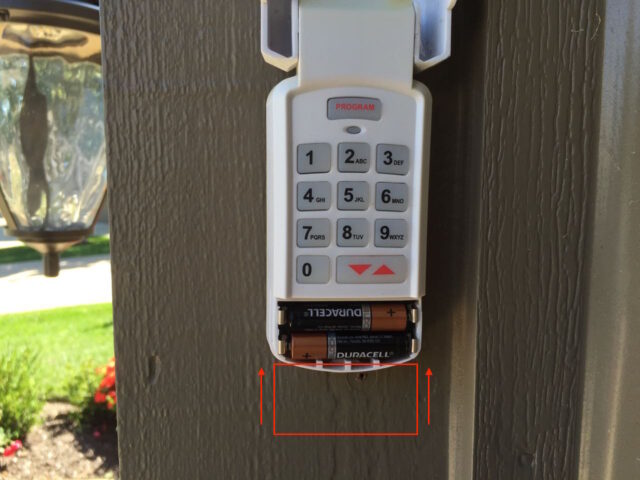
The Overhead Door remote that I was working on must be slid on from the very bottom. I didn’t get a picture of it but here’s a diagram of how to do it:
Successful with this repair? Do you have a tip to add? Please leave a comment!
I wonder how many of these remotes get thrown away when they could be easily fixed. Let me know in the comments if this trick worked for you. If you were able to solve your broken garage remote in a different way please share that as well.
Please note: if you do not have any approved comments on this site then your comment must be personally approved by me before it will appear. I do this to keep my site 100% free of spam comments. I read them all and almost always review and respond to all comments within a day. I look forward to hearing from you.
Amazon Associate Disclosure: As an Amazon Associate I earn from qualifying purchases. This means if you click on an affiliate link and purchase the item, I will receive an affiliate commission. The price of the item is the same whether it is an affiliate link or not. Regardless, I only recommend products or services I believe will add value to Share Your Repair readers. By using the affiliate links, you are helping support Share Your Repair, and I genuinely appreciate your support.

This repair posting confirmed what I’d done recently.
I found this website(?) as I was looking for the proper terminology for the battery “contact”, which is the critical part of this problem and it’s repair.
Yesterday I scraped away at the rusty corrosion on the four contact areas in the battery compartment. Success for the most part. However, the contact was still a little stubborn because:
The compartment is big for the size of the standard AAA batteries, maybe I’ll add a sliver of foam padding, rolled up piece of tape, etc. to pack the batteries in tighter and keep them from losing contact.
Thank you. I like the format here.