We are living in a modular home that still has the original thermostat. The place isn’t insulated very well and the summer has been hot so we have been getting some big electric bills because of our air conditioning. I felt it was time to put a programmable thermostat on this furnace and if you want to know how to do it, follow along for Honeywell RTH2300 thermostat installation instructions…
Hardware:
- Honeywell RTH2300B Programmable Thermostat
- Evcon Industries (Coleman) Direct Vent Forced Air Furnace Model DGAT075BDD
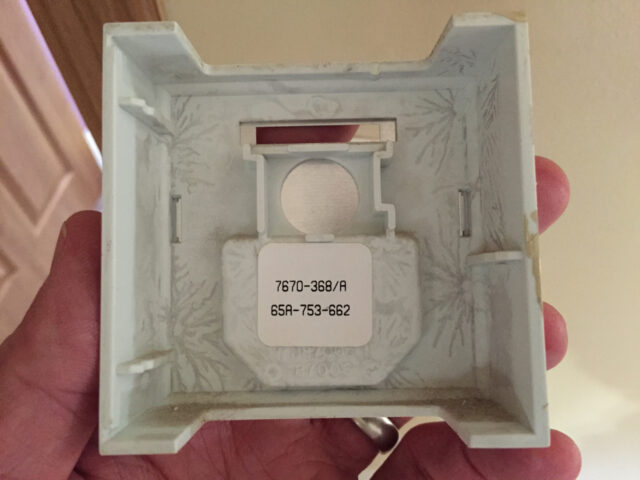
- Evcon Thermostat 7670-368-A 65A-753-662
Tools Needed:
- Cordless Drill
- 3/16-Inch Drill Bit (for drywall)
- Phillips and Flat-Head Screwdrivers
- Fine-tip flat-head screwdriver
- Hammer
Honeywell RTH2300 Thermostat Installation Instructions
Step 1: Turn off your furnace and AC Condenser.
There possibly could be a switch to turn off your furnace on the furnace but mine does not have that. Hopefully your electrical panel is labeled like ours is:
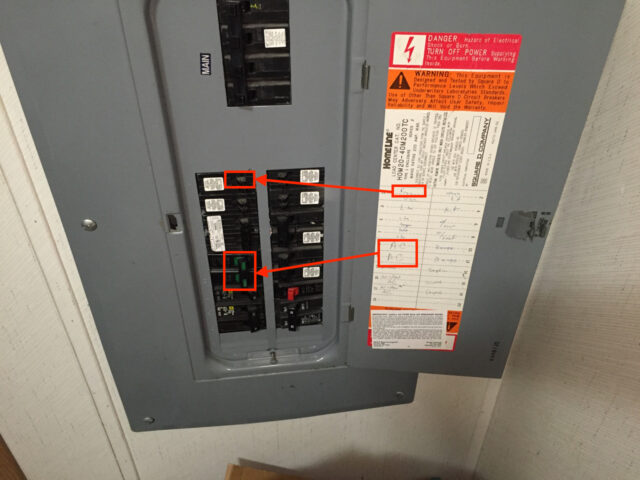
I have wired a thermostat without shutting off the furnace. There is 24 VAC on some of those wires, which will not hurt you at all, but you do risk damaging your furnace electronics if you touch the two wires together so I highly recommend taking the time to shut off the power before proceeding.
Step 2: Open up the thermostat.
Here is the original Evcon thermostat that will be replaced:
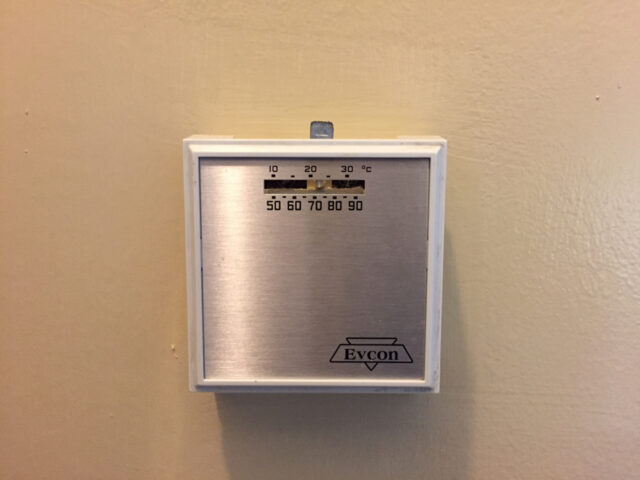
Step 2a: Remove the outer faceplate.
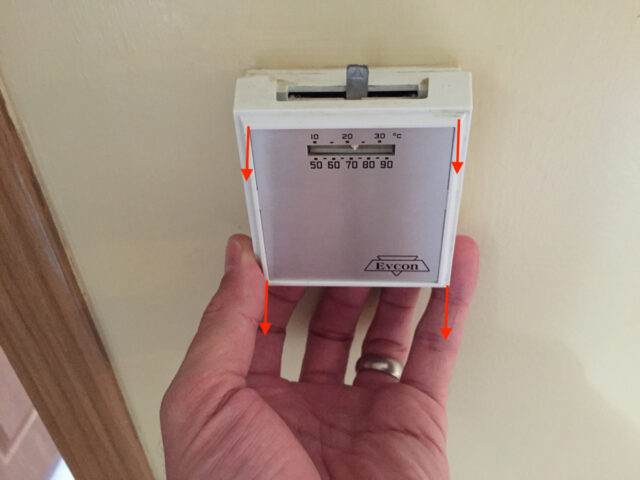
With your fingertips grasp the cover and pull straight out:
The model information off the back of the cover:
Step 2b: Remove the inner cover.
There are five flat-head screws visible from the inner cover. Three of them are to connect the cover to the back and the other two are mounting screws. The three that connect the cover to the back actually are making the electrical connections between the thermostat electronics and the wiring on the back plate. You will want to remove all five screws at this point:
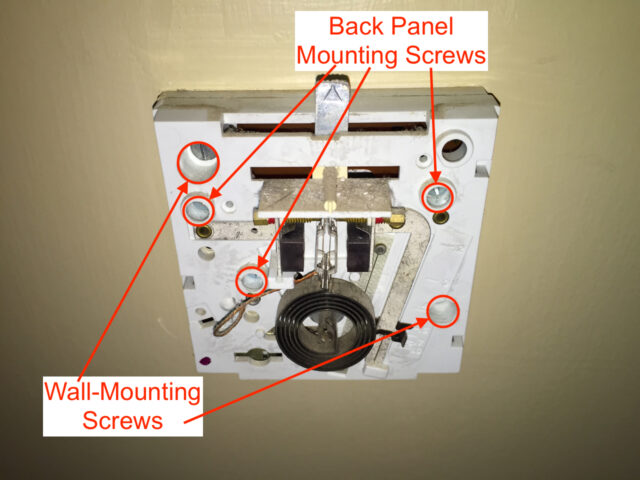
When you have those screws removed it will come off the wall and the inner panel will come off revealing the wiring connections:
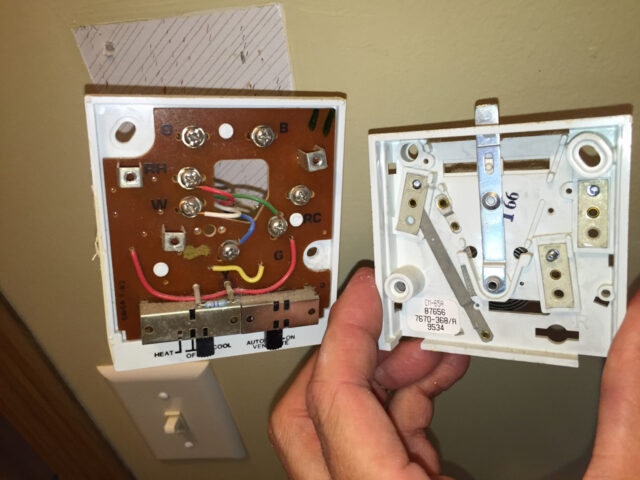
Step 3: Label the wiring.
Now in my example you will see why it is important to label the wiring connections–because the colors may not be correct. Here are the labels that are important for this thermostat:
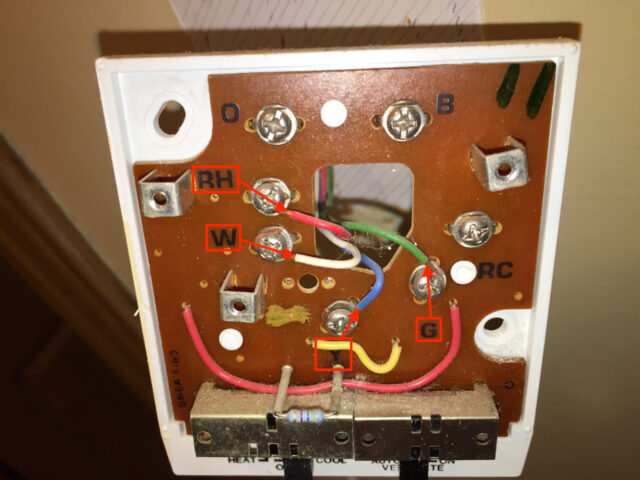
Note that the blue wire connects to the Y terminal, but it’s a BLUE wire, not a yellow wire. The RH (Red Heat) connects to a red wire, the green wire connects to G, and the white wire connects to W. Use the labels that came with your thermostat like I did OR use some masking tape and a sharpie to label what connection the wire is connected to on the thermostat:
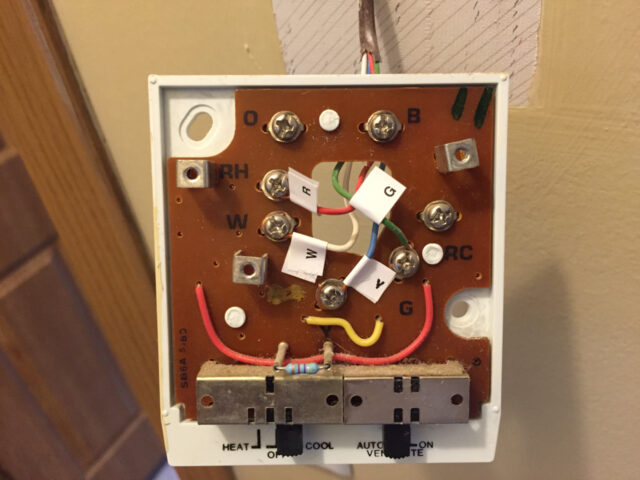
Step 4: Disconnect the four wires from the thermostat.
Unscrew the screws connecting the four wires to the thermostat and pull them through the hole to free the thermostat body.
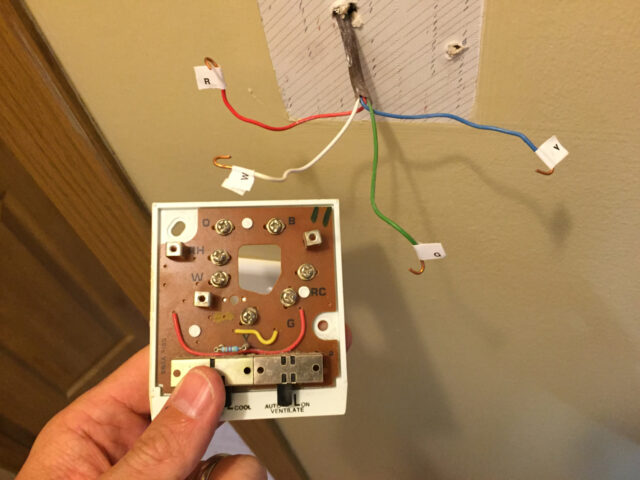
Step 5: Prep the wires for connecting to the new thermostat.
The new thermostat has a different method for connecting the wires so you are going to want to straighten the wires and trim them to approximately 3/16 inch as seen below:
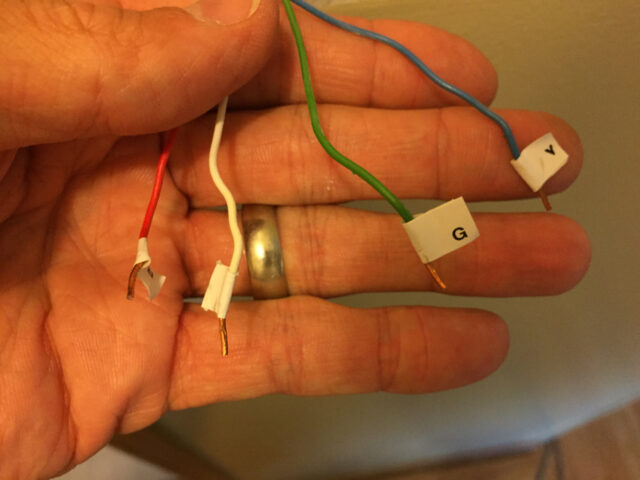
Step 6: Connect the wires to the thermostat mounting plate block.
Insert the wires into the corresponding connectors and tighten the set screw. One thing to note is that the right two terminals are jumpered together, so you could connect the red wire to either side, with the jumper remaining in there:
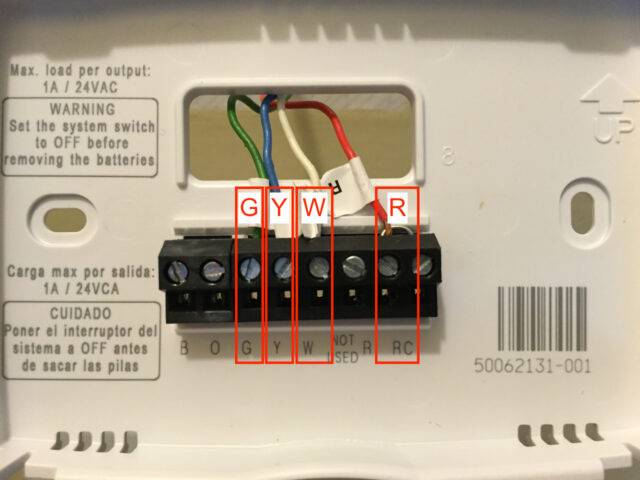
Step 7: Set the furnace type on the thermostat.
Gas/oil furnace fan settings are different from electric furnaces so there is a select switch on this thermostat that must be selected. If you are on propane, natural gas, or heating oil, slide the switch to the left. If you have electric heat or a heat pump, slide the switch to the right:
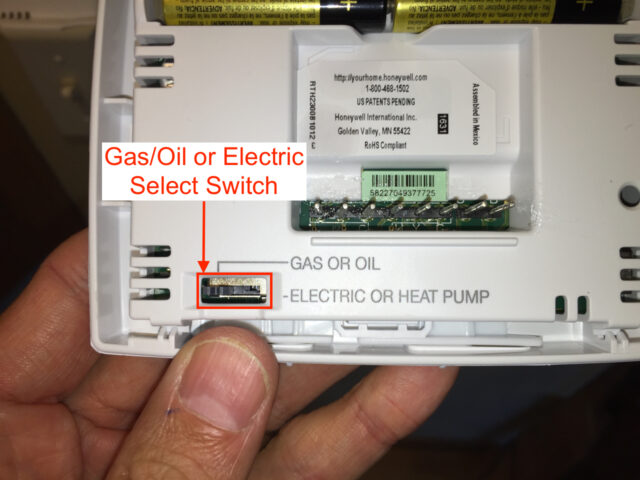
Step 8: Snap the thermostat into the mounting plate and test it out.
Before we get any further you should test out the thermostat to make sure it works. You will need to snap the thermostat into the mounting plate to test it. I already mounted it to the wall when I took these pictures but they will help you understand how to do it.
Step 8a: Snap the thermostat on the mounting plate:
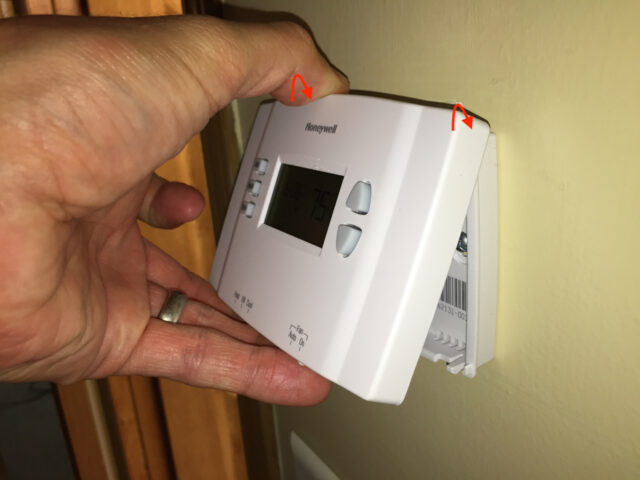
To snap the thermostat body on the mounting plate, hook the top of the thermostat on first and then using the top like a hinge, rotate the bottom edge down and into place:

Hook the top edge on the mounting plate:
Rotate the bottom edge down and on the mounting plate:
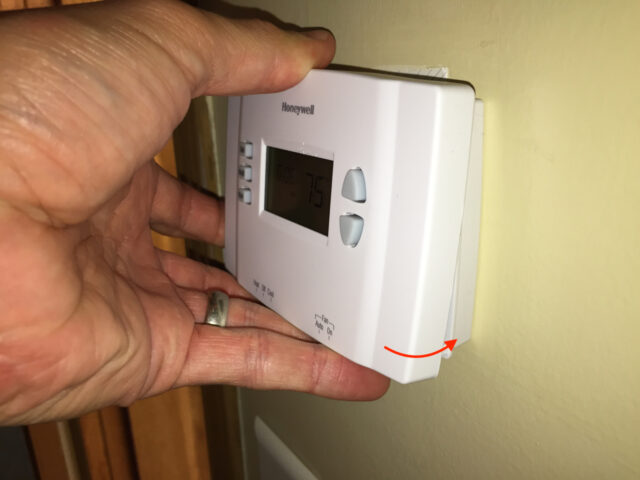
Don’t force it and you may need to lift slightly on the thermostat as you snap the bottom edge into place. The contacts from the main thermostat are going into a connector on the mounting plate that connect them to the thermostat wires:
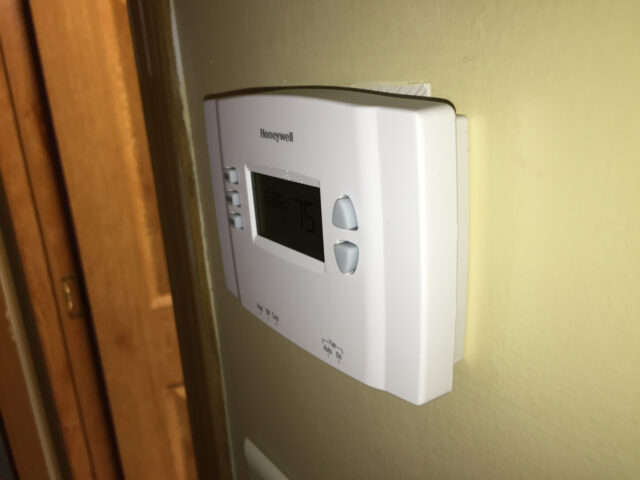
Step 8b: Test the thermostat.
Slide the mode switch to heat or cool to turn on your furnace. This does not mean your furnace will come on. If the current set temperature is already met it won’t come on. You may need to use the up/down arrow buttons to change the temperature and then press the Hold button to keep it there and wait for the furnace to come on. “Cold” or “Heat” may flash on the thermostat LCD screen for a bit before the furnace actually comes on and then it will stop flashing once the furnace comes on. You can also test the fan switch by switching the fan to ON and see if the fan comes on.
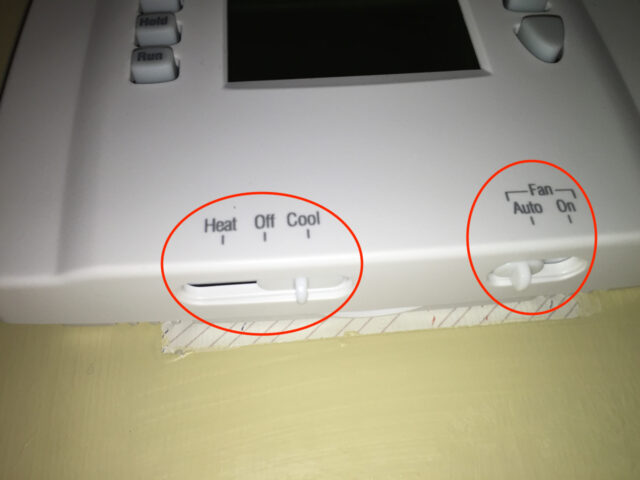
If your furnace works, then move on to step 8. If it didn’t work then you should check your wiring connections–did you connect the correct wires to the right terminals on the thermostat mounting plate? Did you forget to tighten one of the set screws down?
Step 9: Install the mounting plate on the wall.
I already showed you how to snap the thermostat on the mounting plate but the mounting plate hasn’t been mounted to the wall yet. In my situation I wanted to orient the thermostat on the wall to cover the unpainted spot but you also must consider where the thermostat wire is coming out of the wall and how your mounting location can interfere with the wiring. You don’t want the mounting plate to be smashing down the wire or the thermostat will not snap in correctly.
Step 9a: Unsnap the thermostat from the mounting plate.
If the thermostat is snapped into the mounting plate for testing then you need to remove it. This thermostat is designed to unsnap from the bottom edge. If the thermostat is not mounted to the wall then you’ll need to hold the mounting plate while pulling out on the bottom edge. Here’s the view from the bottom of the thermostat:
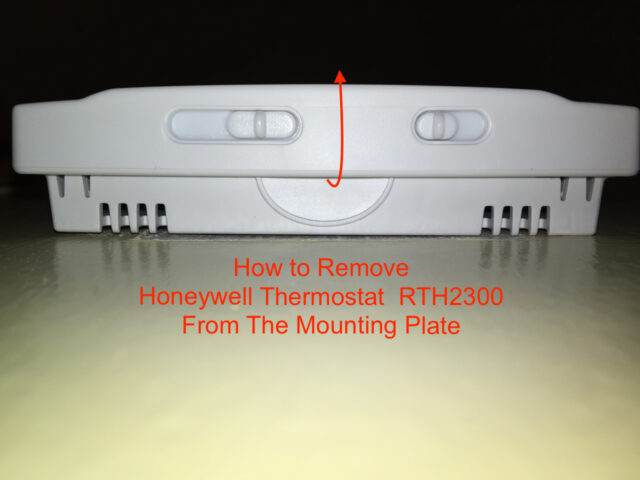
Step 9b: Mark where to drill the holes.
Hold the thermostat in place where you want it mounted and draw around the oval screw holes:
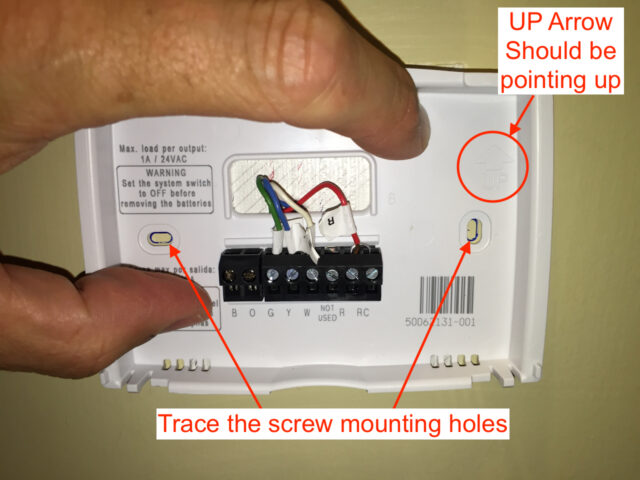
Step 9c: Drill a hole in the center of each oval.
For this installation, mounting the thermostat on drywall, you should drill a 3/16″ hole all the way through the drywall. You are drilling holes for the wall anchor so the hole will be bigger than the actual screw.
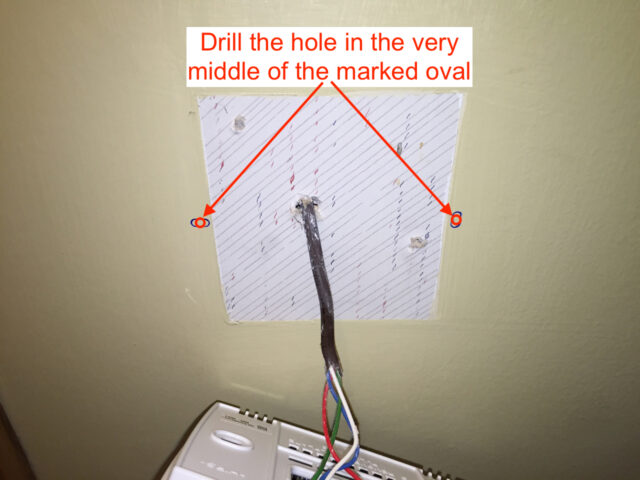
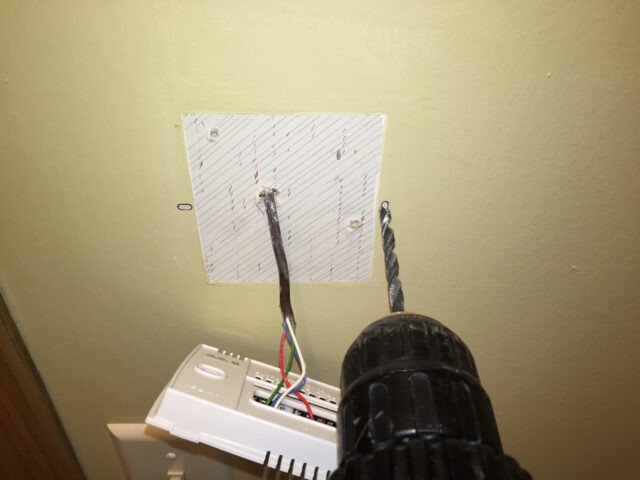
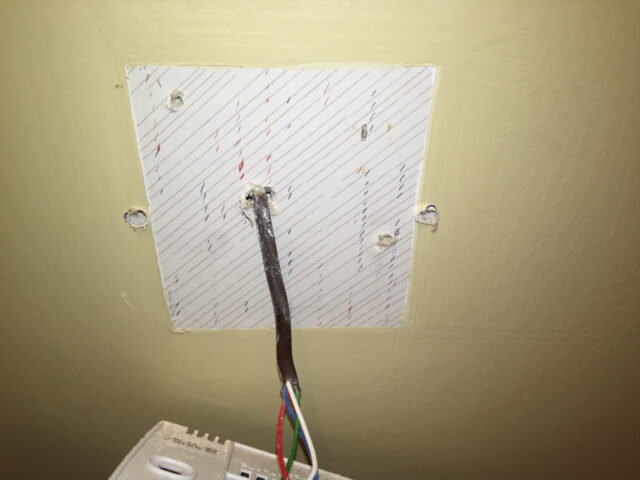
Step 9d: Install the wall anchors.
Insert them as far you can by hand:
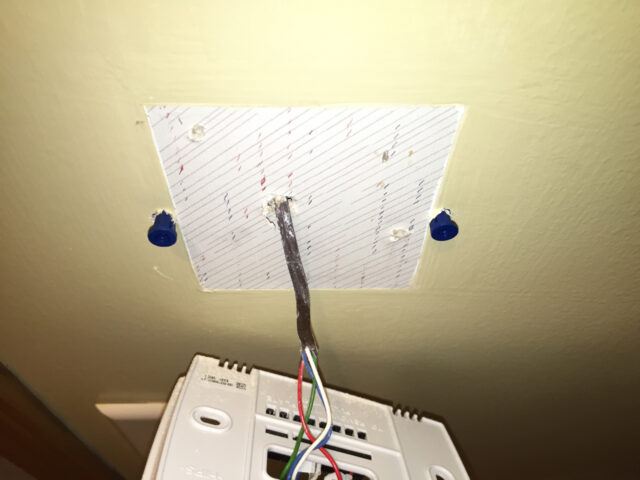
Carefully tap them with a hammer until the lip is flush with the wall:
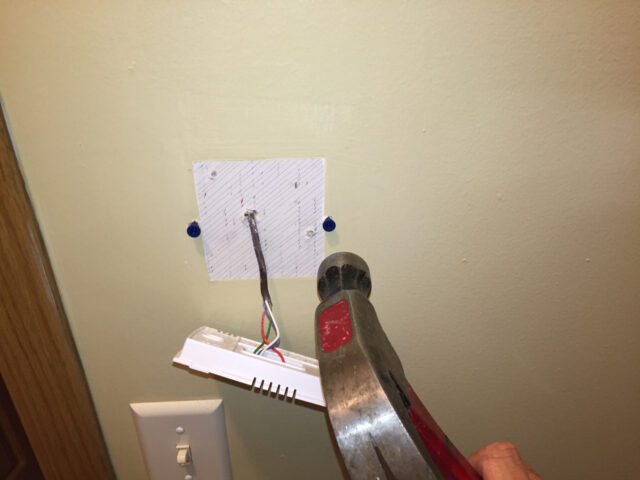
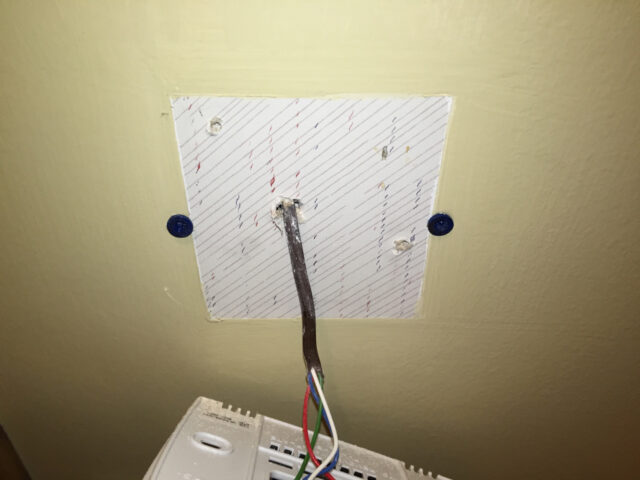
Step 9e: Secure the mounting plate to the wall.
Push the thermostat wire back into the wall as you push the mounting plate flush with the wall. Then line up the mounting plate holes with the wall anchors:
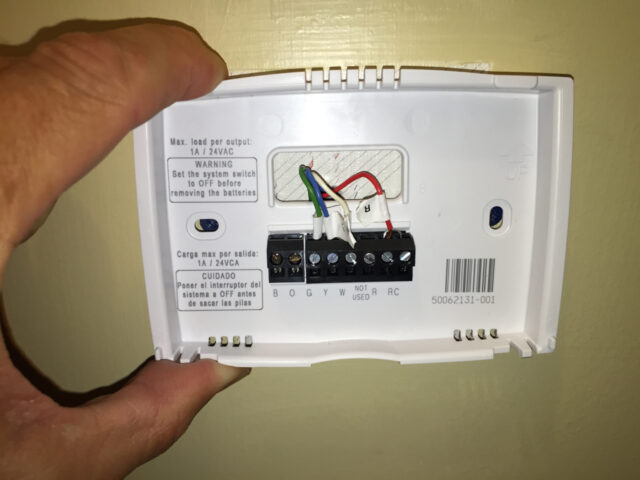
Install the screws, adjusting the alignment of the mounting plate as you tighten each one down as their oval shape allows for small adjustment:
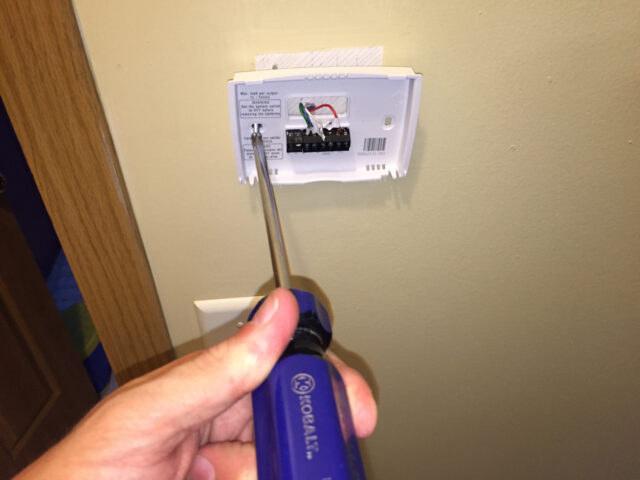
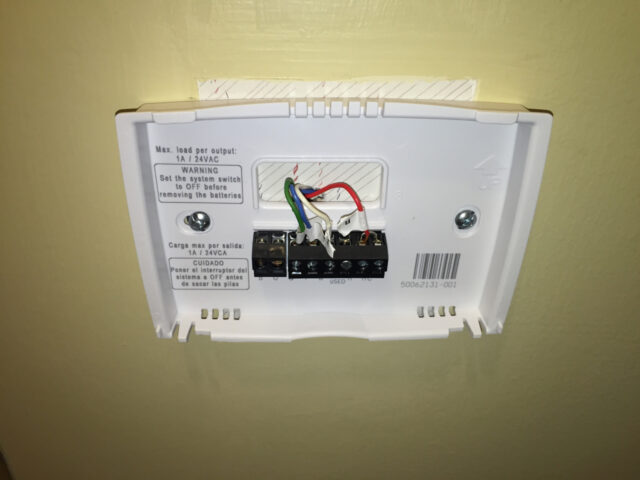
Step 10: Snap the thermostat on the mounting plate.
To snap the thermostat body on the mounting plate, hook the top of the thermostat on first and then using the top like a hinge, rotate the bottom edge down and into place:

Hook the top edge on the mounting plate:

Rotate the bottom edge down and on the mounting plate:

Don’t force it and you may need to lift slightly on the thermostat as you snap the bottom edge into place. The contacts from the main thermostat are going into a connector on the mounting plate that connect them to the thermostat wires:

Now you are done! All you need to do at this point is program the thermostat. If you want step-by-step instructions for programming this thermostat, I have you covered, check out my tutorial:
Honeywell Thermostat RTH2300 Programming Instructions
Did this help you upgrade your old thermostat? Do you have a tip to add? Questions? Please leave a comment!
You can replace your own thermostat with a little help. If you have a tip to share, if you noticed an error in this article, or if you have a question–please leave a comment.
Please note: if you do not have any approved comments on this site then your comment must be personally approved by me before it will appear. I do this to keep my site 100% free of spam comments. I read them all and almost always review and respond to all comments within a day. I look forward to hearing from you.
Relevant Links:
- Evcon Industries (Coleman) Direct Vent Forced Air Furnace Model DGAT075BDD Installation Manual (pdf)
Amazon Associate Disclosure: As an Amazon Associate I earn from qualifying purchases. This means if you click on an affiliate link and purchase the item, I will receive an affiliate commission. The price of the item is the same whether it is an affiliate link or not. Regardless, I only recommend products or services I believe will add value to Share Your Repair readers. By using the affiliate links, you are helping support Share Your Repair, and I genuinely appreciate your support.


Great help John, Thank you. One question, I have both a blue wire and yellow wire coming from the wall on my old thermostat. The blue was connect to the terminal labeled W2. Any idea what I should do with the blue wire? Leave it or double it up with the yellow. Thank you kindly for your assistance.
Guy, check out the wire tables on this site here.
Extremely helpful!! Very simple to follow
Hello sir. Thank you for this site. Trying to help my mother in law trouble shoot her issue remotely. She is not getting a light on her unit. If she flip the switch it works but no indication of the temperature. Replaced the unit and same issue. Any ideas?
Hi. I have the same setup. The old unit i thought might be bad because the sc unit would not shut off cool was turned on. I replaced with same digital unit as you. Wires all connected properly..all functions still the same way the old unit did. I have to manually turn off cool..it wont auto shut off when desired temp is reached. Im starting to think it’s the wiring from the actual ac unit itself. I live in a mobile home. The heat auto shuts off..but for some reason the old unit would not auto shutoff the ac and neither does the new digital unit. I figured i would start with the thermostat since i believe was the cheapest option. The AC unit is called mars. Any thoughts?
Thanks
I’m not a HVAC professional so it’s hard for me to guess without looking at it myself. When I first installed mine, I had problems and did a thorough look over the thermostat wiring, which I detailed in this article: Thermostat Wiring Troubleshooting. I would try that and see if you can find the problem.