It was 99 degrees outside and our AC was blowing warm air. It turned out that the fan motor on our condenser unit was bad. I was able to replace the motor and get our AC back up and running for a couple hundred dollars. I must say that the replacement of this motor was preceded by a series of troubleshooting steps, which I’ve outlined in another article, which you can read here:
How to Troubleshoot an Air Conditioner
Guys, I’m learning as I do these repairs and I learned A LOT in this repair. When I connected the motor initially it worked fine but the next morning it had stopped working and the condenser was blowing the circuit breaker again. I got some advice from a new HVAC connection I developed (thank you Brian!) and re-wired the motor and it fired back up and has been running great for a couple of weeks now. Follow along where I walk you through the steps of how to replace an AC condenser fan motor and I’ll share the lessons I learned…
Equipment:
Part Needed:
- FSE1028SF 1/4 HP, 825 RPM, 1.5 Amps, 48 Frame, Sleeve Bearing Condenser Motor
- Jard 12929 5.0 MFD Motor Run Capacitor
- Wire Nuts
- Zip Ties
Tools Required:
- Phillips and Flat-Head Screw Drivers
- Socket and ratchet set (get those and about all you’ll need for most repairs in this set: Stanley 99-Piece Socket Set
)
- Wire Stripper
- Flush-cut wire nippers
(for trimming the zip ties)
- Crescent wrench
(for removing fan from motor shaft)
- Nail bar
(I used mine to pry the fan off the motor shaft)
- Hammer
(for loosening up the fan on the motor shaft)
- Fan Blade Puller Tool
(if you don’t want to use a hammer and nail bar–this tool would be very handy in times like this)
How to Replace an AC Condenser Fan Motor
Step 1: Disconnect the AC Condenser power.
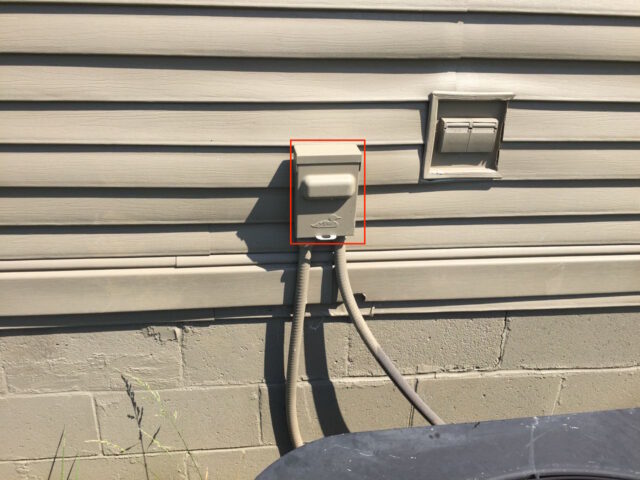
First of all I want to warn you that you must be very careful when working on AC Condensers as there is 220 V AC power connected to them and you could kill yourself or in the least scare the crap out of yourself if you got shocked. If you are not comfortable or experienced with working with electrical appliances, please do not proceed. If you do want to go forward, make sure to disconnect power to your AC condenser before you start tearing into it. There should be a power disconnect box mounted on the outside of your house where flexible conduit runs from the house to the condenser. Here’s what the one on my current house looks like:
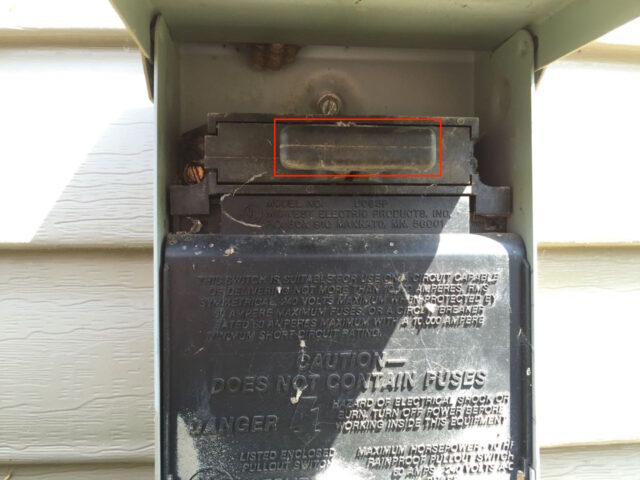
Usually there is a paddle inside that you can pull out that disconnects power from the AC condenser unit. Lift the door on the box and pull the handle straight out to remove the paddle and disconnect the power:
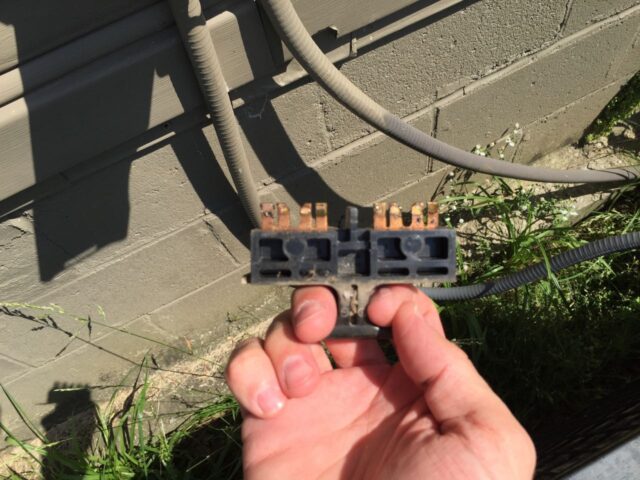
Here is what it looks like removed:
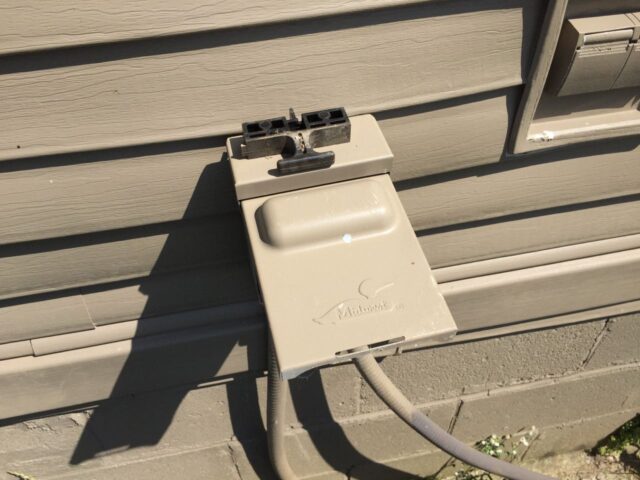
I would set it on top of the box so you can SEE that the power has been cut:
Step 2: Open up the access panel on the condenser.
If you haven’t cut the power then go back to Step 1 and do not proceed.
Look for the corner of the condenser where the electrical conduit goes into the body of the condenser. There will be a metal panel you can remove to expose the electronics of the condenser. This is where the access panel was located on this condenser:
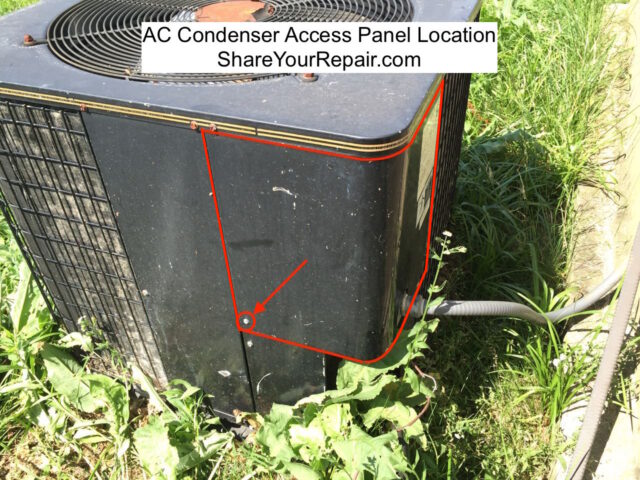
There was only one screw holding this panel in place, which tucks under the top. I highlighted the single screw I needed to remove. For this condenser, once you have removed the screw(s) holding the access panel in place, the panel slides down:
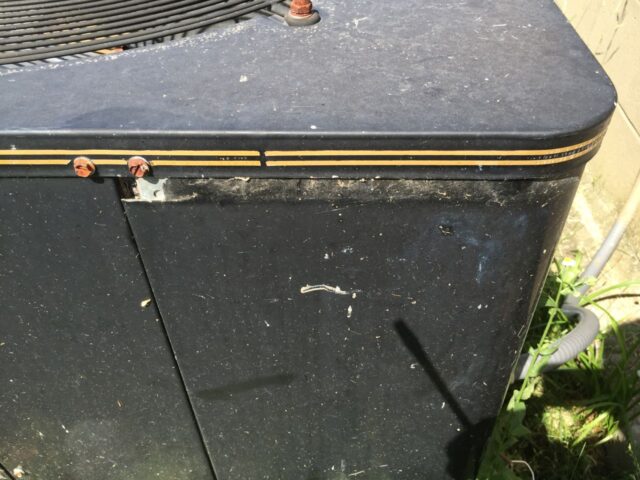
Note: the screws that attach the top don’t go through the access panel and do not need to be removed.
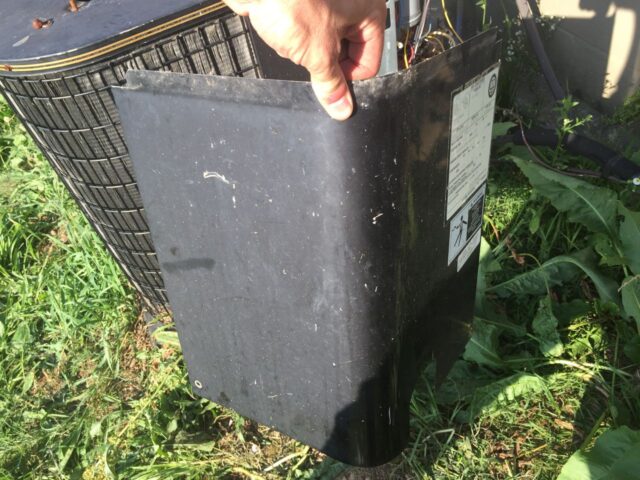
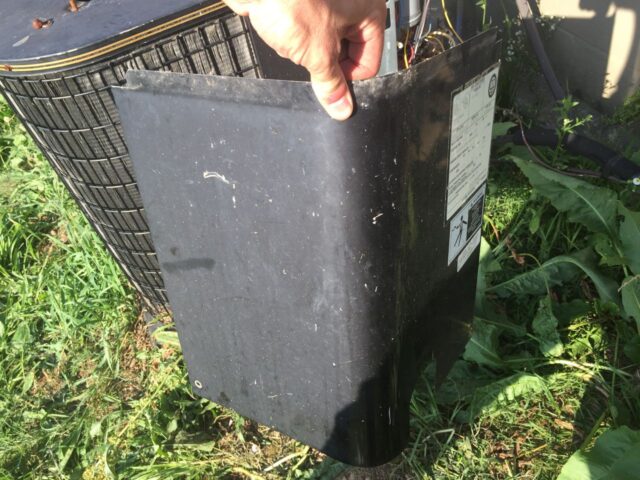
Here is the panel removed:
Step 3: Locate the parts inside.
Here’s a general tour of the components inside my AC condenser access panel:

Warning: Even though you have disconnected the power you still have a charged capacitor in there so you could shock yourself. Proceed with caution and DO NOT proceed if you are not comfortable working with electricity.
Step 4: Remove the old motor:
I’ll break this up into multiple smaller steps for you…
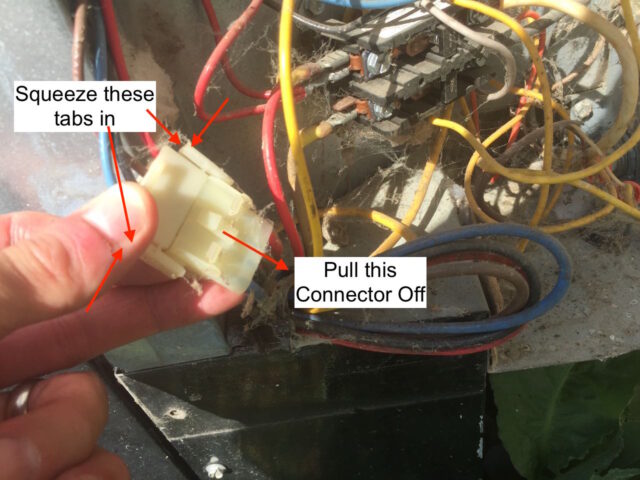
Step 4a: Disconnect the motor electrical connector.
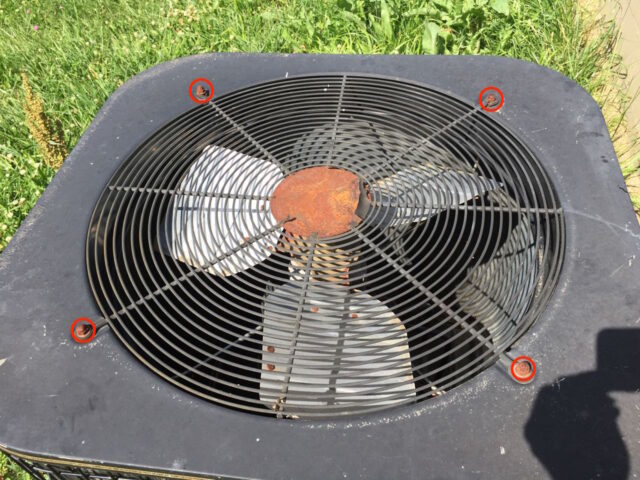
Step 4b: Remove the grill.
There were four 9/16″ nuts holding the grill on
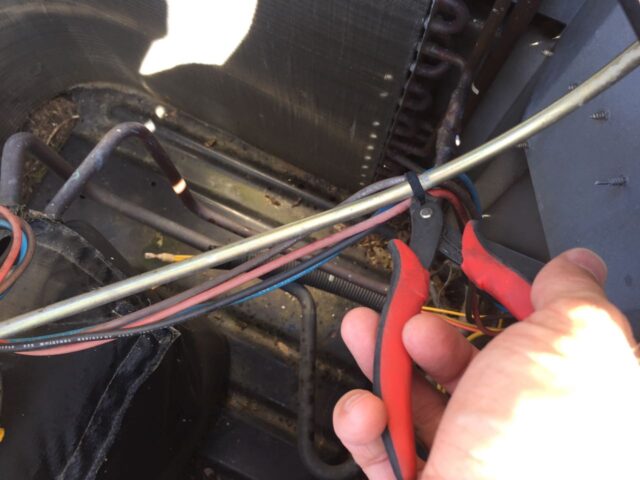
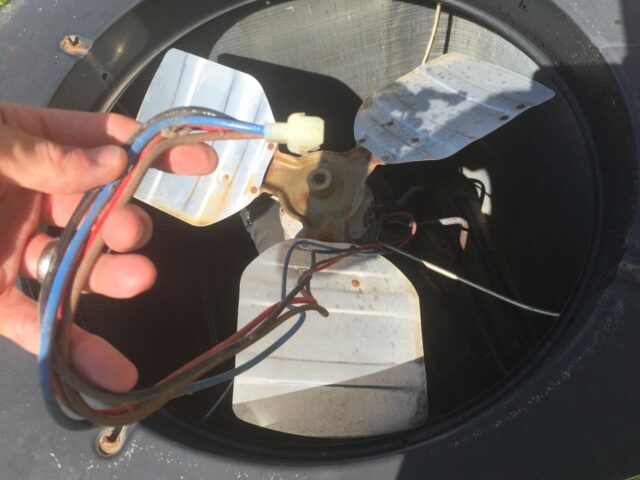
Step 4c: Pull out the motor wiring.
Feed the connector you disconnected in Step 4a up into the fan area and carefully clip any zip ties that hold the motor wiring in place:
Step 4e: Loosen the motor mounting bracket.
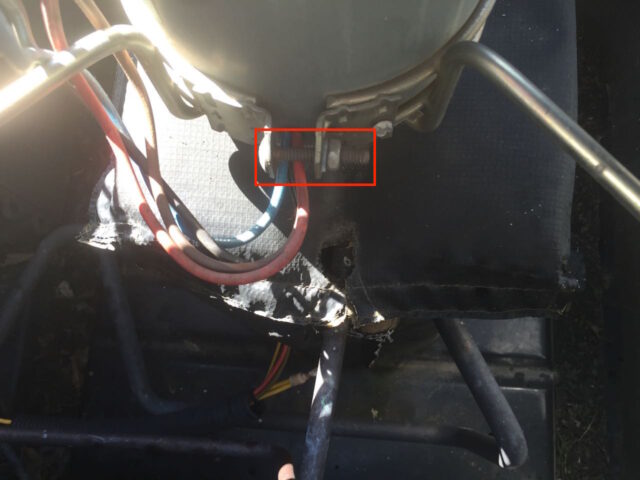
There are a couple different ways your condenser fan motor may be mounted. Some are mounted by the end of the motor and there will be four bolts connected to the top grill. In this case there is a wire bracket that tightens around the outside of the motor. Loosen the one 7/17″ bolt:
Step 4d: Remove the motor from the condenser unit.
Once you have the bolt loose you can slide the motor up and out:
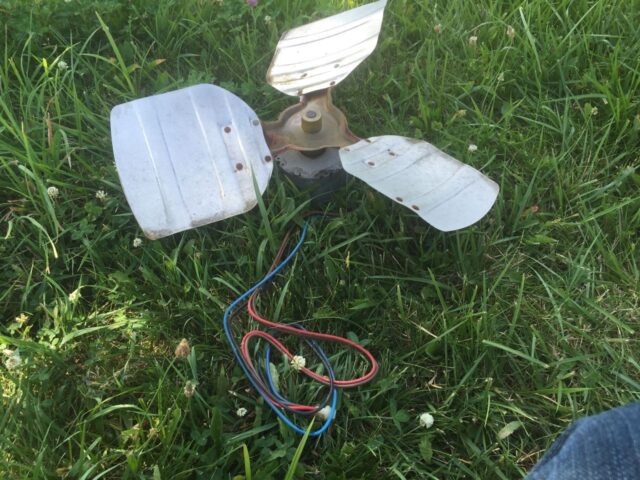
Step 5: Comparing the motor schematic with the AC condenser schematic.
The first thing I notice was that the wires on the old motor were a different color than the wires on the new motor. Time to look deeper on how this thing is hooked up. Thankfully there was a schematic on the inside of the AC condenser access door:
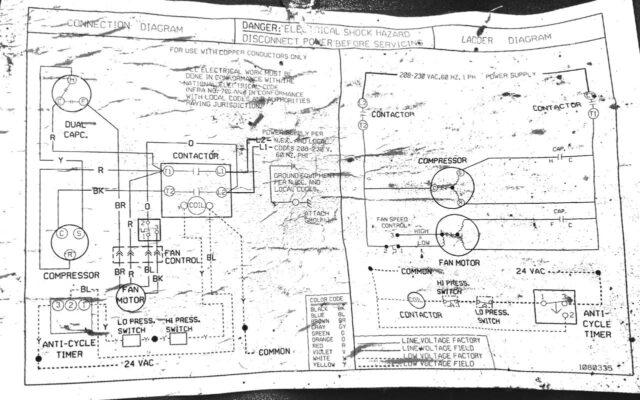
My new motor came with a schematic as well, but it is much more simple:
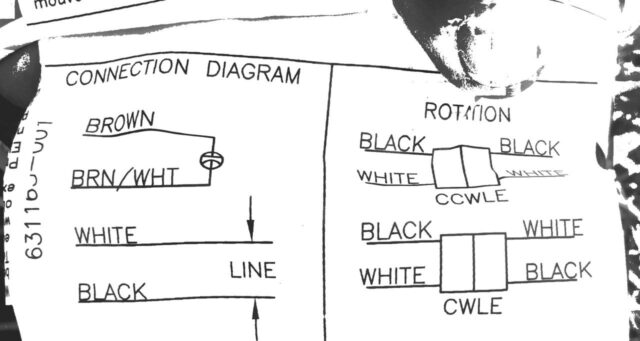
I made a table of the old motor connections and what they were connected to and what the new motor schematic prescribed that I hook its wires up to:

Here is how I initially spliced in the new motor, using the old connector:
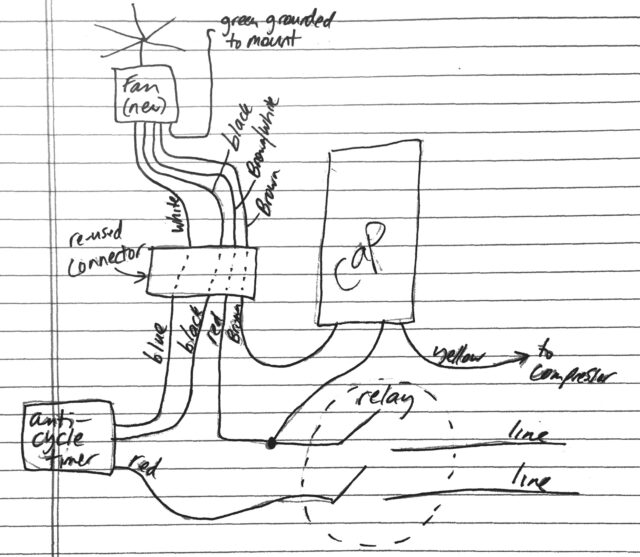
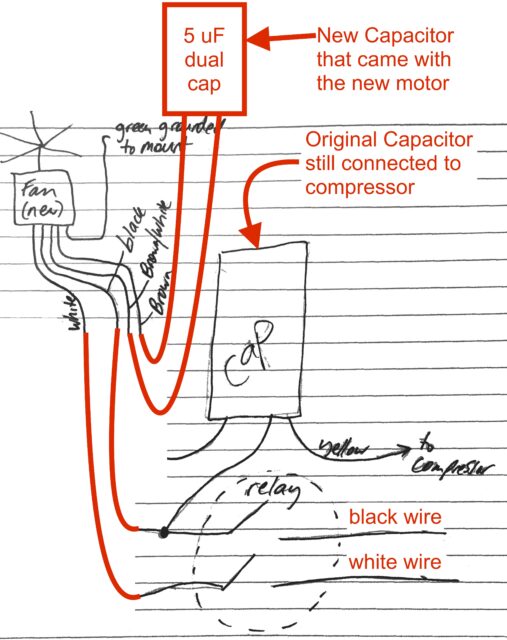
Disclosure: Before you go any further, I must say that the way I first connected this motor (as shown in table and hand-drawn schematic above). This worked overnight, but for some reason didn’t end up working long-term–probably because of the anti-cycle timer being in the circuit, so read on to the end to see how I ended up wiring it. The way I ended up wiring it involved wiring it exactly like the motor’s schematic specified (and therefore bi-passing the anti-cycle timer). The anti-cycle timer must not be necessary with the new modern motor I purchased. Caution: Before you start tinkering again with your wiring you MUST disconnect the power to the condenser unit as I have prescribed in Step 1. Here is what I settled with, a much simpler schematic:
Here’s a look at the original wire-nut splicing job I did, connecting the new wiring to the old connector, so I could just re-connect it with a snap:
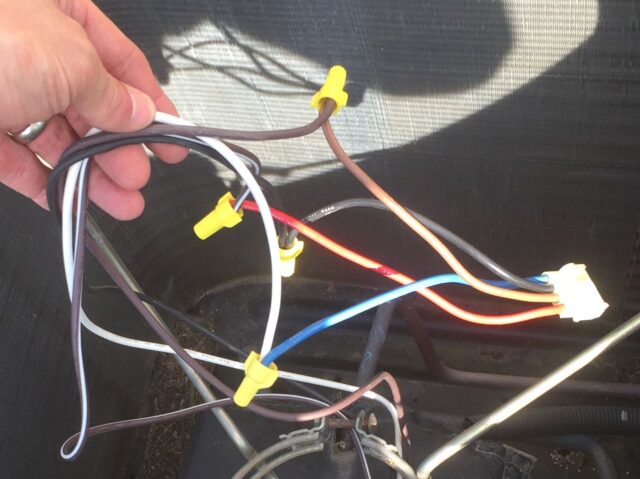
I ended up taking those wire nuts off and connecting the fan motor wires directly to the contactor and crimped on connectors for connecting to the new dual capacitor.
Step 6: Remove the old fan blade for transferring to the new motor.
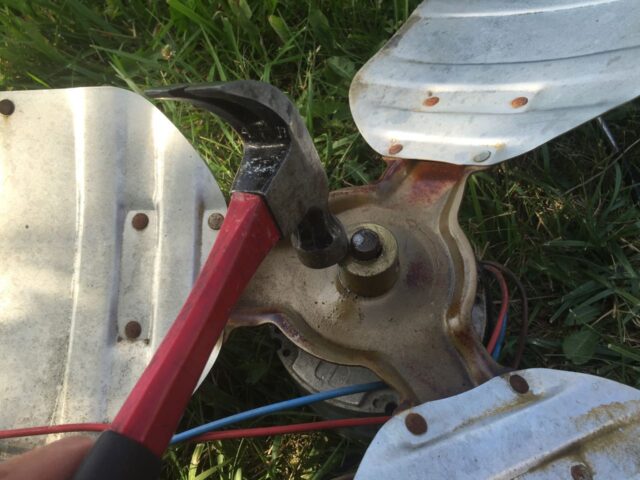
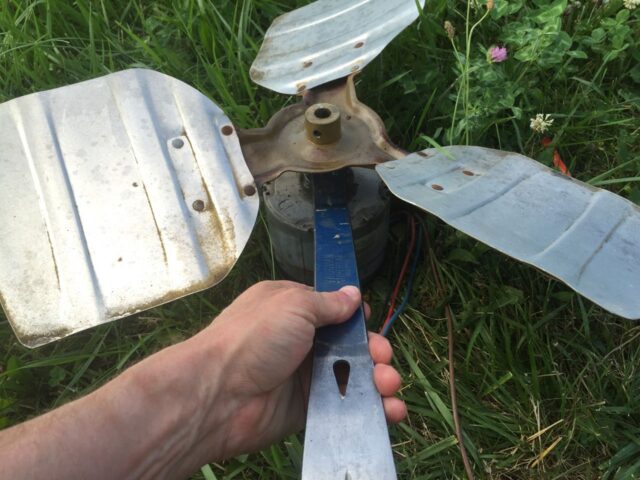
Now I must say this didn’t work for me either, because the old motor had a larger shaft than the new motor. I had purchased a fan blade that fit the new motor just in case I wasn’t able to get the old one off the shaft, so I was ok. But I wanted to try removing this fan anyway, and here is how I did it… I sprayed penetrating oil on the shaft to try to loosen it up. Then I tapped on the solid part of the fan and tapped it on a little farther to break the fan free. Yes, I know that putting it on there further is going the wrong direction, but I couldn’t tap on the back side without risking bending something. By tapping it on, you gain breaking the shaft free, which I believed would be worth it, and I did get it off:
Step 7: Insert the new motor.
One tip I’ll give you is to make sure you remove the correct condensation drain plug. As you can see in the picture below, there is a red plastic plug. When I purchased the motor there was one in both ends. This is to make the motor workable for alternative mountings. What you want to do is leave the top plug in and remove the bottom. Condensation in the motor can drain out and the top plug keeps rain from getting in the motor.
First feed the wires down through the opening that holds the motor and then guide the motor down into the mounting bracket. You’ll want to turn the motor so that the wires come out of the housing where they should or where they won’t rub on anything:
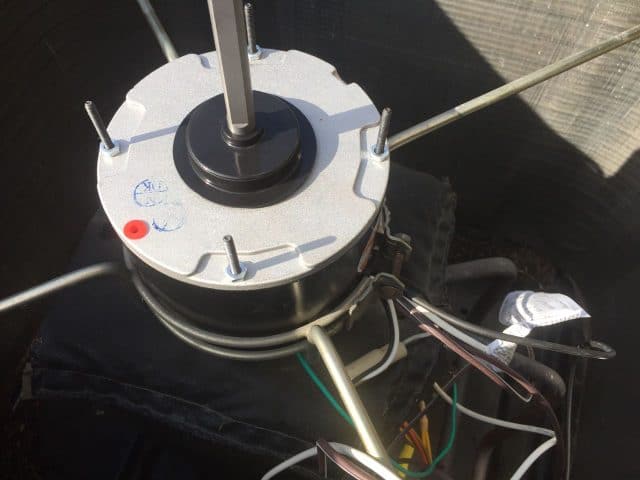
One thing I should not is that there were some screws sticking out on the sides that I needed to remove first. I believe they are for one optional design where the motor is mounted into a band and you would reinstall these screws through holes in the band:
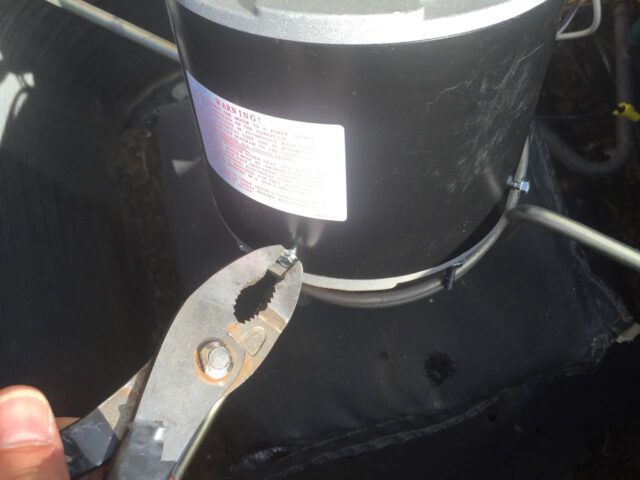
Those bolts that stick out the top and bottom of the motor can be cut off. They are there for installations that involve mounting the motor by either of the ends, which will be the case in some condenser units. One thing to note is that these bolts go all the way through the motor and hold it together. Be careful that if you leave them they don’t hit the compressor or the fan blades.
Step 8: Reconnect the motor connector.
Feed the wiring connector down into the electrical panel area and connect the electrical connector if yours is a plug-n-play swap out (but mind did not turn out to be):
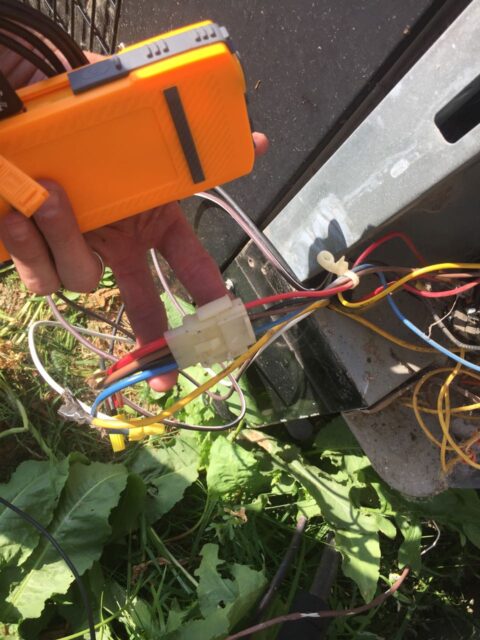
This is how I ended up having to wire my motor (leaving the existing capacitor connected to the compressor):
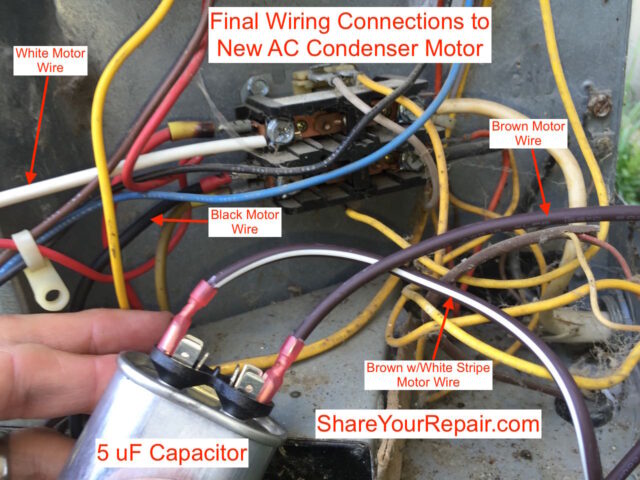
One thing I wanted to say about my electrical connections above–the contactor has set screws on all four connections that you can use to connect directly to it. In the picture above I used a crimped connector for the black wire but then realized I could just use the screws and connected the white wire directly with the screw. It is actually my goal to go back in there at some point and cut off that crimped connector and connect the black wire directly with the screw.
Another tip: A HVAC professional I consulted on this installation suggested that I not allow the metal body of the new capacitor to touch anything metal on the condenser unit. So I put it back in the box it came in after I wired it and then wrapped the box in electrical tape.
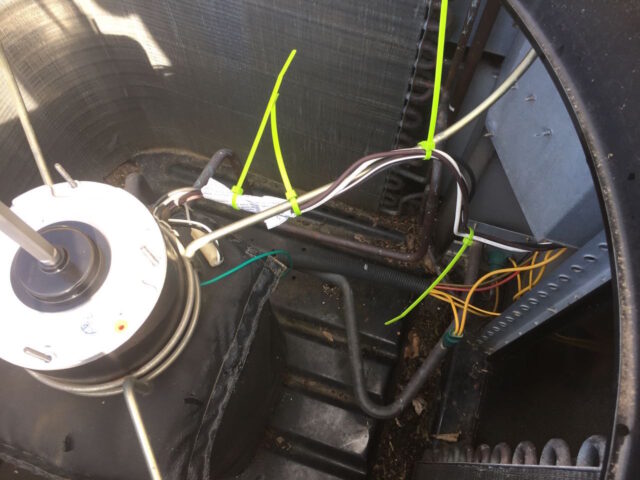
Zip tie the wires in place. This is very important because there will be vibration and the fan is blowing UP, so it would tend to draw any loose object up into the blades:
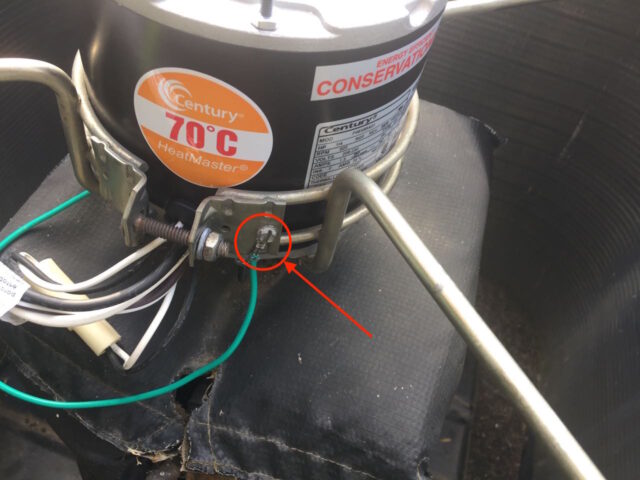
I connected the motor ground to a set screw that was on the mounting bracket:
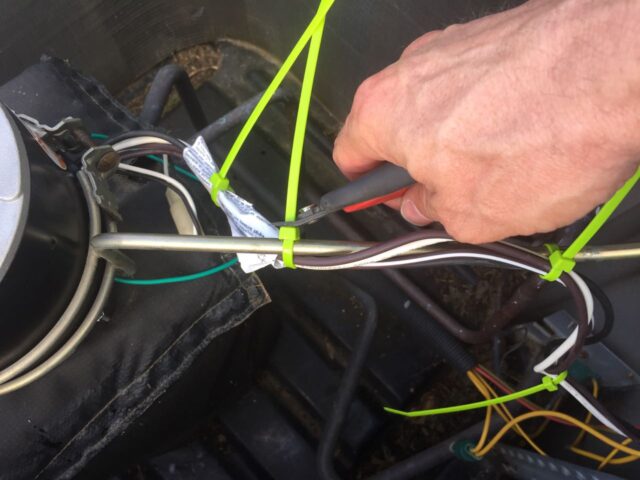
Trim off the zip ties. I used my very hand flush-cut nippers I have linked in the tools list at the top:
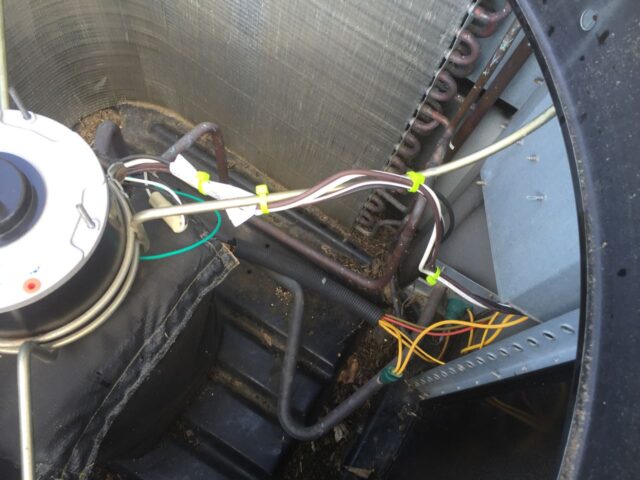
Nice and clean:
Step 9: Tighten the bracket nut and bolt.
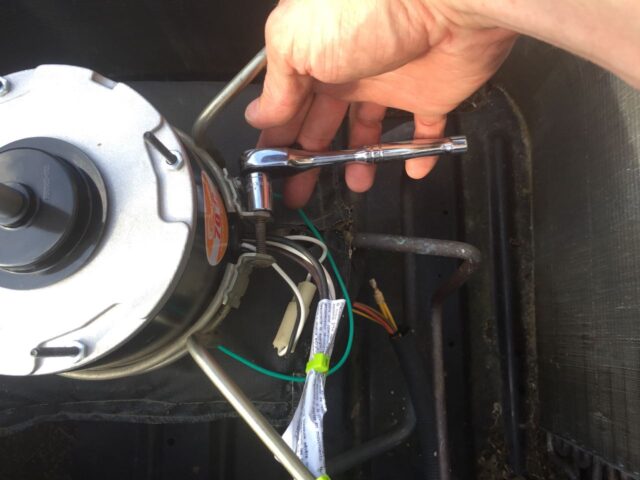
Use a socket and ratchet to tighten it down. Mine took a 9/16″ socket:
Step 10: Install the fan on the motor.
All you should need to do is slide the fan on the motor shaft, and tighten the set screw on the flat side of the motor’s shaft. I used crescent wrench on the square-headed bolt. There is a finished side of the fan and an unfinished side–the finished side goes up. You want to make sure that the fan isn’t up too high so it won’t hit anything (or too low for that matter–each installation will be different).
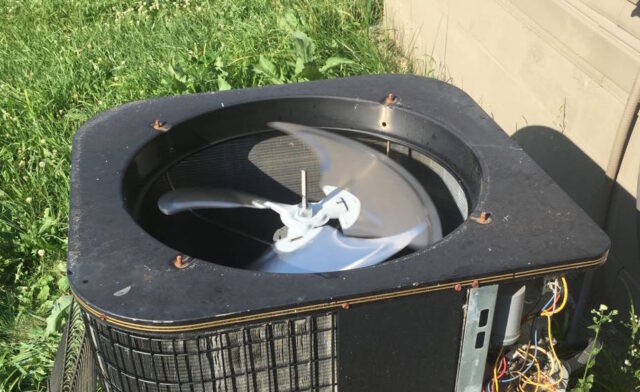
Note that the motor shaft sticks way out. I could have cut it off but it is not in the way so I left it as is.
Step 11: Test out the installation.
Before you put it all back together you should give it a try. Reinstall the shut-off disconnect paddle. Make sure it is oriented correctly because it is designed to be able to be installed in a position that makes no connection OR if flipped over, to make the connection and power the condenser. Orient the disconnect paddle so the copper conductor lines up with the connections, in this case, on the bottom:
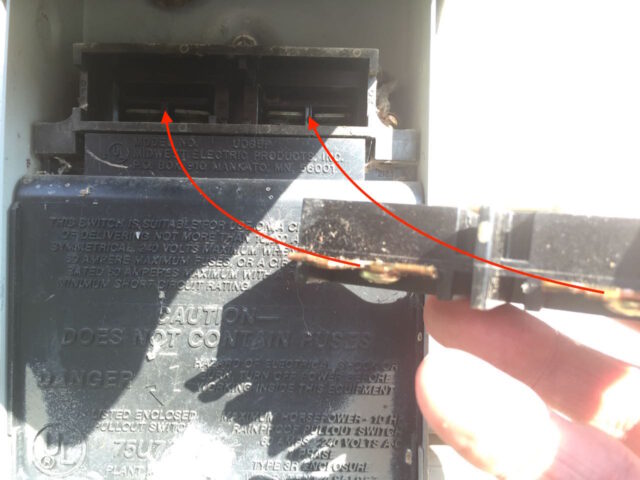
Turn on the AC at the thermostat and see if the fan comes on. To my joy, mine came on the first time:
Step 12: Button up the wiring.
Caution: It would be wise to disconnect the power, as shown in Step 1, before proceeding, if you have just tested your installation and the condenser is live.
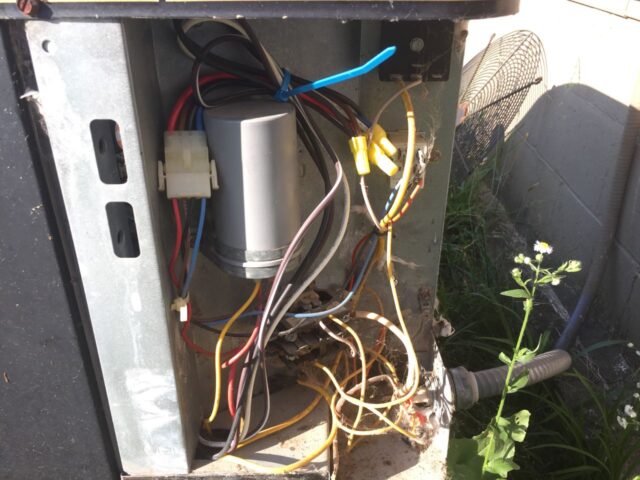
I used zip ties to clean up the installation:
Step 13: Reinstall the electrical access panel.
It slips up under the top panel and then install the screws, or screw in my case since there was only one left:
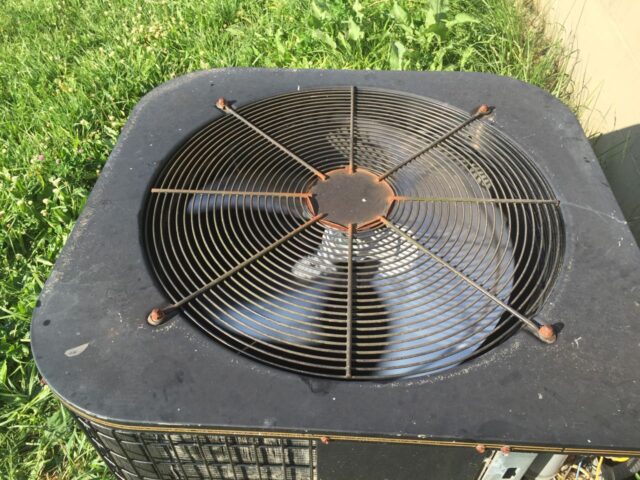
Step 14: Reinstall the fan grate.
Check for fan blade clearance. The new fan blades I purchased were thicker than the original so I needed to bend them slightly in order to keep them from hitting the grating. Test spin them before turning the condenser on. You don’t want to ruin a $75 fan!
Successful with this repair? Do you have a tip to add? Please leave a comment!
It’s expensive to have a HVAC contractor come out. If you were able to replace your condenser fan motor with the help of this article please leave a comment and encourage others to do it themselves too and save a lot of money.
Please note: if you do not have any approved comments on this site then your comment must be personally approved by me before it will appear. I do this to keep my site 100% free of spam comments. I read them all and almost always review and respond to all comments within a day. I look forward to hearing from you.
Amazon Associate Disclosure: As an Amazon Associate I earn from qualifying purchases. This means if you click on an affiliate link and purchase the item, I will receive an affiliate commission. The price of the item is the same whether it is an affiliate link or not. Regardless, I only recommend products or services I believe will add value to Share Your Repair readers. By using the affiliate links, you are helping support Share Your Repair, and I genuinely appreciate your support.


I had the fan go out one night. With the heat and high humidity, my wife was screaming at me that she would not get through the night without AC and wanted to go to a hotel. Me being the let me take a shot a fixing this kind of guy, I quickly determined the outdoor fan motor had failed.
It occurred to me that the only thing the fan does is draw air through the condenser coils. I disconnected the fan motor so that it would not trip the breaker. I then placed a portable fan that was about the same size on top of the condenser unit and plugged it in with an extension cord. When I turned the AC on, the compressor worked and the fan worked to draw air through the condenser coils. This arrangement worked fine and got us through the night. I tracked down a replacement motor at Grainger the next day.
Years later, the inside blower motor failed. This time, I found a more efficient motor that still had the same RPM, HP, wiring and shaft size. Pay attention to the electrical power consumption rating as two motors with the same HP may not have the same power efficiency. As I recall, the new motor was about 30% more efficient.
A fan is a fan as long as the condenser unit doesn’t have a protection circuit to disable the system if it’s motor isn’t pulling enough amps. Good job on the work-around. I’ll keep in mind the efficiency issue if I replace another motor. In times like this it is always a balance between getting it back up and running, picking the best components, and sharing my repair. Sometimes I only get the first one done.