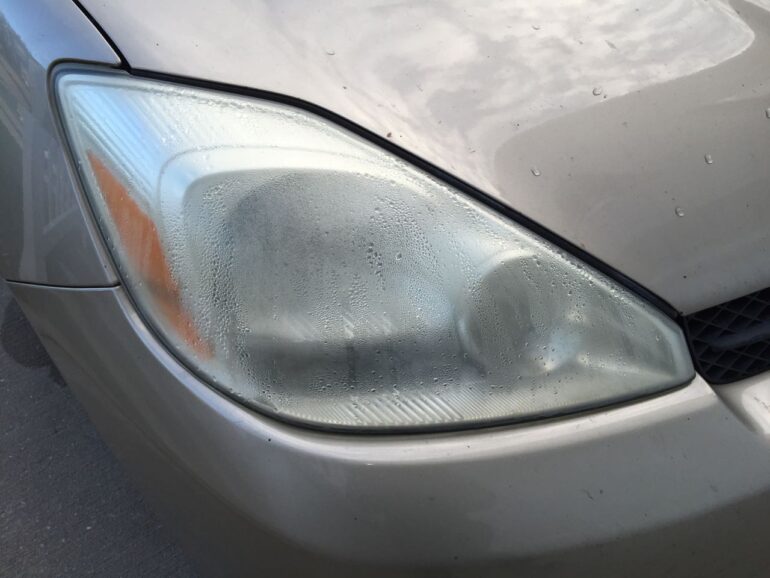
This article shows you how to fix moisture in headlight of a 2004-2010 Toyota Sienna. When we arrived back from an all day trip where it rained the entire time there was moisture in our passenger side headlight of our 2004 Toyota Sienna. I did some research and it turns out that there was a manufacturing defect on the right side headlight and the seam fails and water leaks into the headlight. Time for another repair. I wasn’t sure how this was going to go but I’m very pleased with how the repair turned out so follow along if you want to know how to Fix Moisture in Headlight of your Toyota Sienna. The major reason for repairing the one headlight instead of replacing it, is that if you replace one headlight you’ll have two different looking headlights–one with a yellow tint and a clear one. I’d rather repair it if possible and it’s very possible and I’ll show you how…
How to Fix Moisture in Headlight-Toyota Sienna
Vehicle:
Parts Needed:
- Seal All Adhesive and Sealant
- Glue Applicator Syringes
- SYLVANIA 3157NA/4157NA Turn Signal (Incandescent) Bulb
OR 3157 LED Replacement Bulb
- SYLVANIA 3652 Corner (Incandescent) Bulb
OR 3652 LED Bulb Replacement
- ACDelco 9006 Professional Low Beam Headlight and Front Fog Light Bulb
(This is the outside headlight bulb if yours is burnt out)
- Philips 9005 Standard Halogen Headlight Bulb
(This is the inside headlight bulb if yours is burnt out)
- Front Wheel Well Clip Center Pins
(if you break some of them)
- Front Fender Clips
(I didn’t need to replace any of these but just in case you broke one)
- Toyota Grill Clips
(both of mine were broken when I removed them)
Tools Needed:
- Phillips Head Screwdriver
- 10mm socket and ratchet (get this and much more in a 210-Piece Stanley Tool Set
)
- Blower Fan
- Cordless Drill
- drill bit set
- Claw Pick-Up Tool
(optional but VERY handy and a necessity for every person who dabbles in auto repair)
Step 1: Pop the hood.
The hood release is by your left knee when you are sitting in the driver’s seat. Release the safety latch, lift the hood, and put the hood rod in place to hold it up.
Step 2: Disconnect the four electrical connectors to the bulbs.
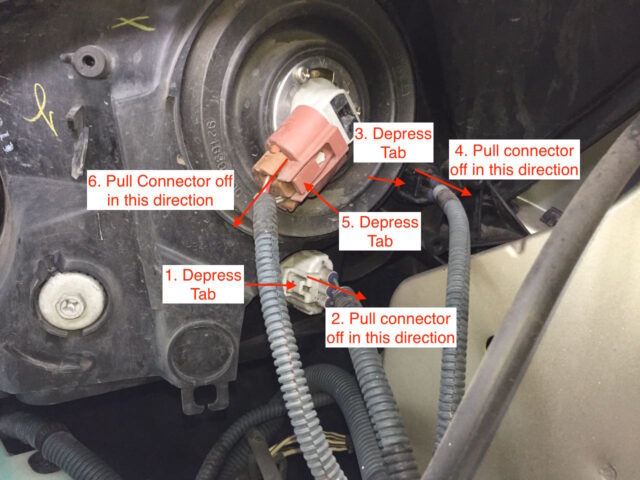
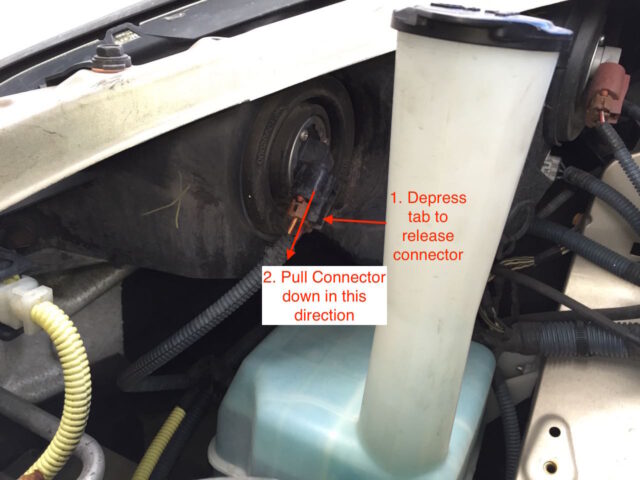
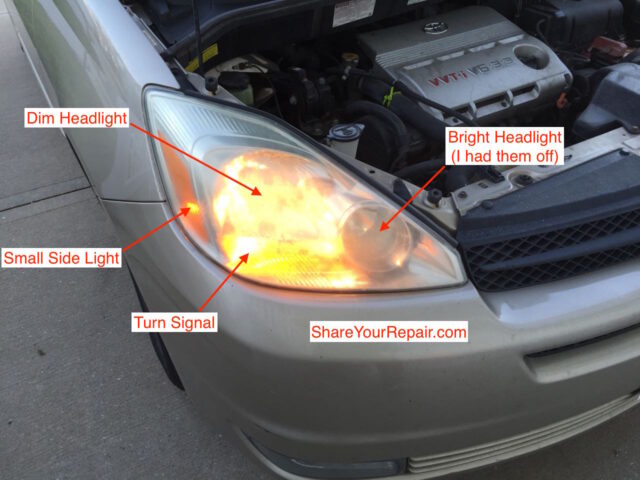
There are four connectors on each headlight (low beam, high beam, turn signal, and a side bulb too)
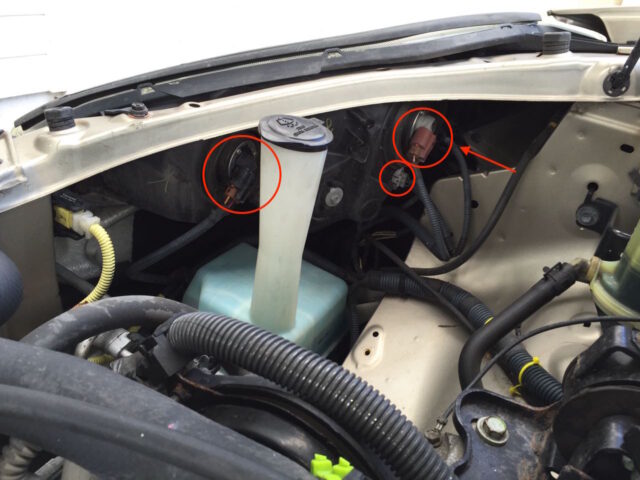
Here are the outside three connectors:
Here’s the inside connector:
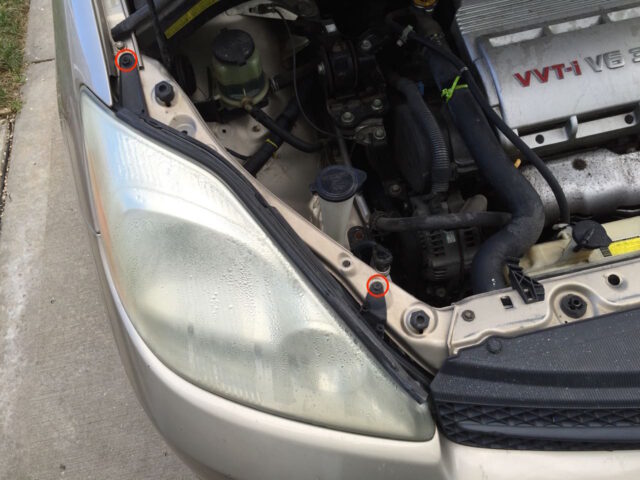
Step 3: Remove the top headlight screws.
Remove the top two phillips-head screws from the headlight frame:
Step 4: Remove the left two grill clips.
There is one headlight mounting screw that is hidden under the grill so you need to pop out the left two clips from the grill.
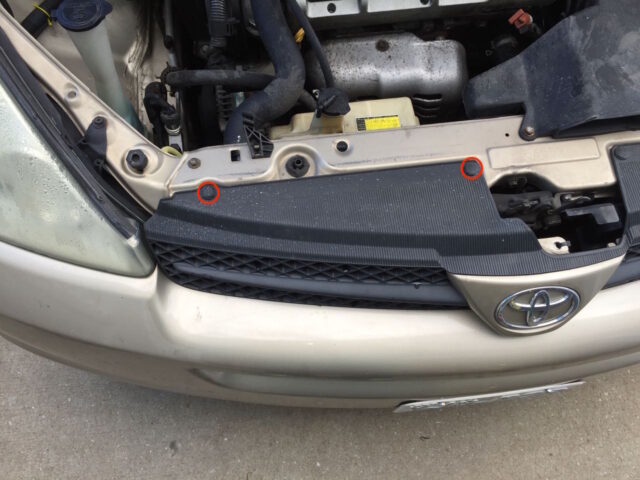
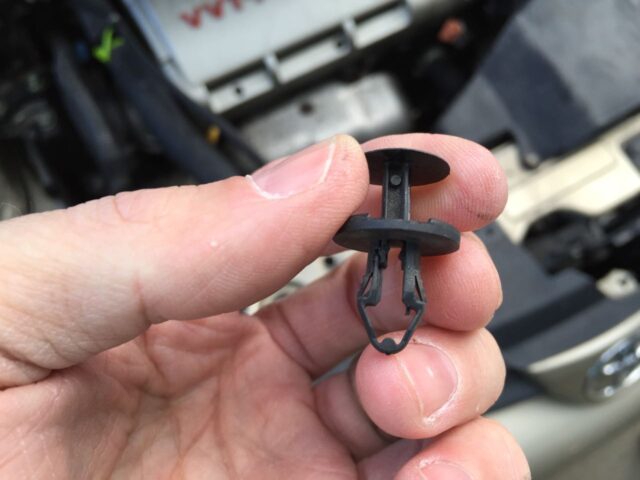
Pop up the centers and then pry out the clips. This is what they look like removed:
Step 5: Pry up the corner of the grill and locate the inner headlight mounting screw.
Grip the grill as seen below and carefully pry it toward the front of the van to expose the inner headlight mounting screw.
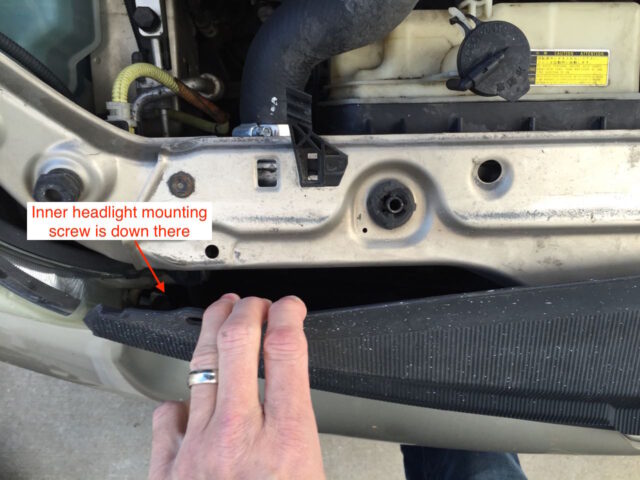
Remove the screw seen below. Be careful to not drop it down in the bumper or you may create more work for you.

Step 6: Pop out the center of the front two wheel well clips.
Here is the location of the two clips we need to remove. We are only removing the pin from the inside of it.
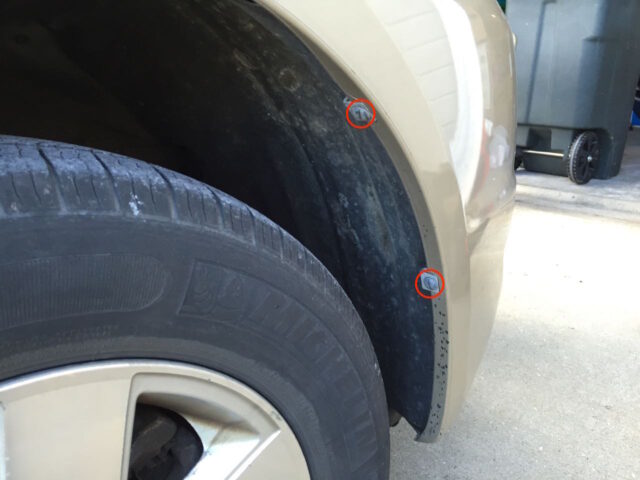
Pry up the inside pin and then pull out completely. The rest of the clip will stay in place as the bumper just slides into it from the side.
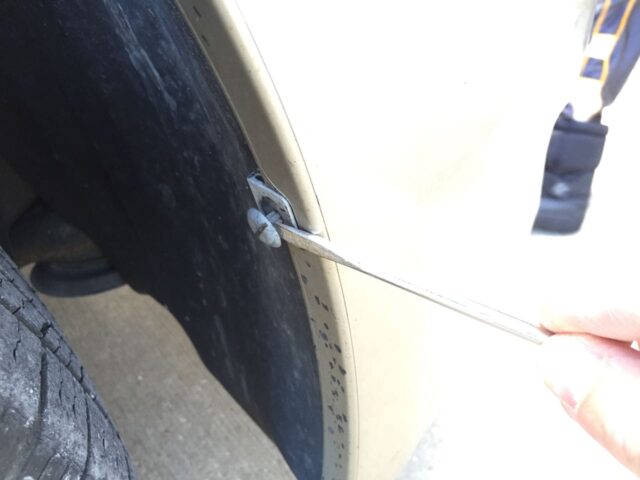
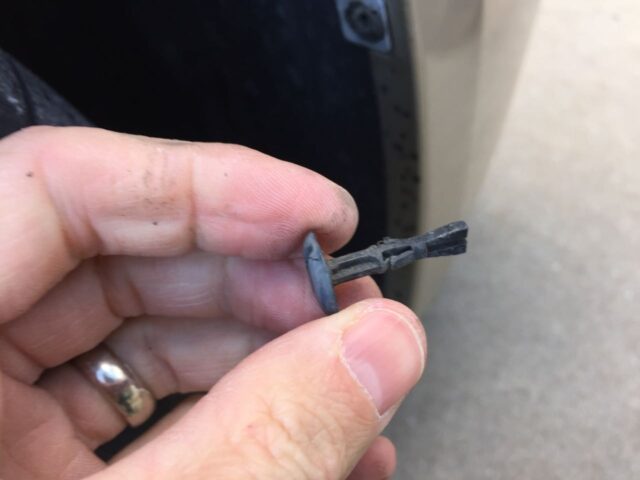
This is what the pin looks like when it is removed:
Step 7: Unsnap the bumper from the quarter panel.
The bumper snaps to the quarter panel with three clips along its seam. Here is a video of me releasing these clips:
I have written a detailed step-by-step tutorial on how to completely remove the bumper for my article on how to replace the radiator. You don’t need to remove the entire bumper but you can refer to Step 9 on the page linked above.
Step 8: Pop the edge of the fender free.
For both of the clips where you removed the center pins pry the bumper out of the clips as shown below:
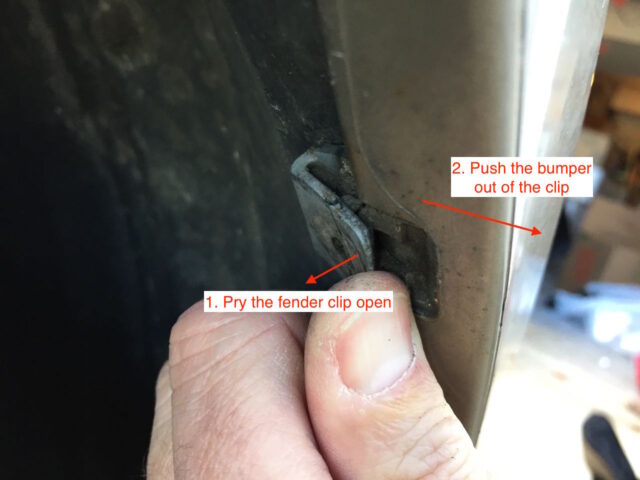
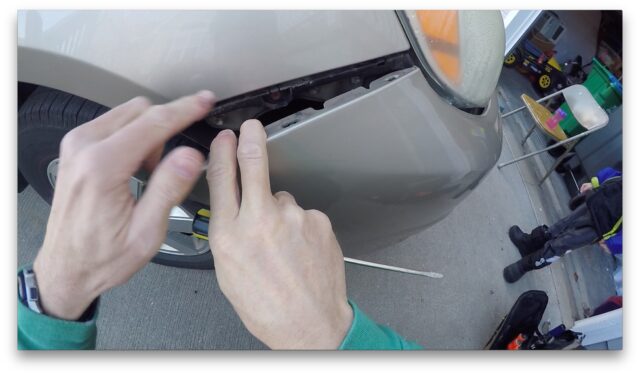
Once you have released the two clips the bumper will open up:
Step 9: Remove the outside headlight mounting bolt.
You will now be able to access the outside mounting bolt as shown here:
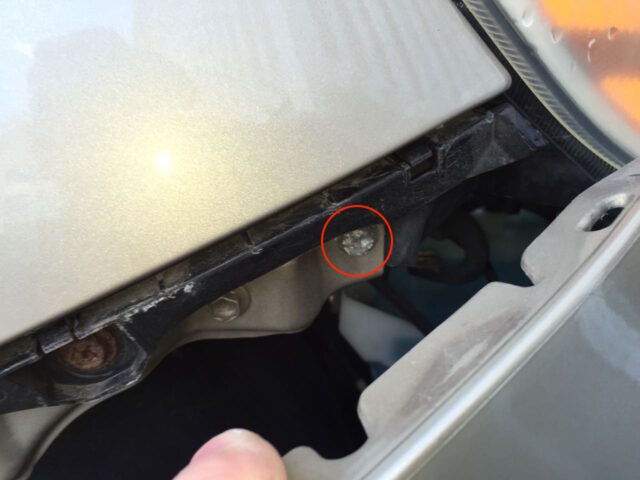
Use a 10mm socket and ratchet to remove this bolt:
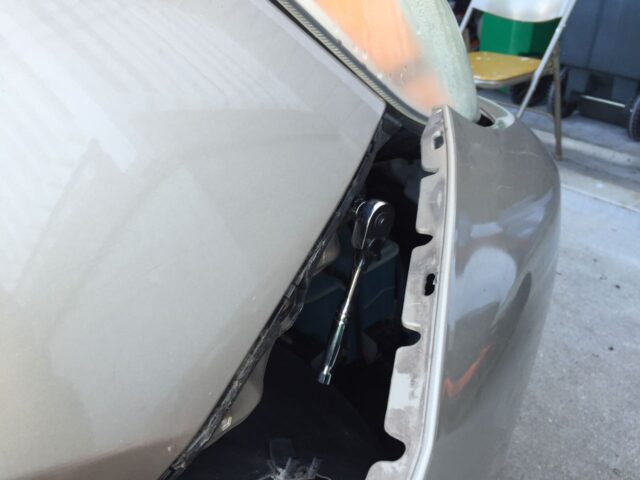
Step 10: Remove the headlamp assembly.
I first lifted the top two brackets off the little post they were caught on:
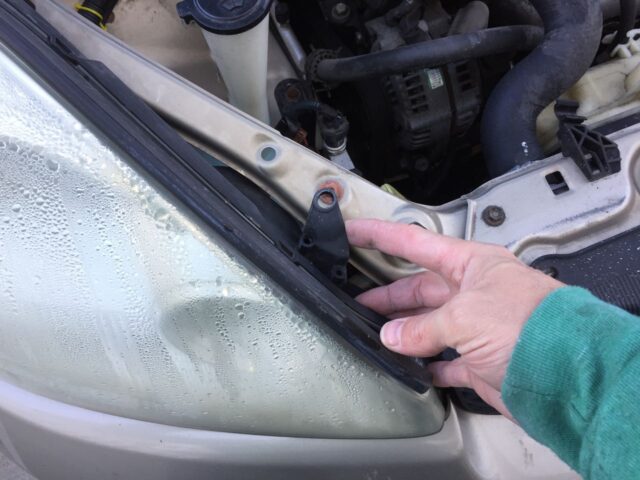
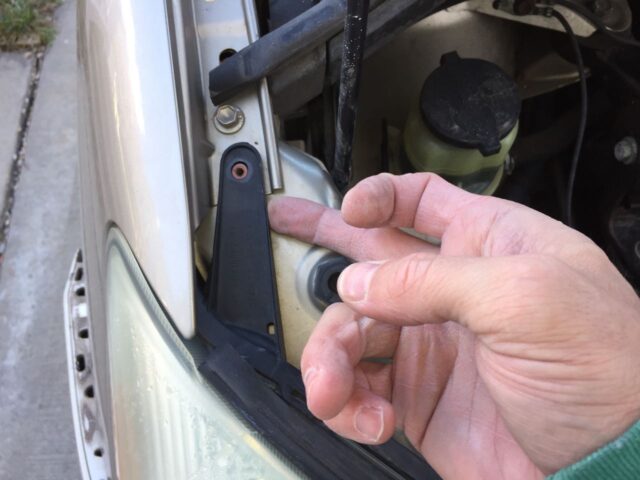
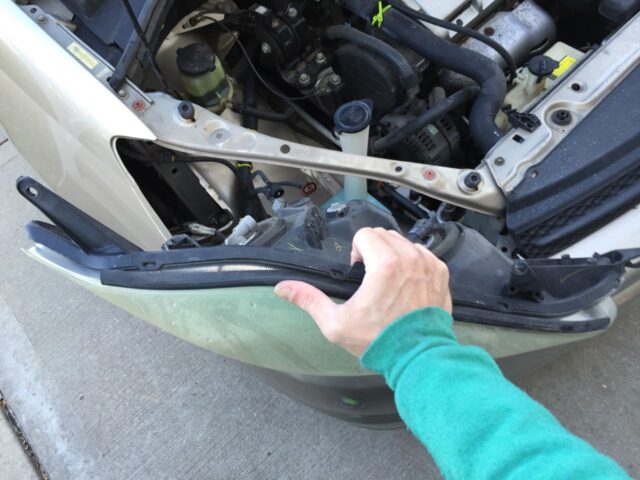
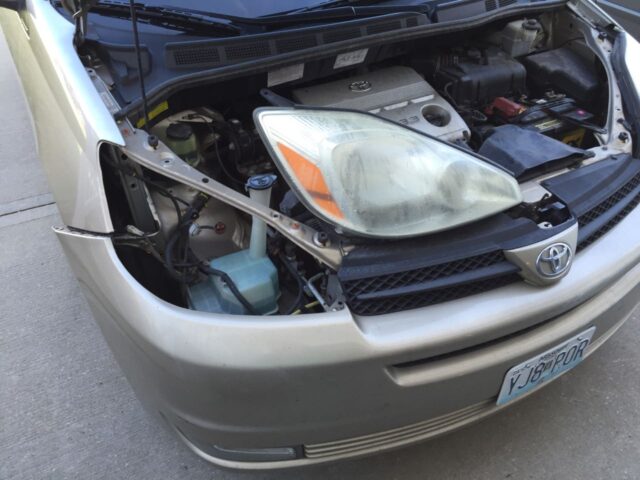
You will then need to play around with working the headlight out of the vehicle. Pry up on the grill like you did when you removed the front screw in Step 5 and work the headlight out of the opening. Here it is out:
Step 11: Remove all the bulb assemblies from the headlight.
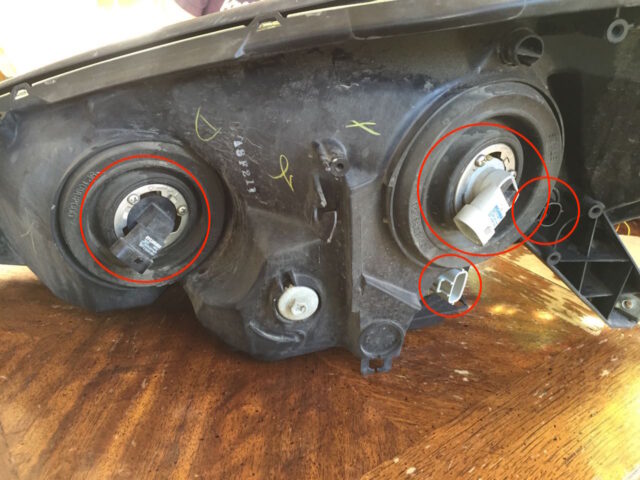
Each of them turns about 30-degrees counter-clockwise and then pulls straight out to remove. Remember not to touch the glass bulbs of the high and low beam bulbs or you will surely shorten their lifespan because of the oil on your fingertips. The inner headlight bulb (high beam) has an orange rubber o-ring on it:
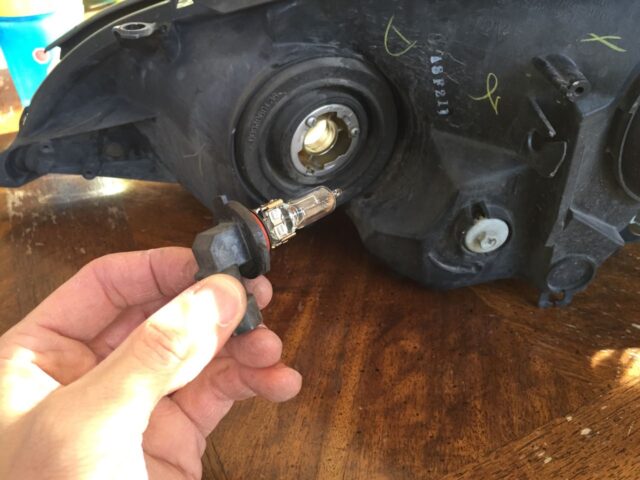
The outer headlight bulb (low beam) has a yellow o-ring on it:
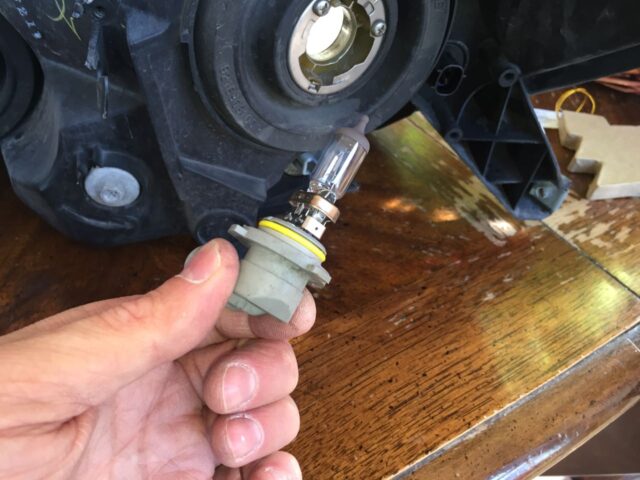
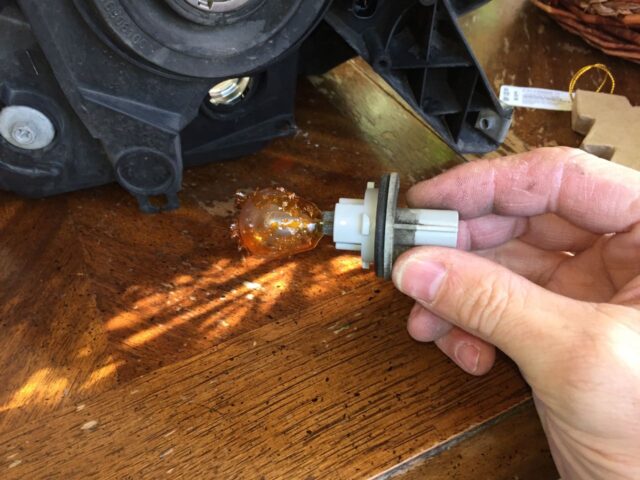
The third from the inside will be the turn signal and that bulb is colored yellow. The yellow plastic on the bulb was flaking off on mine and that may have been because of the moisture inside the headlamp:
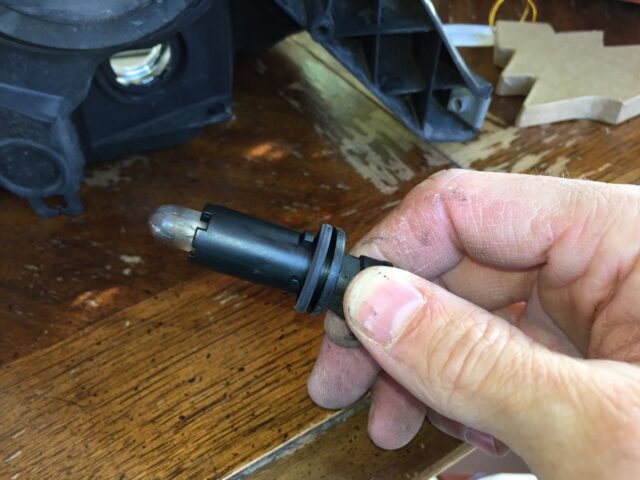
The outside bulb is shown below and it was obvious that it was burnt out (and I didn’t even know there was such a bulb honestly):
Step 12: Dry out the inside of the headlight.
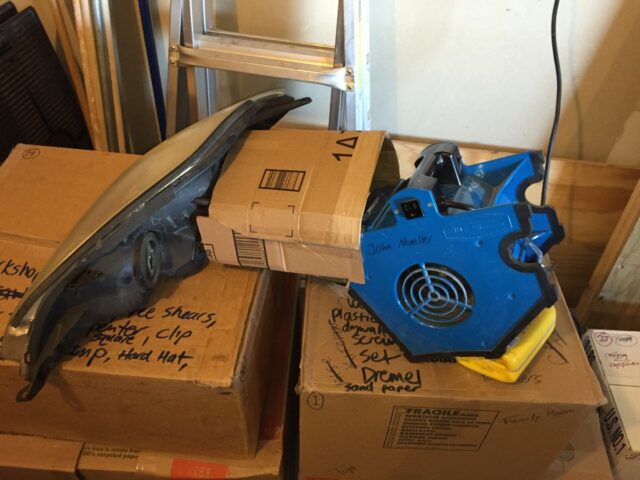
There was quite a bit of water on the inside of my headlight. I first set up my “blue blower” and let it blow in the two outer bulb holes and let that run for a few hours:
I then realized how much water was in the bottom of the headlight when I heard it slosh around in the bottom. There was a lot of water in there:
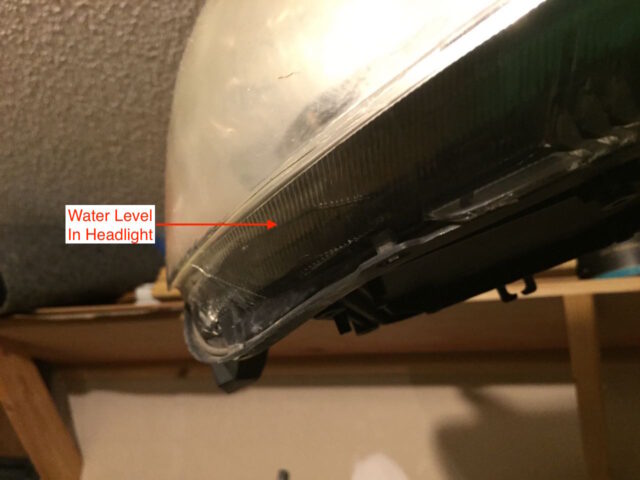
When I saw how much water was in there I knew it would take forever to dry out with just air. I also knew the openings where the lightbulbs go in are not shaped to easily pour out water (so I could now just pour out the water) so I decided to drill a 1/4″ hole in the bottom of the headlamp (outside of where it would be visible) in order to pour the water out:
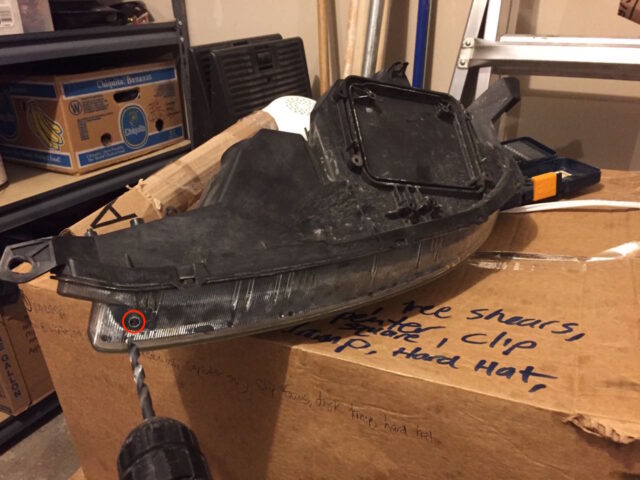
This is how much water drained out:

I used a hair dryer for a little while but never left it unattended and kept it on the lowest heat setting. I didn’t leave it blowing in one hole for long and even with that, the plastic got pretty hot. I taped a cardboard tube onto the hair dryer to put some space between the dryer and the headlight:
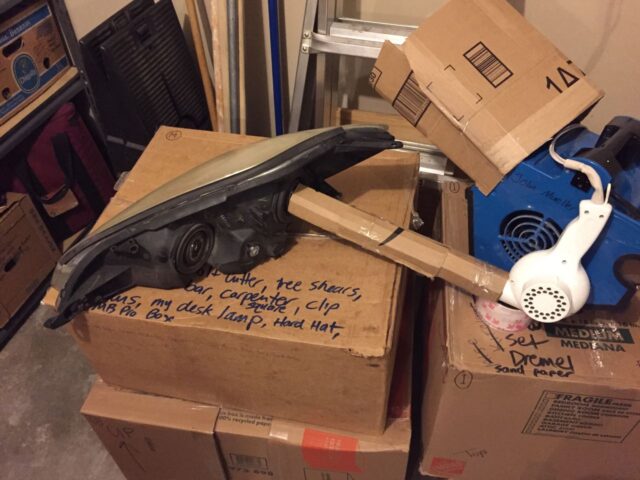
For the most part I only used the blower on the headlight to dry it out and once I drained the water out by drilling the hole it started drying faster. It took at least 2-3 hours to dry out the headlight and there still were a few drops in there when I decided to move forwards anyway…
Step 13: Apply glue to the headlight seam.
At this point I was not too sure whether I would try re-sealing the headlight or I was just going to drill some holes in the bottom and leave it open for the water to drain out. I decided I would try re-sealing it and see how it went and then I could either drill more holes in the bottom or seal it up.
I used the glue application syringes I have linked in the parts section at the top. Take the plunger out and fill the syringe with glue, leaving a little room for the plunger as seen below:

I tried the blue tip size but the glue would hardly come out of them. I tried the next larger size, green, and it worked very nicely and the tip still did fit down into almost all the seams:
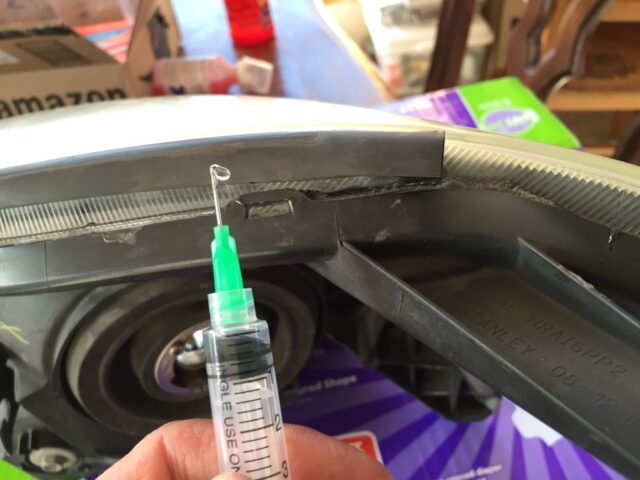
It required quite a bit of pressure on the plunger to keep the glue flowing but it worked nicely. Flood the seam between the clear plastic and the black back plastic piece as seen below:
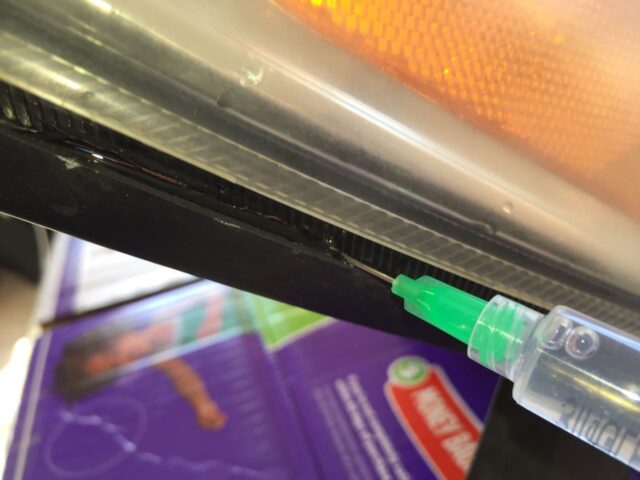
Put the tip of the syringe as deep into the seam as you can and let the seam “fill up” as you move the syringe along. I liberally flooded each place where the snaps were to make sure it was sealed in those locations as seen below:
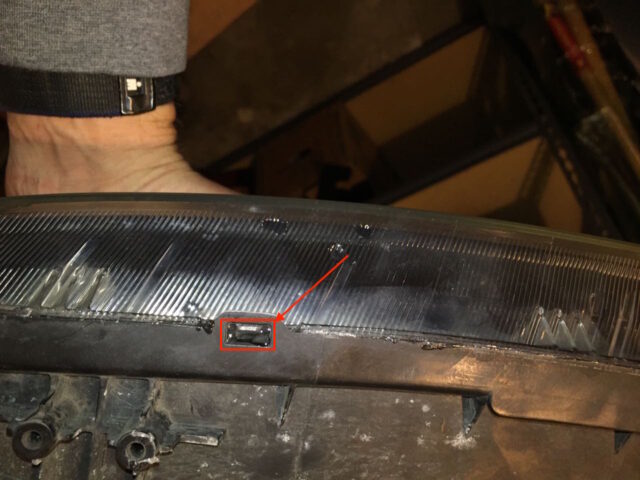
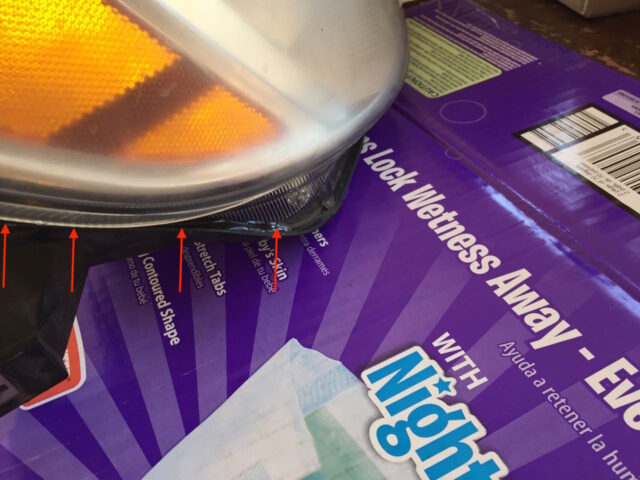
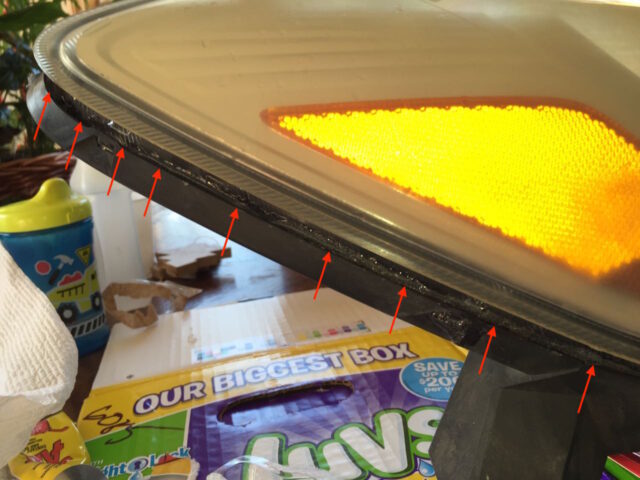
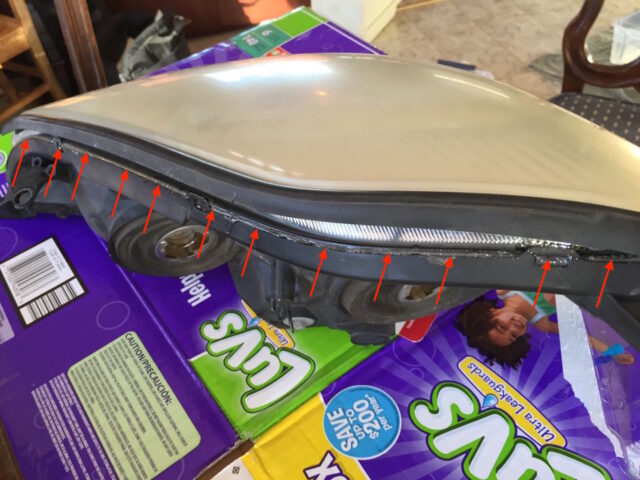
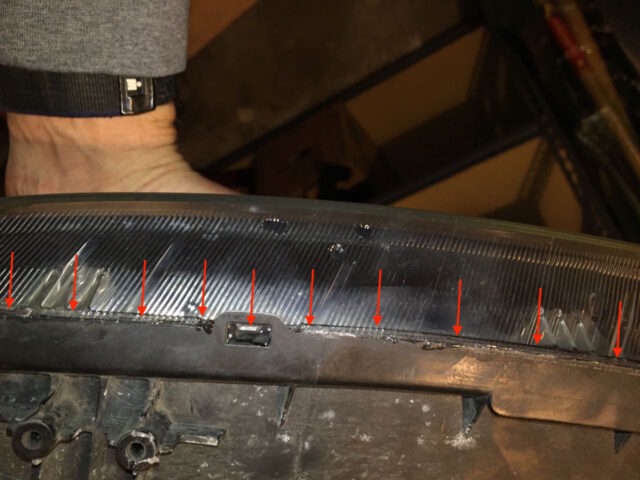
I didn’t worry about the bottom seam that much because gravity will pretty much keep the water from going in there but while I was working on it I went ahead and sealed the lower seam too.
Step 14: Allow the glue to set up.
This adhesive said it set up in 5-6 minutes but I had started applying it before all the water had been dried inside the headlight. I put the blower back on the headlight to help the adhesive to cure and to dry the headlight out a bit more inside.
Step 15: Reinstall the bulbs.
First make sure to replace the burnt out bulbs if they were bad. My headlight bulbs were good but the turn signal had the pealing plastic coating and the outside tiny one was definitely bad. I replaced the tiny bulb (the far outside one) on the driver’s side of the as well since you get two bulbs in one pack and I figured it was bad (and I didn’t even know there was such a bulb in my van on the very corners). One thing to note is which headlight bulb is which. The orange o-ring bulb is the high beam bulb and the yellow o-ring bulb is the low beam bulb. Here is how they went back in for me (orange o-ring on the left and yellow one on the right):
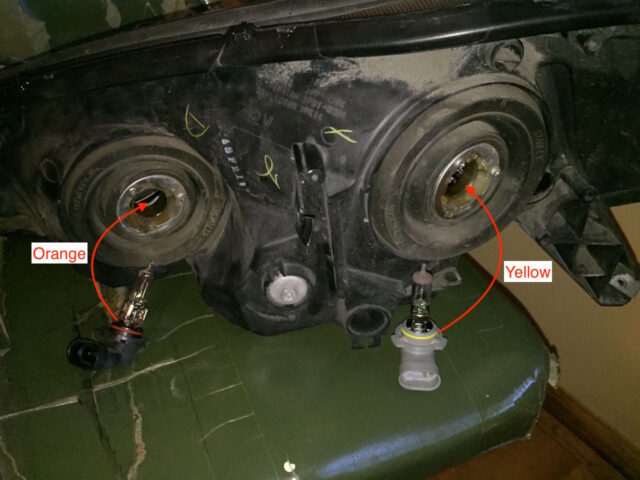
Don’t forget to put back in the turn signal light bulb and the tiny corner bulb too.
Step 16: Seal up the drain hole you drilled.
At this point I decided that my adhesive was going to do a good job of re-sealing up the headlight and I wanted to fill the hole I had drilled in the bottom of the headlamp in Step 12. I liberally squeezed some adhesive in the hole, put a piece of clear packing tape over the hole, and then reoriented the headlight so the hole was facing down so the adhesive did not run up into the headlight and let it rest (with the hole oriented down) for 10 minutes or so to set.

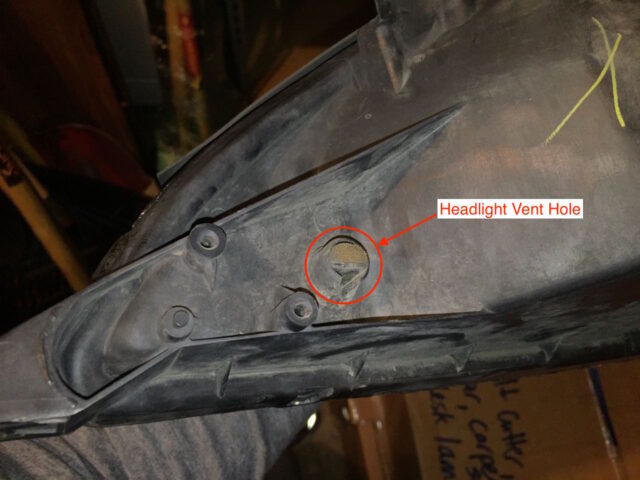
One thing to note–these headlights DO have “breathing holes” built into them and you can see one here with Styrofoam in it:
Step 17: Re-insert the headlight into the van.
It was a little tricky but you will need to carefully guide the headlight back into place. I pulled back the grill a bit to give me some space. Be careful not to apply to much force to any of the tabs that stick out of the headlight so you do not break something off. I first got it partially in place as seen below:
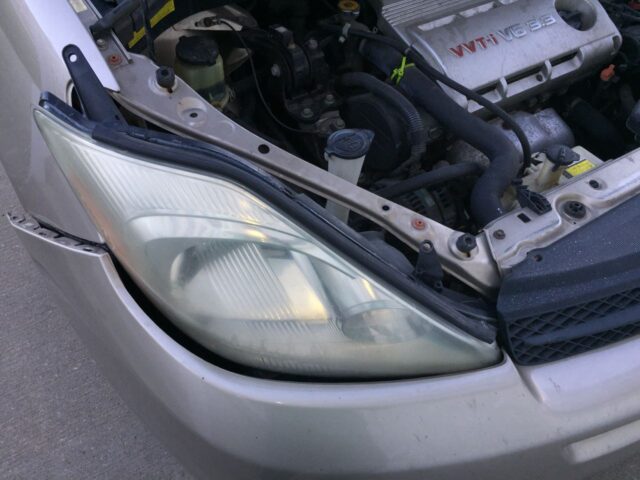
One tight fit area is the V at the top where the mounting tab must be on one side of the quarter panel and the headlight on the other:
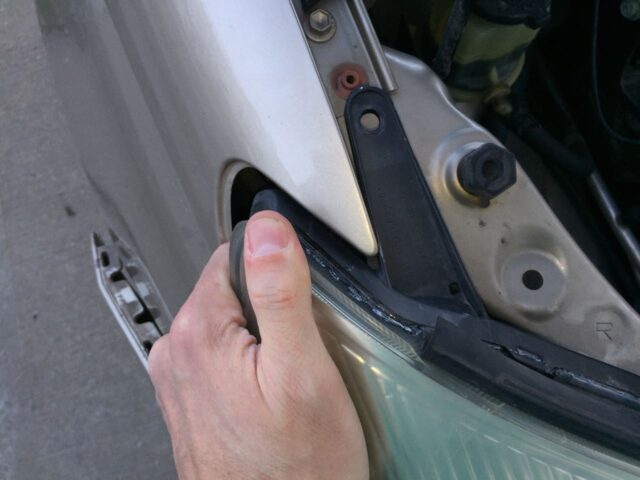
Step 18: Reinstall the headlight screws and bolt.
Do not over-tighten these screws as you could crack the plastic. Pull back the edge of the grill and line up the mounting tab’s hole with where it screws in place:
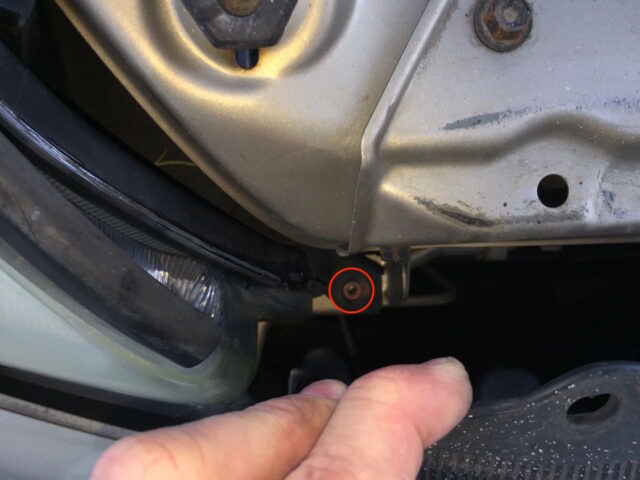
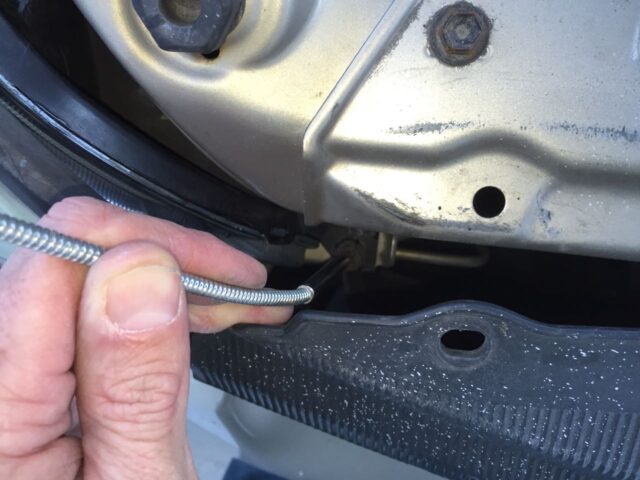
I used my flexible claw pickup tool gripped on the head of the screw to get the screw started down in there:
Line up and reinstall the top mounting screw:
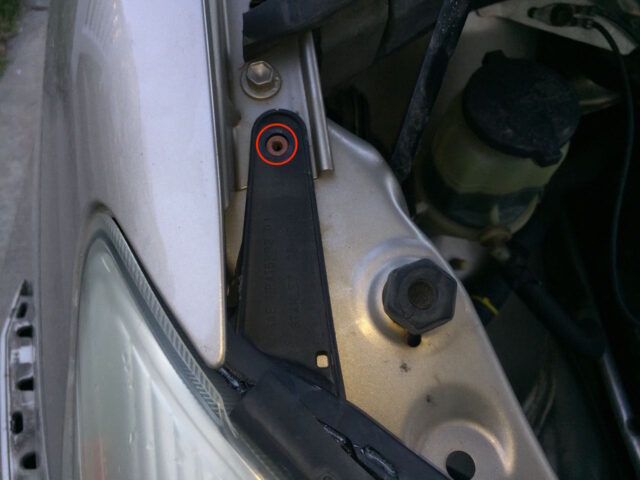
Reinstall the outside mounting bolt via the seam of the bumper:
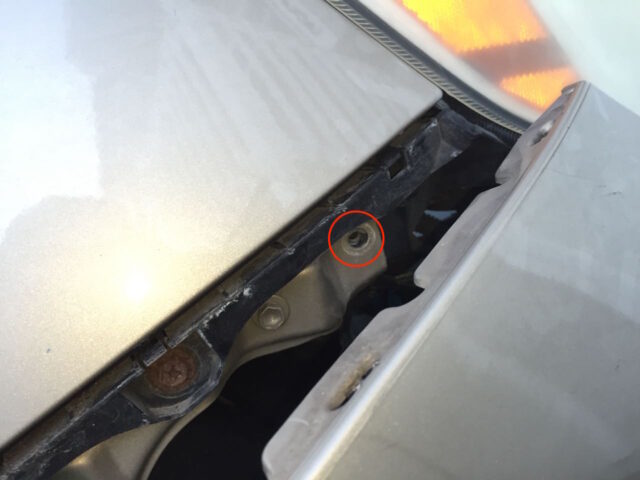
Step 19: Snap the bumper back together.
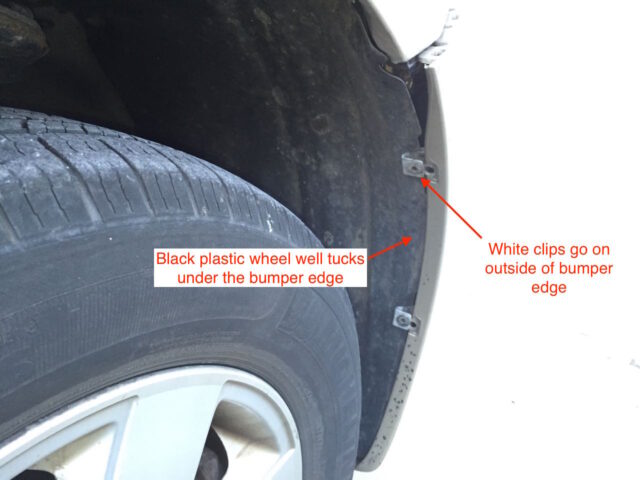
First I made sure the wheel well clips were lined up correctly. If you do not get it all lined back up correctly you may end up having to unsnap the bumper again and you don’t want to have to do that. You’ll want to make sure the black plastic wheel well lining is tucked behind the edge of the bumper. The white wheel well clips need to wrap the edge of the bumper as seen below:
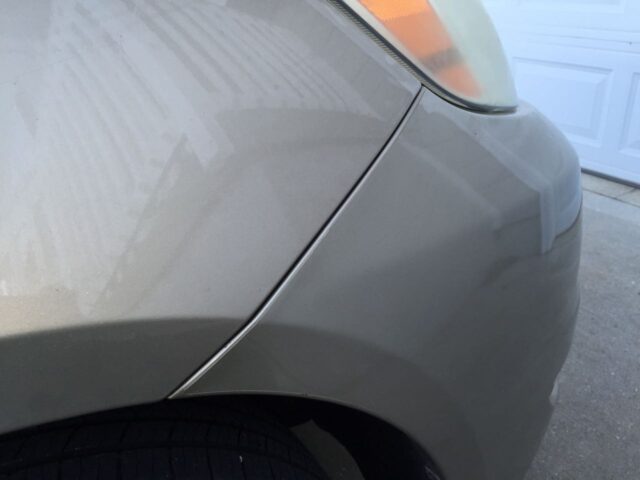
Now align and snap the bumper seam back to the quarter panel. This is what the seam of the bumper should look like when it is snapped back into place:
Step 20: Reinstall the fender clip center pins.
This is what the clips should look like before reinstalling the center pins:
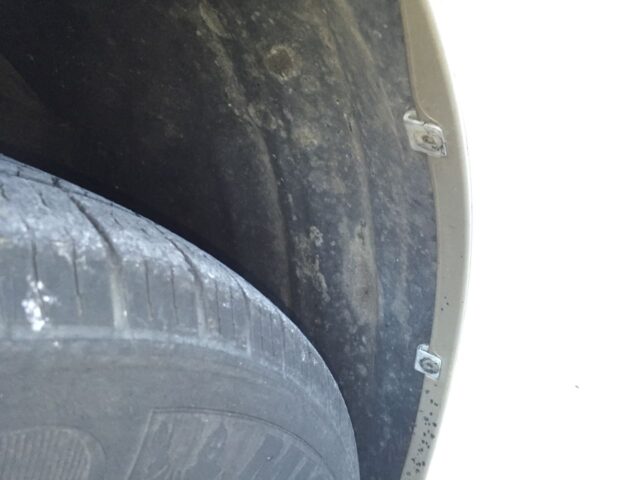
Reinstall the two pins:
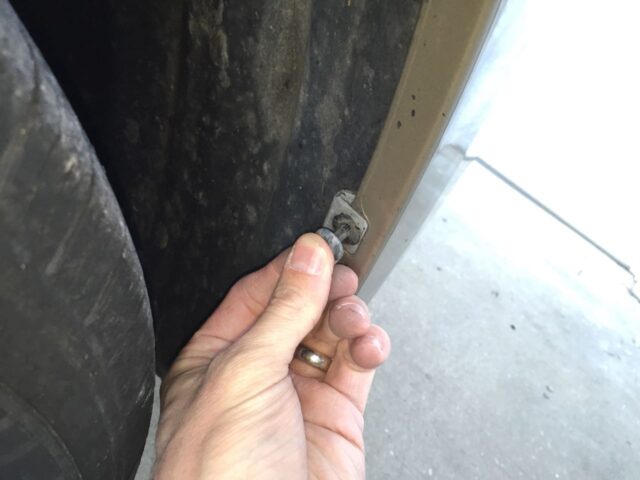
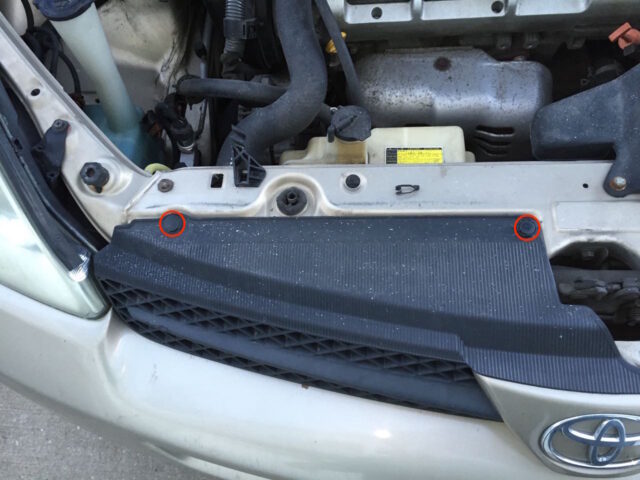
Step 21: Reinstall the grill clips.
Pop the centers out of the grill clips and insert them and press in their centers:
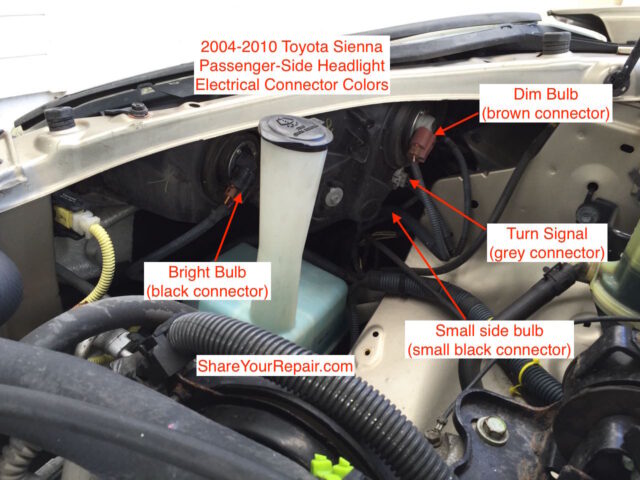
Step 22: Reconnect the electrical connectors to each headlight bulb.
Reconnect all four electrical connectors to their fixtures. The bright headlight (inside bulb) is a black connector, the low-beam bulb is a brown connector, the turn signal bulb has a grey connector, and the small black connector goes to the outside bulb:
Step 23: Test out your headlights.
If you’ve done everything correctly your dim and bright headlights, your turn signal and your side lights should all work. You’ve saved yourself probably $500 over having a dealer do this and you recycled a poorly manufactured headlamp and have given it a longer life.
Amazon Associate Disclosure: As an Amazon Associate I earn from qualifying purchases. This means if you click on an affiliate link and purchase the item, I will receive an affiliate commission. The price of the item is the same whether it is an affiliate link or not. Regardless, I only recommend products or services I believe will add value to Share Your Repair readers. By using the affiliate links, you are helping support Share Your Repair, and I genuinely appreciate your support.

I posted a short video on removing the grill clips. I’m sure others have different ways, but when I used a plastic auto trim tool, it didn’t work very well.
Here’s the video: https://youtu.be/MUGzV6t95gc
Works well for the wheel well plastic clips as well.
very nice man really good website for repairs.thanks for your time doing this it really helps. normally i dont right any comments on website but seing your effort u deserve a tremendous praise.
Thanks for the feedback!
John Mueller, excellent job on this tutorial. If I were a teacher, I give it an “A” on this paper. Anyway, I also have a 2004 Sienna XLE model with the HID xenon bulb. It went out last week after couple days of November rain. The bulb is burnt. Lots of moisture inside the headlight assembly. Initially I thought I needed only to replace the bulb, but it’s a bigger problem than I thought. On models with the HID (high intensity discharged) assembly, there is a headlight ballast (control unit) sitting underneath the assembly that might also be bad. This unit needs to either be replaced (used from e-bay, ~$60) or cleaned, dried unit thoroughly. I am waiting for the ballast control unit from e-bay to arrive before I tackle this project. Thank you again for this excellent write-up.
Thanks for the feedback Jack. You’re the first to give me a grade–I always wanted to get A’s! The HID bulbs do complicate this repair and lucky for me I had the cheap headlights. Unfortunately for you, the HID version suffers from the same manufacturing defect. Please check back in and Share Your Repair and let other HID owners know how it went and if you have any tips for them.
John, I finally got my HID front passenger headlight working again thanks to your excellent tutorial. I ordered a used headlight ballast from e-bay (~$60) and replaced the corroded one. Put everything back together and voila! The ballast is just underneath the light assembly. Now, I need to tackle cleaning up the foggy outer lens of both headlamps.
Great to hear Jack, now it is all downhill from here–there’s tons of resources on polishing up your headlights. I recently watched one that I like, from a Youtube channel I just started following, ChrisFix, because he shows you how to keep them from turning yellow again, (as all mine have yellowed again after I polished them clear): ChrisFix, How to Restore Headlights Permanently The trick is to use a clear-coat paint after you polish them to keep them from oxidizing.
This is a fantastic repair article – Thank you Mr. Mueller!
As a suggestion for marginally clouded headlight assemblies, I have used my halogen work lights as heating lamps to evaporate minor condensation very successfully.
Starting at the base of the headlamp cover, slowly heat the entire cover and then continue to broadcast the heat on the specific regions of condensation. Use cardboard to shield the plastic headlamp cover to ensure you do not damage and overheat the cover. To correct the condensation took about 30 minutes.
Thank you for the feedback. I have a question–how do you get the water out of the headlight though? If you cause the water to evaporate within the lens, but do not replace that hot moist air, with cool dry air, will not the moisture condensate on the inside of the lens again when the lens cools? I found it difficult to circulate much air through my headlights because the openings are small.
How well did the Seal All Adhesive hold up over time? Is your light assembly leaking now?
The repair is holding up great–no water in it now after almost 5 months! If I run into problems I’ll definitely update the article with what happened and what I did to resolve it.
Nice writeup. But, you are lucky, you don’t have the Xenon HID lights. The HID bulb is $100 oem, you can get them less expensive…
Hmmm, I’m leaving a reply to my reply… This is an excellent writeup after I just went back and looked at it again. Really thorough and includes a nice list of mat’ls needed at the beginning. I do have the HID bulb . Not sure I have all the parts, going to try taking it apart now…
Mark
Check back in and add any information that will help other HID bulb Sienna owners. Thanks for taking the time to share.