My GE dryer was sounding like it had sand in it and I did research and found out there are plastic “wearing” bearings that wear out over time and must be replaced. Often the dryer will make a squeaking sound when they wear out, although mine was not “squeaking.” After doing some research, including watching the video here, I learned how easy it is to replace them. Follow along if you are experiencing noise when your dryer runs to replace the drum guides. Here’s a vide of the scraping sound my dryer was making:
How to Fix Squeaking GE DCVH515EF0WW Dryer-Replace Drum Glides
Parts Needed:
- Dryer Drum Slide Kit 4 Pack for General Electric, Hotpoint, WE1M1067, WE1M316, WE1M333, WE1M481
- GE WE14M124 Top Bearing Assembly for Dryer
(if your drum bearings have worn through and were not changed in time and the plastic frame that holds them wore out too)
Tools Needed
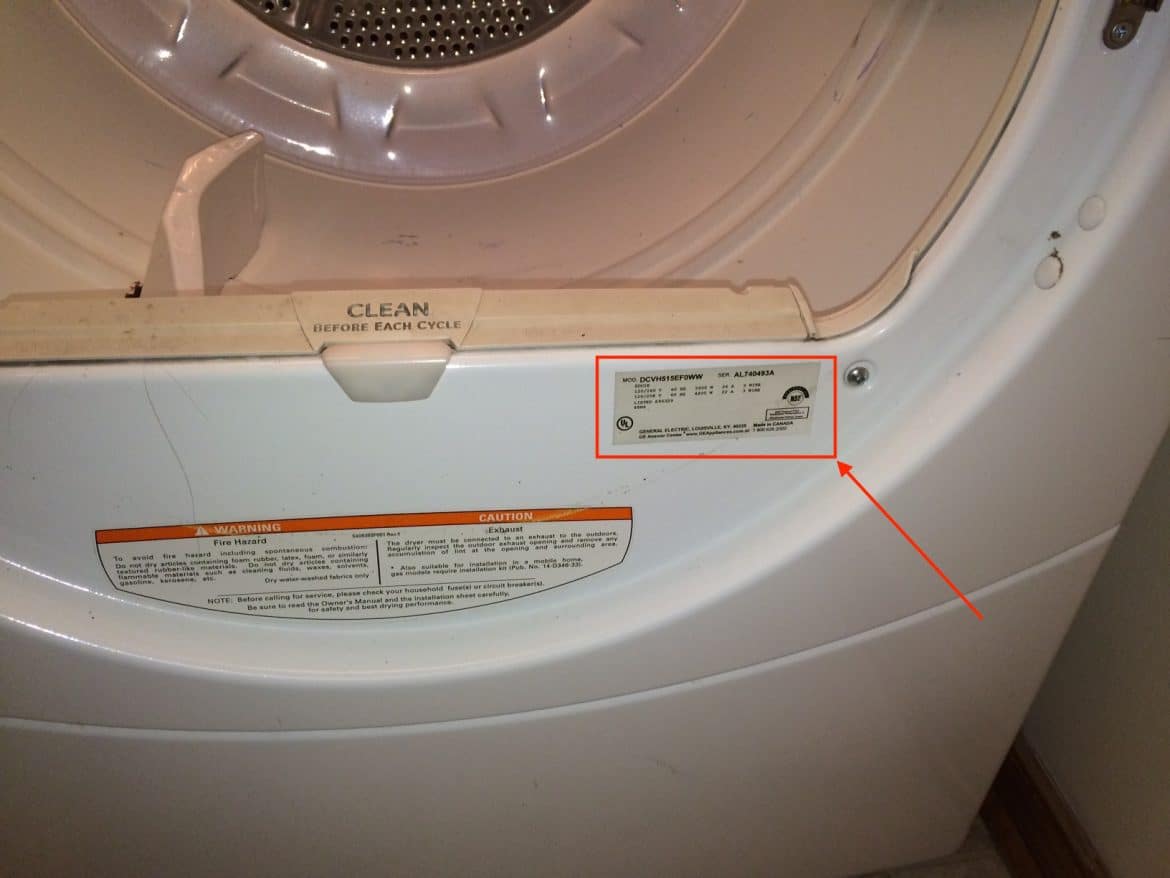
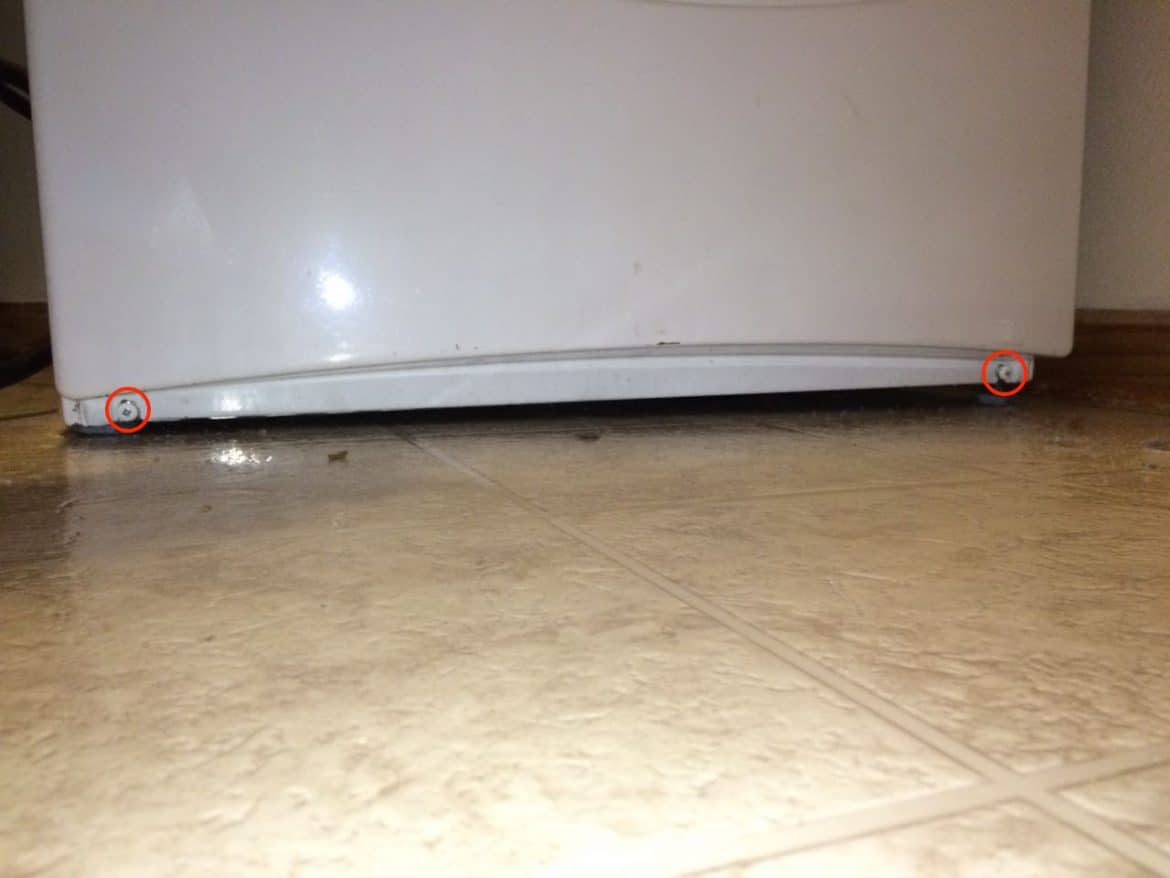
How to determine your GE Dryer model: Open the door and look at the bottom right edge of the dryer’s opening:

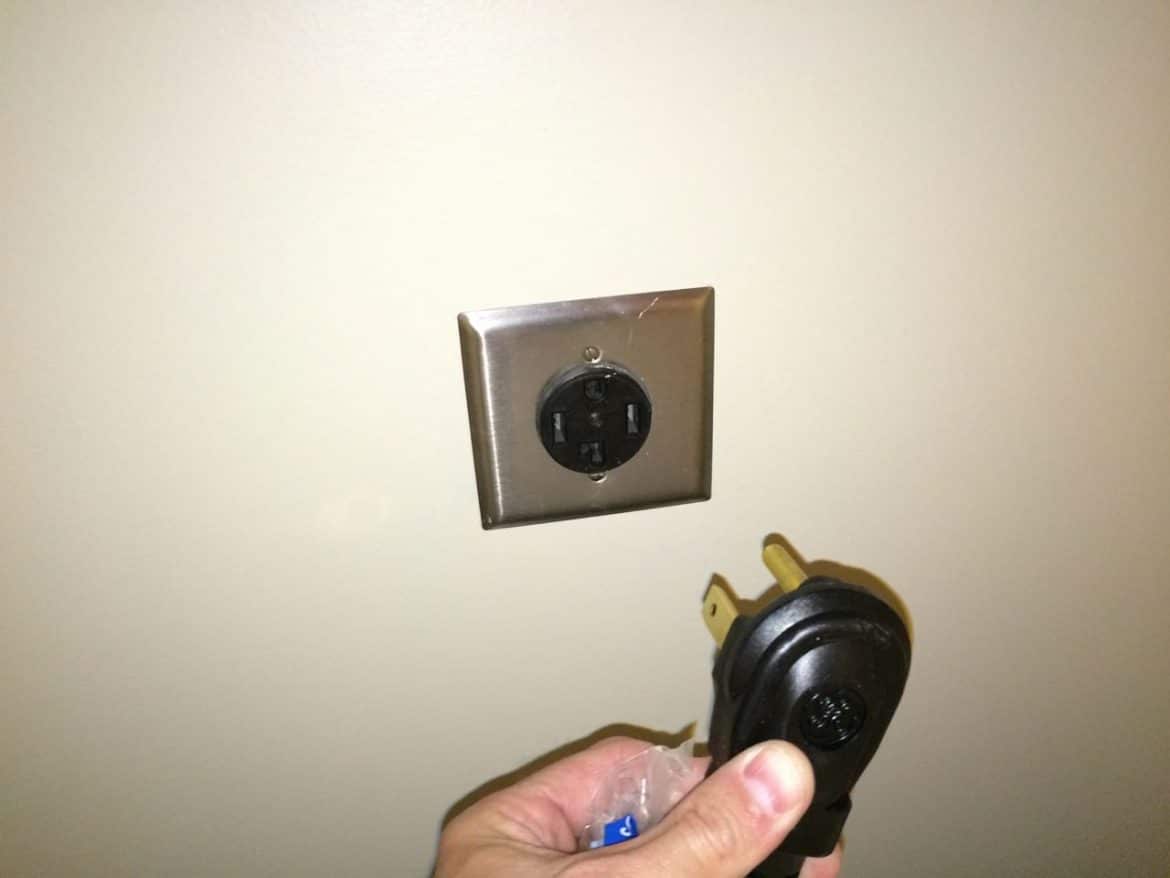
Step 1: Unplug your dryer.
If it is an electric dryer like mine you are dealing with 220V. Regardless, make sure to unplug it before working it on so you don’t get electrocuted.
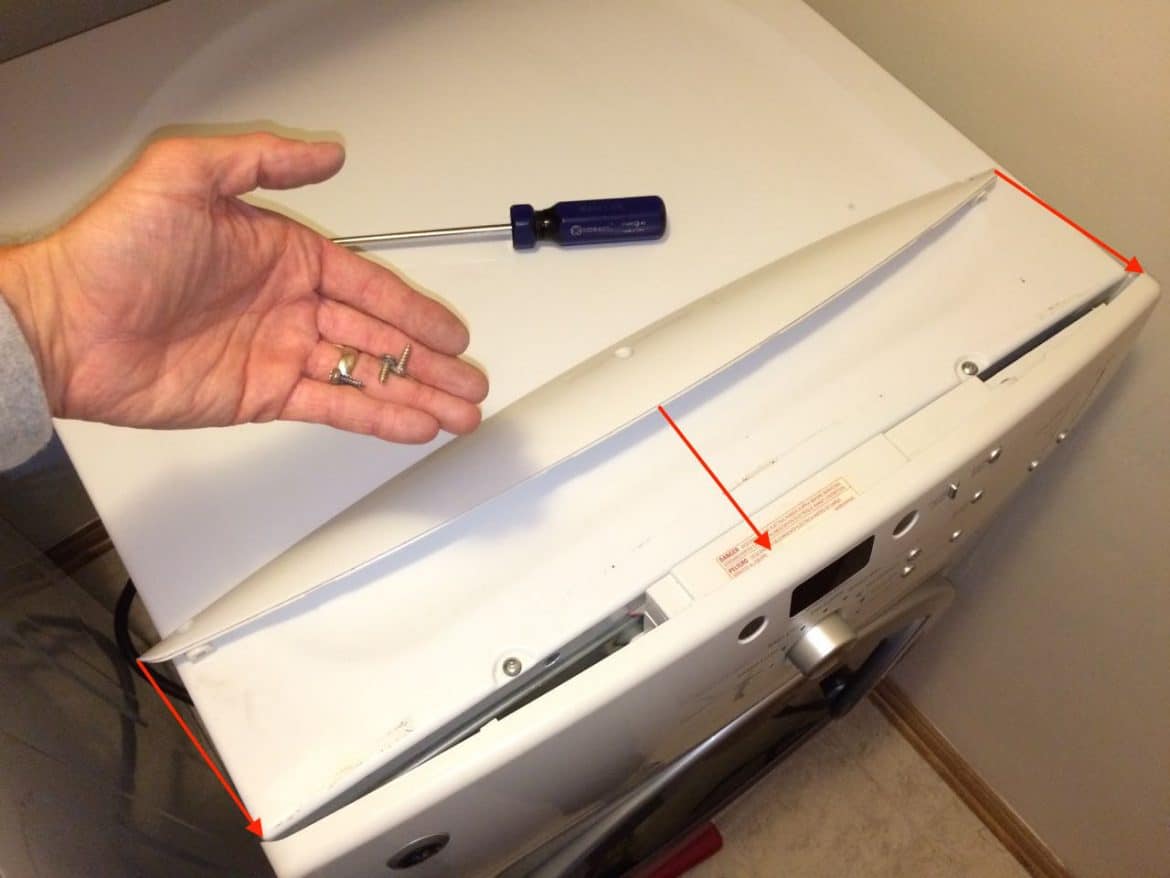
Step 2: Remove the 3 Phillips screws on the top edge of the back of the front bezel.

Once you have removed those three screws you can put your fingernails in the seam and slide the bezel toward the back of the dryer.
Set the bezel and the three screws aside.
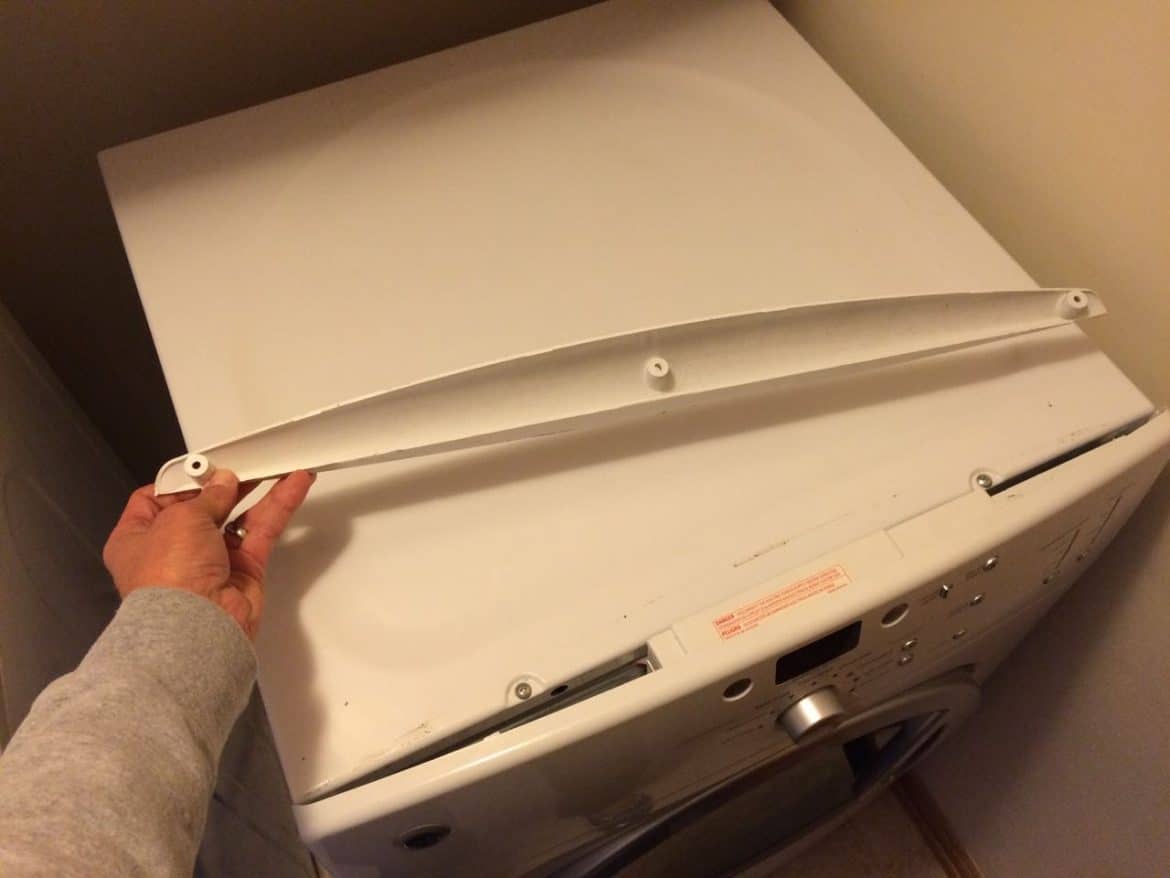
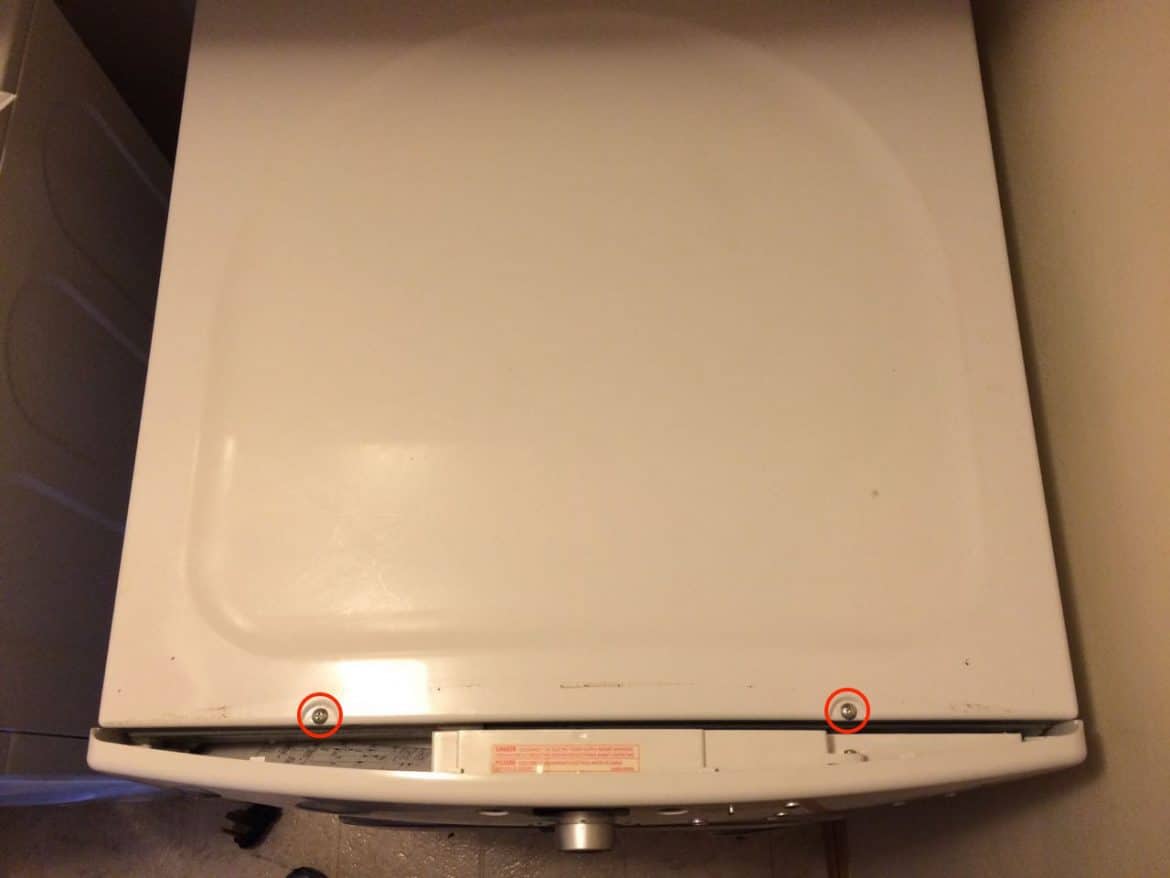
Step 3: Remove the top two cover screws.
They are Phillips head screws:
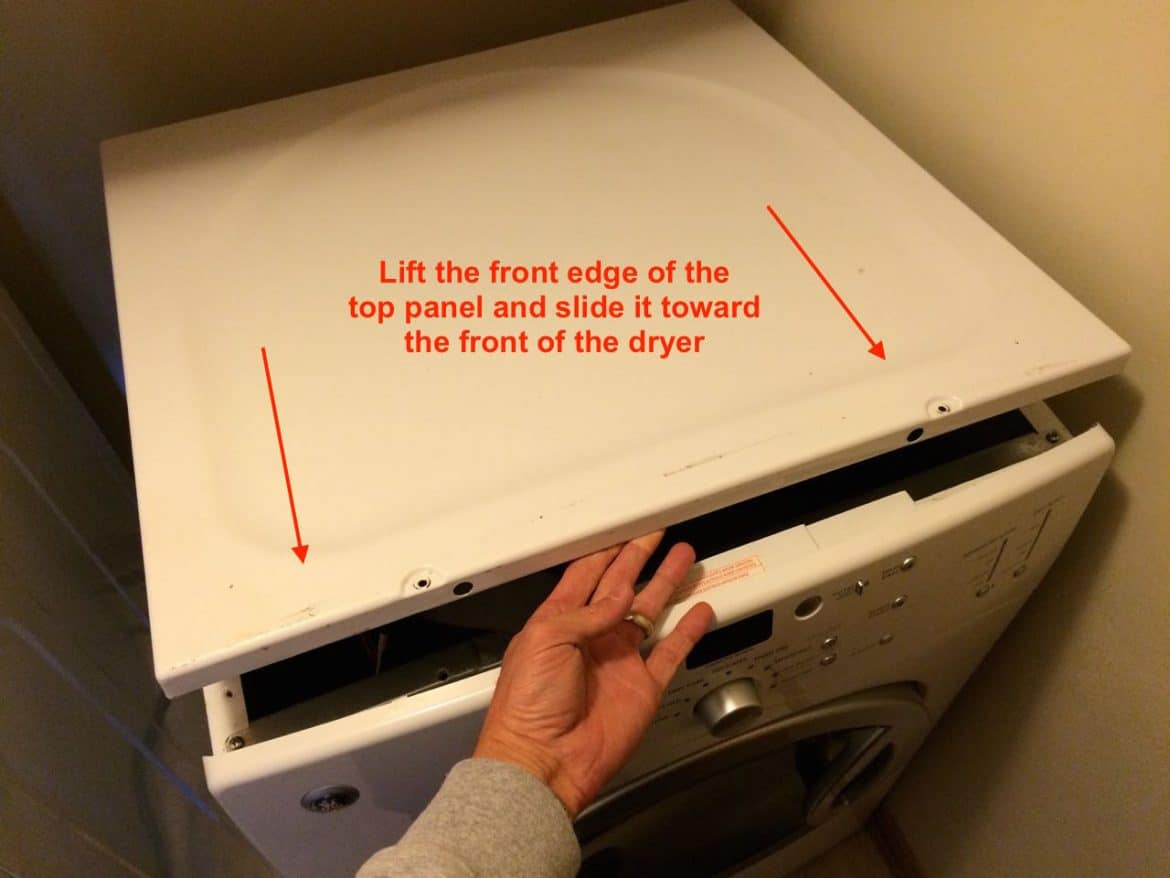
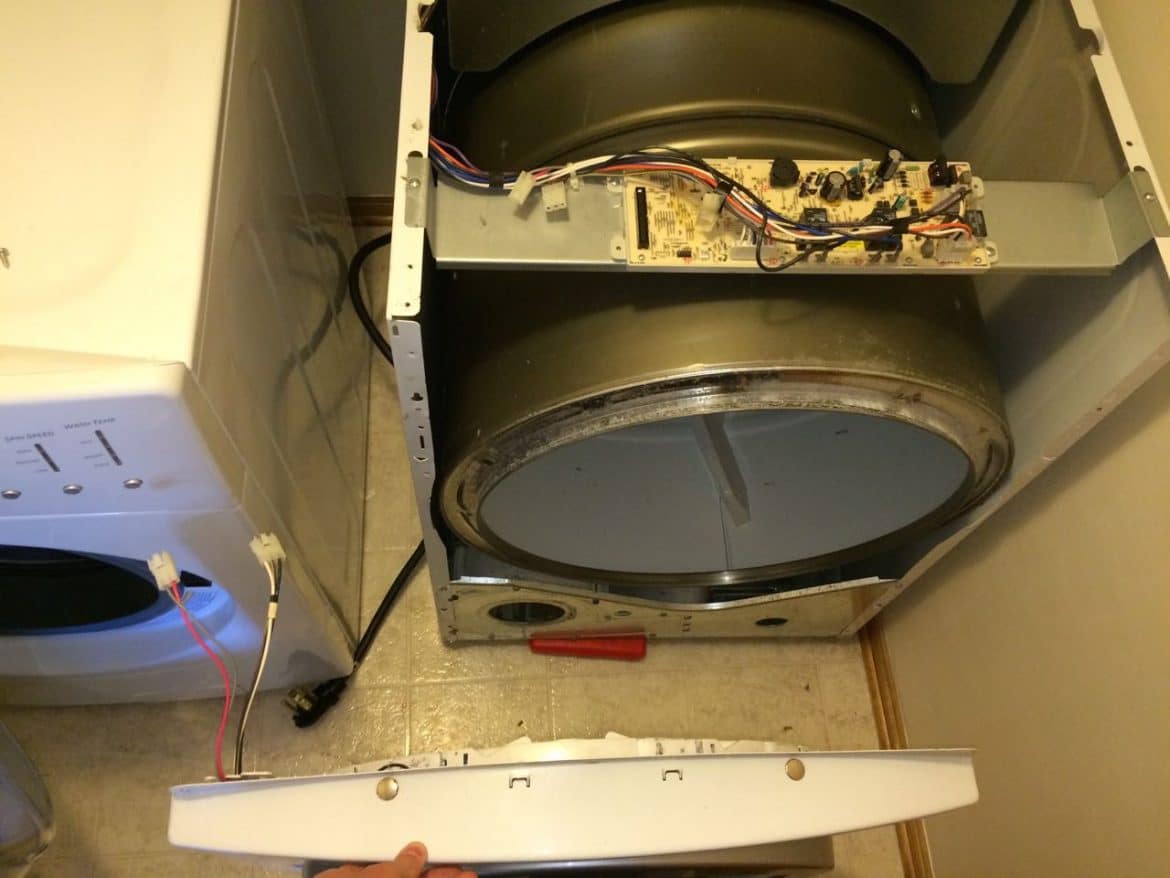
Step 4: Remove the top panel.
Lift up the front edge of the top panel and slide the panel toward the front and remove the top panel.
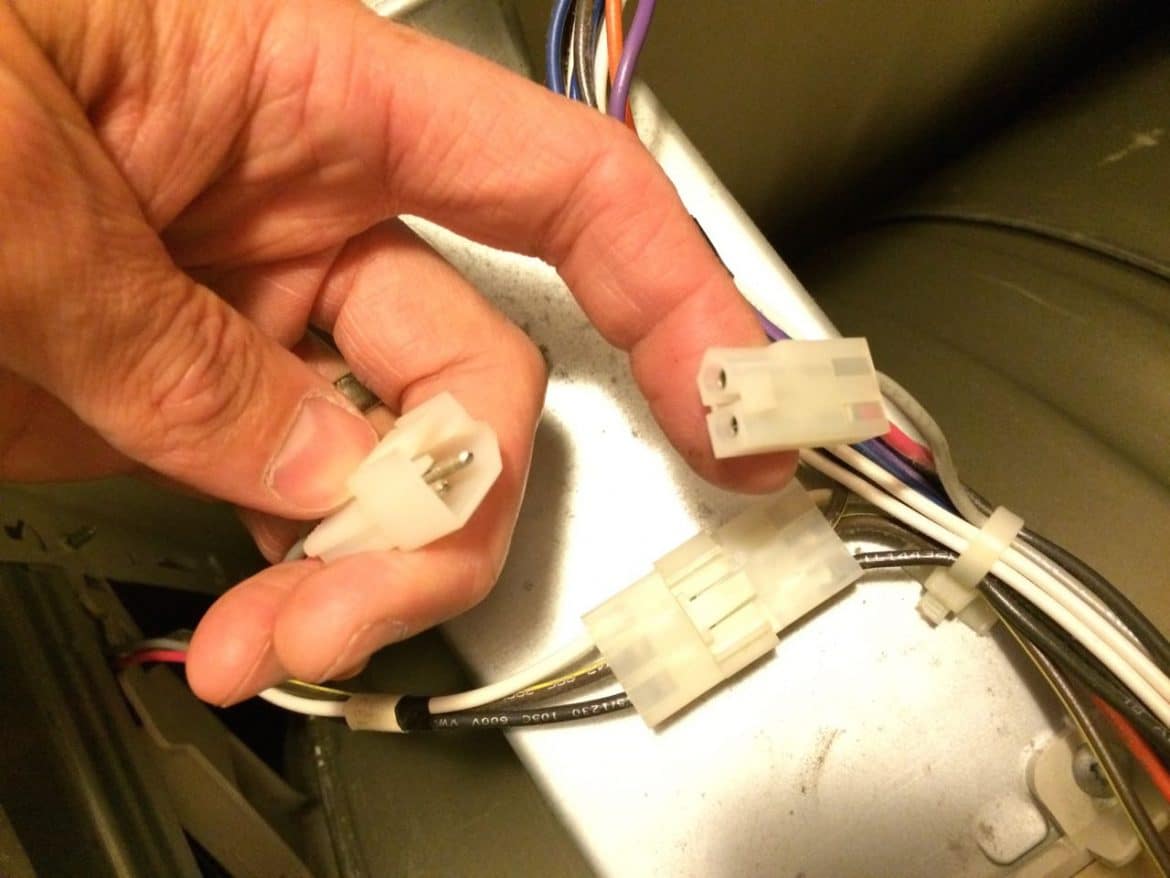
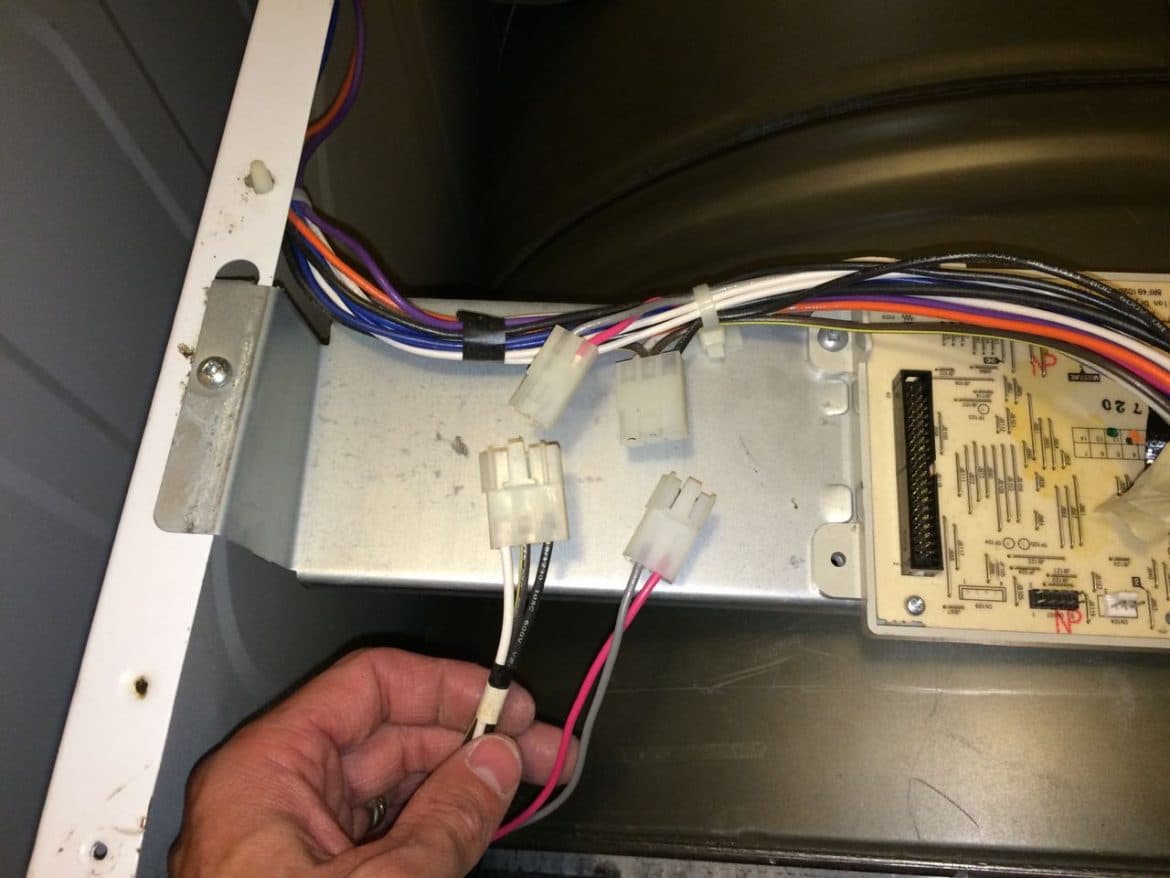
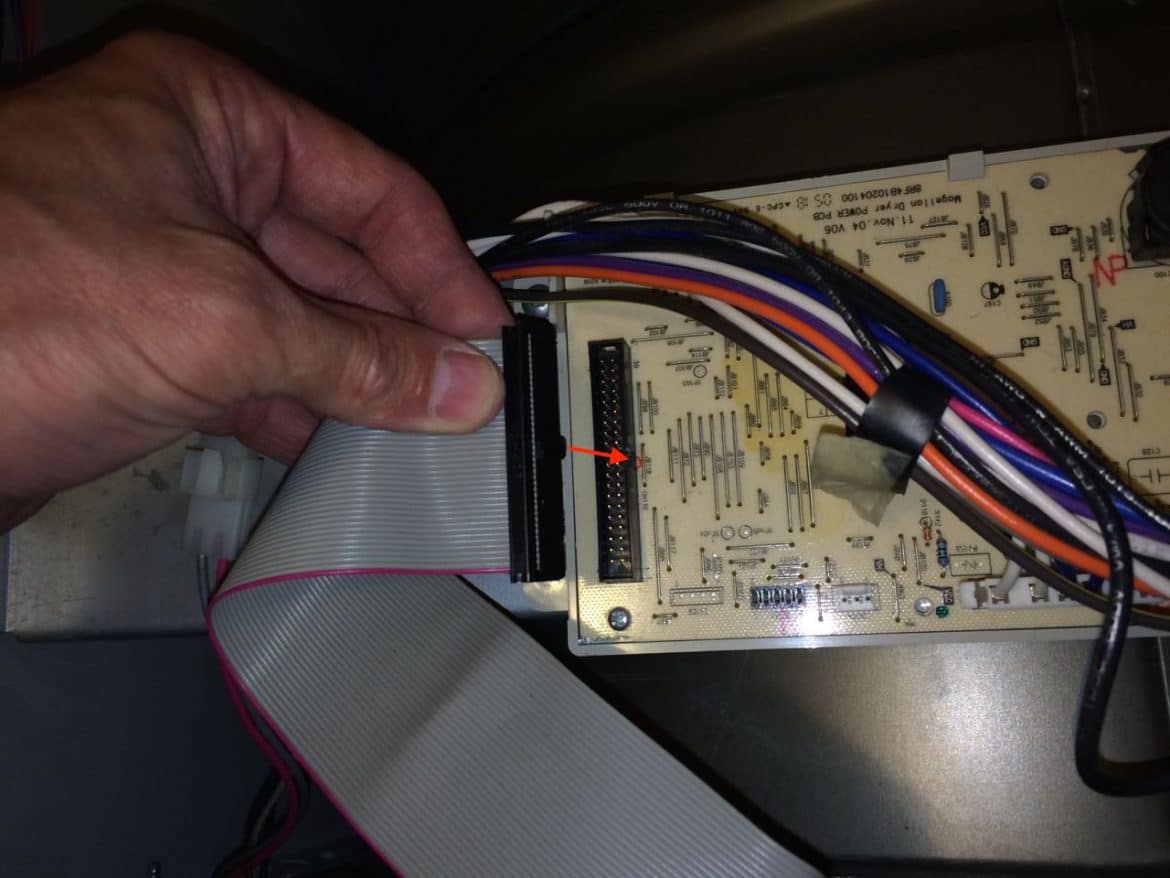
Step 5: Disconnect the light, switch, and control panel wiring connectors.
Before you proceed you need to disconnect three wiring connectors. One is a parallel computer-type ribbon cable for the controls, one is for the light, and the other is for the door light switch (the latter two have tabs you must lift in order to disconnect them):
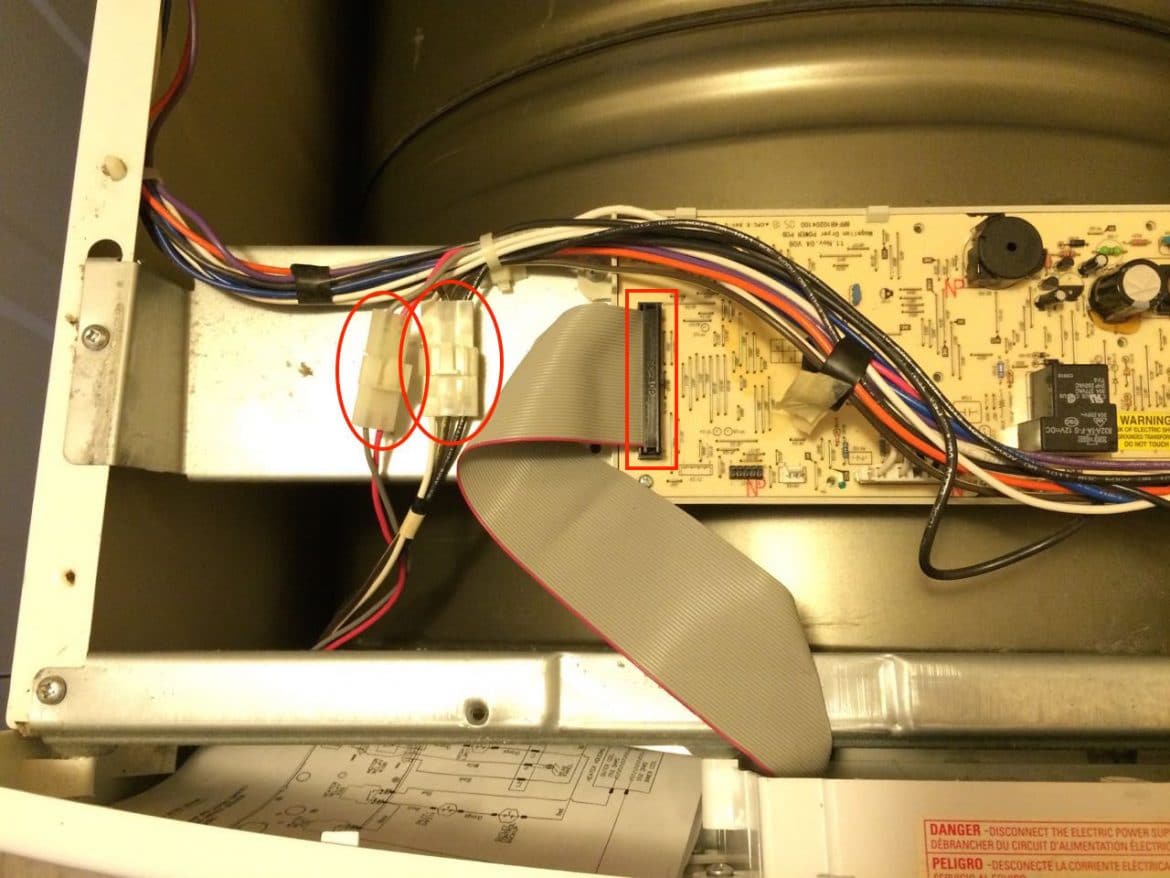
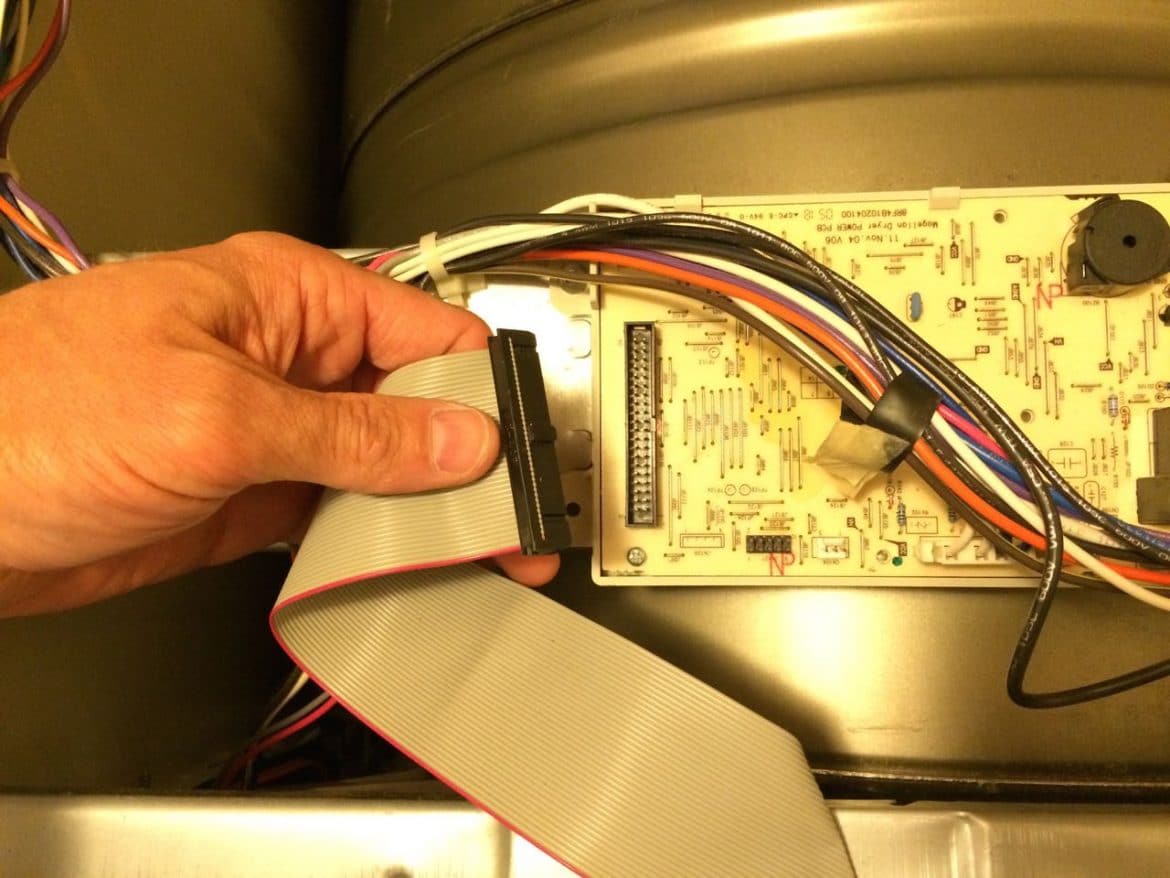
I put one finger on the left side under the ribbon cable and the other on the right side of the black connector, wiggling the connector and pulling up to remove it:
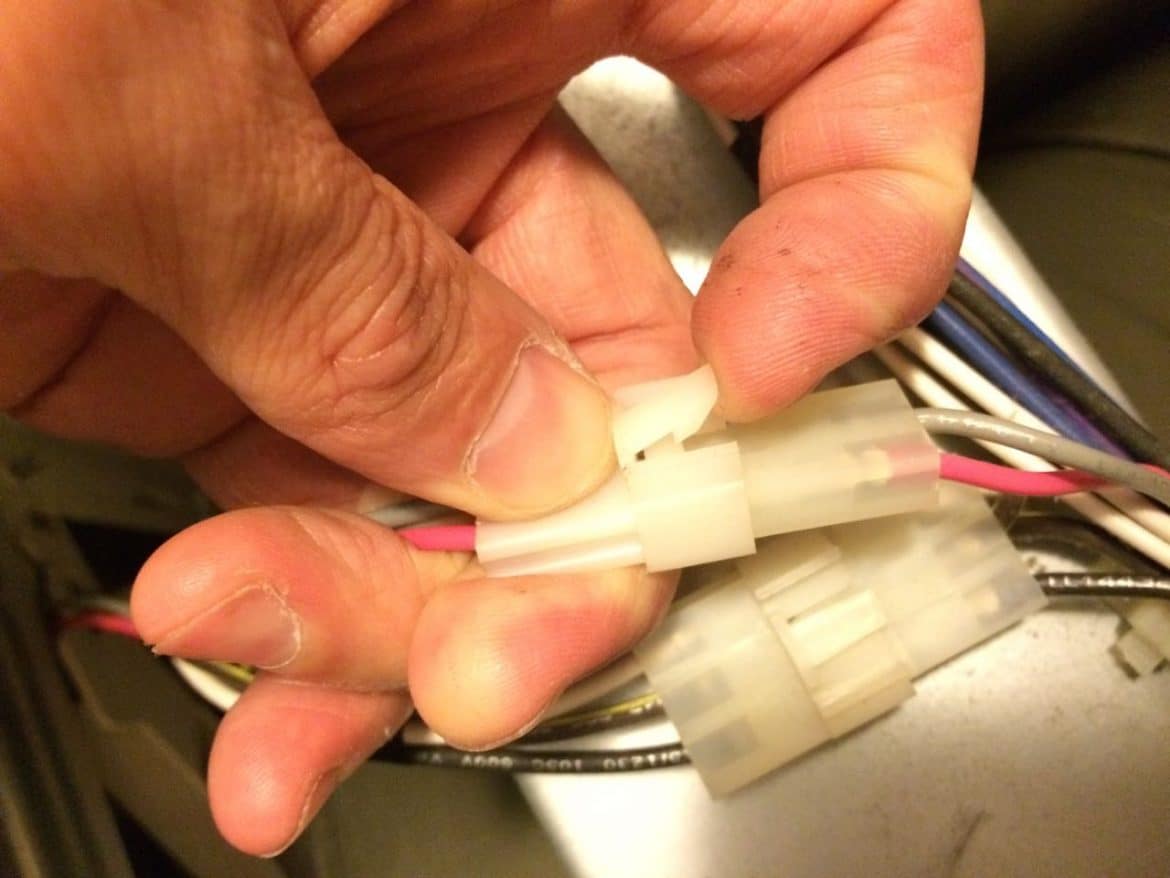
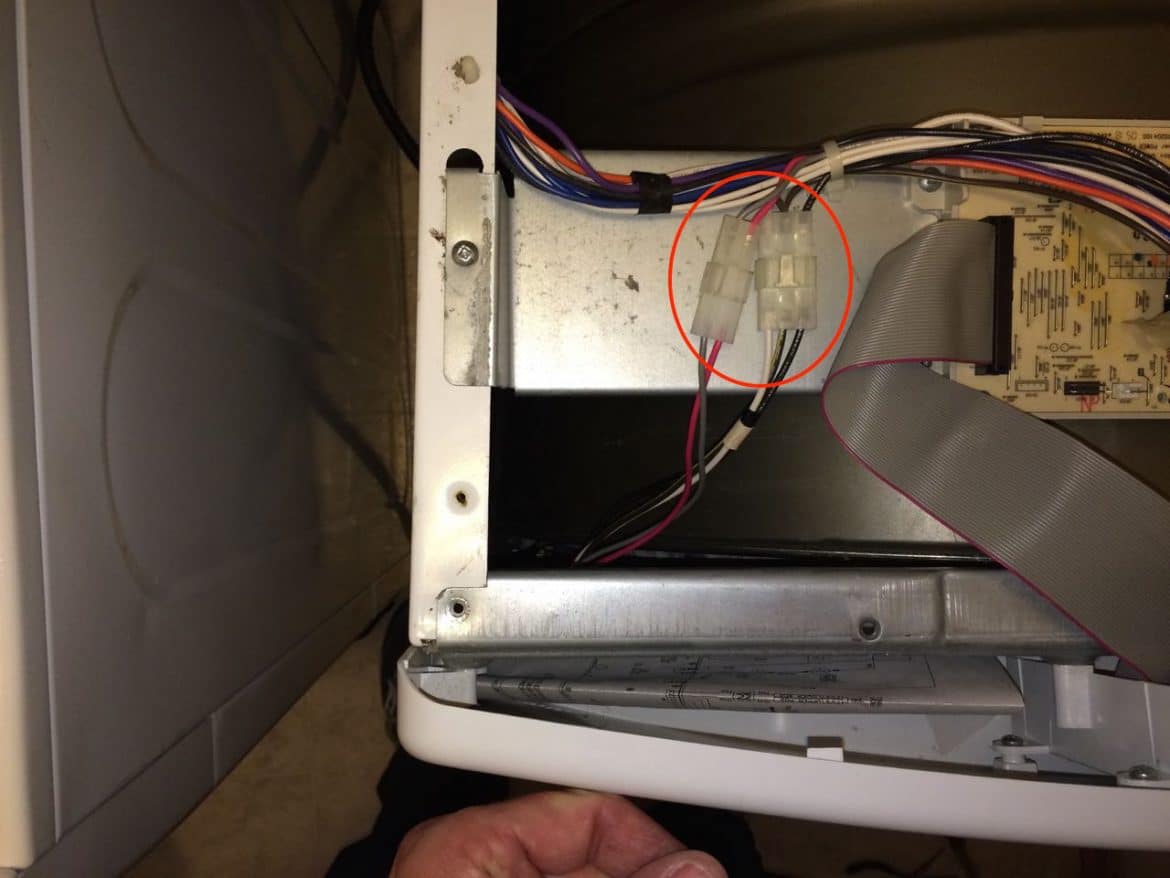
The other two connectors are a similar style where you must lift up the “catch” and pull them apart as shown below:
Step 6: Remove the control panel.
Remove the two top control panel mounting screws:
Then lift the control panel up and off:
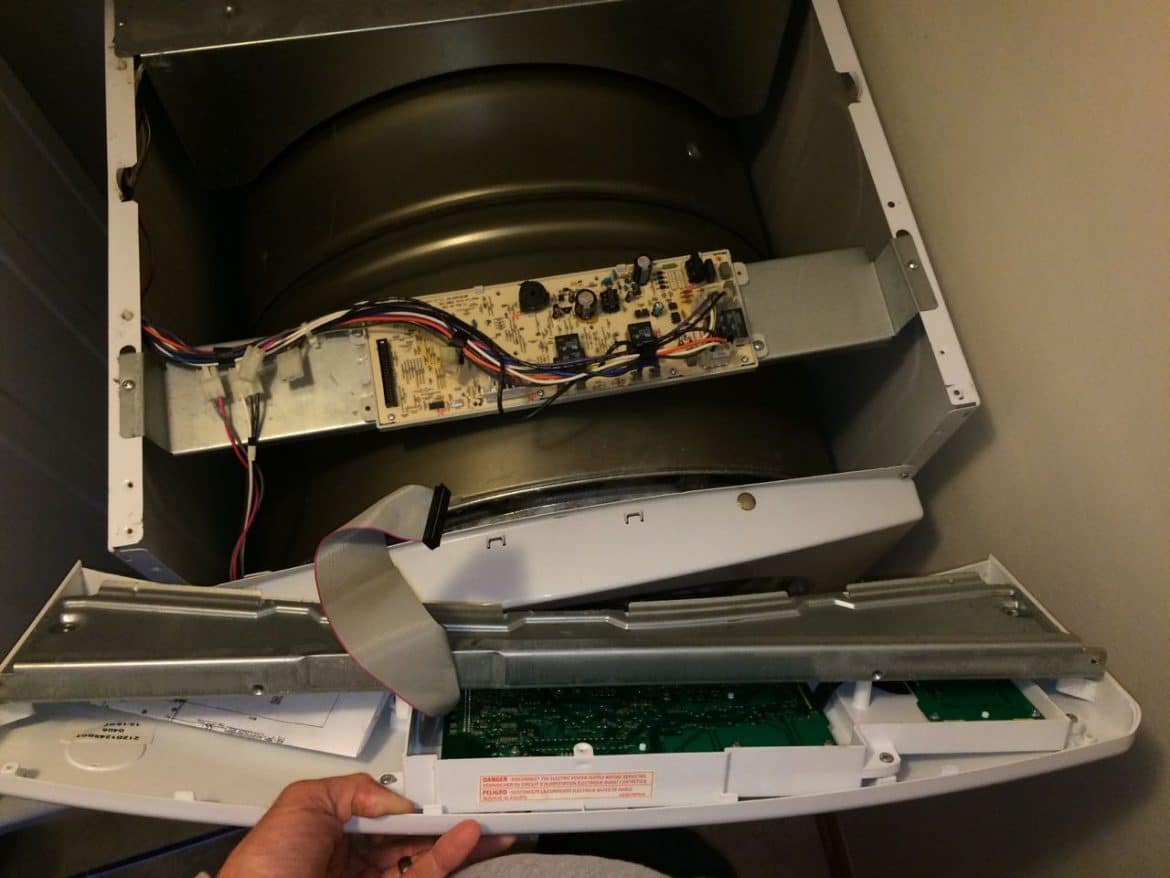
Set the control panel aside in a safe location.
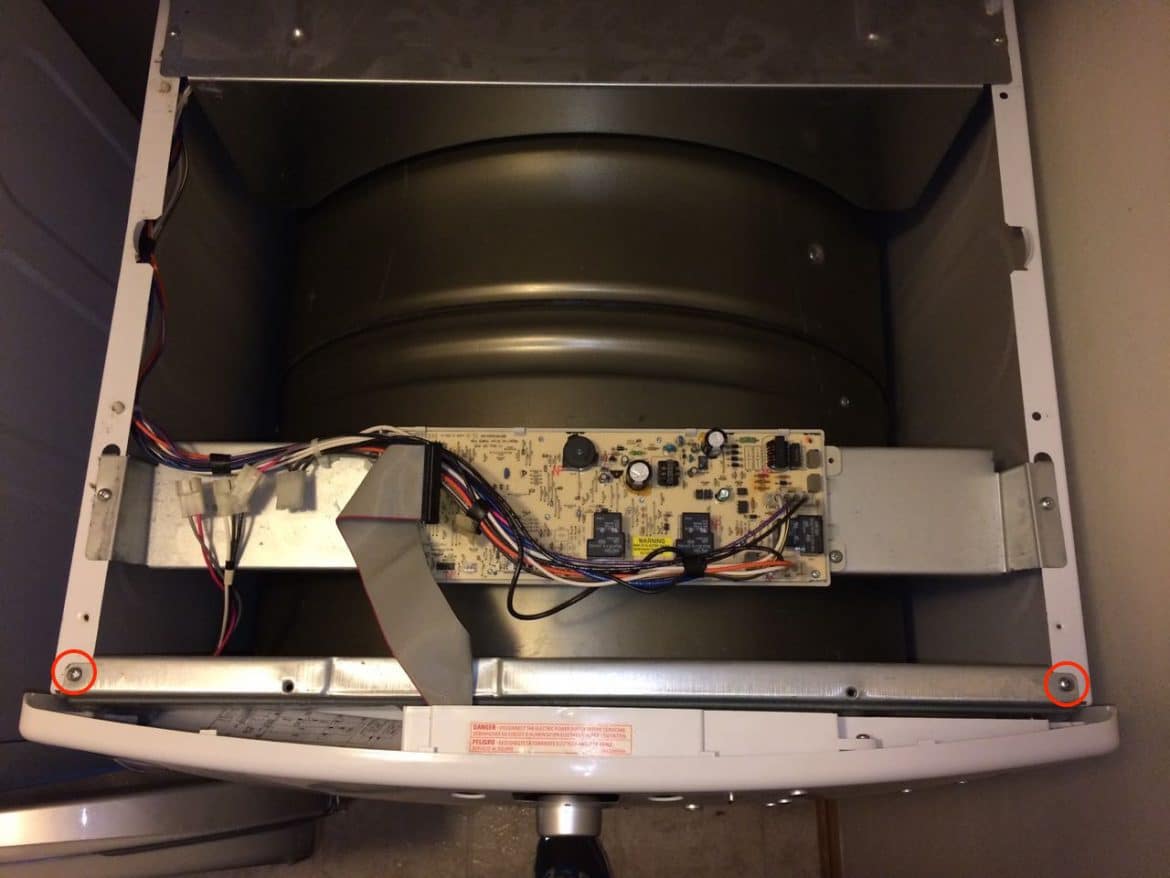
Step 7: Loosen the lower front panel screws.
I found it easier to get at them by propping the front edge of the dryer up on my screwdriver case as you can see below. Loosen, but do not remove, the lower front panel screws:

Step 8: Remove the upper front panel screws.
Remove the two Phillips screws from the upper front panel:

Once you have removed the upper front panel screws you will want to hold the front panel on to the dryer and swing shut the dryer door.
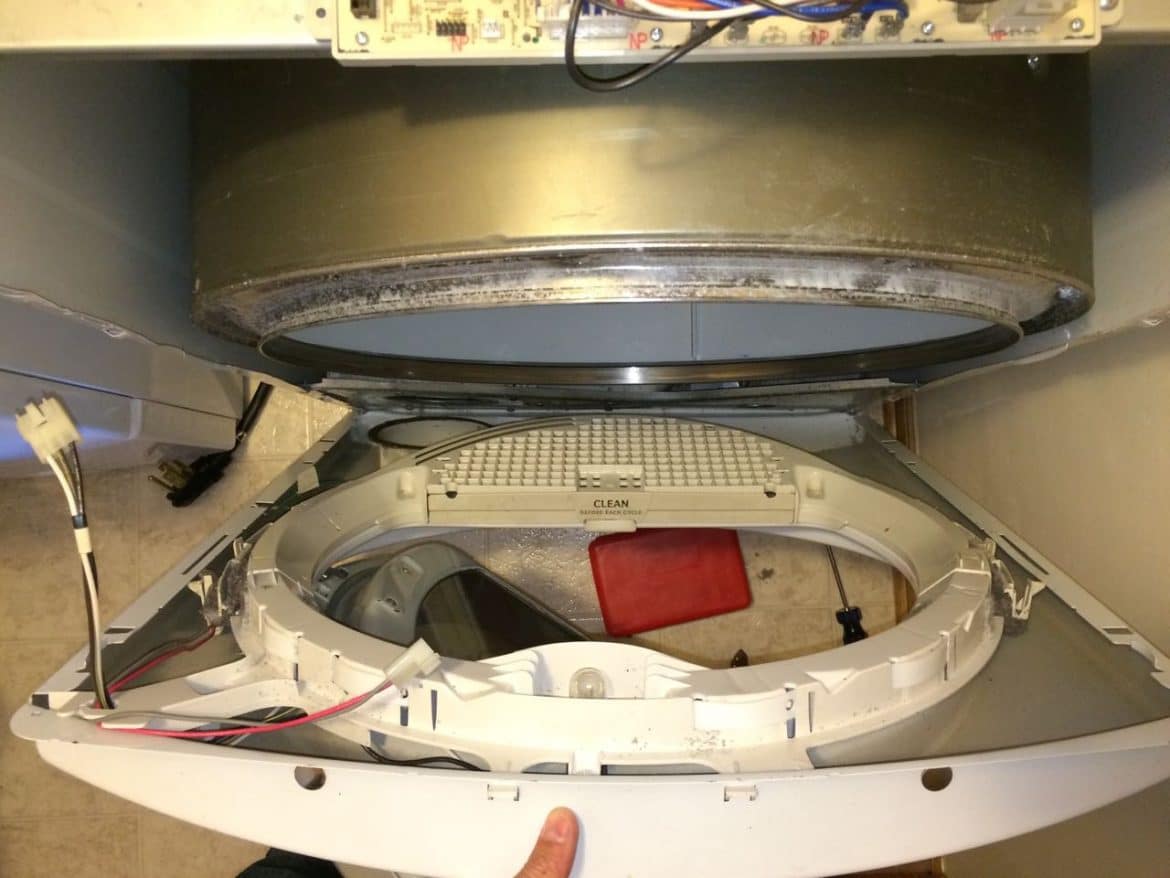
Step 9: Lift the front panel up and off the dryer.
Lift the front panel up and off the two lower screws that you loosened in Step 7. Be careful because the door will want to swing open.
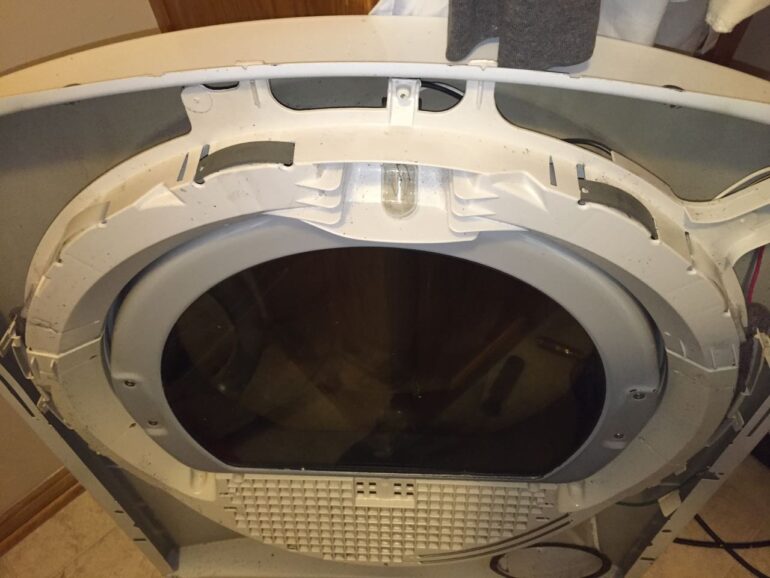
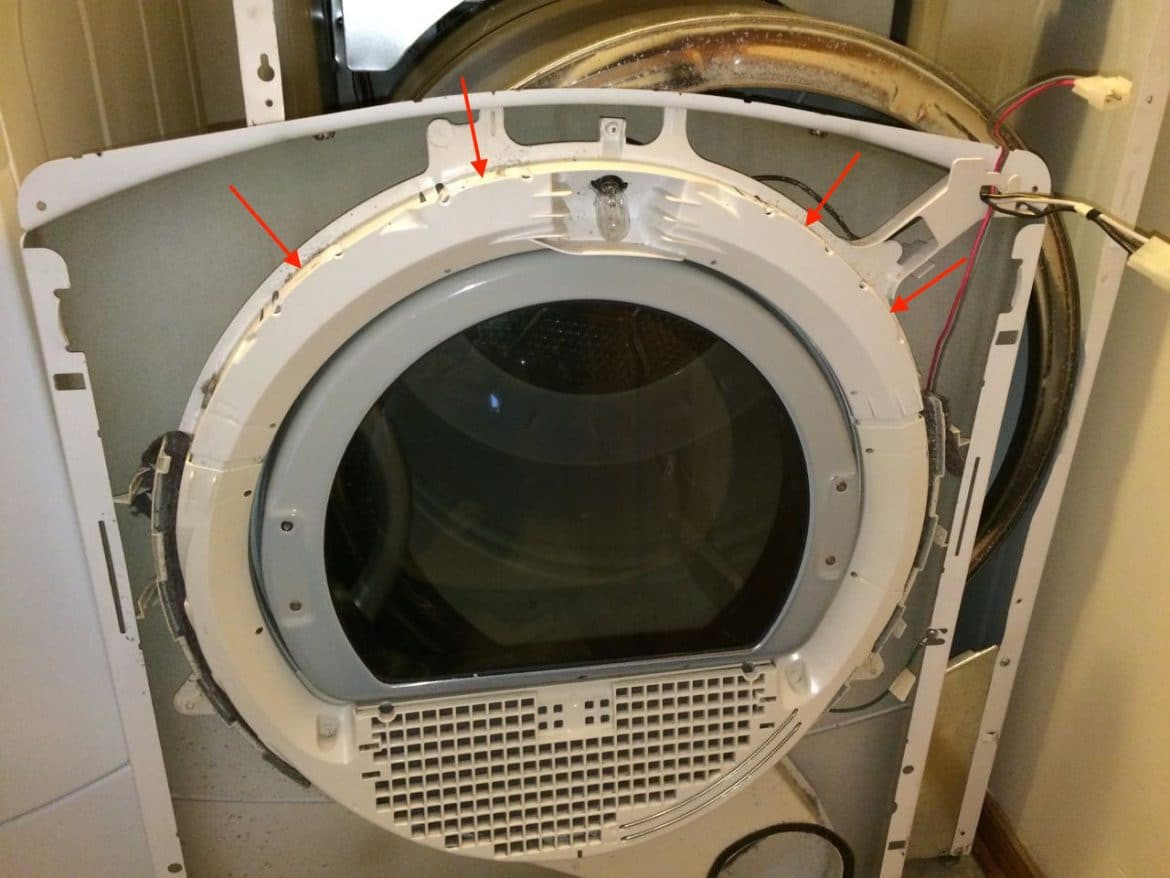
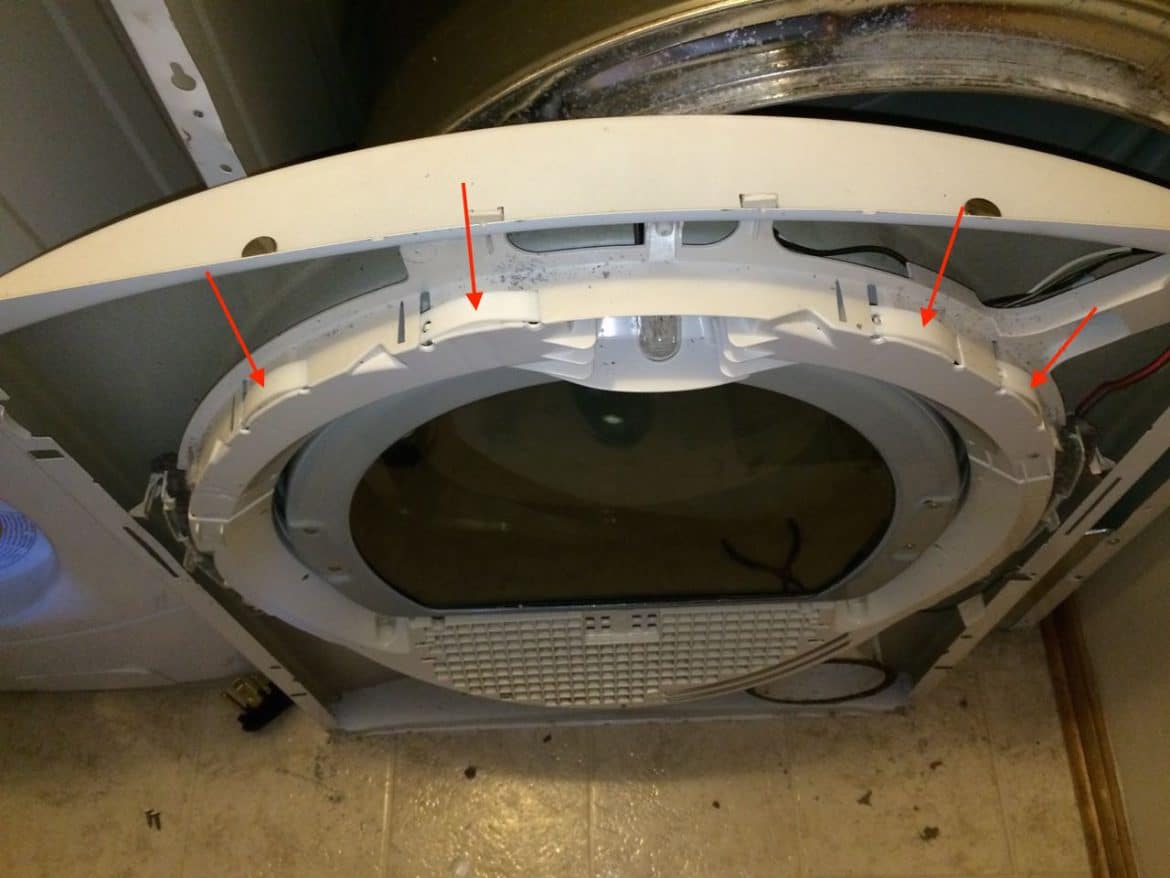
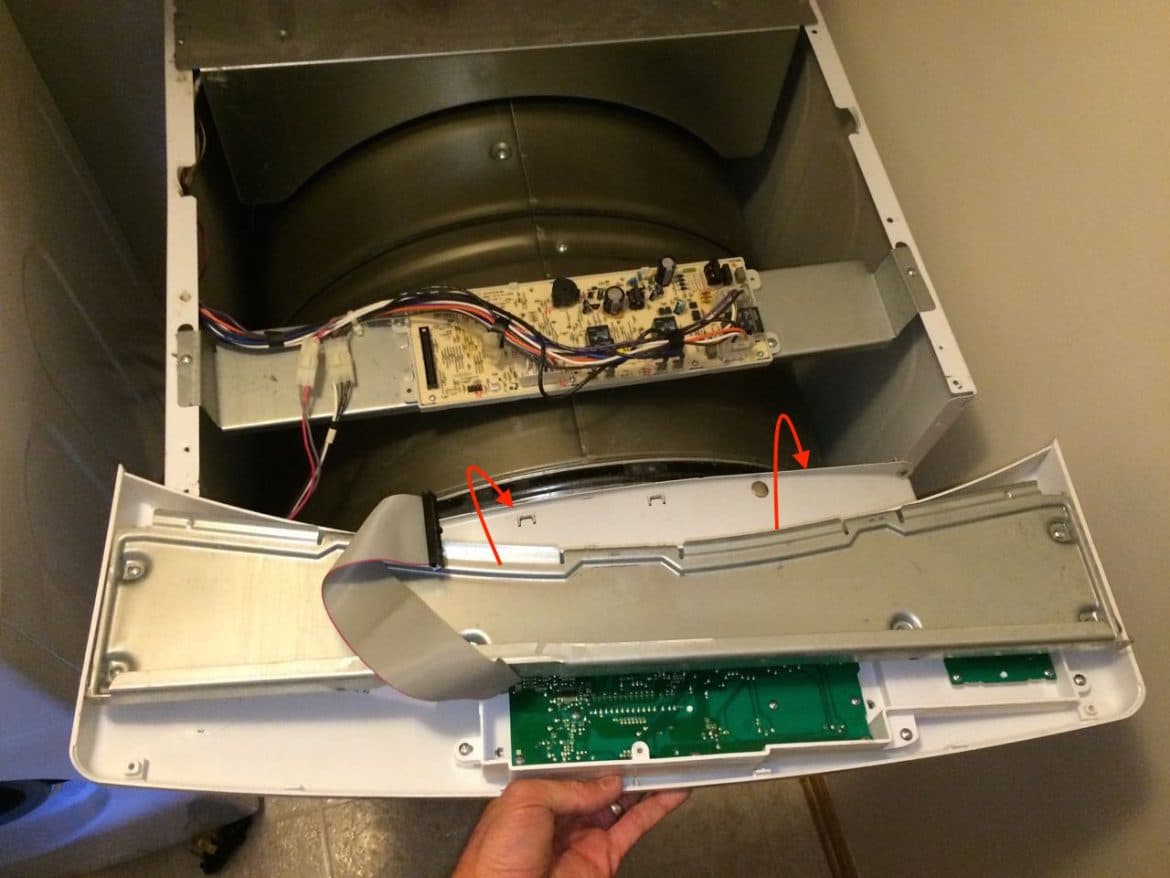
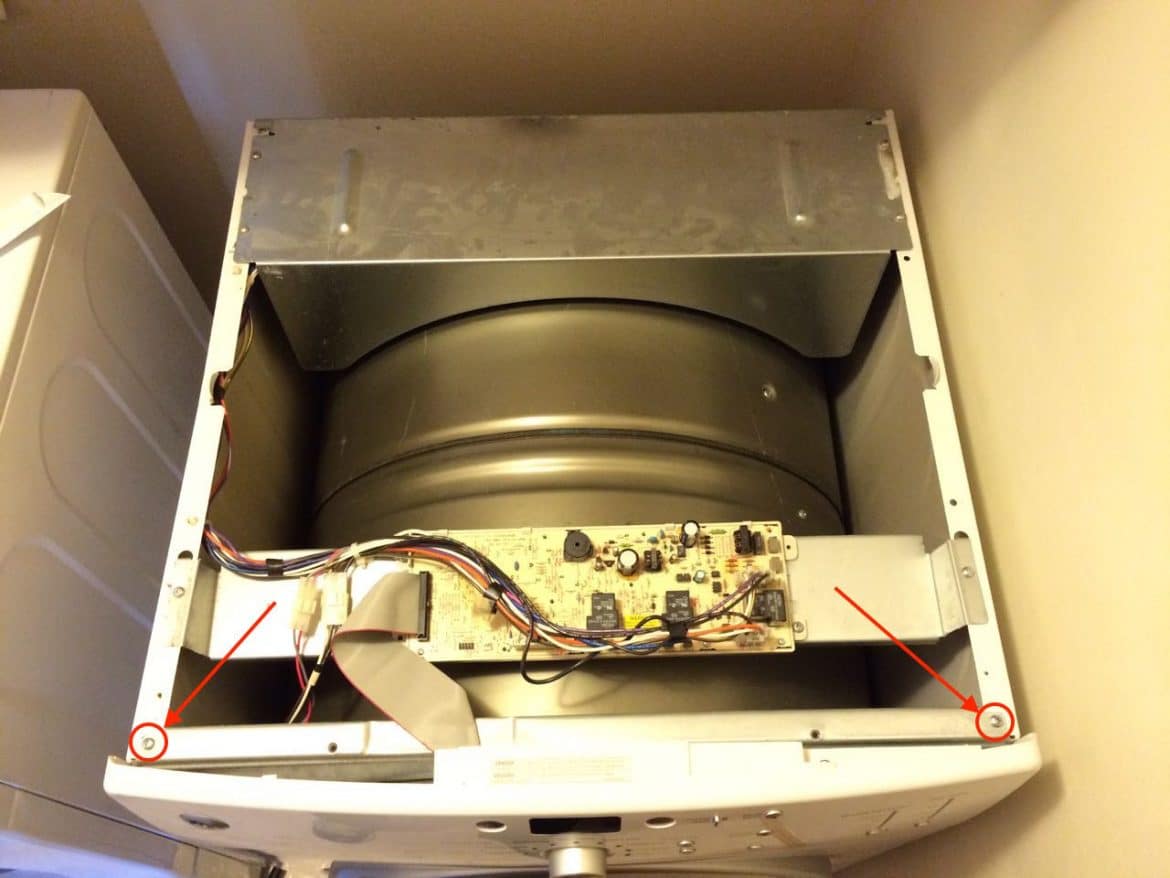
Step 10: Turn the front panel around and lean it against the dryer and locate the four drum glides.
The drum guides are shown by the arrows in the picture below:
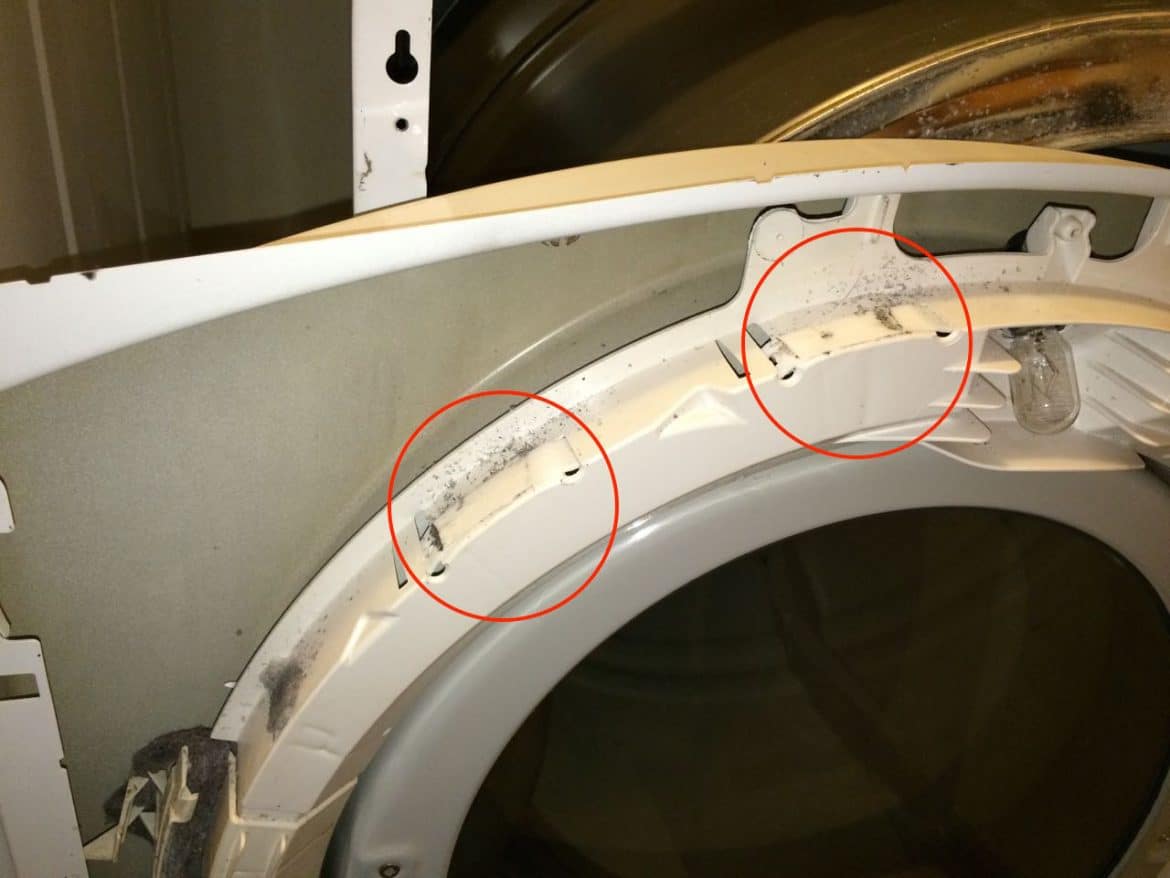
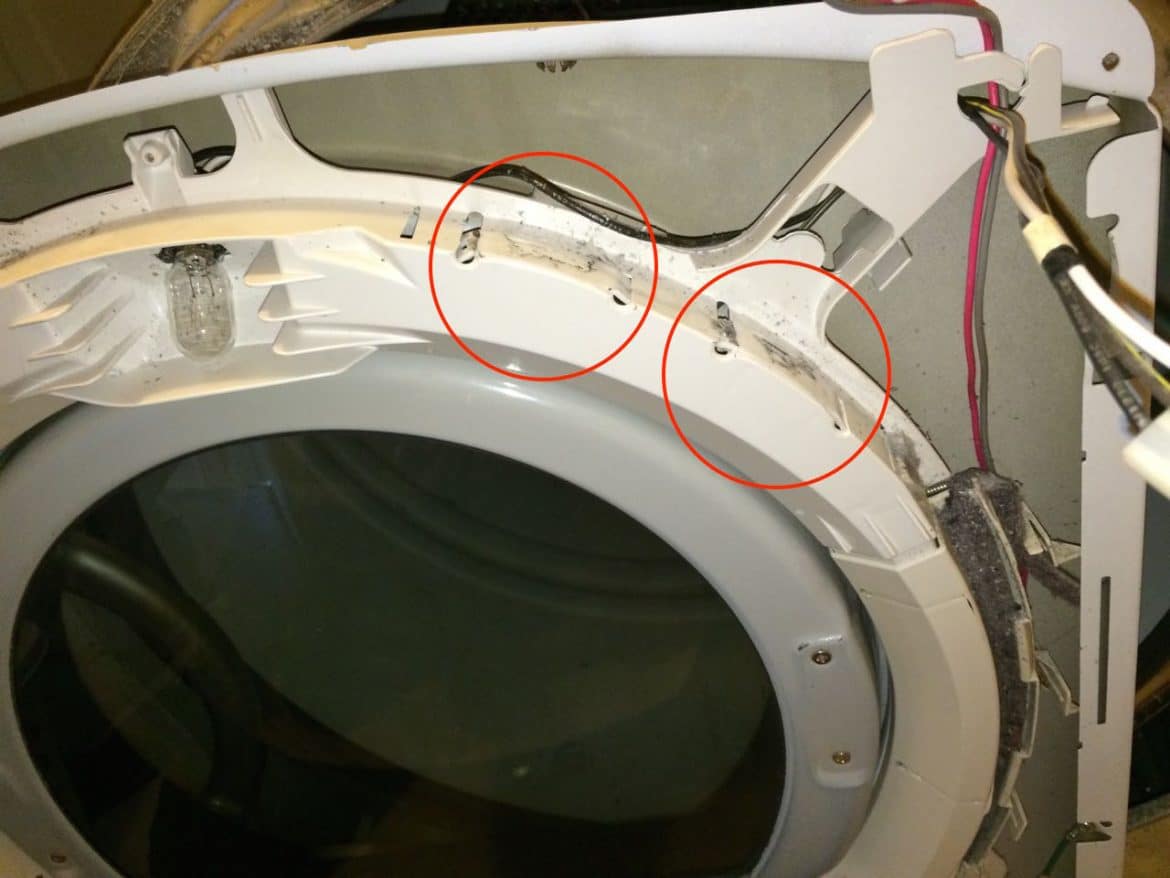
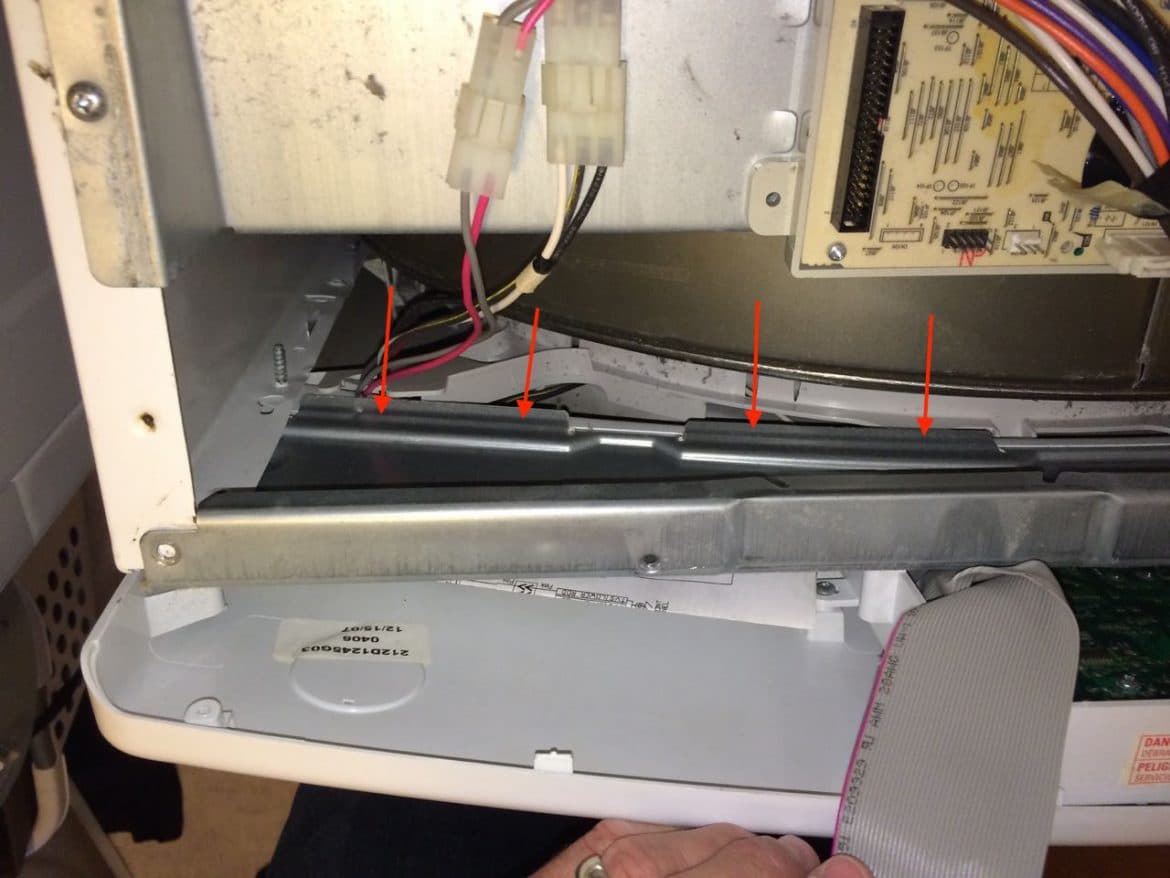
Step 11: Remove the 4 worn-out drum glides.
You will want to be careful not to drop part of each drum glide down into the drum bearing frame if they are as worn as mine were because they will fall apart when you lift them up. I took a pocket knife and slid it under each guide, while grabbing the right end with a needle nose pliers so I didn’t lose the end down in the plastic frame:
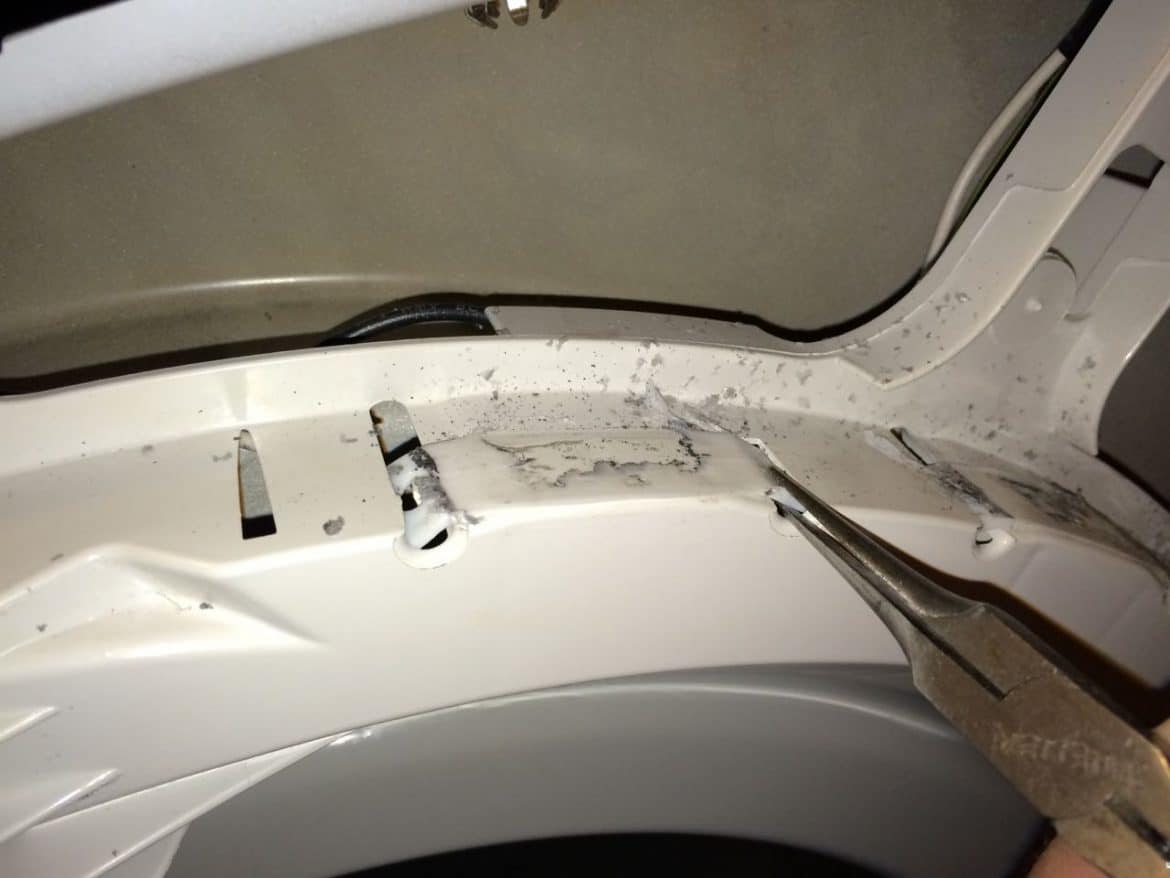

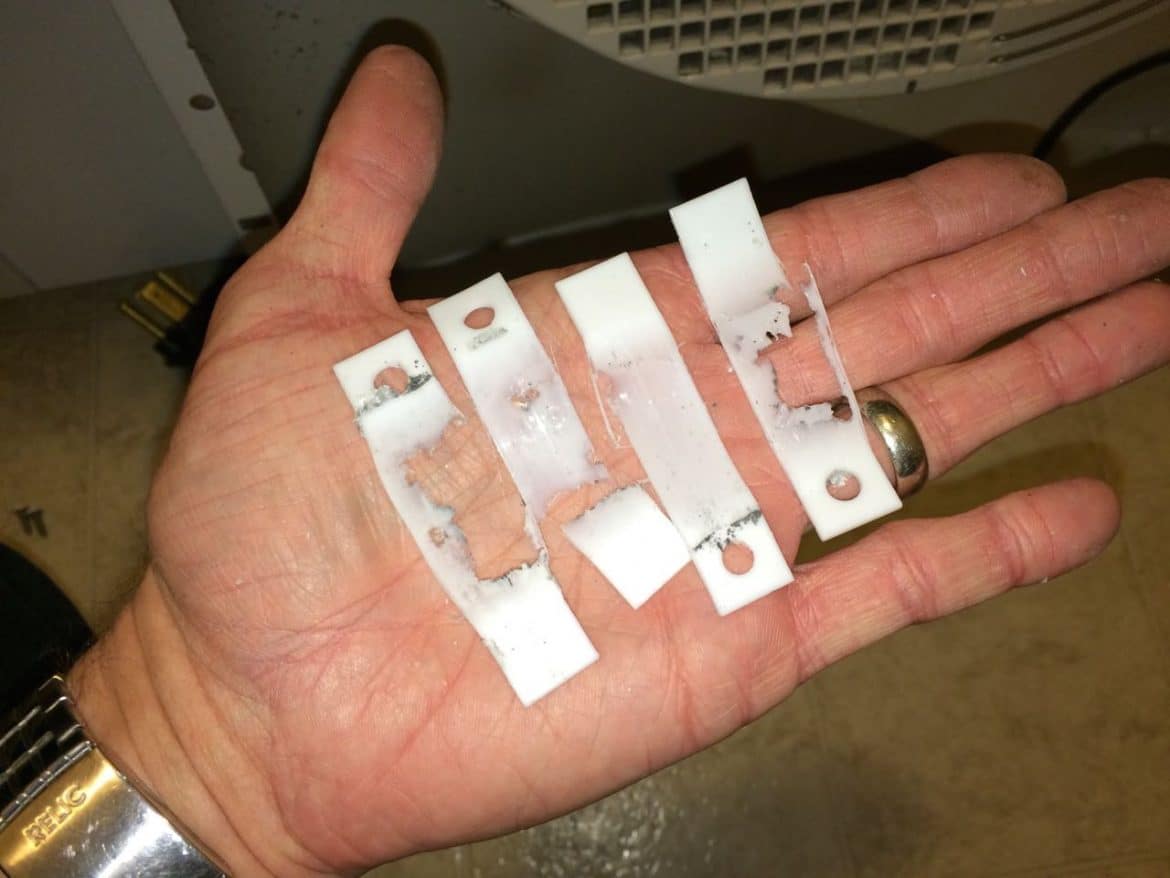
Remove all 4 glides. My glides were really worn out:
If you did not change the drum glides and the plastic frame that holds them has worn out, you will need to replace it as well. That part can be purchased here: GE WE14M124 Top Bearing Assembly for Dryer
Step 12: Install 4 new drum glides.
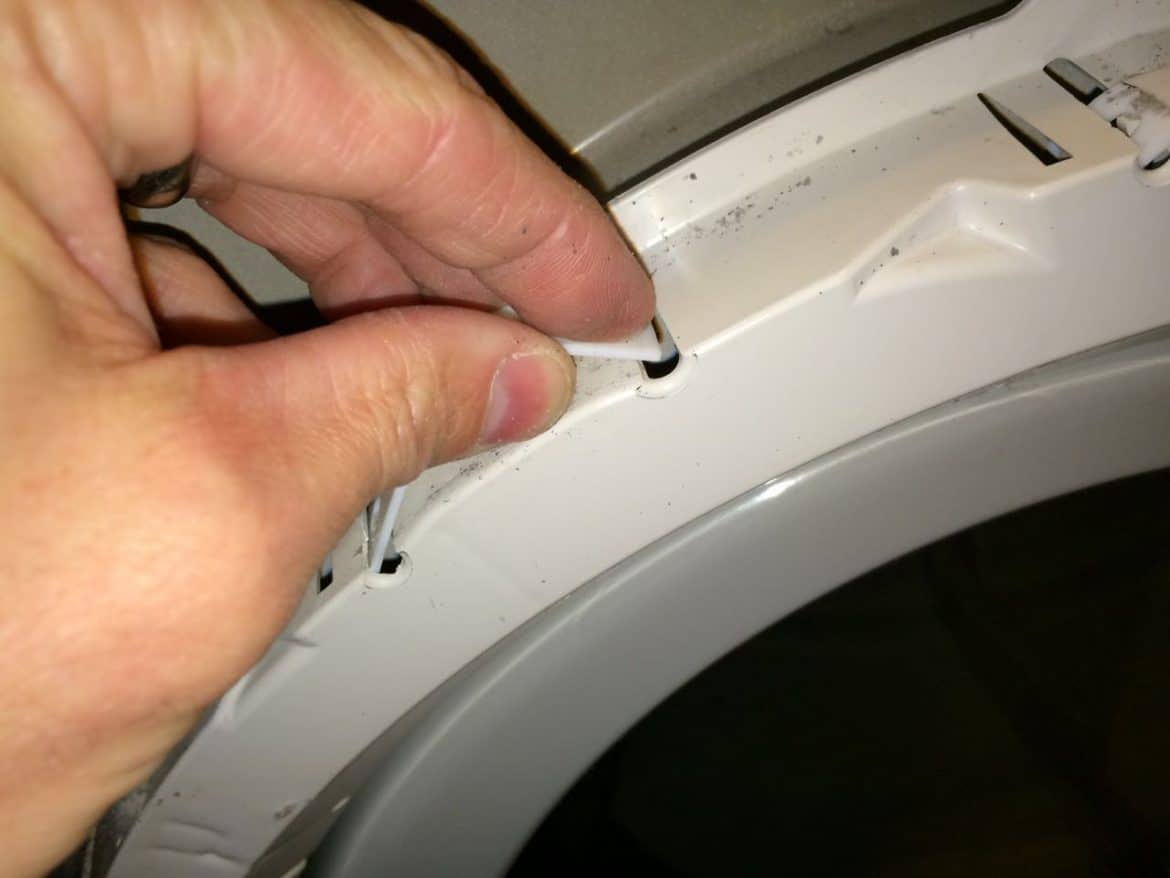
Each drum glide location has a hook and a slot as seen below:
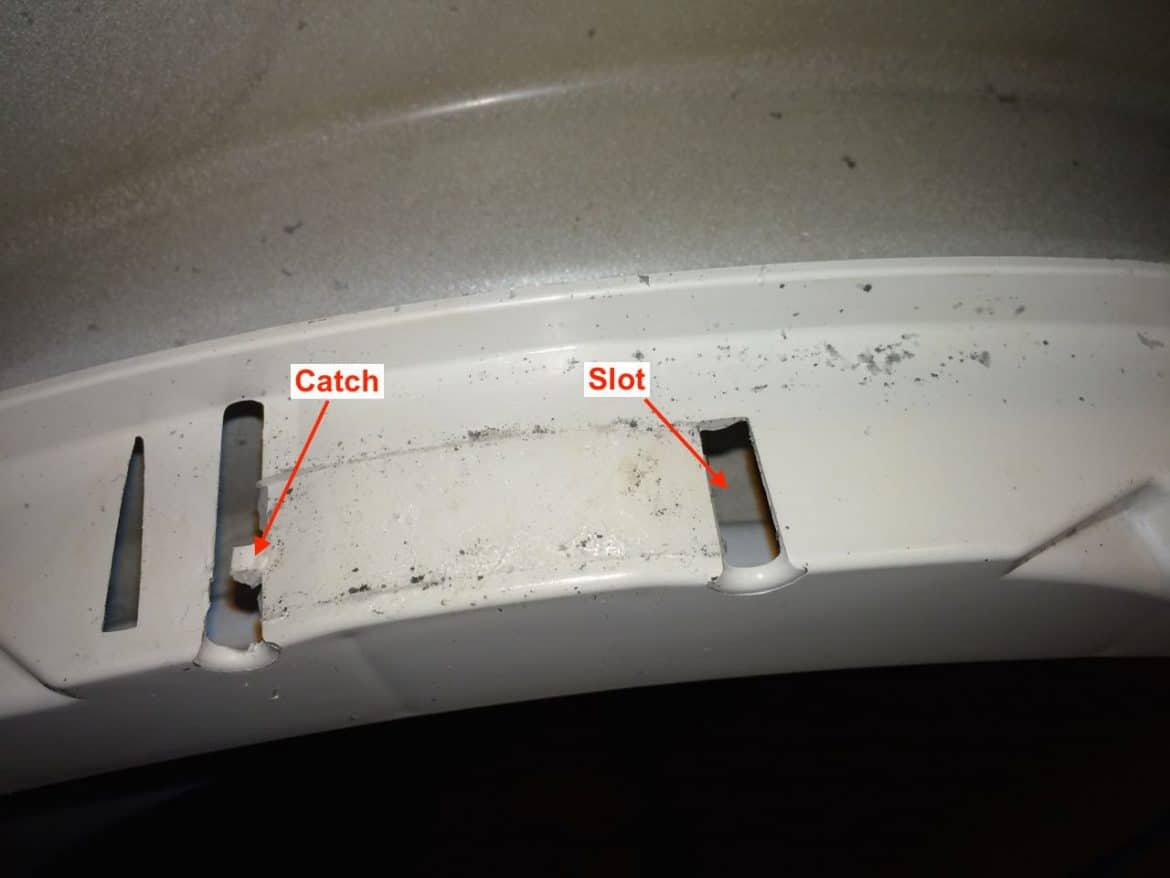
Step 12a: Insert the drum glide end with the hole in it into the “catch” slot and hook the hole on the catch:
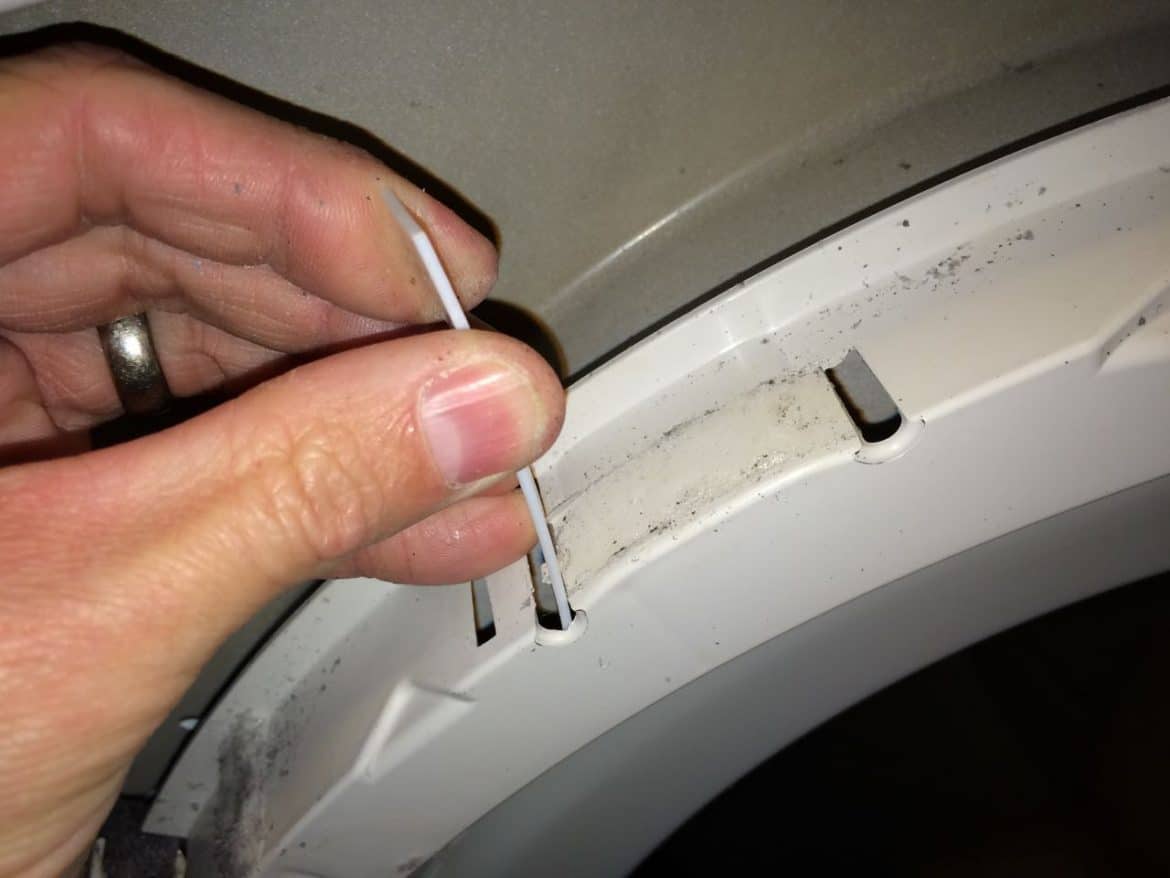
Step 12b: Bow the drum glide with your fingers and insert the other end into the open slot:
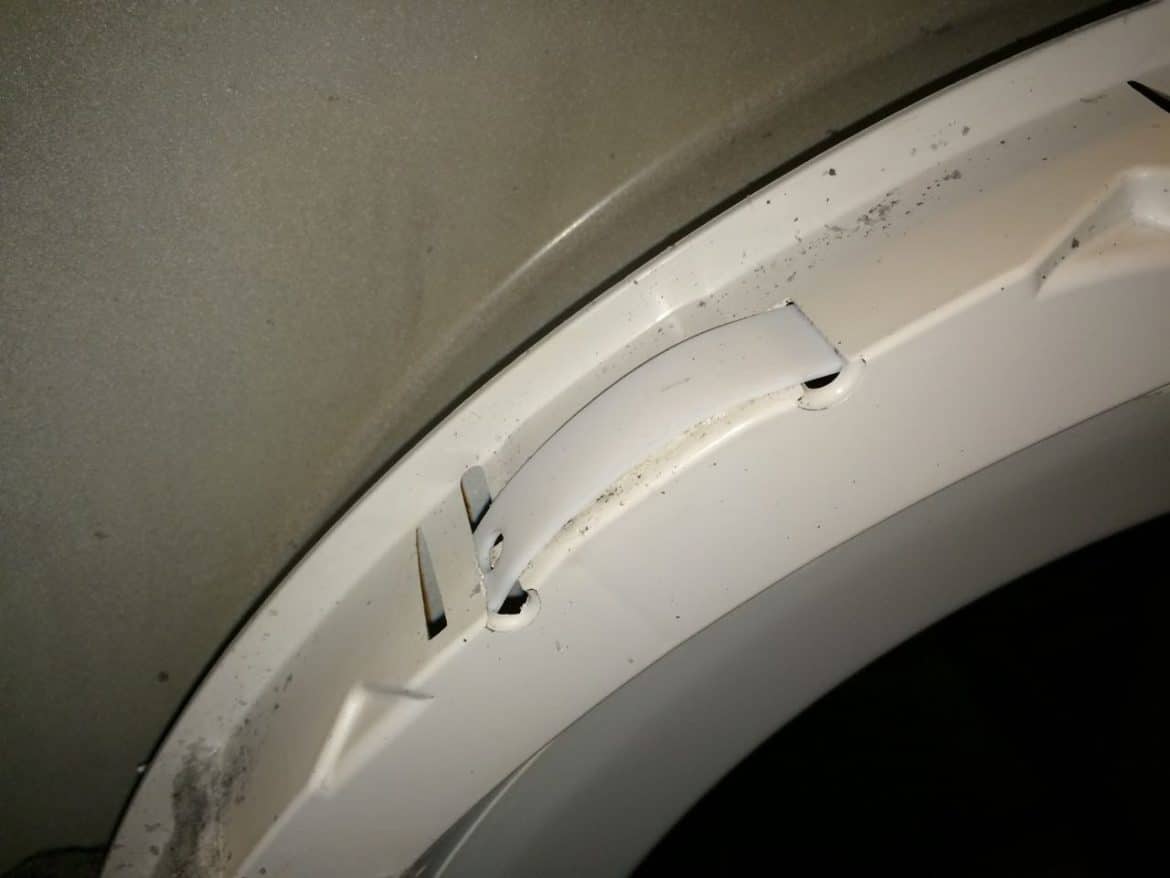
The drum glide properly installed:
Repeat steps 12a and 12b for the other three drum glides. This is what you should have once you have replaced all four glides:
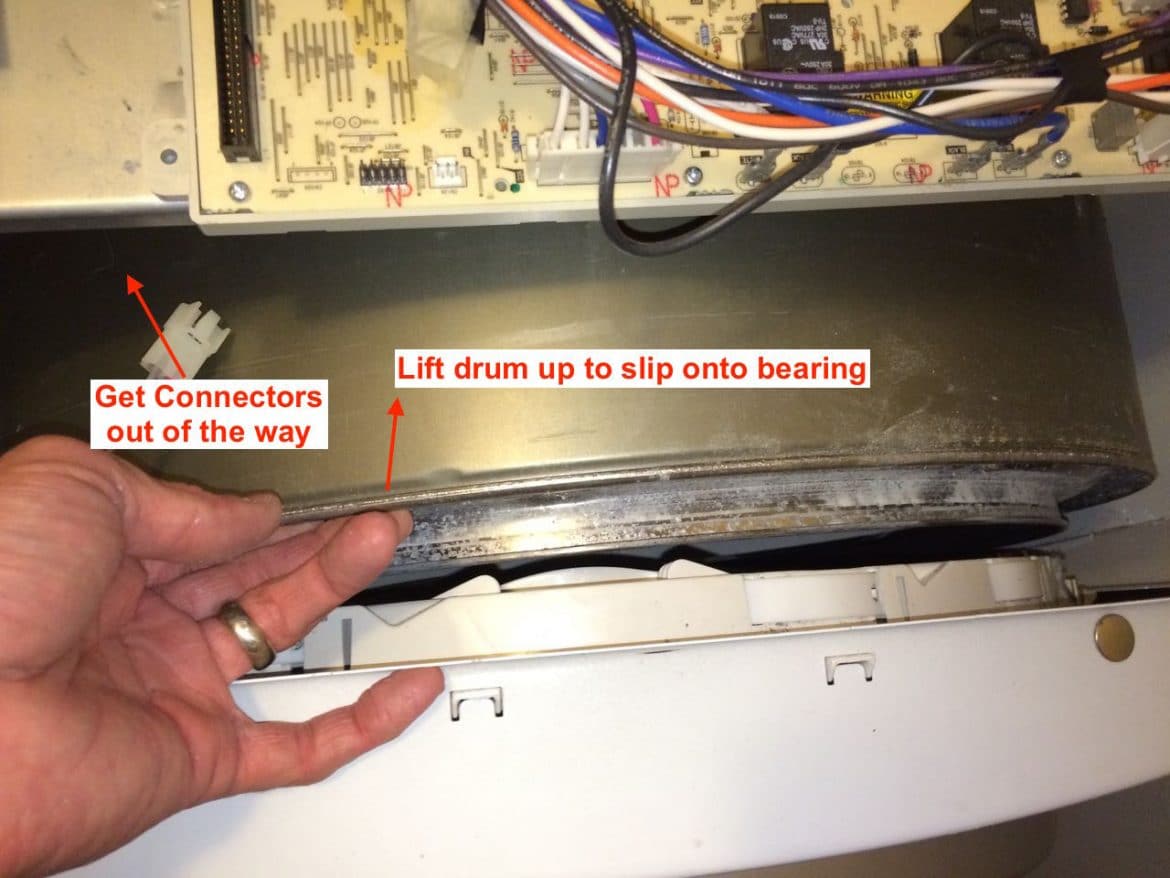
Step 13: Reinstall the front panel on the dryer.
You will need to slip the two bottom “slots” on to the two screws you loosened in Step 7.
As you lean the top of the front panel towards the dryer you will need to move the wiring connectors out of the way so they don’t go into the drum and also you will need to lift the drum up so it slips on to the bearing assembly:
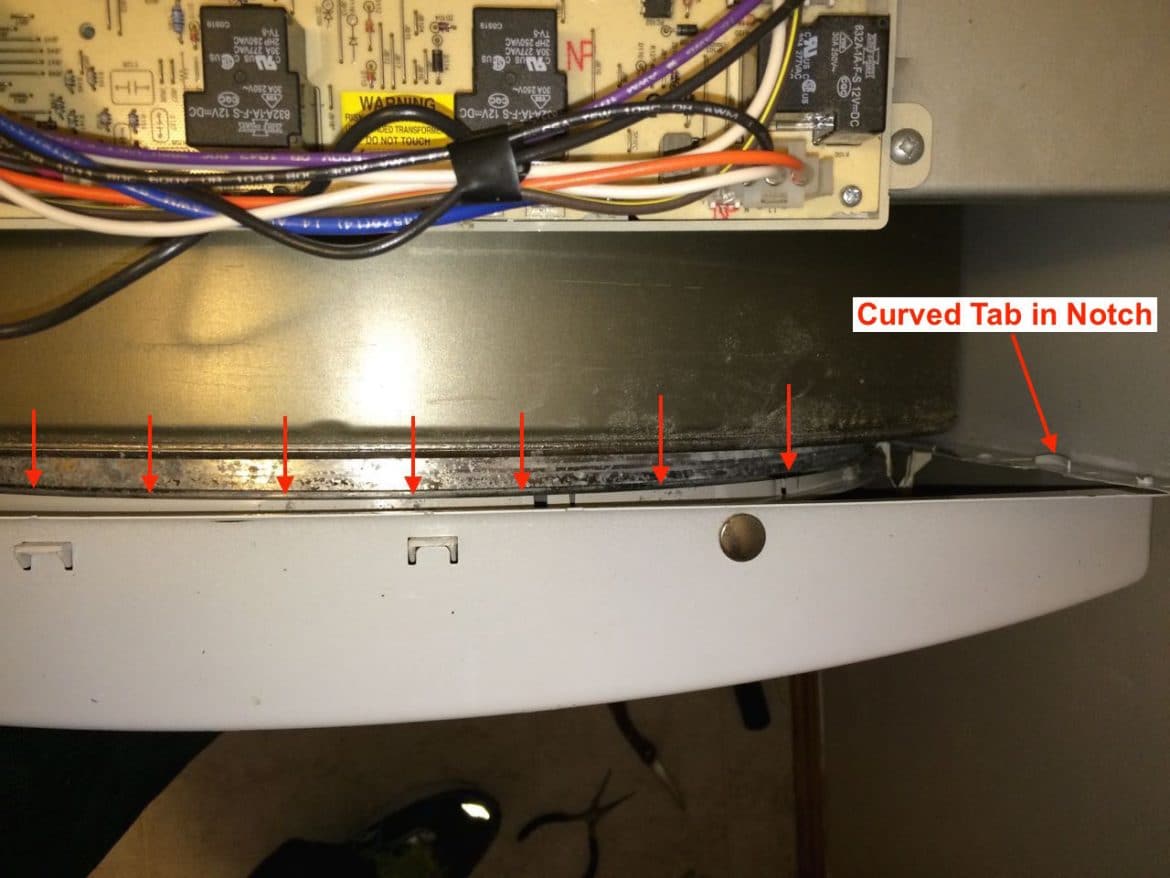
You will also need to line up the curved tab on each edge of the front panel with the notch on the sides of the dryer. I needed to squeeze the sides of the dryer in to line it up (both sides are the same):
Here’s a picture of the front panel in place:
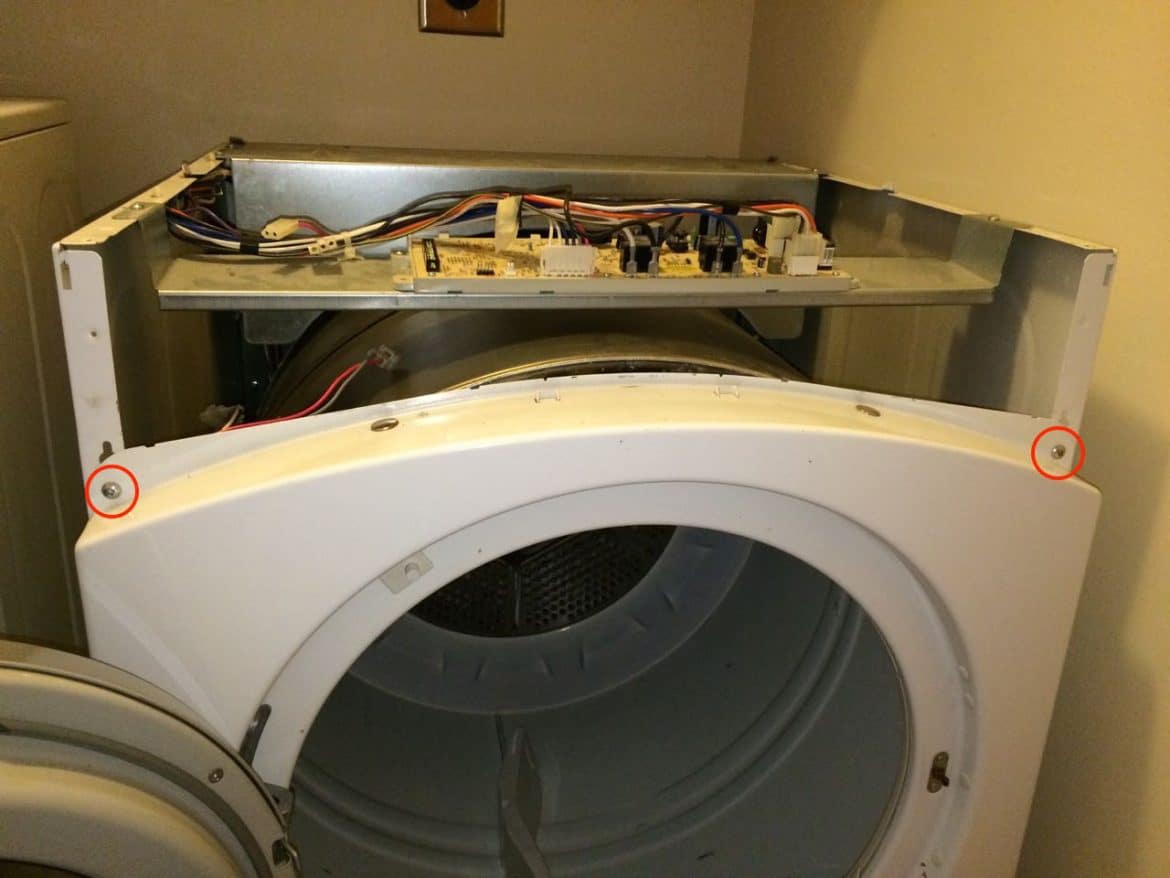
Reinstall the upper front panel screws:
Tighten the two lower front panel screws:
Step 14: Reconnect the light and door light switch electrical connectors.
These connectors only have one way they can go on and one has 3 wires and the other has 2 so you can’t get them mixed up:
Step 15: Reinstall the control panel.
The control panel has a slot on the bottom edge that sits down over the metal lip on the dryer body as illustrated below:
Here the control panel is set back on to the body (arrows indicate where the control panel fits over the edge of the metal frame):
Reconnect the control panel ribbon cable. The female side (on the dryer) has a notch that fits a piece that sticks out on the connector so it will only fit one way:
Reinstall the two screws into the left and right ends of the control panel:
Step 16: Reinstall the dryer top panel.
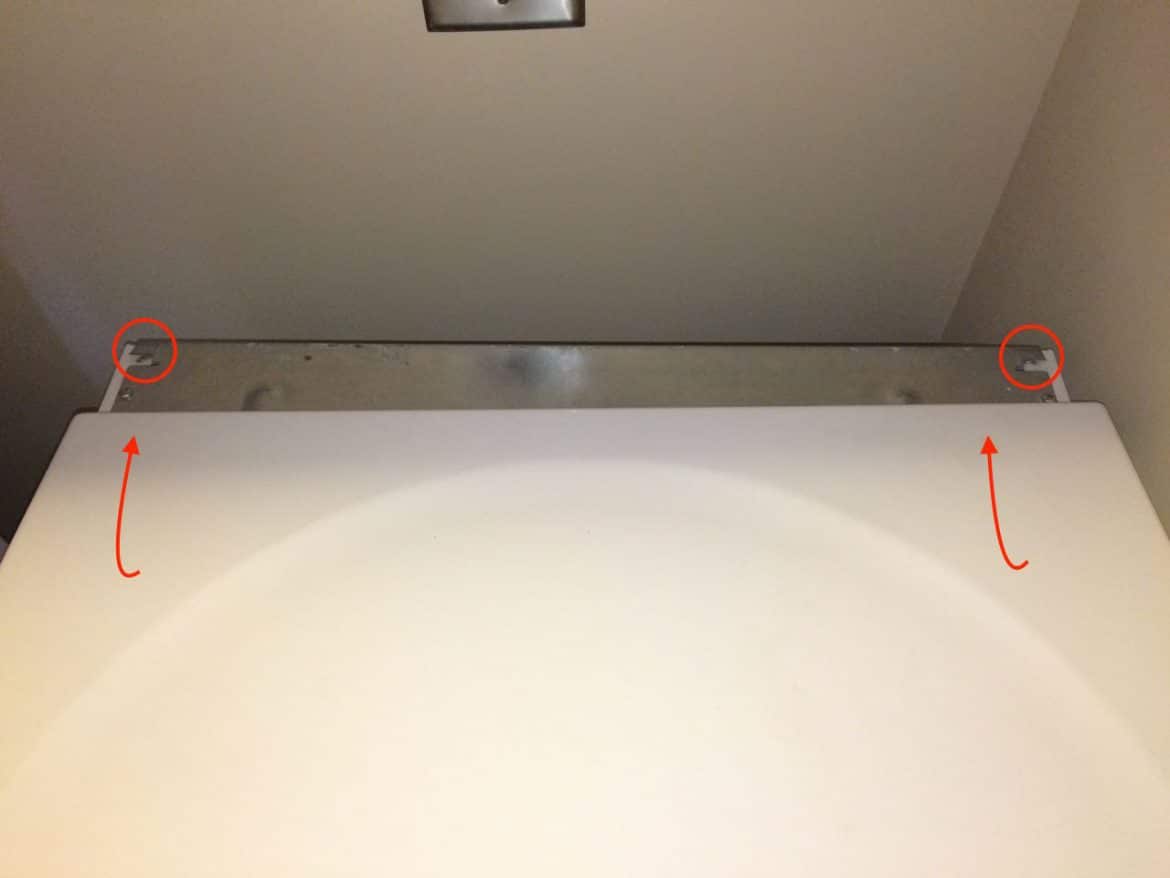
There are two “catches” that hook into the underneath side of the top metal panel (circled below). Set the back edge of the top panel on the top of the dryer and slide it back, centering it on the top of the dryer, and once it locks in place you can set down the top.
Then reinstall the two long top panel screws:

Step 17: Reinstall the back molding.
Slide the back of the bezel in place and reinstall the three Phillips head screws:
Step 18: Plug it back in and enjoying clothes drying with no more squeaky dryer!
Amazon Associate Disclosure: As an Amazon Associate I earn from qualifying purchases. This means if you click on an affiliate link and purchase the item, I will receive an affiliate commission. The price of the item is the same whether it is an affiliate link or not. Regardless, I only recommend products or services I believe will add value to Share Your Repair readers. By using the affiliate links, you are helping support Share Your Repair, and I genuinely appreciate your support.

Very informative with a complete and thorough explanation of how to make repairs. You did an excellent job demonstrating the step-by-step process to get my dryer back to life
You just saved me some serious money. Thank you so much! I tip my hat to you, sir.
Thanks for the feedback Robert and good work on repairing your squeaking dryer! What a difference a couple shims of plastic will make!!