I recently failed the Missouri safety inspection because the horn on my 2005 Hyundai Accent will not work. I am really uncomfortable driving a car in the city without a horn but I had not even noticed that it did not work yet so I was anxious to figure out what was wrong and fix it. Follow along and see how you can troubleshoot your Accent’s horn if it doesn’t work.
1999-2005 Hyundai Accent Horn Will Not Work – Troubleshooting and Replacement Steps
Equipment:
Tools Needed:
- 10mm socket – get that socket and about all the other wrenches you need in a Stanley 99-Piece Socket Set
- Multimeter, if you want to check a fuse or check the voltage at the dome light–I love my Fluke 177 True RMS Digital Multimeter with Backlight
Parts Needed:
- Genuine Hyundai 96620-2C001 High Pitch Horn Assembly
(if your horn turns out to be bad like mine)
- Assorted Mini Fuses
(if it is just a fuse issue)
Step 1: Check the horn fuse and relay.
The fuse for the horn is located in the engine compartment fuse box:
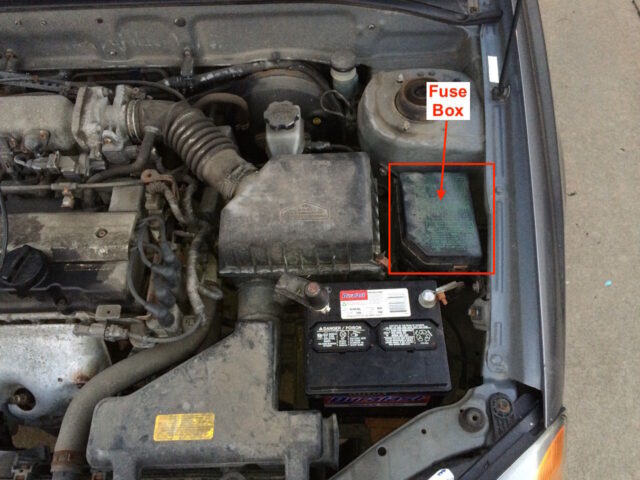
There is a spring-loaded metal catch on the front and back of the lid that holds it on:
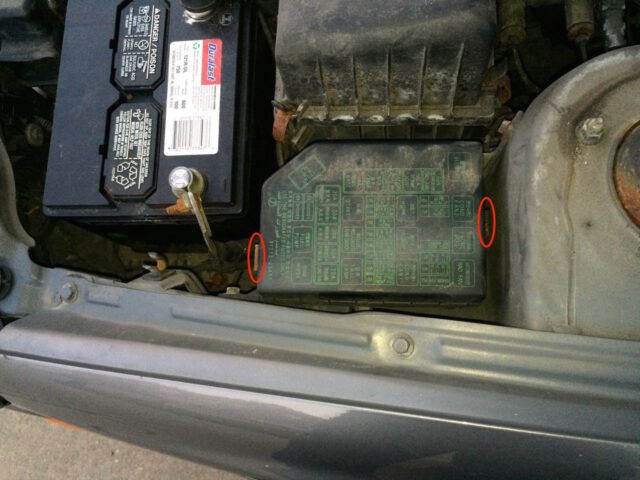
I would pry the back one away from the lid and lift up on the back of the lid:
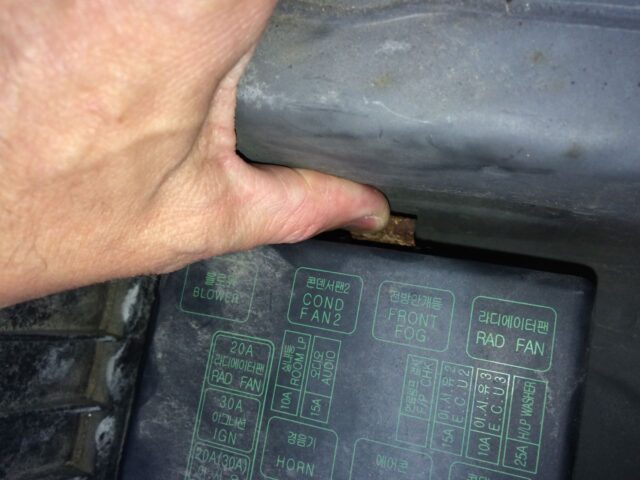
Then repeat for the front tab and remove the lid. The diagram of the fuse box is on the lid:
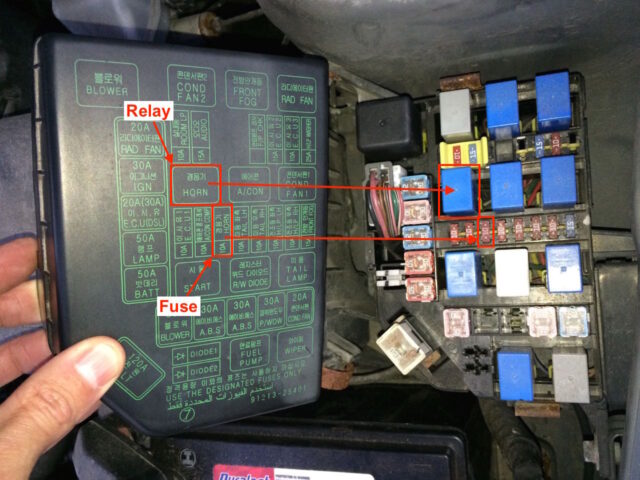
Check the fuse by looking for a continuous “u” wire bridge between the legs of the fuse (if it is good):
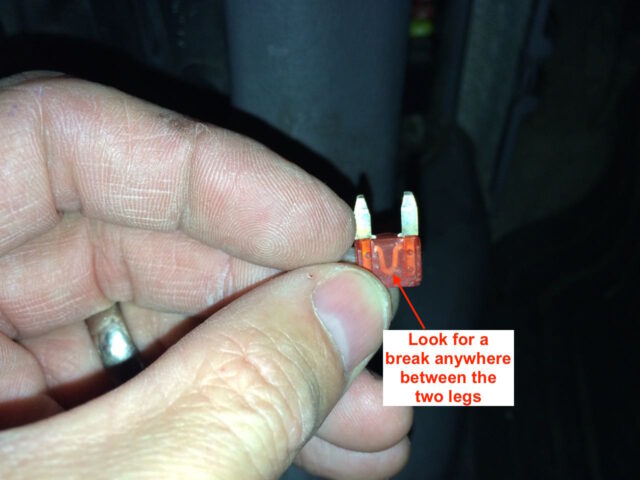
One sign of a bad relay is discolored (yellowed) plastic on the relay. Mine looked good:

Step 2: Check the voltage at the horn.
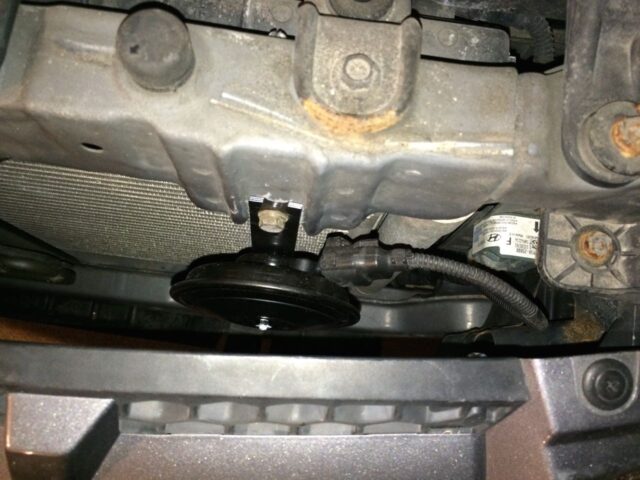
The horn is located between the grill and the radiator:
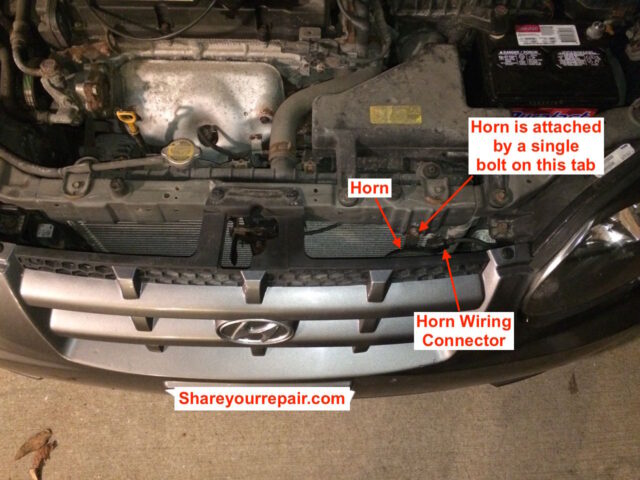
I disconnected the horn’s connector. On my Toyota Sienna there is only one wire in the connector because the ground wire connects via the bolted connection to the body of the van but this vehicle has a separate wire for the ground connection.
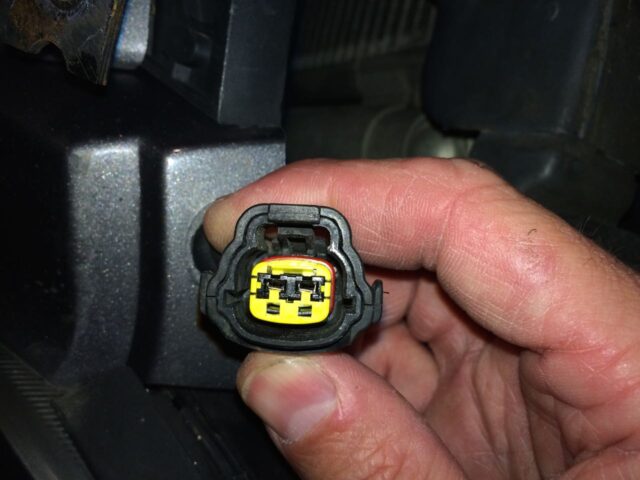
I then connected my multimeter (on DC volts setting) to the connector by stripping the ends of two short pieces of wire, inserting them each into the connector, and connecting them to my multimeter:
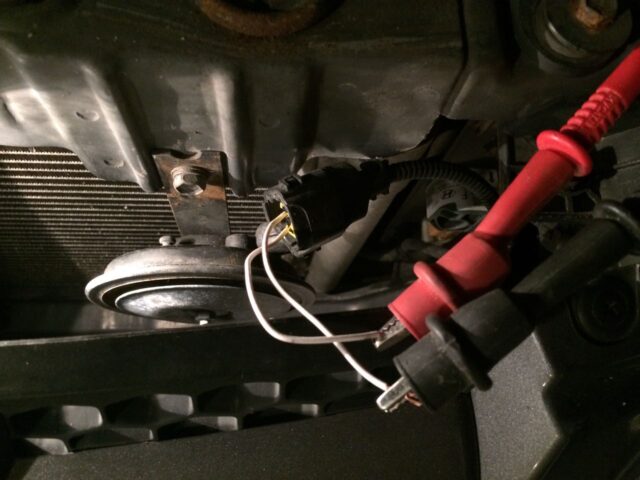
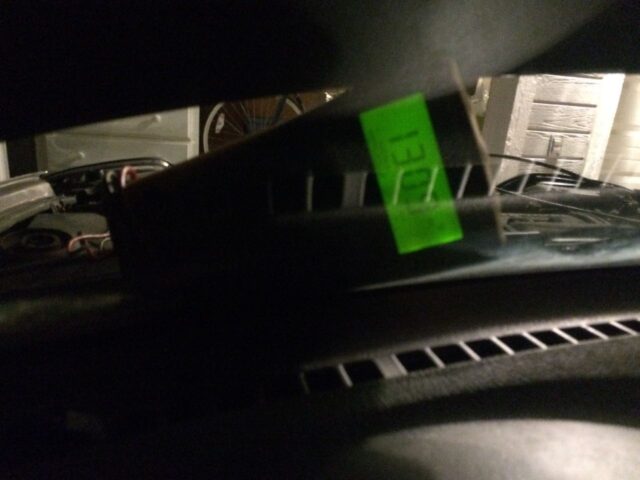
I then positioned my multimeter so I could see the display when I pushed the horn button on the steering wheel. Pardon my poor focus, but you can see on the multimeter display that it was reading 13.09 volts at the horn’s connector–it must be a bad horn!
Step 3: Replace the horn.
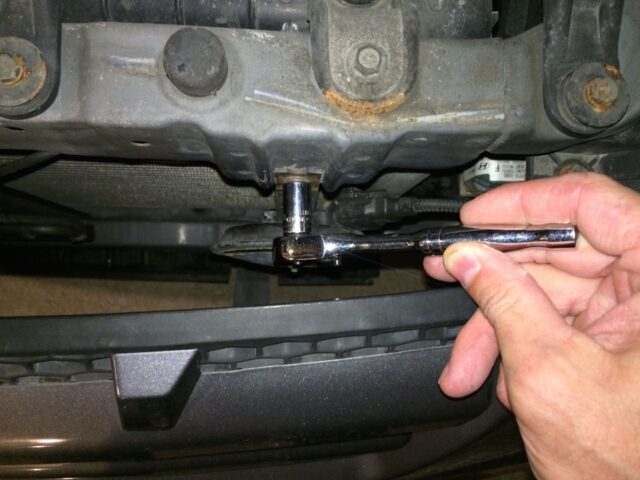
The horn is held in place by one 10-mm bolt on the top of the horn’s flange:
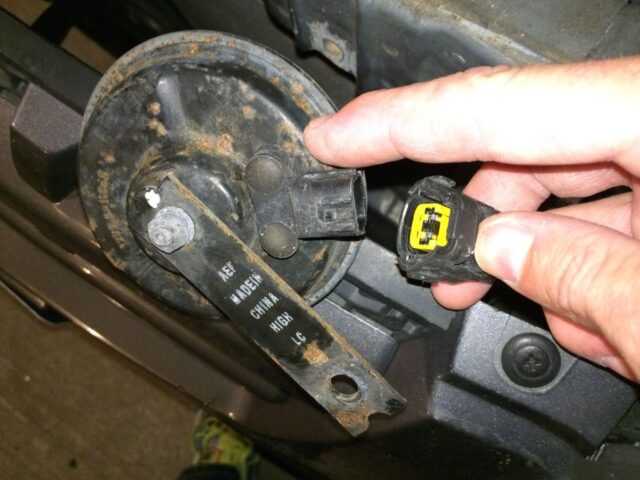
It is actually easier to remove the electrical connector after you have unbolted the horn:
Step 4: Bolt the new horn in place.
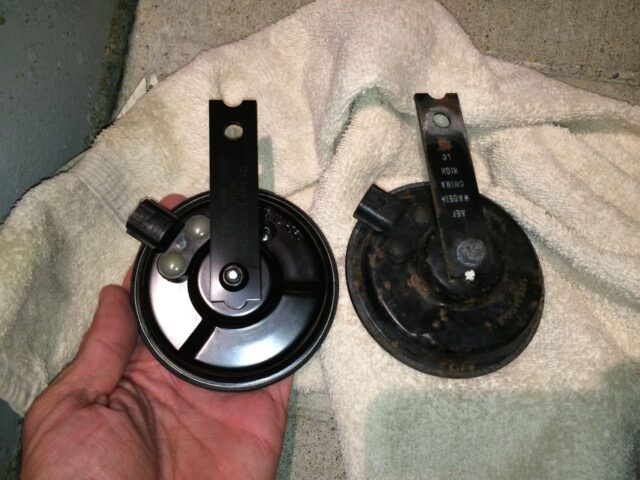
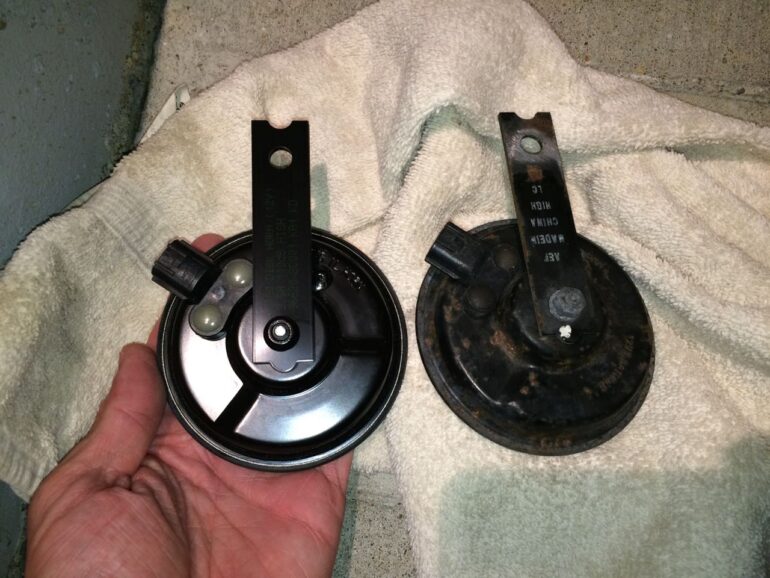
I double-checked that I have the correct replacement horn, check:
Bolt the horn in place using your 10-mm socket and ratchet.
Step 5: Reconnect the electrical connector.
It can only go on in one orientation so you cannot connect it incorrectly. Now you can pass your Missouri vehicle safety inspection!
Amazon Associate Disclosure: As an Amazon Associate I earn from qualifying purchases. This means if you click on an affiliate link and purchase the item, I will receive an affiliate commission. The price of the item is the same whether it is an affiliate link or not. Regardless, I only recommend products or services I believe will add value to Share Your Repair readers. By using the affiliate links, you are helping support Share Your Repair, and I genuinely appreciate your support.

Thanks for sharing! My horn on my 2005 Hyundai Accent is not working and I will be attempting to fix it tonight with your guidance.
Let me know if my troubleshooting steps do not work for you.