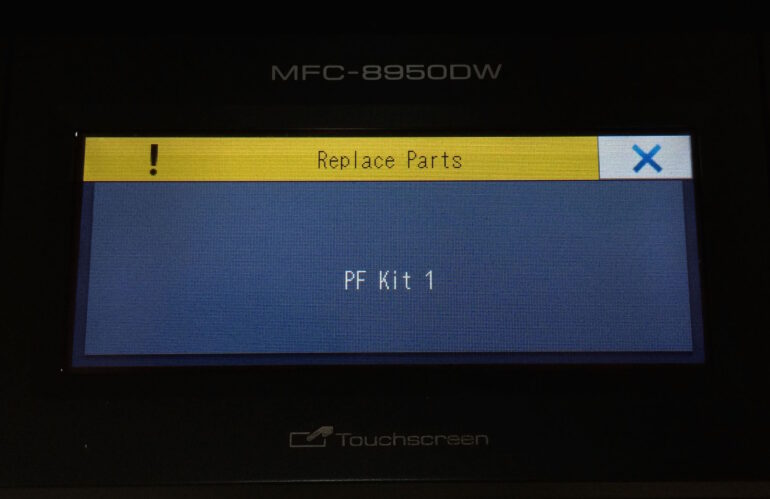
Our Brother MFC-8950 was giving us the persistent error “Replace Parts PF Kit 1.” We’ve run a lot of copies on this machine so it makes sense that it is time to change the Paper Feed Kit. In this tutorial I walk you through how to replace the Paper Feed Kit 1 on a Brother MFC-8950 and access the “secret” menu to reset the counter so it does not keep displaying the error.
How to Fix Brother MFC-8950 Replace Parts PF Kit 1 Error
Hardware:
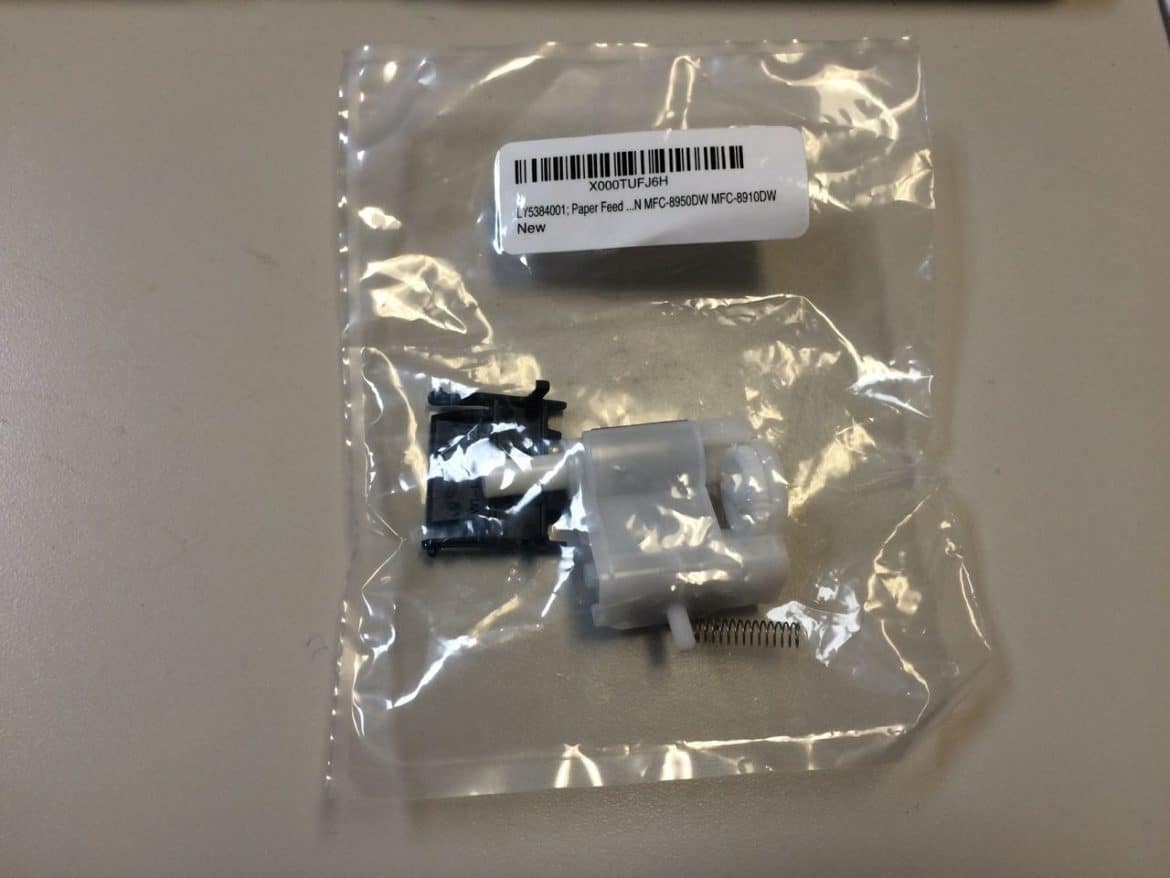
Parts Needed:
Tools Needed:
- Pocket knife or a precision flat screwdriver
(to pry the paper feed pressure bar free)
The error: Replace Parts PF Kit 1. PF stands for “Paper Feed” and the 1 tells you it is on tray 1, the built-in paper tray on this printer. Tray 2 would be the optional (removable) one below it.
Step 1: Order the parts and wait for them to arrive.
If you like you can clear the error by jumping to Step 15 and then at least you don’t have to put up with the persistent error all the time while you are waiting for the parts. This is what the kit contains: the replacement rubber roller assembly, the part on the tray that pushes the paper against the roller (I’ll refer to it as the “paper feed pressure bar”), and the spring that pushes it:
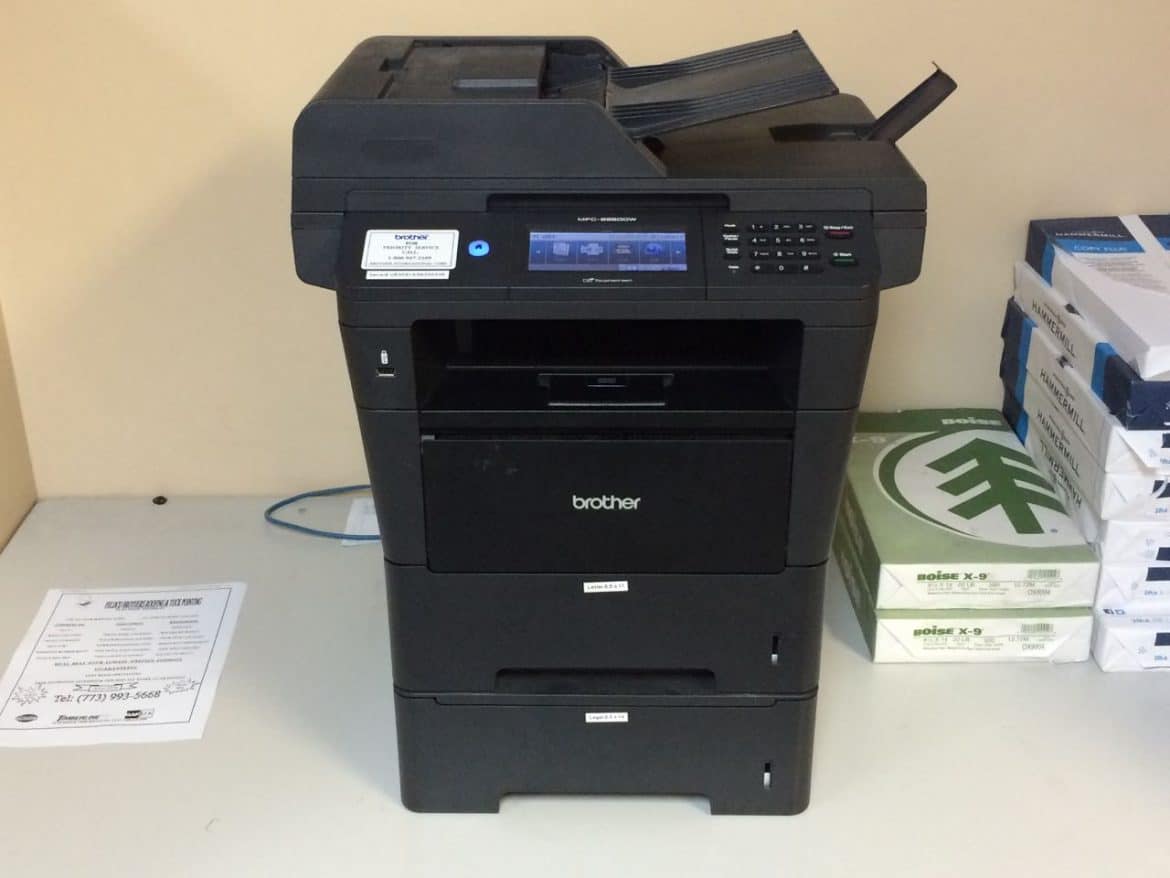
Step 2: Turn of the Brother MFC-8950
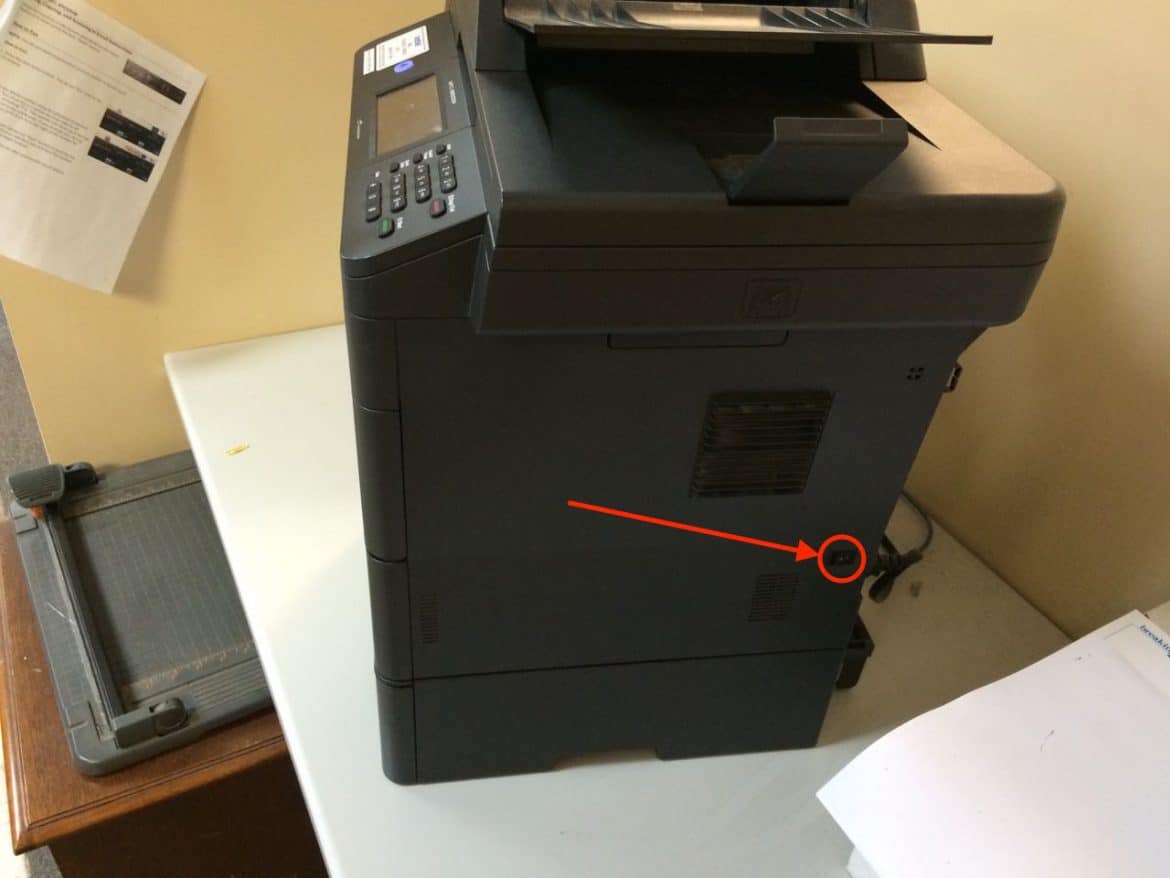
The switch is located on the right side of the machine.
Step 3: Unplug all the cables from the back of the printer.
We are going to flip the entire machine over so you do not want to mess with the cables connected to it.

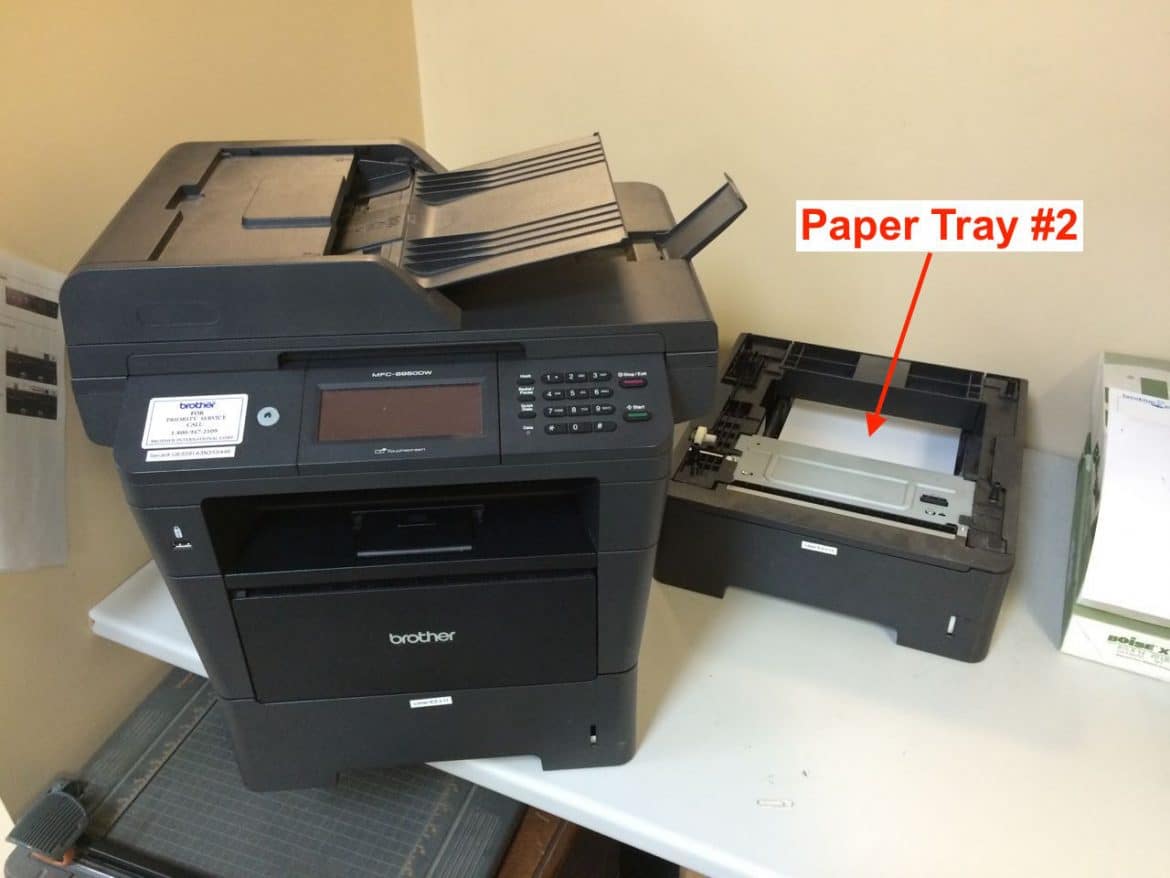
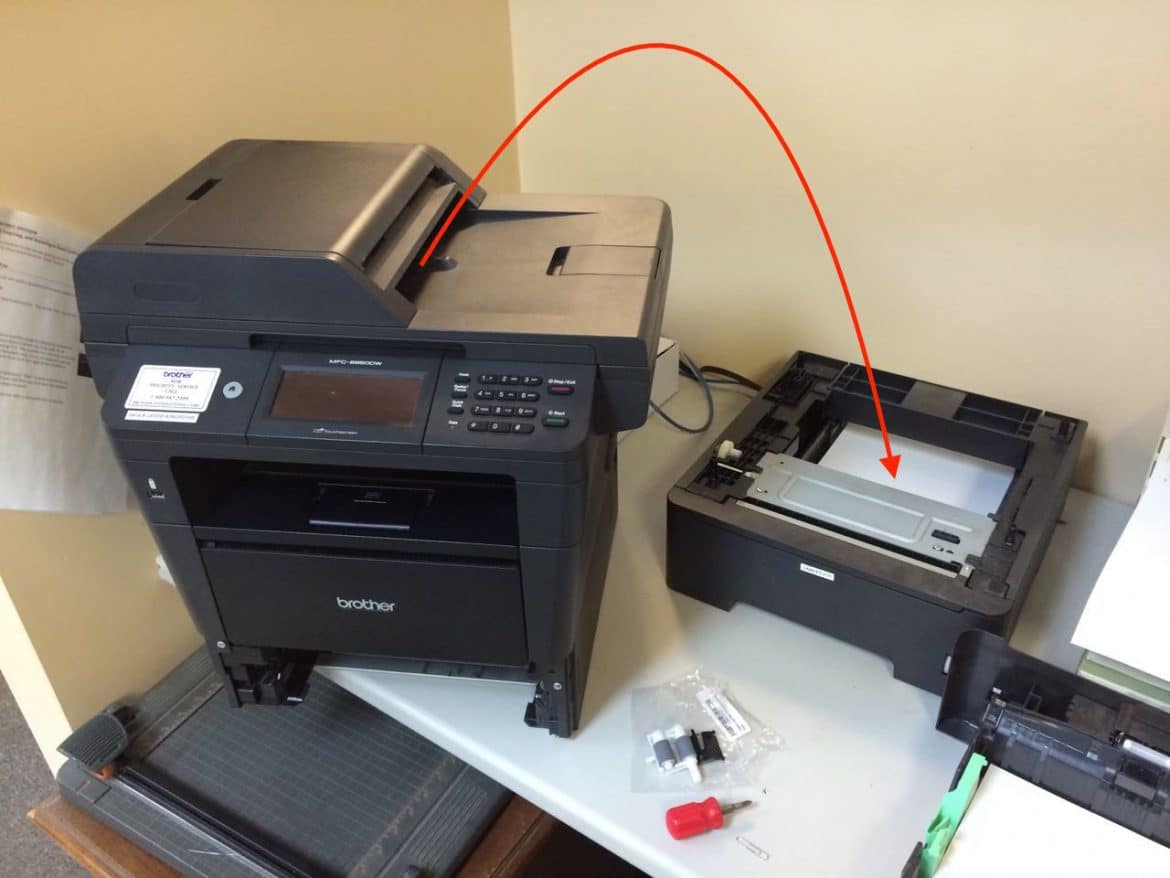
Step 4: Lift the machine off the extra paper tray(s).
If you have the second paper tray like we do you will want to lift the main printer straight up and off the paper tray and set the printer aside:
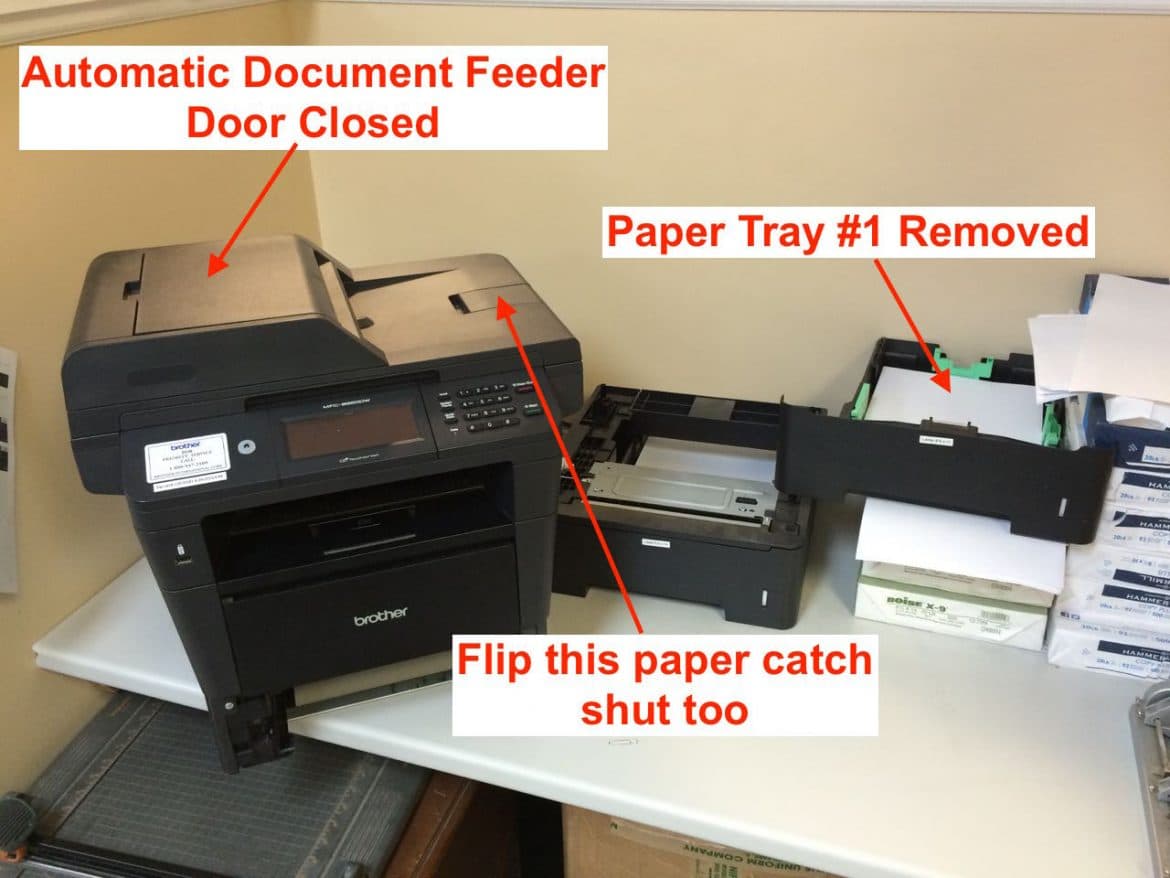
Step 5: Get the printer ready laid over.
I shut the document feeder door and the little catch that keeps the paper from falling off and removed paper tray #1:
Step 6: Lay the printer on its back.
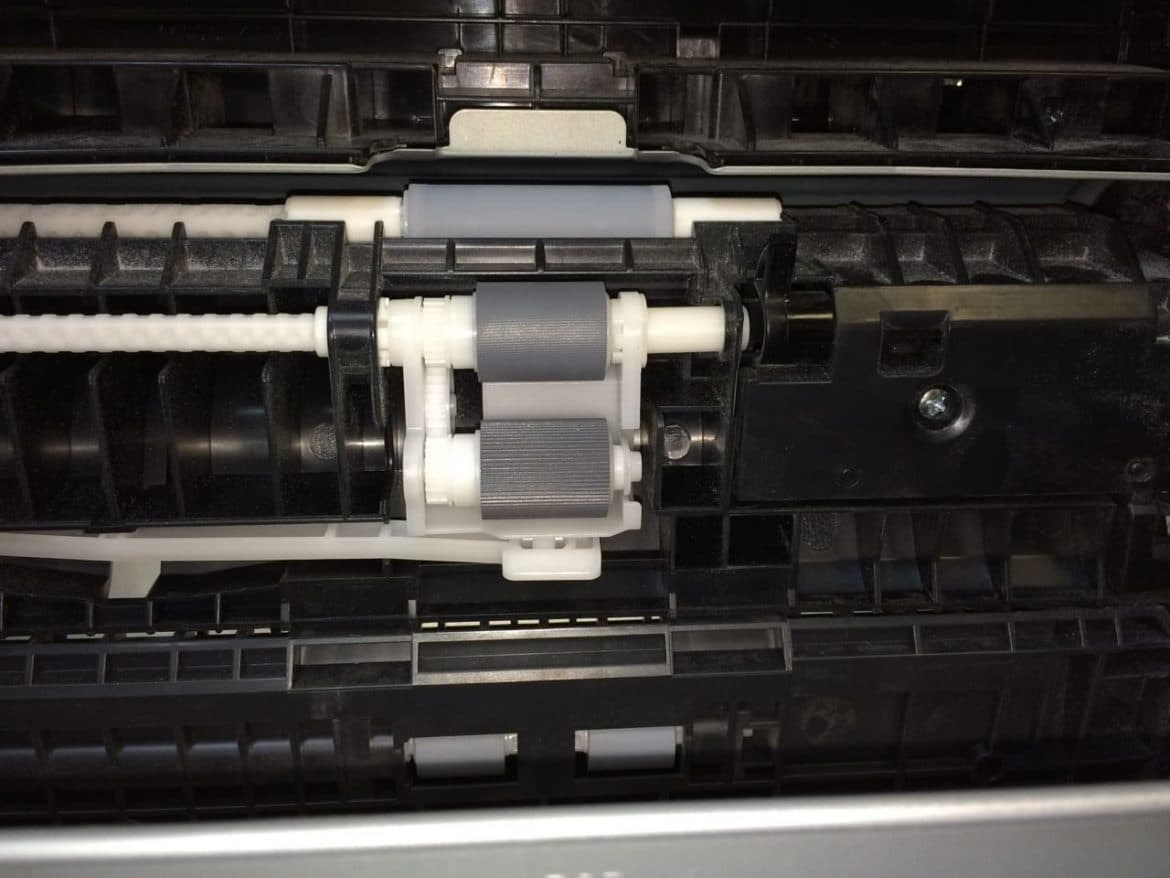
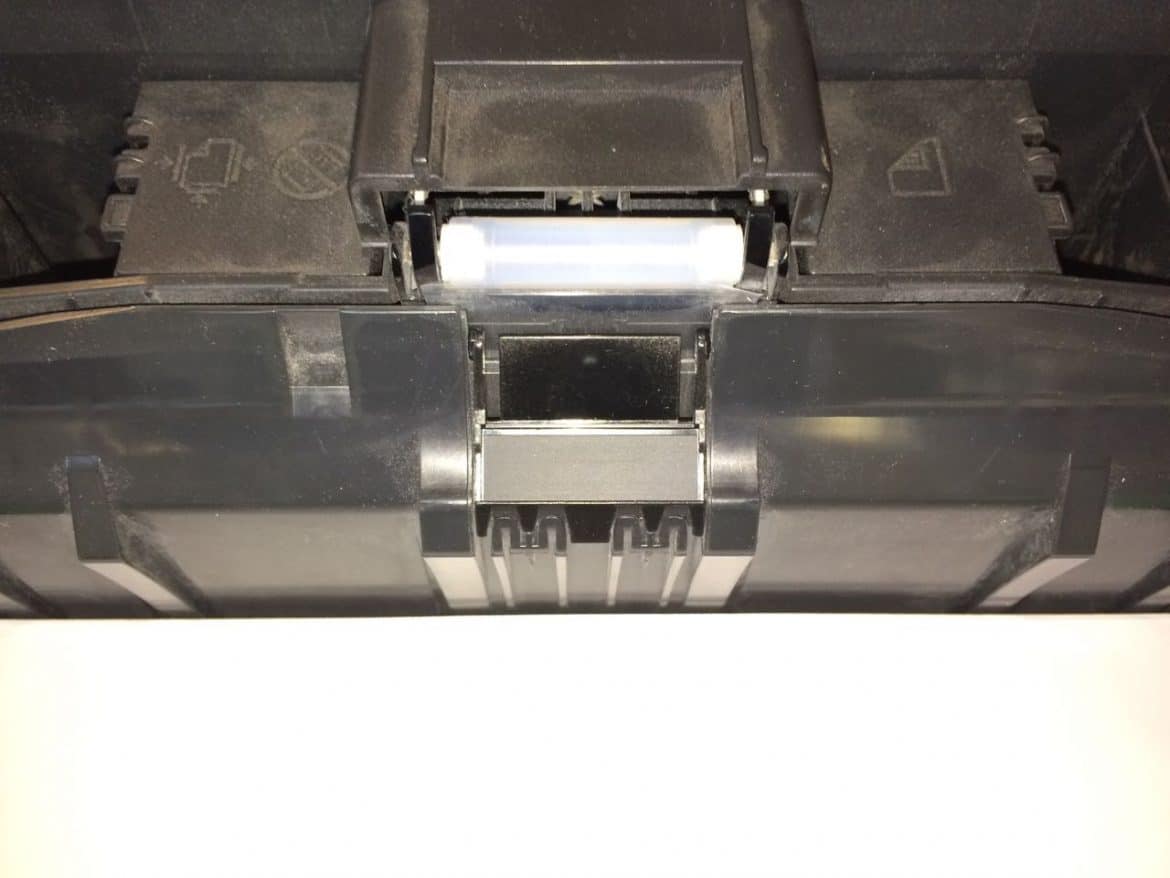
When you lay the printer on its back you will be able to see the main printer’s part of the Paper Feed Kit #1:

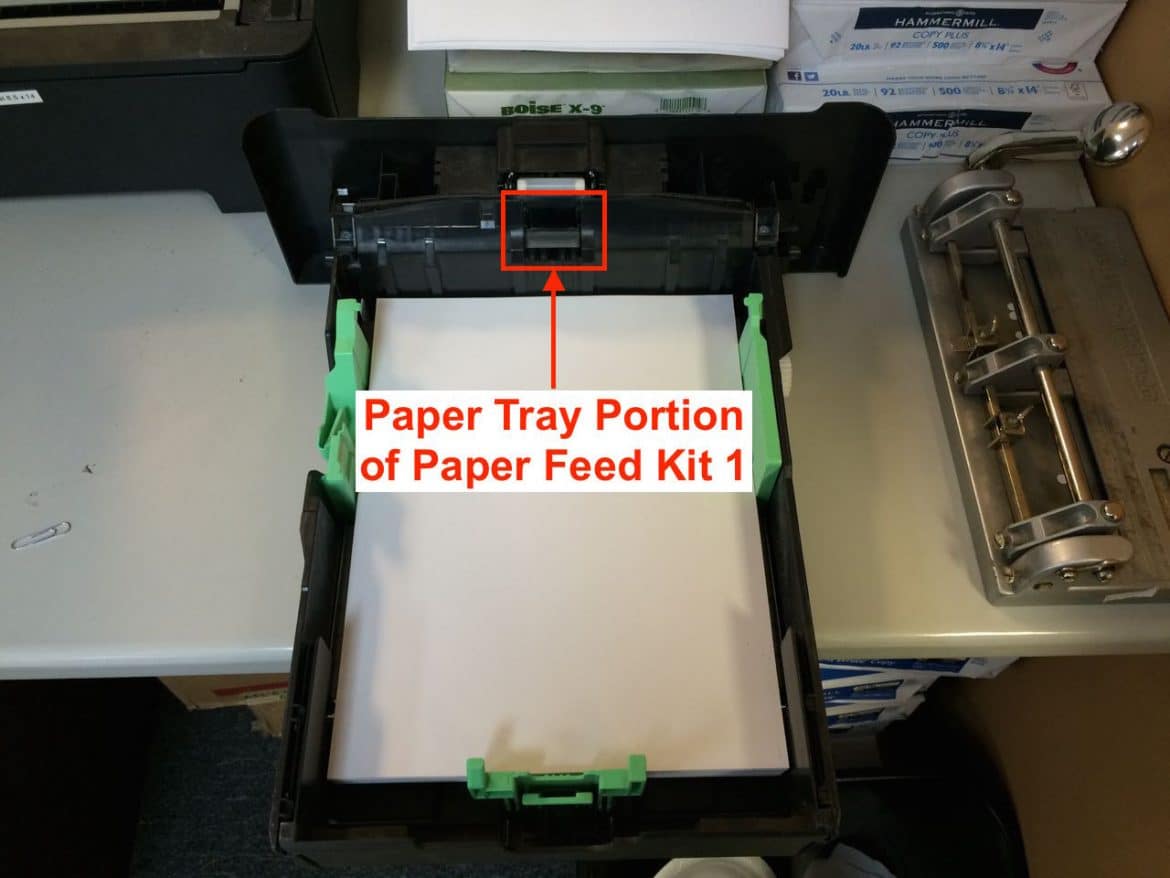
Here’s the other half of Paper Feed Kit 1, which I’m calling the paper feed pressure bar, on the Paper Feed Tray:
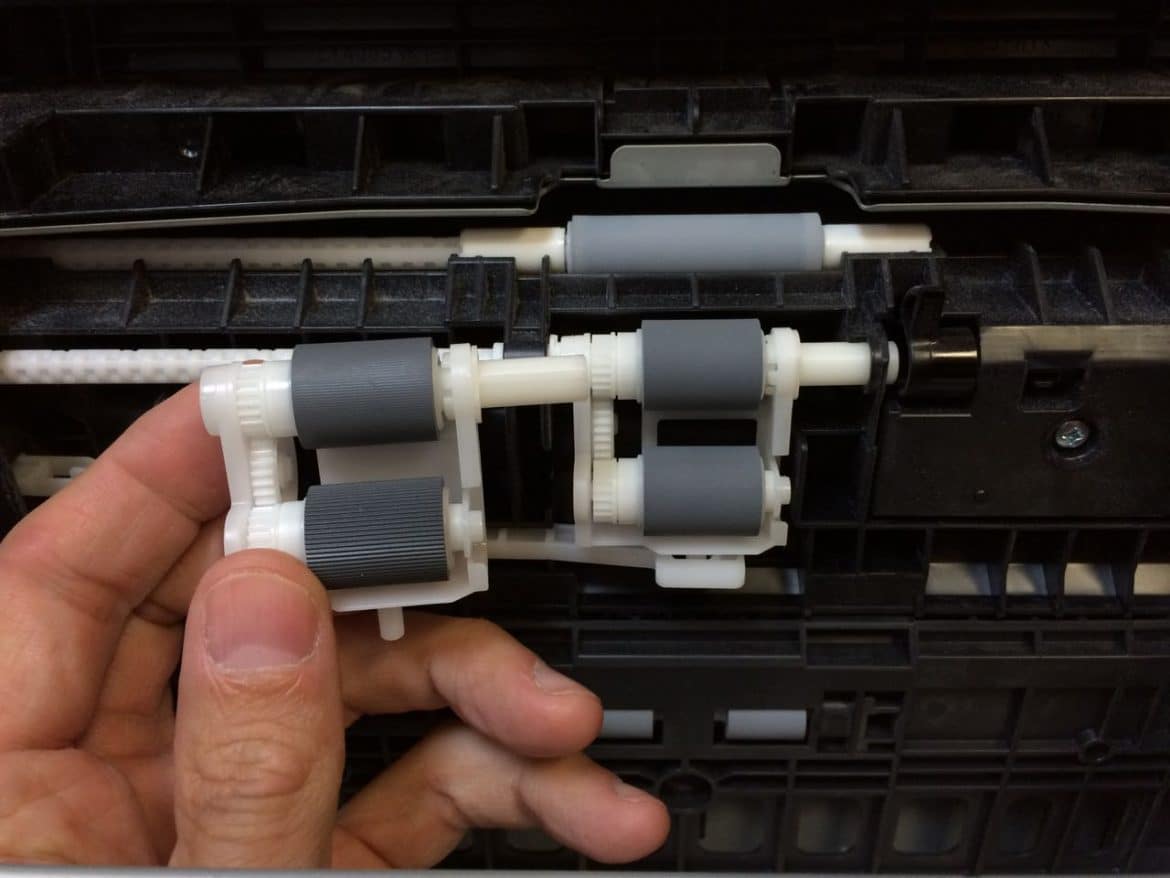
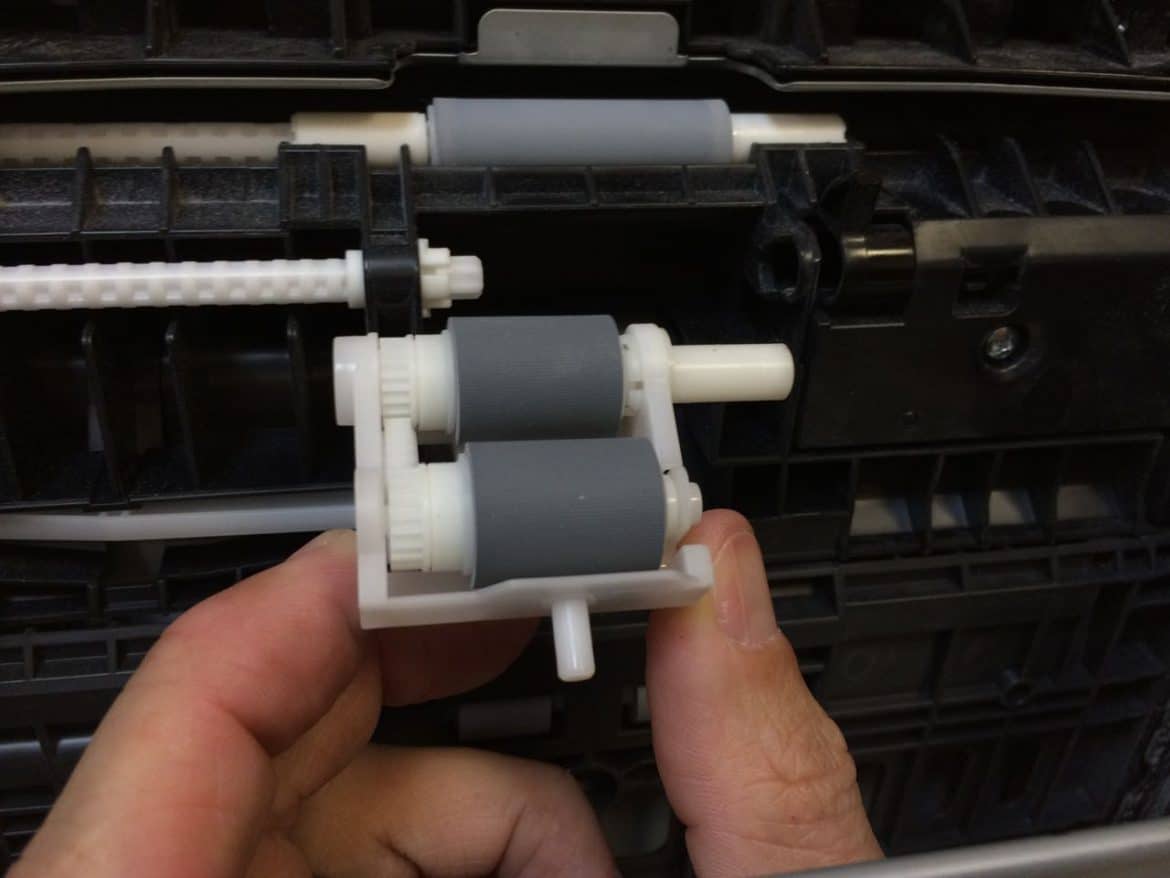
Step 7: Comparing new and old parts.
Here I’m holding up the replacement part next to the old part. If you click on the image below you can definitely see how much wear has taken place (the old roller is smooth and the new one has raised lines on it):
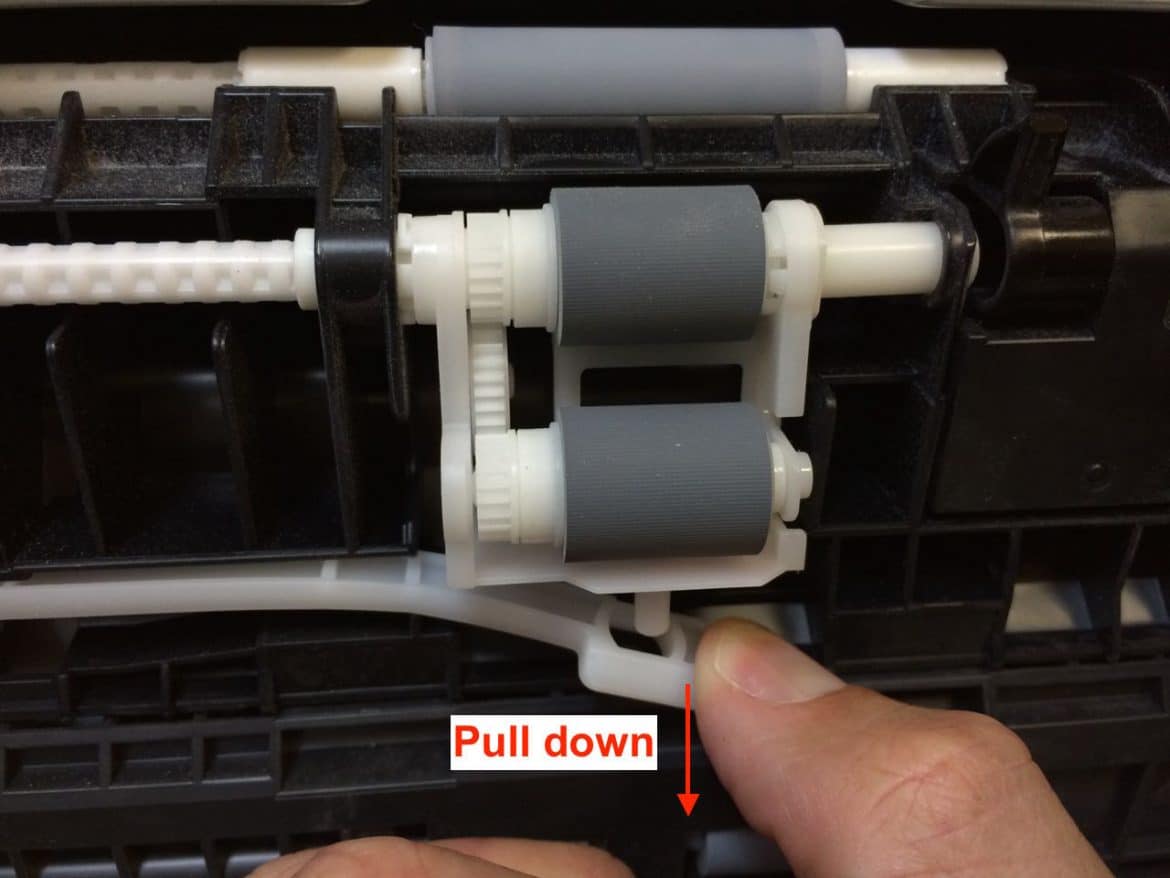
Step 8: Remove the old roller assembly from the printer.
Step 8a: Pull down the plastic tab below the roller assembly.
You’ll need to pull it down far enough so that the post that sticks out the bottom of the roller assembly will clear it:
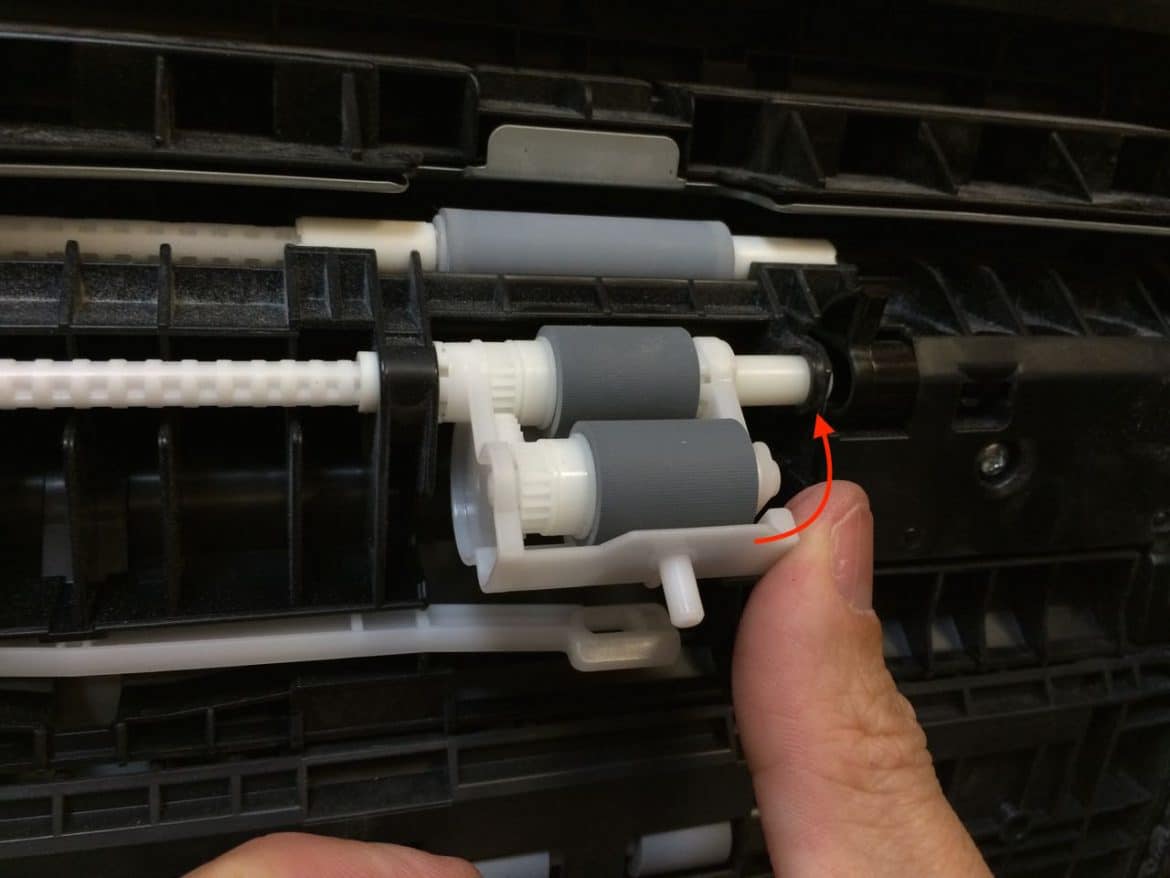
Step 8b: Swing out the bottom end of the roller assembly.
It will rotate on the shaft of the upper wheel:
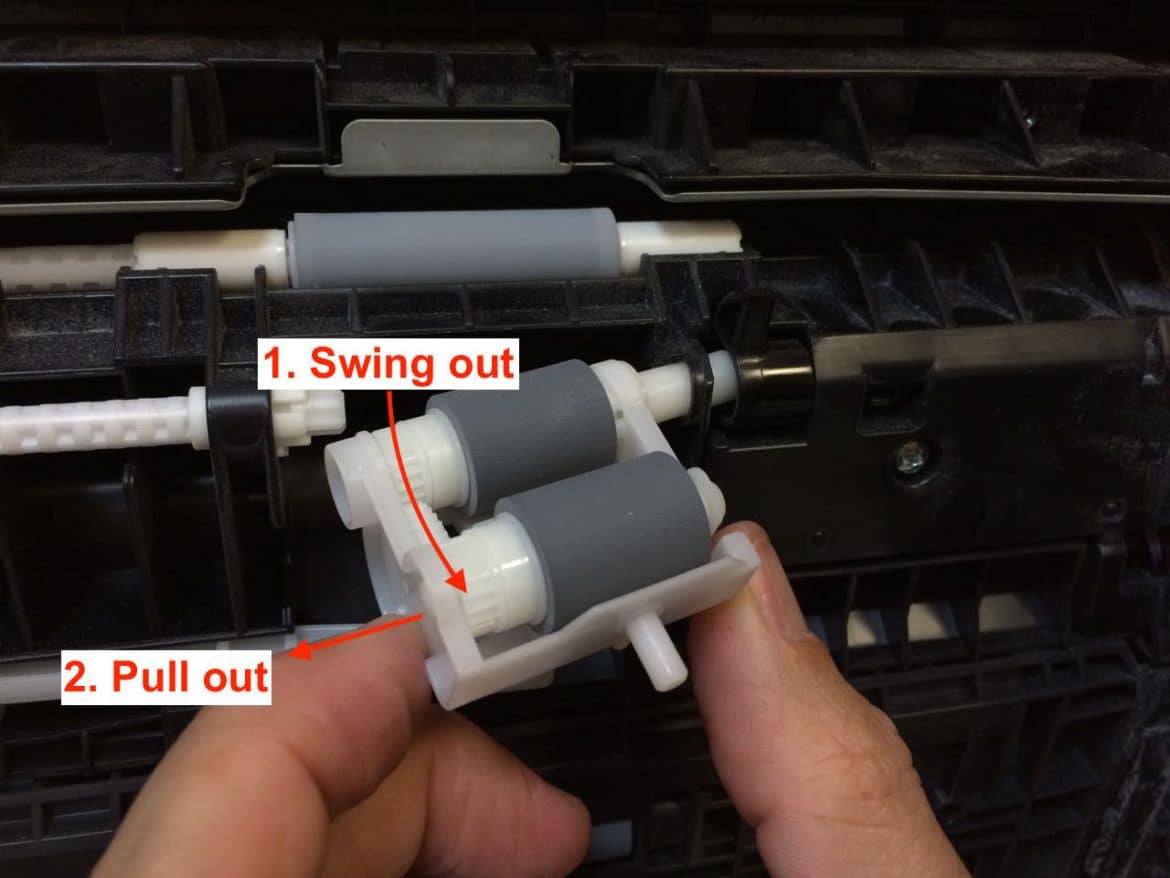
Step 8c: Slide the roller assembly to the right.
The white shaft will slide inside the area to the right:

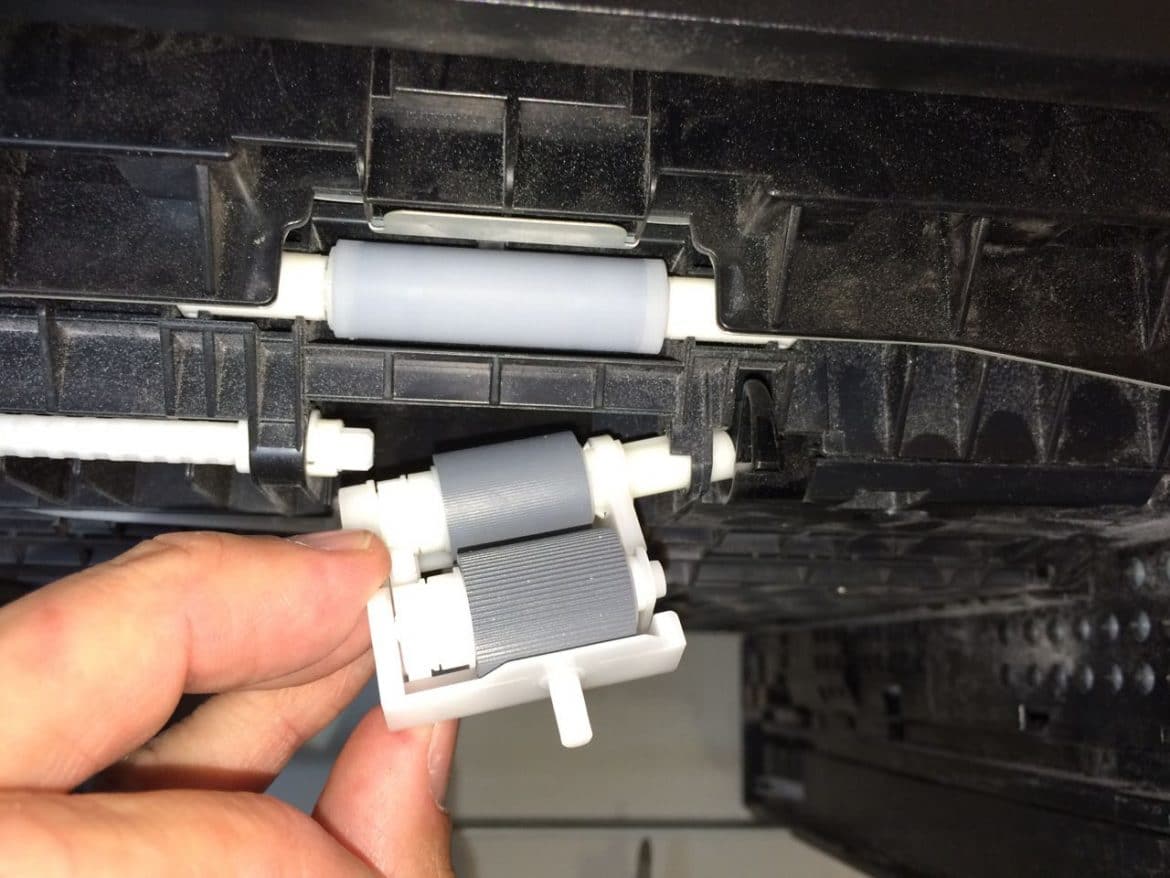
Step 8d: Pull the left side of the roller assembly out and then remove the old assembly.
Step 9: Install the new roller assembly.
Insert the white shaft into the printer like this:
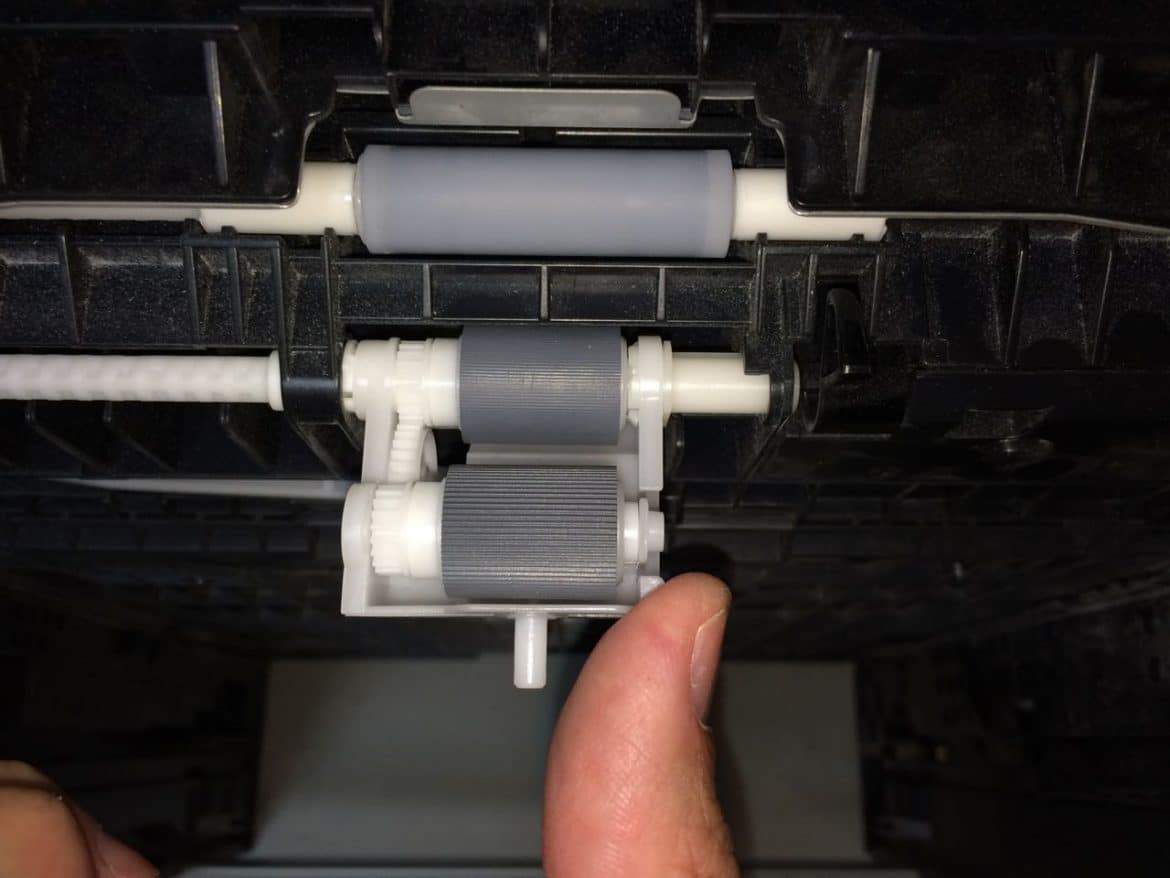
Push the roller assembly all the way in to the right and then rock the left end of the assembly up into the printer. Then slide the whole assembly to the left onto the nub that sticks out on the left:

This is what you should have at this point:
Pull the white tab down and insert the roller assembly’s post that sticks out on the bottom into the hole:
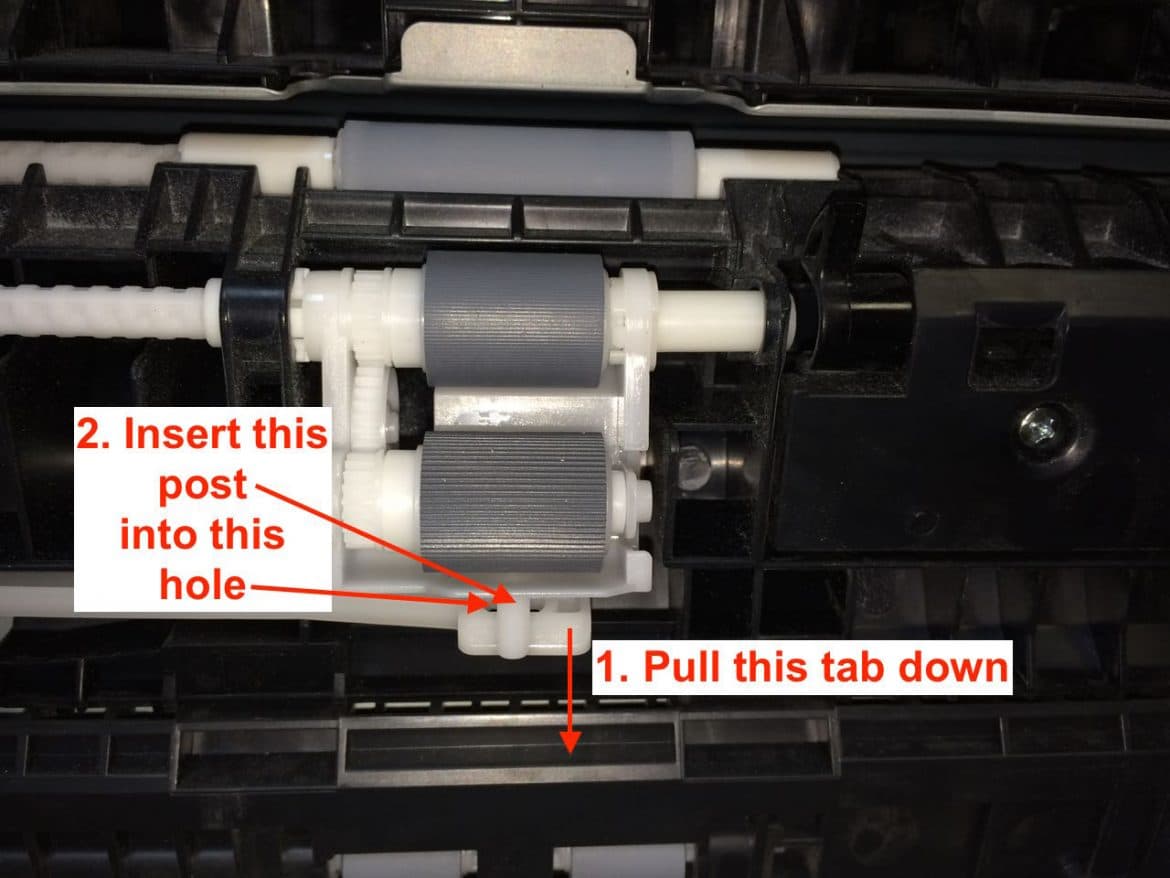
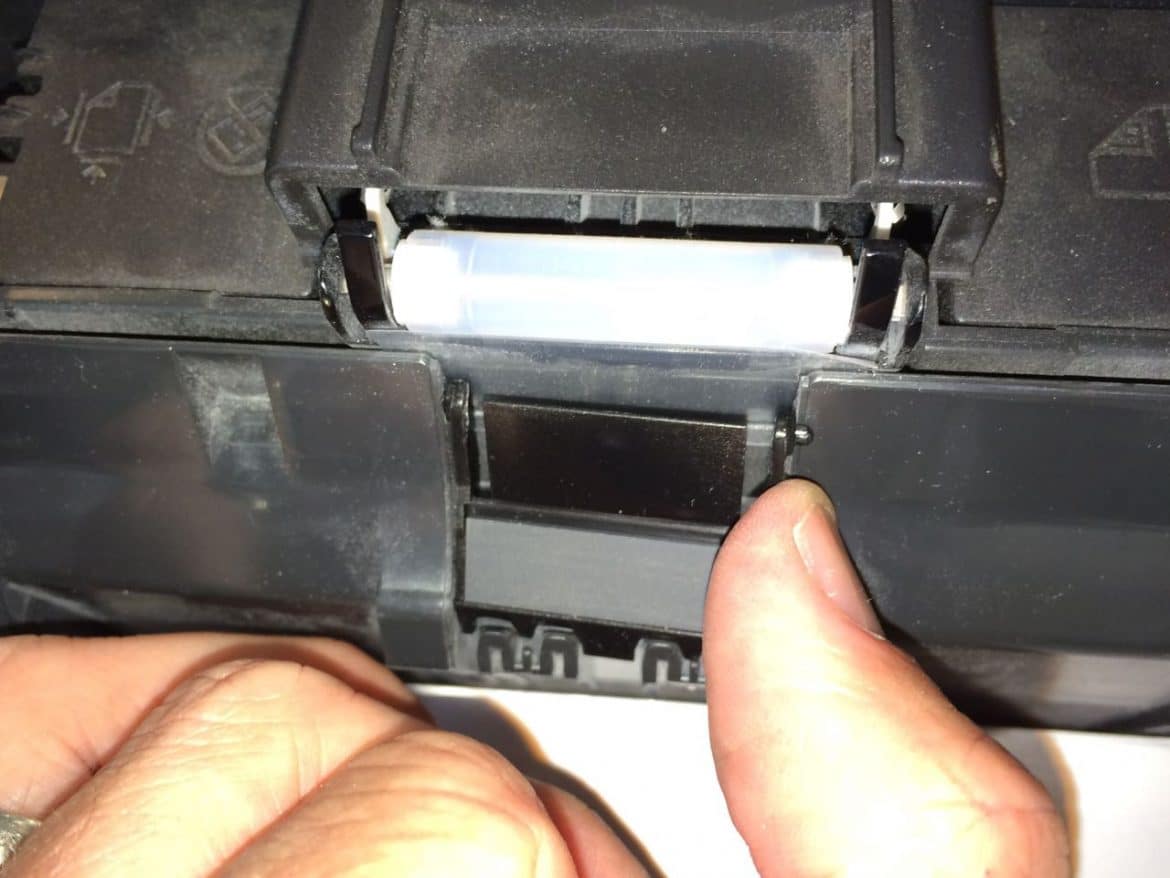
Here’s the new roller assembly installed:
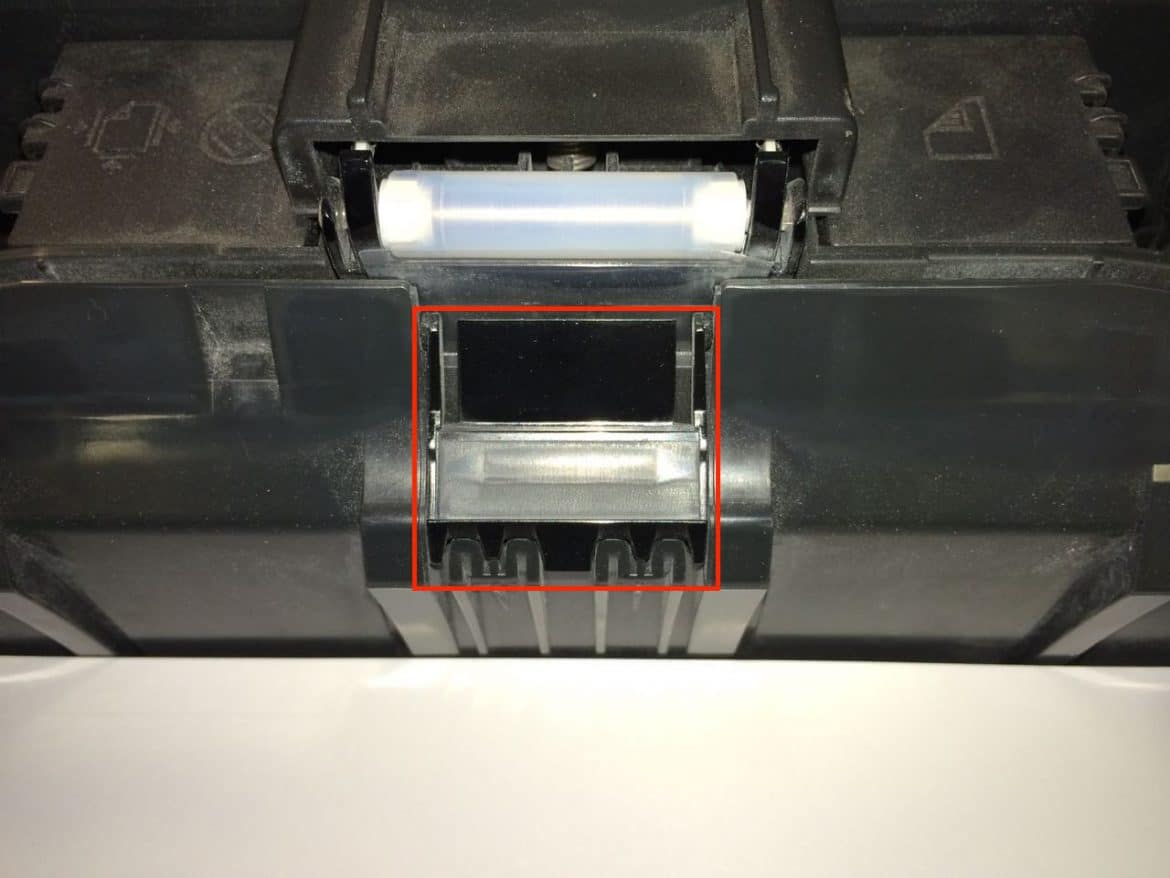
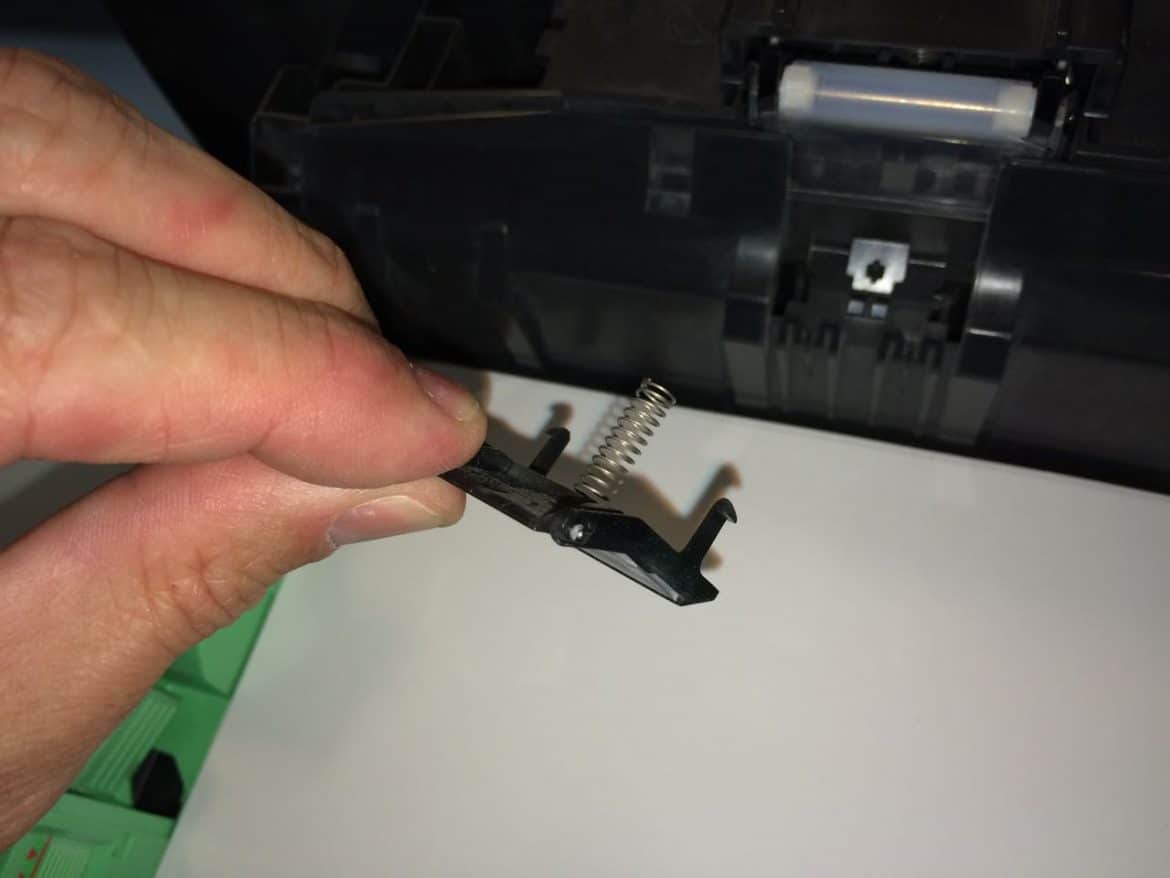
Step 10: Remove the paper feed pressure bar assembly
I’m calling this part the “paper feed pressure bar” but it is a black hinged plastic piece with a slick rubber pad stuck on it on the paper tray, right below the white roller:
To remove it use a pocket knife and pry the arms inward:
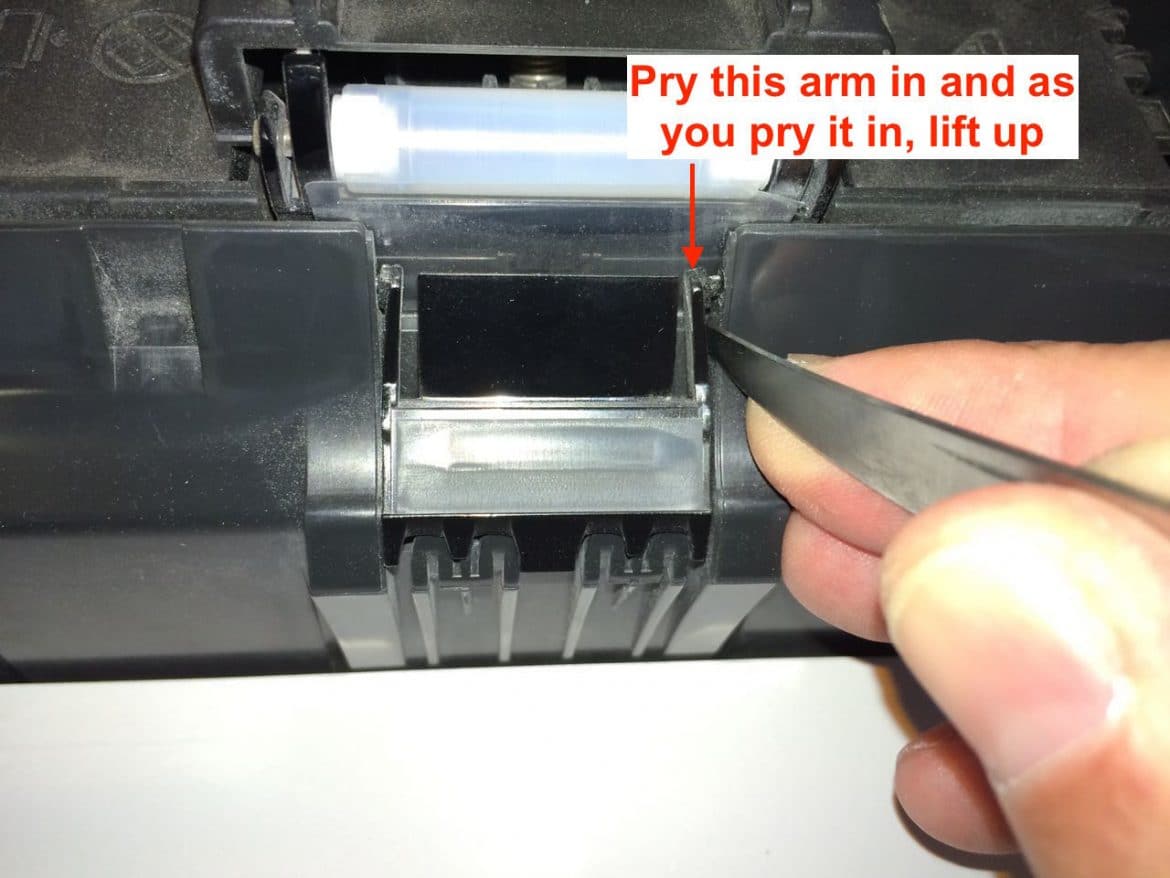
Here I have the right side free:
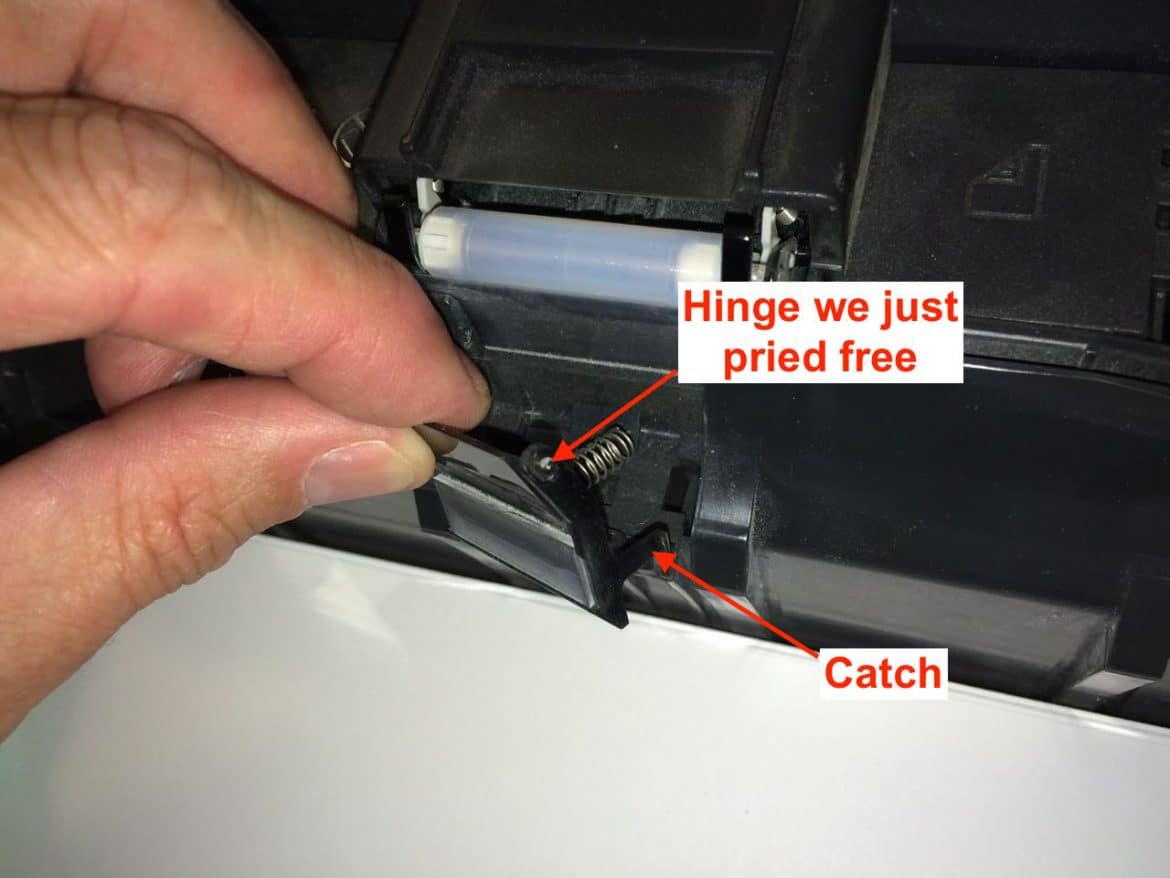
Once you have one side free the piece will come right out. The spring isn’t really retained by the black plastic piece but it stayed on for this picture:
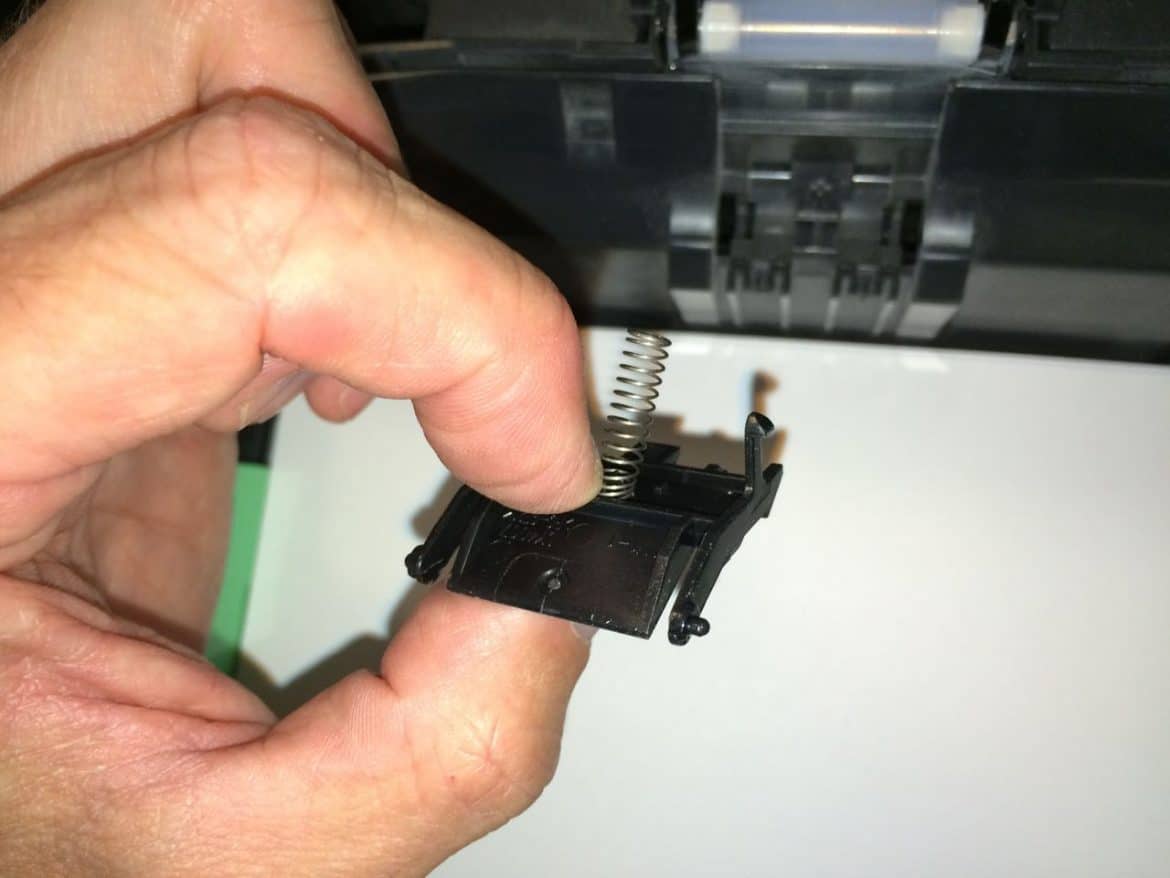
Step 11: Install the new paper tray pressure bar.
Hold the spring onto the new part and then align the other end of the spring with the stub that it must fit onto and snap in the lower clips:
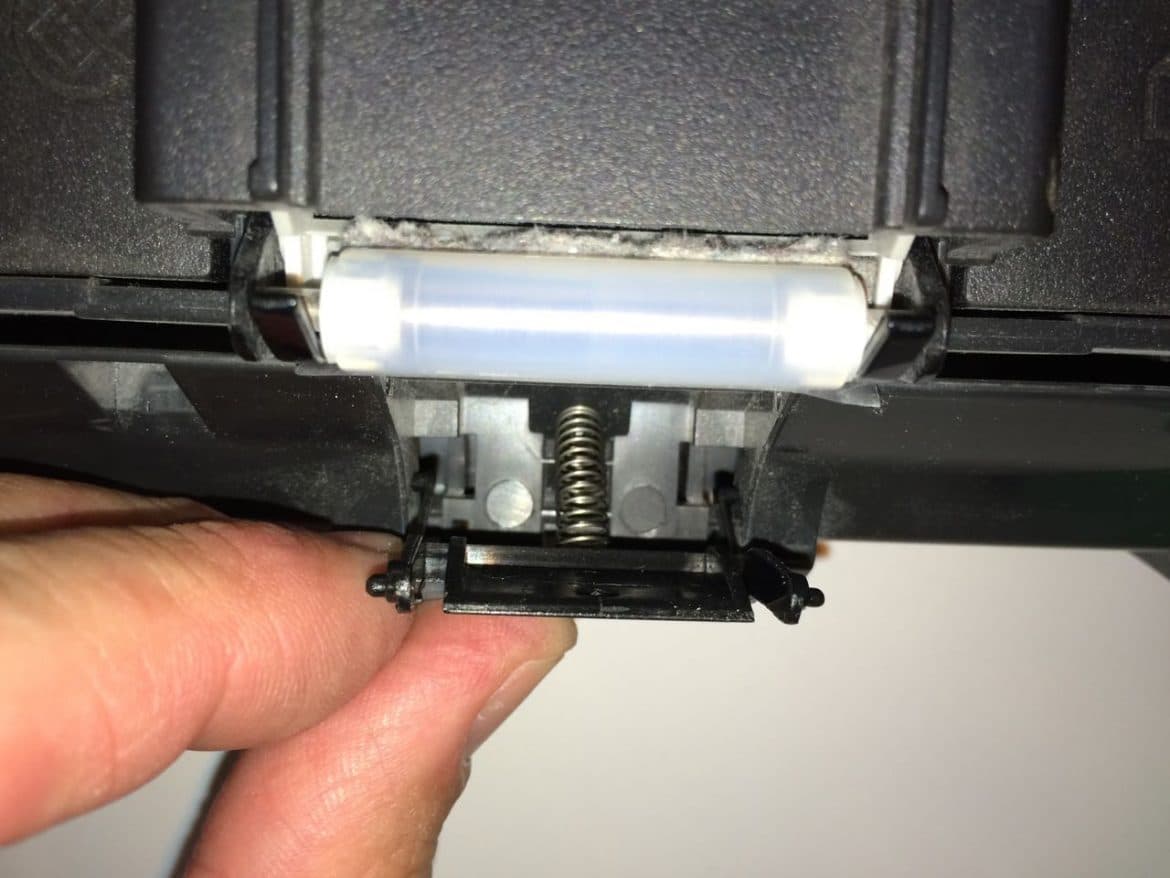
Once you have the spring in place and the bottom catches hooked in, you can snap in the top two hinges. Start with one side:
And then snap in the other side:
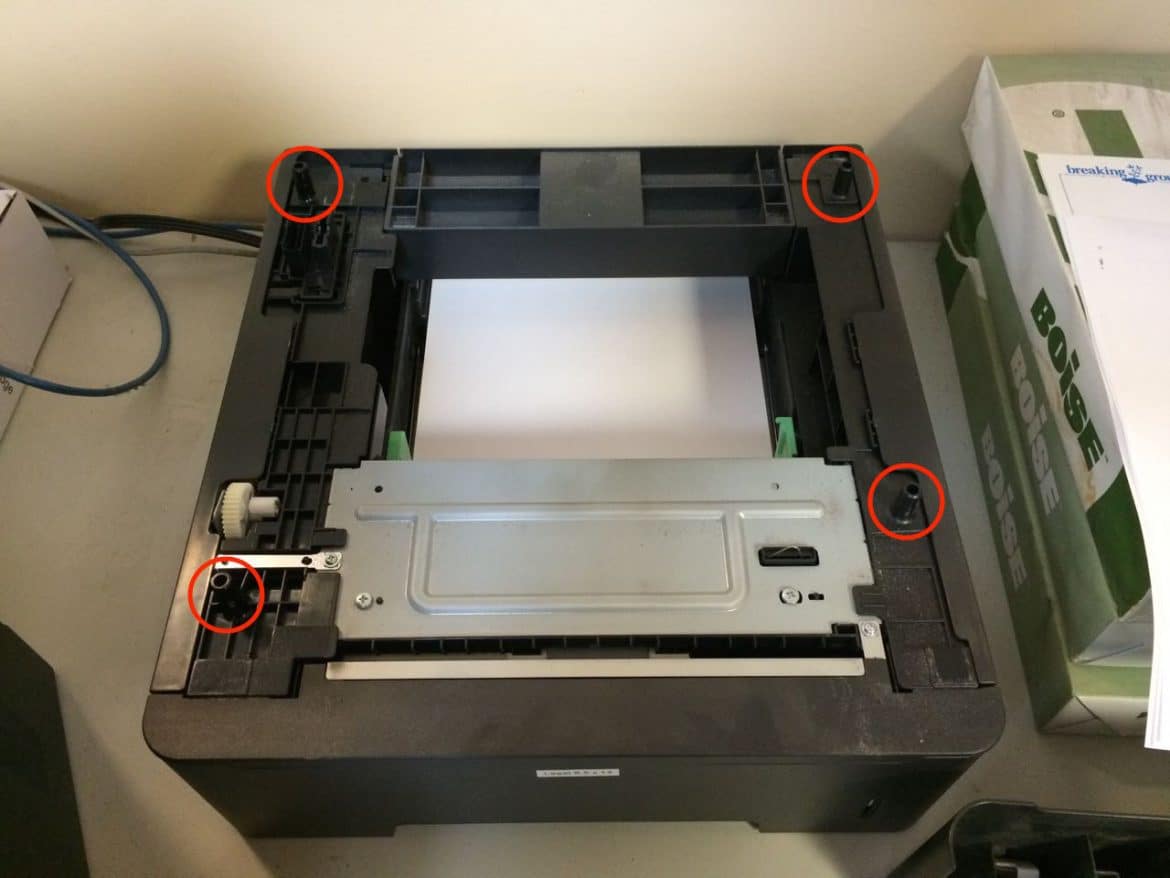
Step 12: Set the printer back on top of Paper tray 2
If you don’t have a second paper try then skip to Step 12.
There are pegs that stick up out of the second paper tray that must line up with the corresponding holes in the bottom of the printer:
Step 13: Reinsert Paper Tray #1
Step 14: Reconnect the cables to the printer and power it back up.
For us this was the power, ethernet, and the phone line for the fax machine. Once the cables are reconnected, power the printer back on.
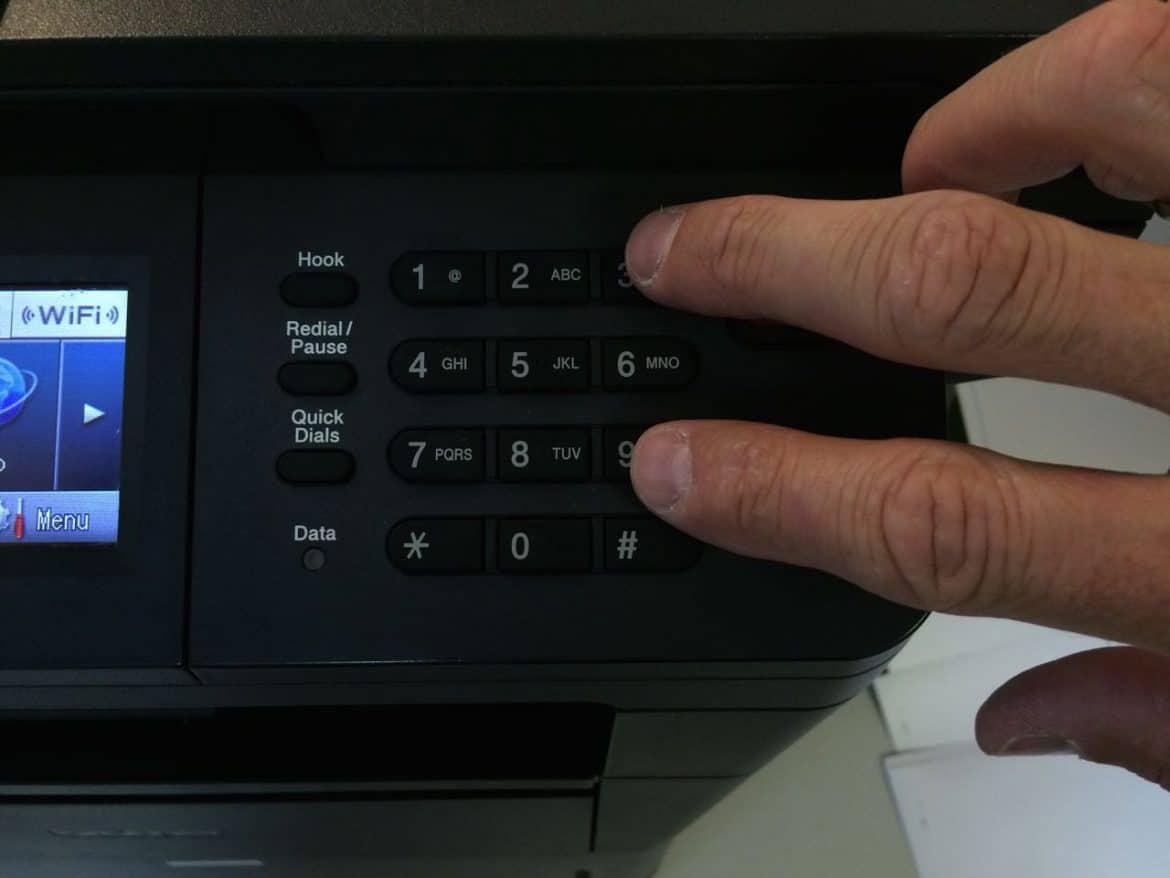
Step 15: Reset the PF Kit 1 Counter
This will clear the “Replace Parts PF Kit 1” error that keeps coming up.
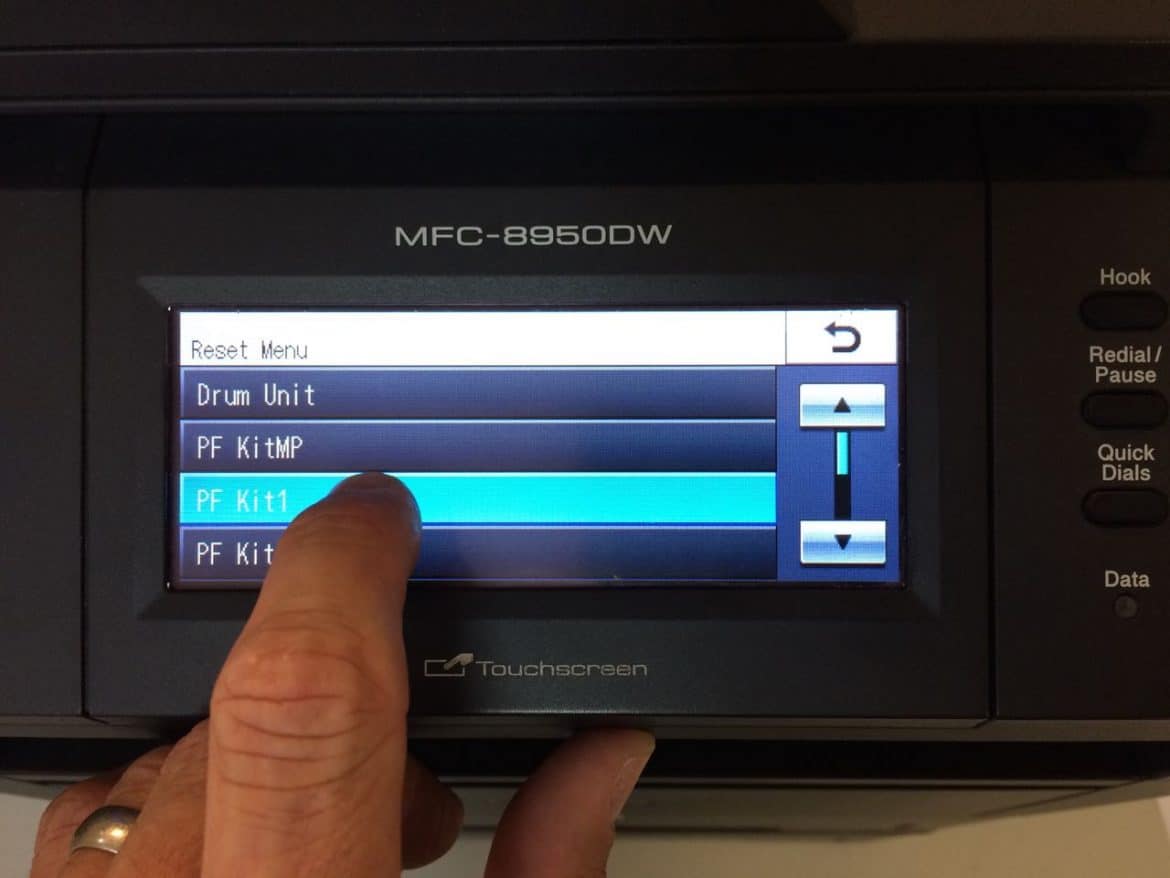
Step 15a: From the main menu simultaneously press both the 3 and 9 keys once.
You must access the secret reset menu to do this. If you don’t time it correctly you will set the number of copies. If you do that just press the Stop/Exit button and try again. You DO NOT hold the keys down, just simultaneously press them once:
If you do it correctly, you will see the reset menu on the display:

Step 15b: Tap “PF Kit1” on the screen.
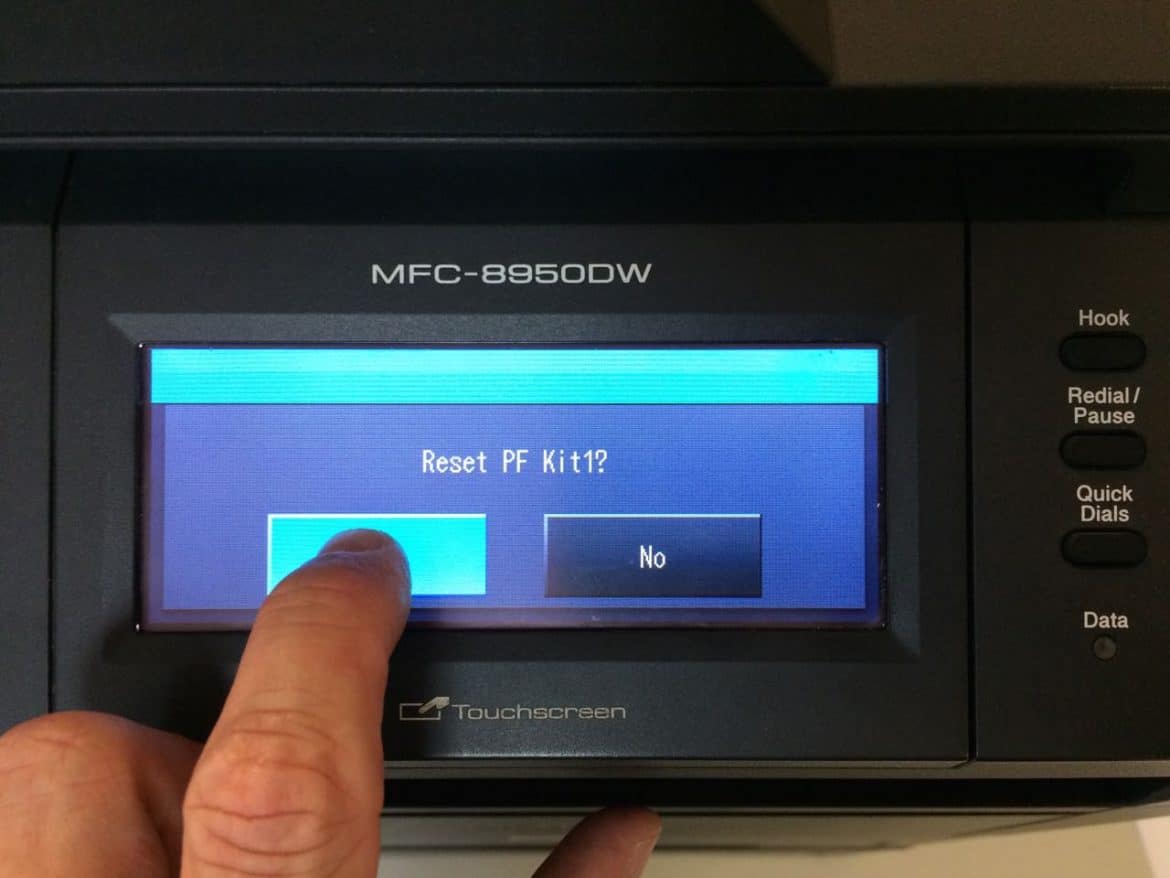
It will double check and ask you if you want to “Reset PF Kit1?” Tap “Yes.”
It should then say “Accepted” to let you know that the counter has been reset:
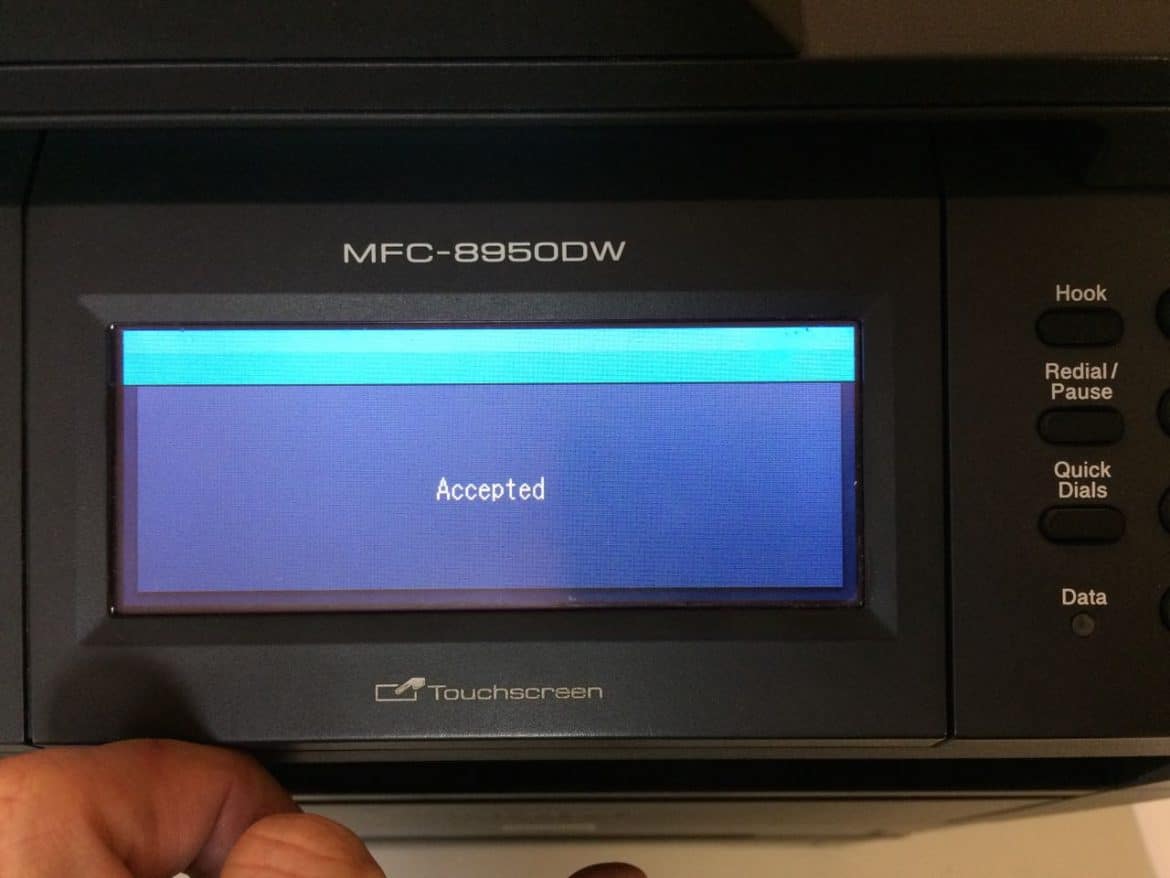
To get out of the Reset Menu press the Stop/Exit button:

Now you’ve saved a repair man call, you’ve extended the life of your printer, and saved money!
Amazon Associate Disclosure: As an Amazon Associate I earn from qualifying purchases. This means if you click on an affiliate link and purchase the item, I will receive an affiliate commission. The price of the item is the same whether it is an affiliate link or not. Regardless, I only recommend products or services I believe will add value to Share Your Repair readers. By using the affiliate links, you are helping support Share Your Repair, and I genuinely appreciate your support.
Worked for a 9320cw as well to reset PF kit and fuser! Thanks!
These instructions work with 8910DW as well (except for the detachable bottom)! Thanks!
Good to know, thanks for sharing.
Thank you so much for the very simple instructions to replace the PF Kit1. I really enjoy being able to fix my own equipment and you made it super simple! 🙂
Thanks for the feedback Angela and good work on repairing your printer!
Dear John, thank you very much for your excellent guide!
Keep up the good work!
Best regards,
Martin
You are so welcome, thanks for taking the time to leave a note. Good job on fixing your printer!