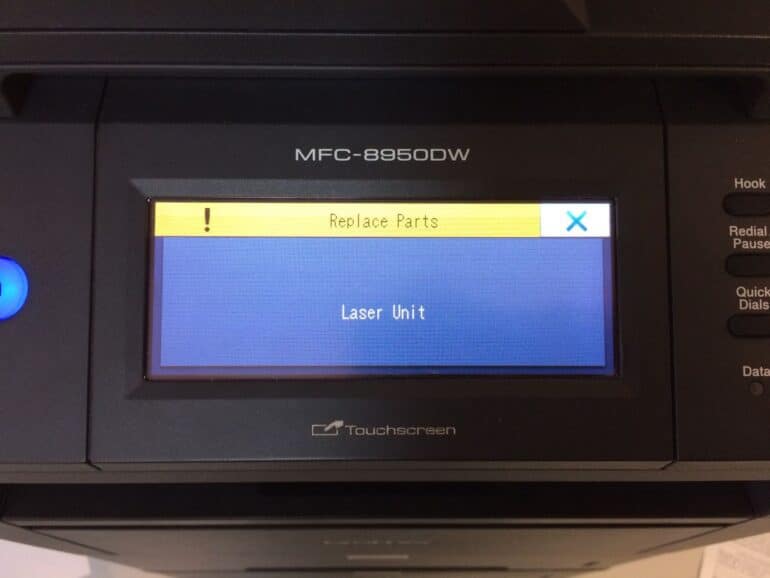
Our Brother MFC8910DW was getting the error: “Replace Parts Laser Unit.” Brother told me it was not covered under the warranty but that I had to pay a certified Brother service center to do the repair. I don’t pay service centers to do my repairs!?!?!? Lol. I found the part I needed and while I was waiting for it to arrive I decided I would find out how much it would cost me to get the repair done. I looked up a repair center on Brother’s website and called them up. The guy told me that the part was about $45 and they charged around $90 an hour and then the nice guy shared that usually they don’t even replace the laser unit, that they don’t really go bad, and that I could just reset the Laser Unit counter and go about my business. Well, that sounds a lot better than doing the repair, if it’s not broke then don’t fix it, right? I was able to figure out the (secret) steps to resetting ALL the counters on this printer and here’s how you can do it too…
How to Reset Replace Laser Unit Message on Brother MFC-8950 Printer
Hardware:
Relevant Supplies:
Step 1: Make sure the printer is at the main screen.
You can press the home button to get here.
| Brother MFC-8950DWT Main Menu with Error Icon in bottom left corner |
Step 2: Open the hidden reset menu by simultaneously press and hold the 3 and 9 keys on the numerical touchpad.
If you don’t press them simultaneously you’ll enter 3 or 9 into the number of copies. If this happens simply press cancel and then try again.
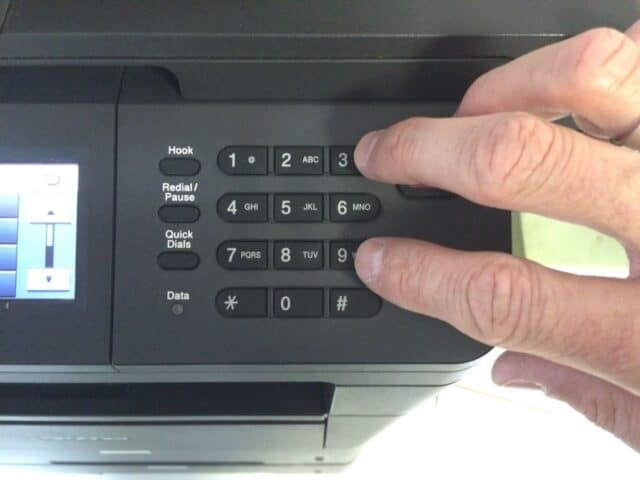 |
| Entering the reset menu by pressing and holding down the 3 and 9 buttons |
If you do it right, this is what you’ll see on the screen:
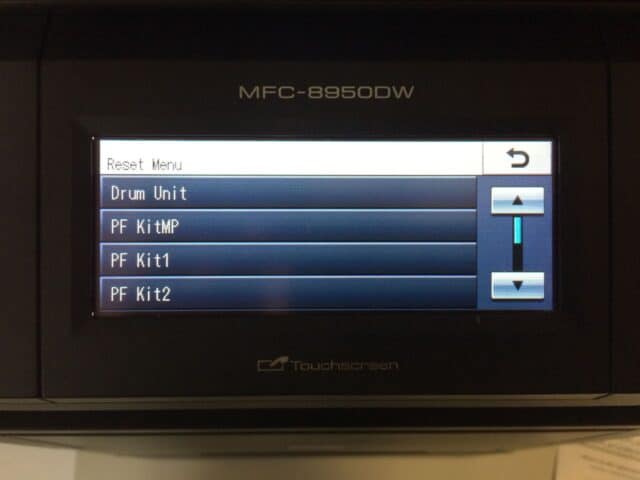 |
| Hidden Brother MFC-8950DWT Reset Menu |
Step 3: Select “Laser Unit” from the Reset Menu.
Press the down arrow in the lower right corner to view the next page of reset menu items to show the laser unit and then tap on “Laser Unit.”
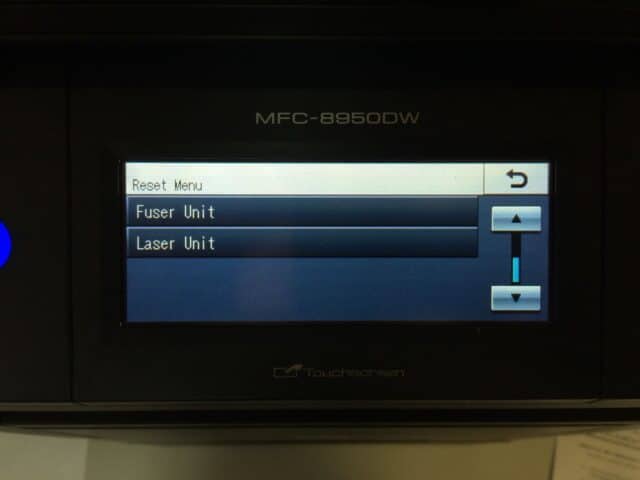 |
| The lower list in the Reset Menu |
Step 4: Tap “Yes” to reset the Laser Unit:
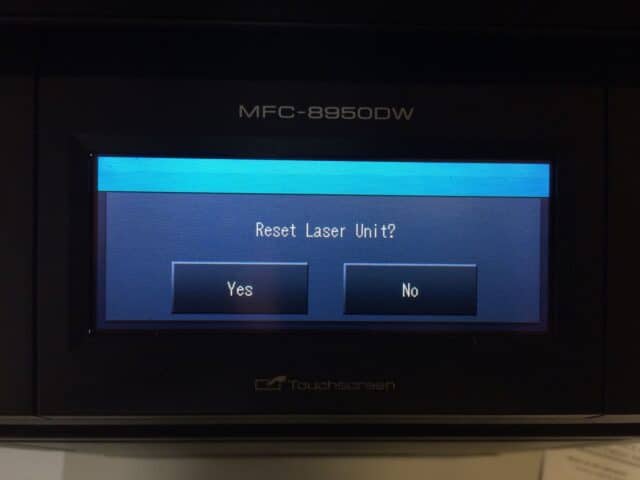 |
| Laser Unit Reset Clarification — Tap Yes |
Step 4: You will then see the following screen:
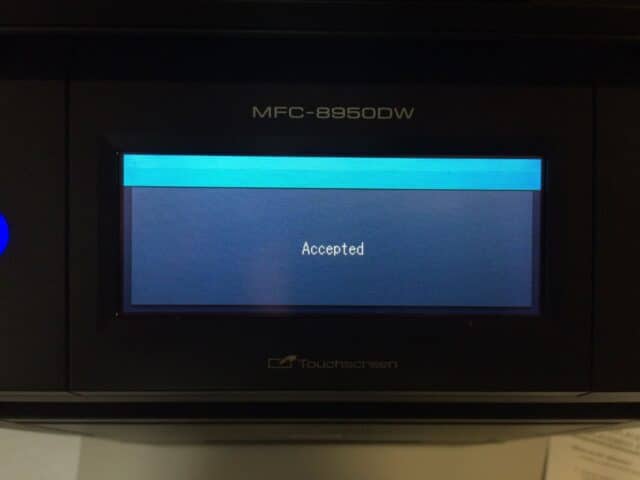 |
| Laser Unit Reset Accepted Message |
You can then go about your business and keep printing and hopefully the Laser Unit will last the life of the printer!
If you want to know how to replace the laser unit I began to write up the tutorial and I decided to leave the steps at the bottom of this post for anyone who wanted to read them. If it goes out I guess I’ll take all the pictures and fill in all the details but until then I’ll just leave the raw steps:
Step 1: Disconnect the printer from power.Step 2: Remove the paper tray. If you have the extra paper tray that sits underneath the printer go ahead and lift the printer off the extra tray.Step 3: Open the back cover.Step 4: Remove the two phillips-head screws from the upper left and right of the back opening.Step 5: Remove the two phillips-head screws from the upper left and right of the opening where the paper tray was removed.
Step 6: Open the front cover door. Press the front cover release button and open the door that covers the area where you remove the toner/drum assembly.
Step 7: Remove the left side cover from the machine. There are 8 hooks that must be released to remove this cover: 3 on the front edge, 1 on the top left, 1 on the left side (inside memory door), and 3 on the bottom.
Step 8: Remove the right side cover from the machine. There are 9 hooks that must be released to remove this cover: 3 on the right side, 3 on the bottom, and 3 on the left side.
Step 9: Remove the main shield cover plate. You will need to remove 4 screws, 2 of which will be connected to ground harnesses.
Step 10: Disconnect 11 cables from the main circuitboard. If you do not have a duplex scanning machine you will only have 9 cables to disconnect.
Step 11: Disconnect the wireless LAN and USB host harnesses connectors. They are on the left side of the machine at the top left.
Step 12: Remove the screw pan screw to release the ground at the bottom left of the right side.
Step 13: Remove the top assembly. Remove the 4 screws that hold the top assembly onto the machine. There are two on the front and one on each of the left and right sides. There are 4 corresponding hooks in the same area as these screws that must be released in order to remove the top assembly.
Step 14: Disconnect the laser unit flat cable.
Step 15: Remove the 4 screws from the laser unit.
Step 16: Remove the laser unit from the printer.
Step 17: Install laser unit into printer.
Step 18: Install the 4 screws into the laser unit.
Step 19: Connect the laser unit flat cable.
Step 20: Reinstall the printer top assembly and snap together.
Step 21: Reinstall the 4 screws into the top assembly. They are located at the top right and left of the front and then one on each side.
Step 22: Reconnect the wireless LAN and USB host harness connectors.
Step 23: Reconnect the 11 cables to the main circuitboard.
Step 24: Reinstall the main shield cover plate. Reinstall the 4 screws, 2 of which connect through ground harnesses.
Step 25: Snap the right side cover onto the machine.
Step 26: Snap the left side cover onto the machine.
Step 27: Reinstall the 2 screws in the paper try opening.
Step 28: Reinstall the two screws on the top right and top left of the back.
Step 29: Close the back cover.
Step 30: Reinstall the paper try.
Step 31: Connect the printer to power and power it back up.
Amazon Associate Disclosure: As an Amazon Associate I earn from qualifying purchases. This means if you click on an affiliate link and purchase the item, I will receive an affiliate commission. The price of the item is the same whether it is an affiliate link or not. Regardless, I only recommend products or services I believe will add value to Share Your Repair readers. By using the affiliate links, you are helping support Share Your Repair, and I genuinely appreciate your support.

My mfc 8950 dw keeps getting the inside jam.after only printing on page of a multiple page document. any suggestions on a fix. rear inside rollers seem to be worn
Sorry, but I’m not going to be able to help. I don’t even have access to this printer anymore.
Hi John ,
Can you give me directions on how to replace the PF Kit 2 on the Brother HL-5470 DWT. Thanks greatly for your assistance.
Sorry, but I don’t even own that type of printer. Typically I just repair what breaks on the equipment I own or work with and the scope of my articles are confined by that. I’d encourage you to scour the web with Google.com to find a solution. Good luck.
Thanks for posting. This information was very helpful!
Thank you so much. really helped!
Your blog has been a godsend! I reset my printer. I think I will replace the laser unit but until I receive the part in the mail I can still use my printer. Again I cannot that you enough.
Tammi, thanks for the feedback–I’m glad I was able to help. That pesky error message is really annoying and overly persistent!