Our Sterling QVF-300 gas-powered furnace was blowing cold air and after inspecting the unit I discovered that the pilot light was not lit. I wrote up how to light the pilot light in another post, which you can visit here:
How to Light the Pilot Light of a Sterling Gas Heater Model QVF-300 Blowing Cold Air
After I got the pilot light lit it would still not light. I then realized that the “Blocked Vent Switch” had popped out and needed reset. After resetting the blocked vent switch by pushing in the red button the unit would heat for a while and then the blocked vent switch would trip, even though the vent wasn’t blocked. Time to replace the blocked vent switch.
How to Replace the Blocked Vent Switch Part 1J11R02833-002 of a Sterling Gas Heater Model QVF-300 Blowing Cold Air
Tools Needed:
- Phillips head screwdriver (get a good set here
if you don’t have one)
- Ladder (for space purposes I use a very handy Multi-Position Ladder
)
Parts Needed:
- Sterling Blocked Vent Switch Part #: 11J11R028333-002 (call Sterling at 413-564-5540 and talk to their customer service department to find a parts dealer in your area) Other numbers on part: L240F 206104
Step 1: Remove the lower screw of the blocked vent switch cover.
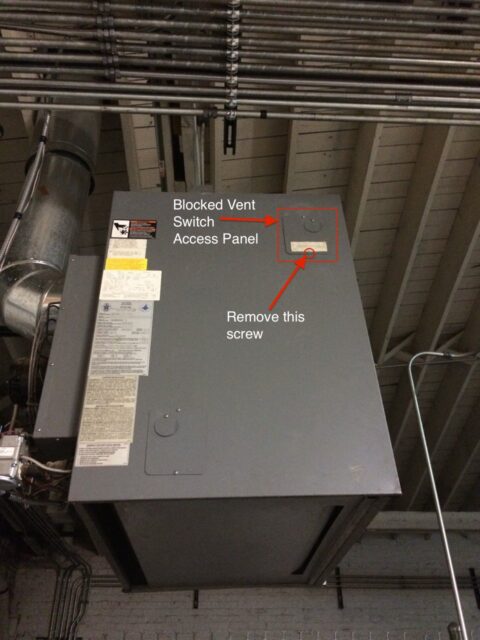 |
| Blocked vent switch access panel location |
Once you have the lower screw removed you can just rotate the panel up and out of the way. This will reveal the blocked vent switch:
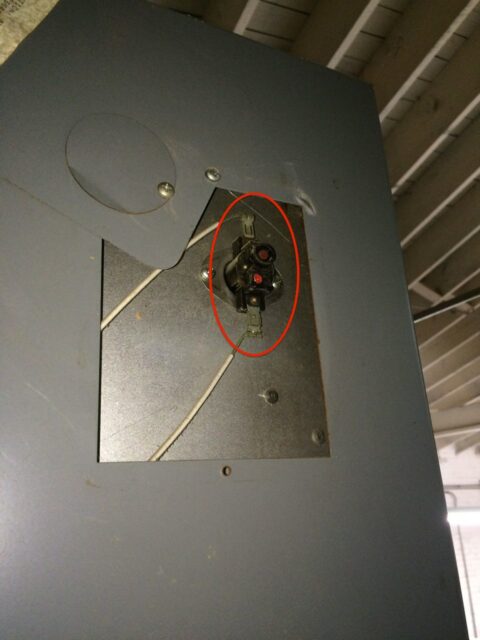 |
| Blocked vent switch |
Step 2: Remove the two blocked vent switch mounting screws.
On either side of the switch there is a phillips-head screw. I found them a bit difficult to remove–make sure you you don’t drop them down inside the furnace.
Step 3: Pull of the electrical connectors from either side of the switch.
They were easy to remove for me and was able to pull them off with my bare hands. Make sure not to pull on the wires but to grab a hold of the connector and pull them straight off. Also be careful to not allow the wires to get away from you and fall back inside the furnace. I didn’t have that happen to me and didn’t want to add work to my repair!
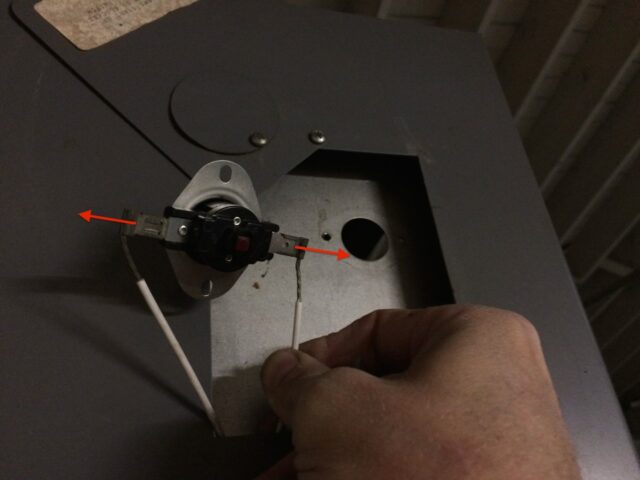 |
| Disconnect the wires from either side of the switch |
Step 4: Reconnect the wires to the replacement part.
The replacement part I received was slightly different in that the reset button was square and not round like the original (the new part is actually pictured above).
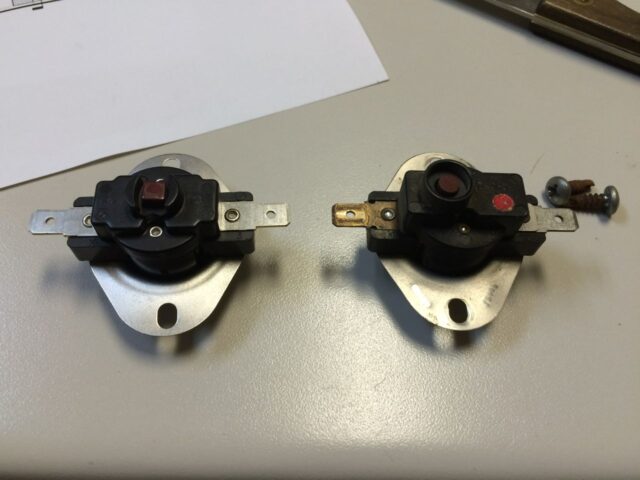 |
| The replacement part on the left and the original on the right |
Close-up of numbers on old part:
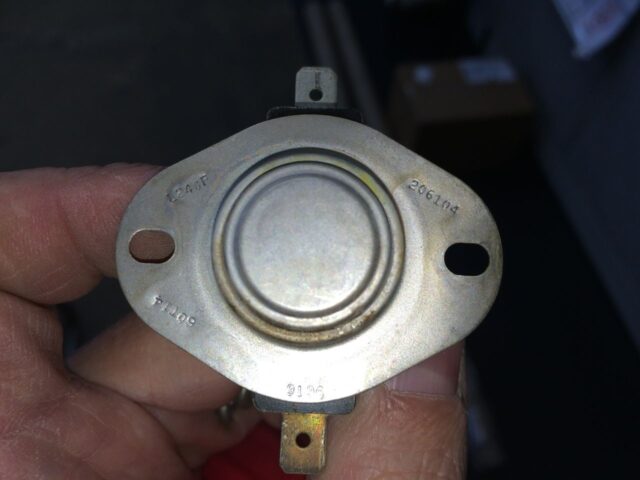 |
| Numbers stamped on part (but they are not the “part number”): L240F 206104 60114 9616 |
It doesn’t matter which wire you connect on which side because the switch only “shorts” the two wires together. I found that the way the wires were bend made it easy to see which one had gone on which side originally.
Step 5: Reinstall the two screws that mount the blocked vent switch to the body of the furnace.
Step 6: Close the access panel and reinstall the panel screw.
Now you are ready to enjoy a warm room again!
Amazon Associate Disclosure: As an Amazon Associate I earn from qualifying purchases. This means if you click on an affiliate link and purchase the item, I will receive an affiliate commission. The price of the item is the same whether it is an affiliate link or not. Regardless, I only recommend products or services I believe will add value to Share Your Repair readers. By using the affiliate links, you are helping support Share Your Repair, and I genuinely appreciate your support.

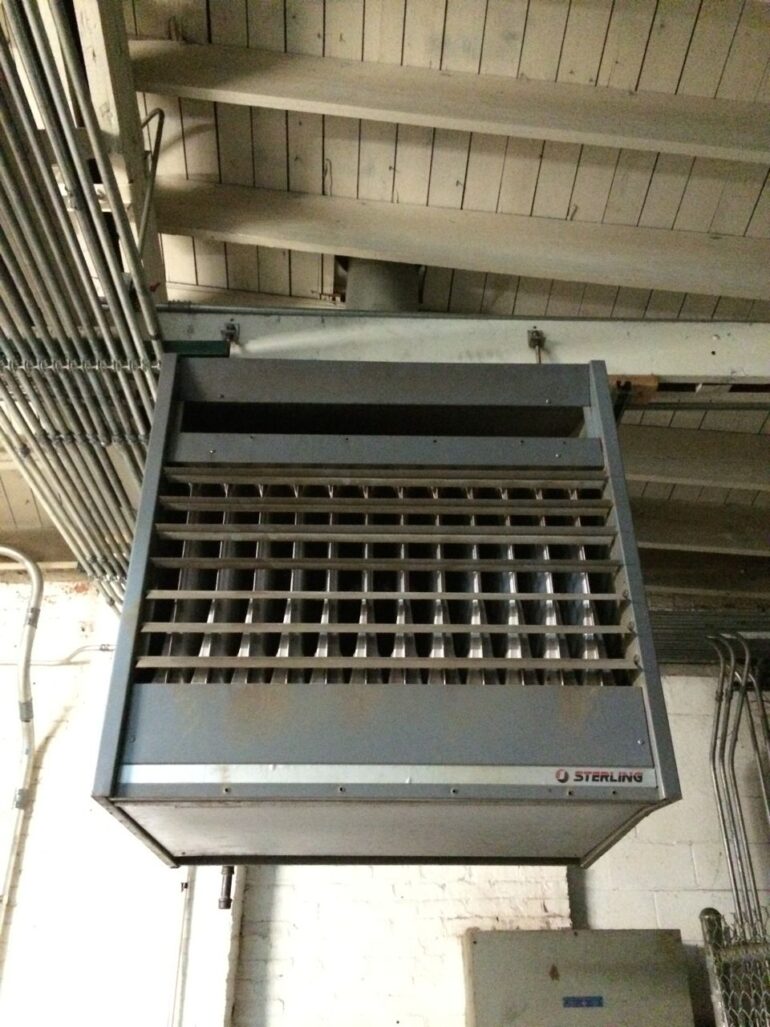
I have a similar unit that is propane… I need a picture of the back of the unit… particularly the Johnson controls box. All the wires have come out and I can’t find a diagram . Any help is greatly appreciated!
Barry, I don’t even live in the same state as that old bay furnace so I’m sorry but I can’t provide any more pictures. You should be able to google the model and find some schematics for how it should be wired though.