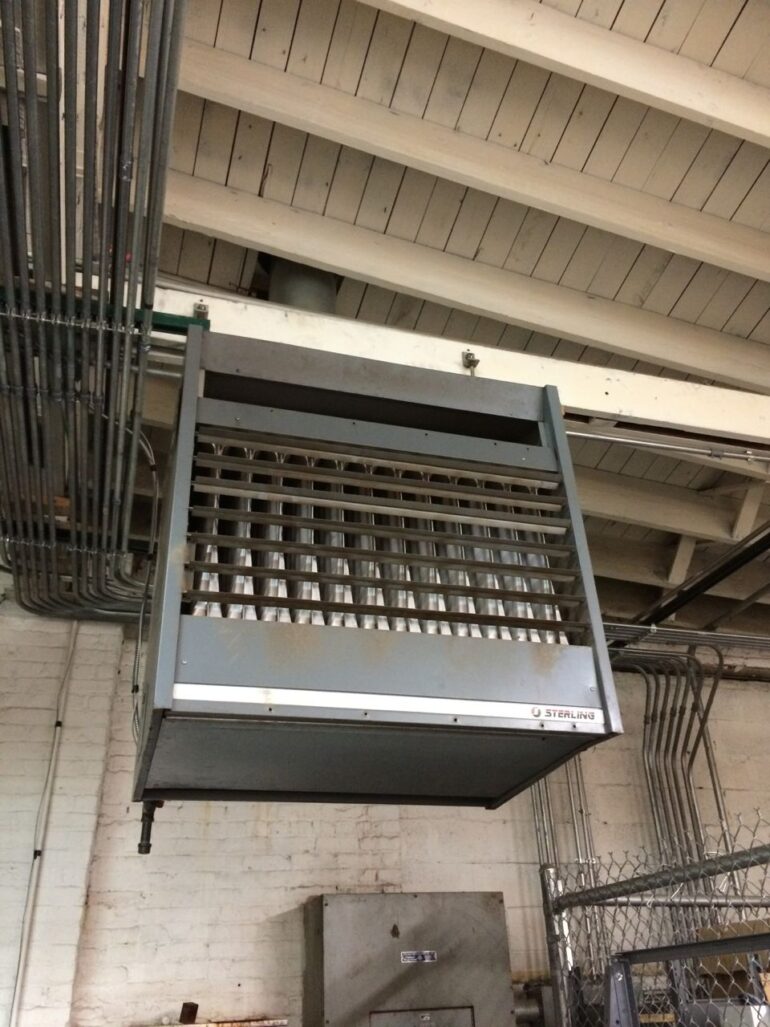
We have a Sterling Gas forced air heater in our bay area and it was blowing cold air. It turns out the pilot light was out. Here is how to light the pilot light. If you are not comfortable working with natural gas and HVAC equipment you should not attempt this, proceed at your own risk.
How to Light Pilot Light of Sterling Gas Heater Model QVF-300 Blowing Cold Air
Equipment:
- Sterling Gas Forced Air Heater Model QVF-300
Tools Needed:
- Phillips Screwdriver, pick up a good set here
if you don’t have one - Fireplace/Grill Lighter
- Flashlight (or the flashlight on your iPhone will work). If you want a nice rechargeable Maglight flashlight, you can get one here
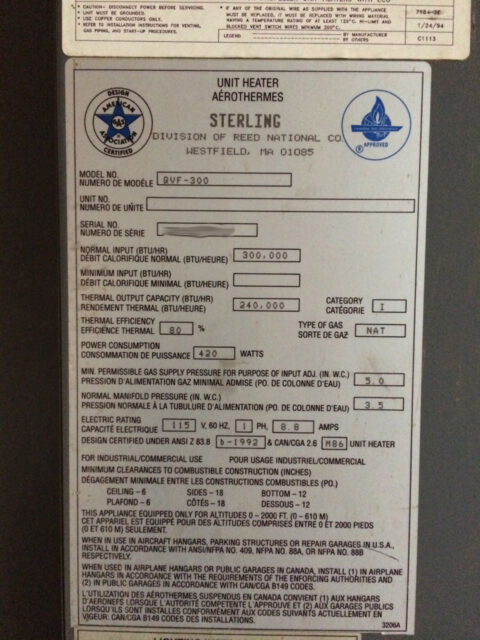 |
| Sticker on side of Sterling Model QVF-300 Gas Heater |
Step 1: On the left side of the unit locate the pilot light door.
There are actually two of these identical doors on our furnace but the pilot light is the lower left one:
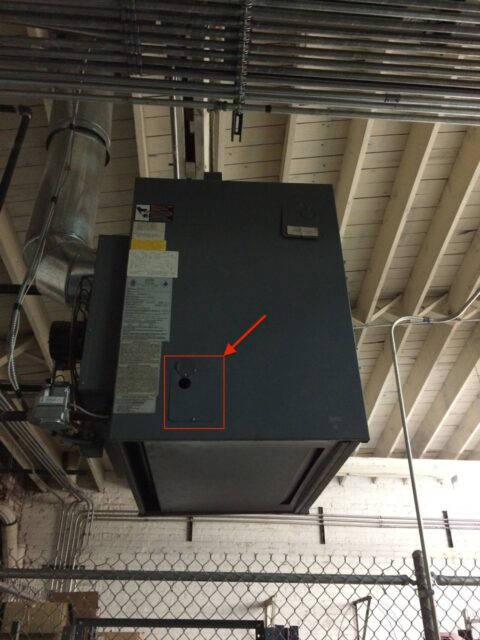 |
| Pilot light access panel |
Step 2: Check to see if the pilot light is already lit.
If you loosen the screw on the round door you can rotate it up and peer inside. If this is what you see below, the pilot light is already lit:
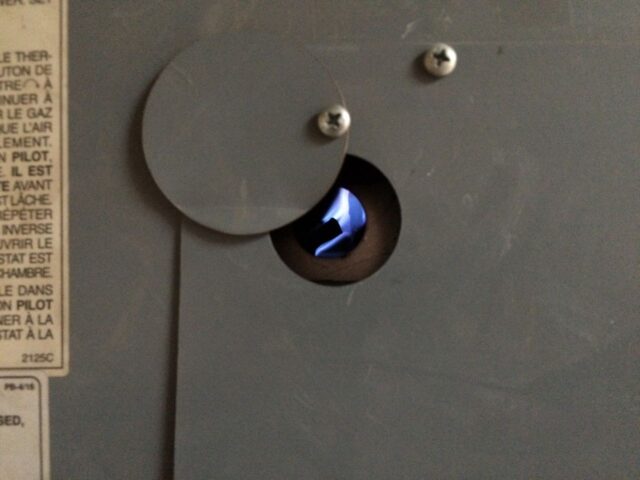 |
| Pilot Light Already Lit |
If your pilot light is already lit and you furnace still blows cold air you have some other issue, which I will not get into in this post. If your pilot is not lit then go to step 3.
Step 3: Locate the gas valve and put it into Pilot Light mode as seen below.
The red paint on the silver valve body is the marker showing you which of the modes you are in.
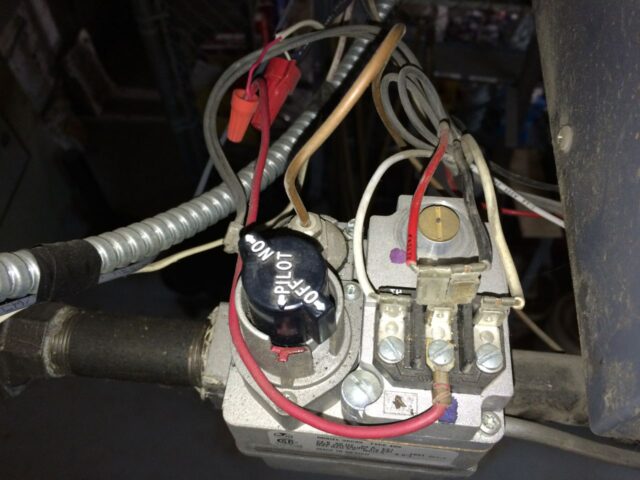 |
| Valve in Pilot Light Mode |
Note that the “wings” on the knob that say ON-> and <-OFF are in the notches so that you will be able to press the valve knob down.
Step 4: Hold down the button while the pilot light burns.
Press and hold down the black valve button down and light the pilot and continue holding the valve button down for approximately 1 minute with the pilot lit.
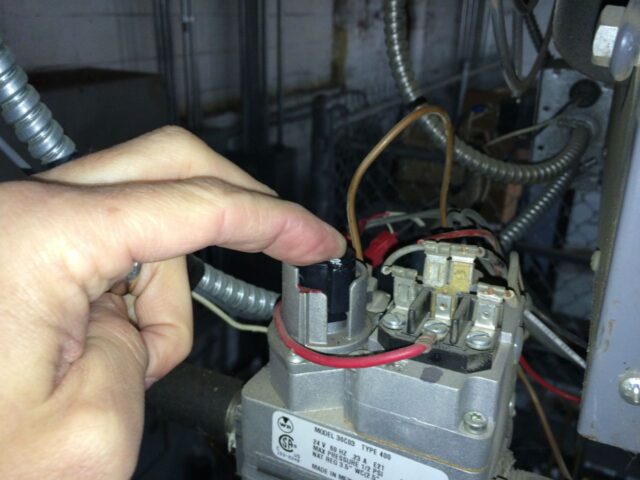 |
| Pressing down the gas valve button in the pilot light setting |
The gas will come out where the arrow points below:
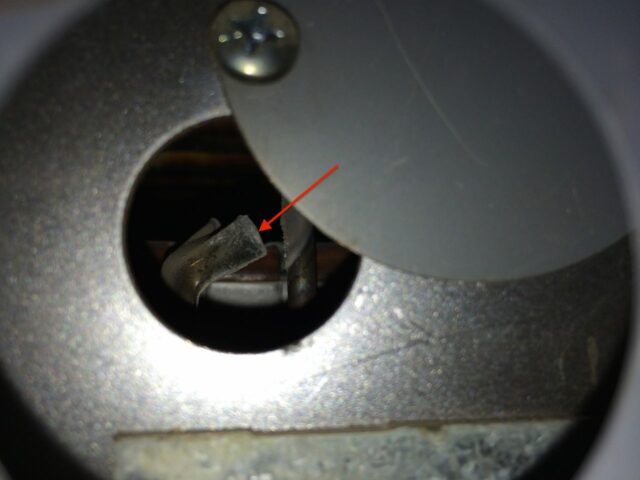 |
| The pilot light “pipe” and where the gas comes out |
IMPORTANT: Once you have the pilot light lit you must hold the valve down continuously for about a minute (with the pilot burning) so that the thermal couple has time to heat up so the pilot doesn’t go right back out. If you hold the valve button down for a minute and once you release the valve the pilot slowly goes out you most likely have a bad thermal couple. That’s another post that I haven’t had to write yet but it isn’t a hard repair.
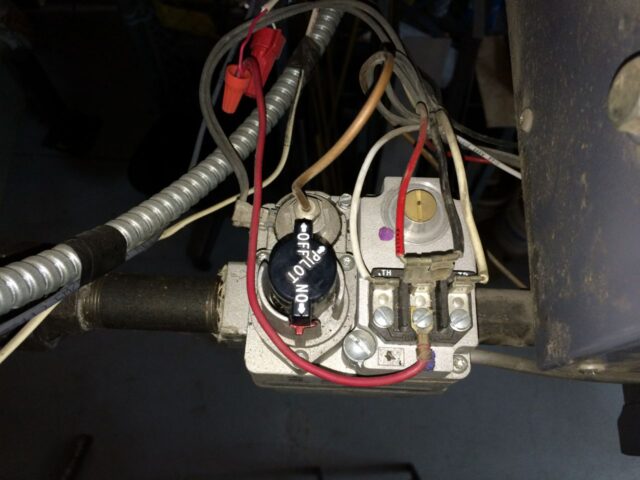
Step 5: Release the black valve and then turn the valve into the “On” position.
It should look like this:
 |
| Gas valve in “ON” position |
Note that <–ON points to the red paint on the valve body.
Step 6: Check the blocked vent switch.
After I completed step 5, even though the pilot stayed lit, the furnace continued to blow cold air. The blocked vent switch was tripped (popped out). You will need to remove one screw from the rectangle door and rotate the door open to expose the blocked vent switch. Originally I thought this was a “limit switch” but it is not (although this furnace does have a limit switch on it, that is not it in the picture below). Press in the red button as seen below:
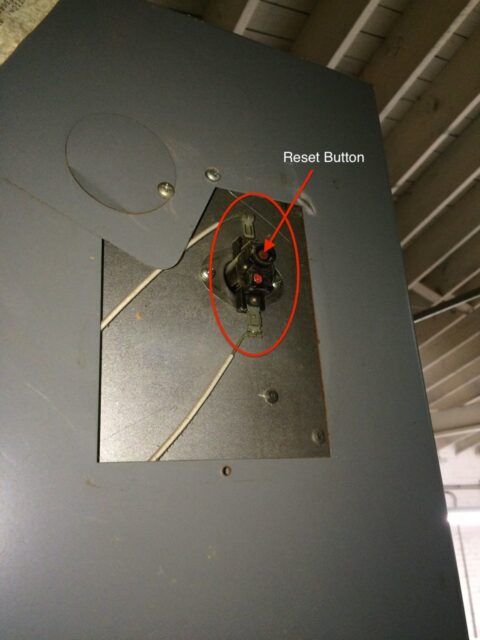 |
| Blocked Vent Reset button location |
The switch will stay in once you press it.
Note: I eventually discovered that the blocked vent switch was bad. After pressing it in the furnace would fire up and eventually it would begin to blow cold air again. When I checked the blocked vent switch above it wouldn’t be popped out all the way but when I would push on it, the furnace would blow hot air for a while but not for long. I wrote up how to replace this switch in the following tutorial:
Step 7: Close the panel doors and reinstall the screws in them securely.
Step 8: Using the thermostat, turn the furnace on and test it out.
You should be good to go at this point. If the fans come on but the furnace doesn’t blow warm air, check the pilot again to make sure it hasn’t gone out. If it keeps going out you most likely have a bad thermal couple. When ours goes out, which it eventually will, I’ll write up how to replace it for you 🙂
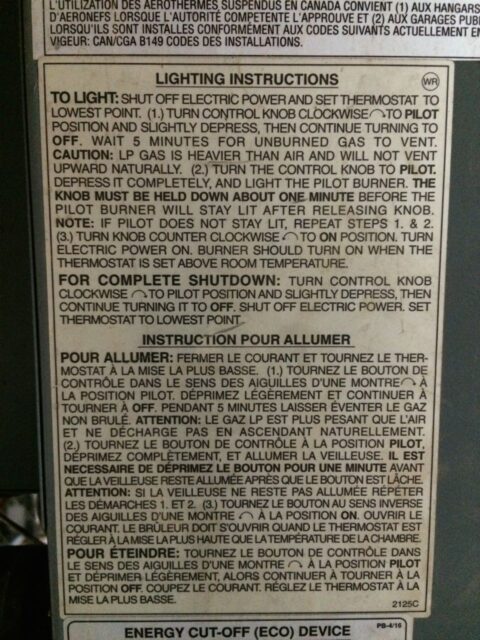 |
| Lighting Instructions Sticker on side of Furnace |
Amazon Associate Disclosure: As an Amazon Associate I earn from qualifying purchases. This means if you click on an affiliate link and purchase the item, I will receive an affiliate commission. The price of the item is the same whether it is an affiliate link or not. Regardless, I only recommend products or services I believe will add value to Share Your Repair readers. By using the affiliate links, you are helping support Share Your Repair, and I genuinely appreciate your support.

