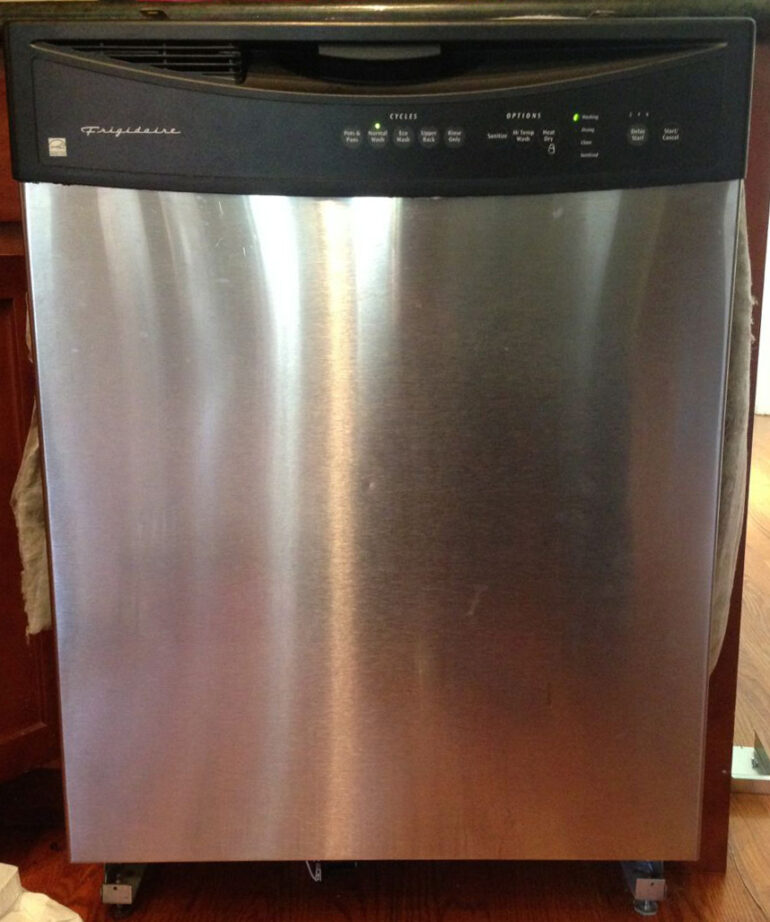
A friend’s dishwasher was not working and would not run through all the cycles. They had a repair man come out who told him the main motor was out. The repair company wanted over $300 for the repair so he asked if I could do it. Since it was diagnosed, which makes it a much easier repair, I accepted.
How to Replace Main Pump Motor on Frigidare FDB1502RGCO Dishwasher
Equipment:
- Frigidare FDB1502RGC0 Dishwasher (made by Electrolux Home Products)
Parts Needed:
- Frigidaire 154844301 Motor Kit
(which includes the 2 rubber o-rings)
Tools Needed:
- Screwdriver set
- Hex head driver set (or allen wrench set
), get a good Hex Head set here
.
- Flashlight. I’m using a rechargeable Makita flashlight I got in high school that came with a set and I highly recommend Makita. You can pick up a Makita 4-Piece Cordless Set here
.
If you don’t know what model of dishwasher you have, for this Frigidare, the model/serial number sticker was just inside the dishwasher when you open the door, by where the top (right) rack arm is:
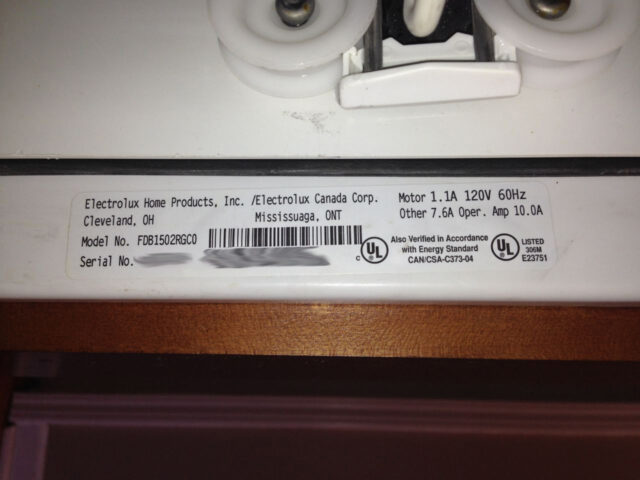 |
| Label on Frigidare FDB1502RGCO dishwasher |
If you have not ordered the part, you can get a good deal on it at amazon.com here. Here’s how to replace the main motor:
Step 1: Cut the power to the dishwasher.
For this repair it was easy since in this installation there was a switch under the sink that was labeled “dishwasher.” What that switch is really there for is to accidentally shut it off when you stuff things under your sink and then wonder why your dishwasher isn’t working! But, the switch right there made it easy to cut the power for this job:
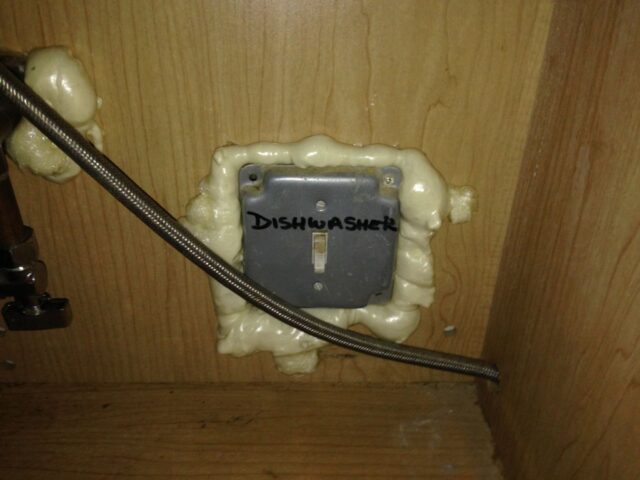 |
| Dishwasher switch |
In your situation you may need to go to your circuit breaker panel. If you don’t feel comfortable working around electricity then you shouldn’t attempt this repair–continue at your own risk.
Step 2: Remove the two cabinet mounting screws.
You’ll need to open the door of the dishwasher and they will be at the top of the dishwasher just under the cabinet lip. It is possible that they used caulk or adhesive on the metal tabs if you have some kind of stone-based counter top. In that case you may need to just use a knife or chisel to break the adhesive free. Remove the two screws.
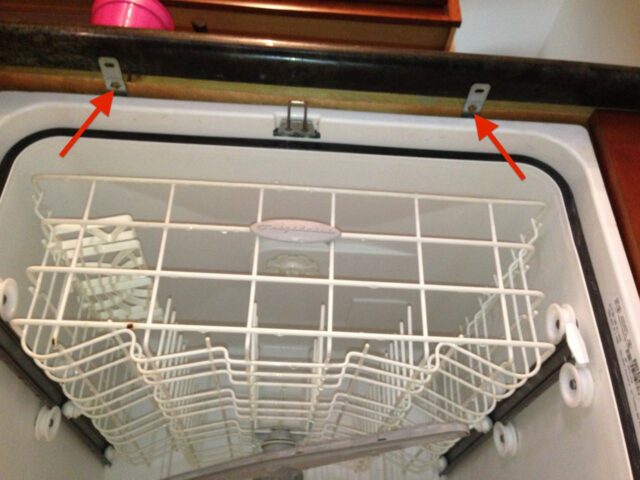 |
| Dishwasher under-cabinet mounting screws |
Step 3: Remove the toe kick panel of the dishwasher.
There is a screw on either side:
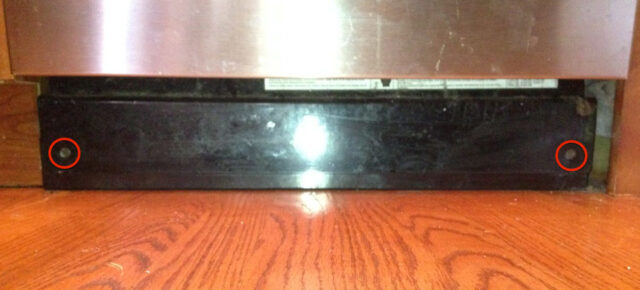 |
| Screw location on the toe kick panel |
Once you have the lower panel removed you can see the part we need to replace:
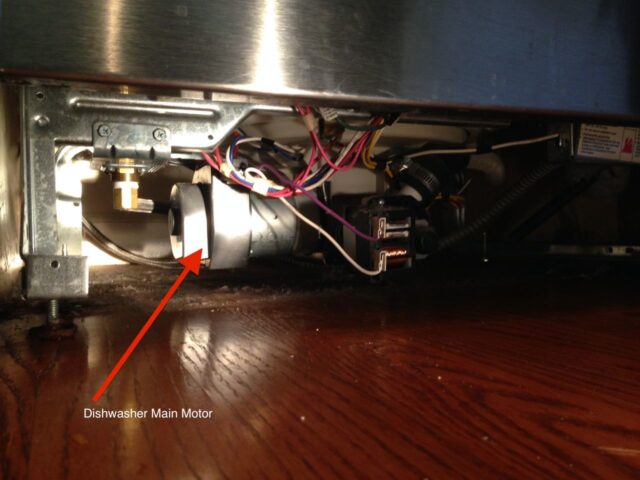 |
| Main motor |
Unfortunately you cannot replace the motor without taking the dishwasher completely out of the cabinet and laying it on its side so there is enough clearance to pull out the locking tab (it requires probably 5 inches of clearance under the pump).
Step 4: Carefully begin to move the dishwasher out and disconnect the water line, waste line, and/or power as necessary.
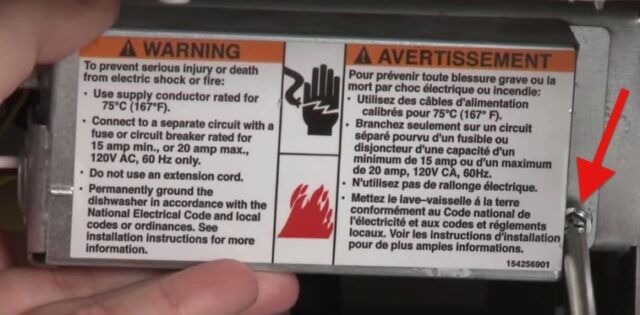
Depending on how long the water line, waste line, and electrical wiring are, you may be able to do this repair without disconnecting anything, but most likely you will need to disconnect at least one of them. I this case I began moving the dishwasher out and quickly could see that I needed to disconnect the electrical flexible conduit, which was the shortest of the three. To access the wiring connection there is one screw on the right side of a metal cover that encloses the electrical junction box on the dishwasher:
Here I have the wires disconnected and the locking ring loosened from the conduit:
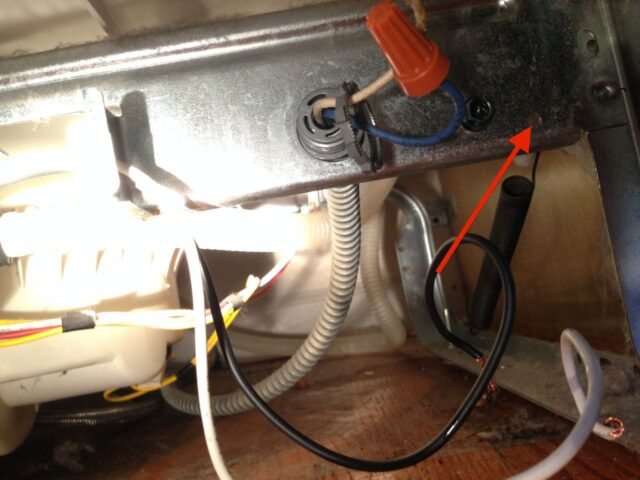 |
| Dishwasher Electrical Connection and location of screw that holds the cover over the junction box |
I disconnected the wires, put the wire nuts back on the normally hot wires, removed the locking ring from the end of the flexible conduit, and pulled the wire nuts through the hole in the body of the dishwasher to free it from the power connection.
Step 5: Carefully lay the dishwasher on its right side.
I had another guy help me do this and we actually picked the dishwasher up and then laid it on its side. You may want to have some towels handy–when I did this a small amount of water leaked out on the floor.
Step 6: Disconnect the electrical connector of the main pump.
There is a tab on the back side of the white electrical connector you must depress to disconnect it.
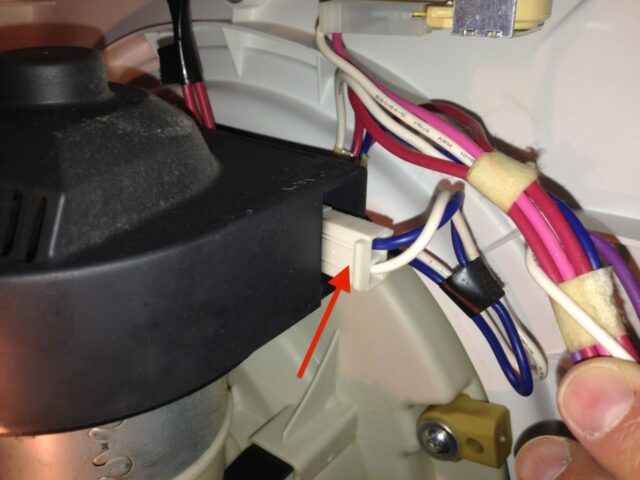 |
| Main pump electrical connector |
Here’s a good view of the tab you must depress to release the connector:
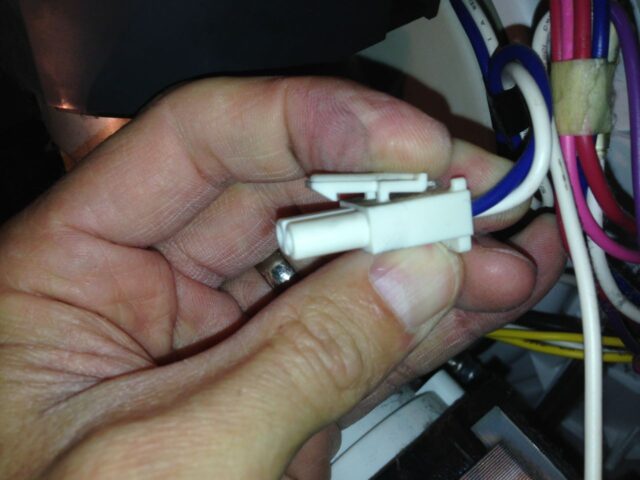 |
| Here I am depressing the tab that allows you to disconnect the electrical connector |
Step 7: Remove the 2 screws from the main pump locking tab.
I don’t know what to call it but the black metal tab that locks the pump into place (I’ll call it a locking tab) has two CRV-3 head screws holding it in place–remove them both and set aside for later. You could use an allen wrench or a driver tip like I did to remove them. If you don’t have a set of these, you can get the same set I have, which is so handy to have on hand, here
.
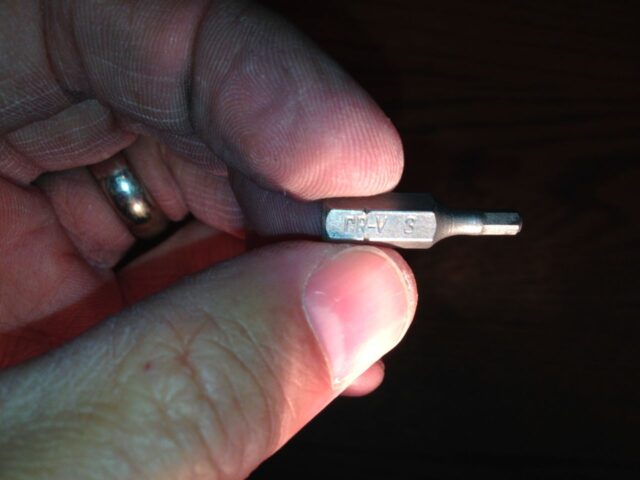 |
| CR-V 3 Driver bit for removing the two screws from the main pump locking tab |
The screw locations circled in red below:
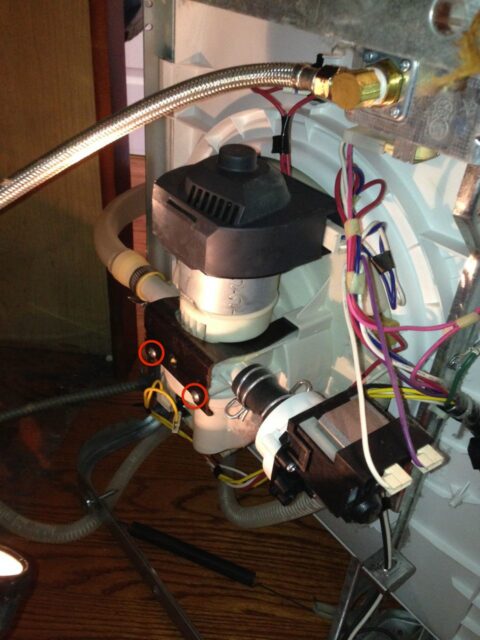 |
| Main pump locking tab screw locations |
Step 8: Slide the locking tab straight off.
It should slide straight off very easily:
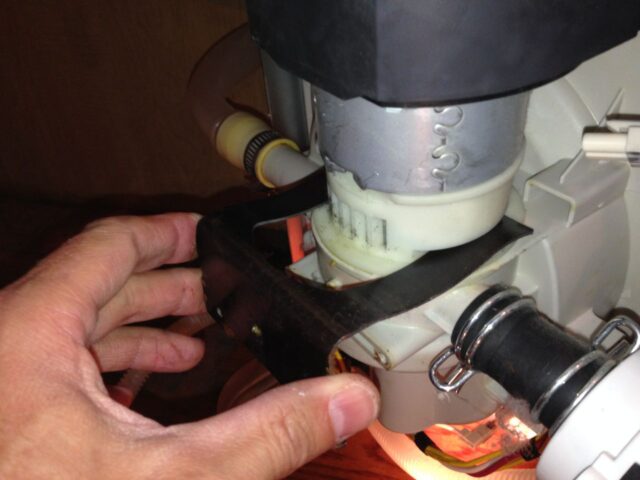 |
| Removing the main pump locking tab |
Step 9: Pull the main pump straight up and out of the dishwasher.
You may need to twist it a bit but it should come out easily.
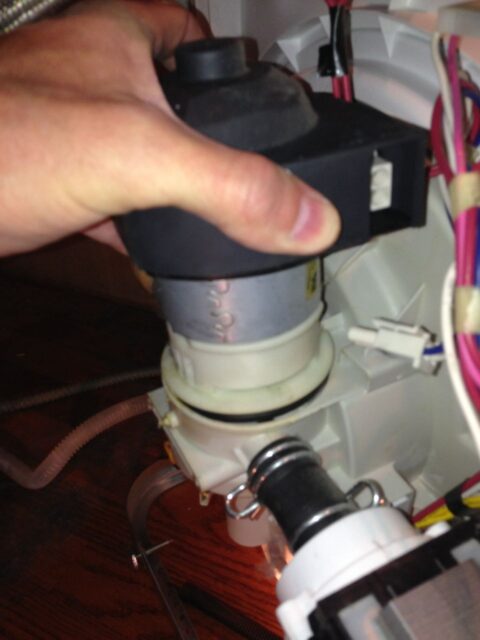 |
| Removing the pump–pull straight up |
Here’s what it looks like with the pump out:
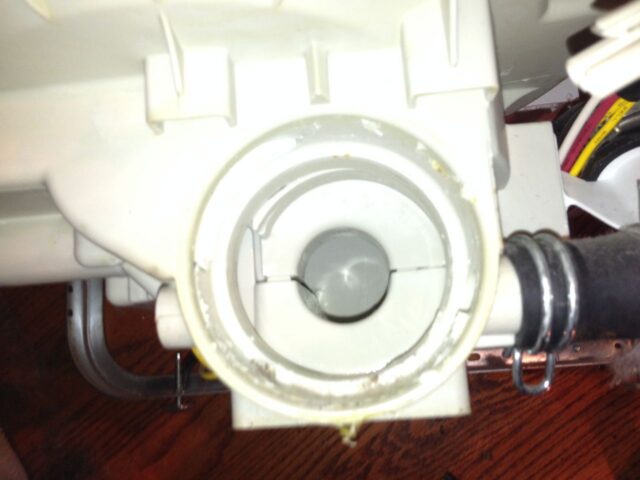 |
| The view with the pump removed |
It turned out that there was a chicken bone wedged in the impeller of the pump, which is very likely why it wasn’t working. I forgot to take a picture of it 🙁 Since we had got this far we went ahead and replaced the motor anyway, although removing the bone may have fixed it. Who knows how that chicken bone got past the filter screen.
Step 10: Place the o-rings on the new pump.
Your pump should have come with two new rubber o-rings, a larger and a smaller one. Put them on the new pump as seen below:
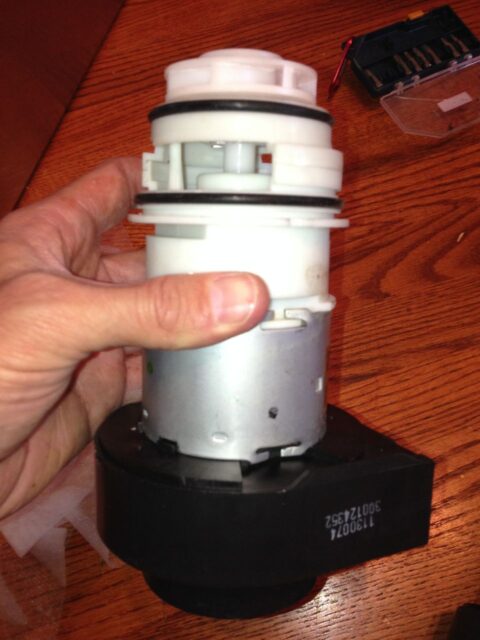 |
| The smaller o-ring goes on top, as seen in the picture above |
Step 11: Insert the new pump down into the dishwasher.
There is a notch on the back of the pump that should line up as seen below. The white plastic flange of the pump should rest all the way down on the dishwasher as demonstrated below as well:
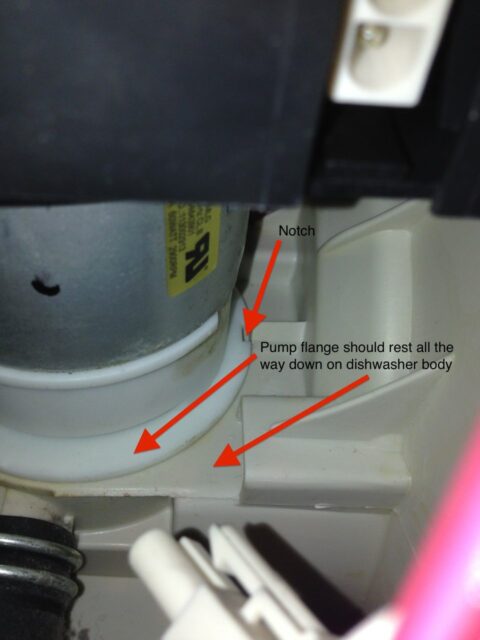 |
| Notch on pump should line up and the pump should sit all the way down |
Step 12: Reconnect the pump’s electrical connector.
The tab should lock it in place. There’s only one way to re-connect it because of the connector shape:
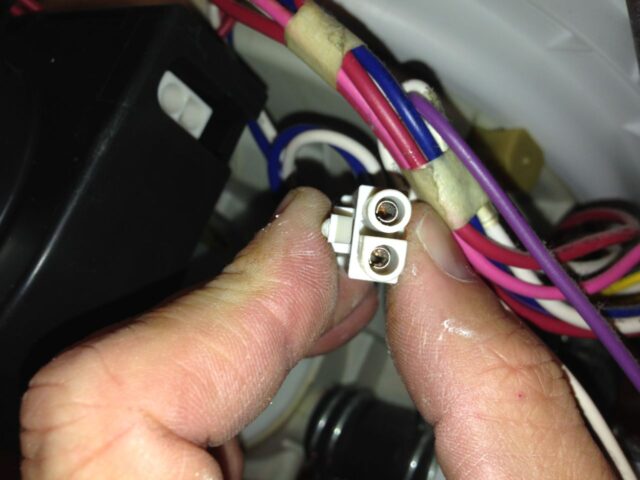 |
| Electrical Connector–it can only fit one way, which is good |
Step 13: Reinsert the black metal locking tab.
It should rest on top of the plastic flange of the pump and insert into the two holes of on the dishwasher and hold the pump down in place.
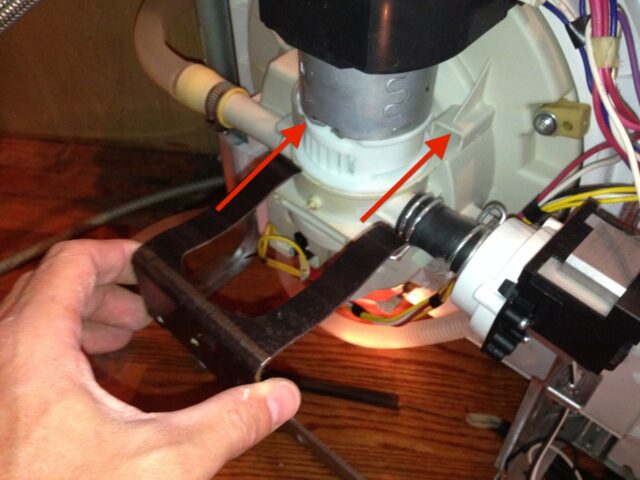 |
| Reinstalling the main pump locking tab |
Step 14: Reinstall the 2 screws that hold the locking tab in place.
Step 15: Sit the dishwasher back on its feet.
Slide it back into the opening being careful to keep the insulation laying flat over the top and sides of the dishwasher. Make sure the wast line snaps into its notch where it runs around the right side of the dishwasher.
Step 16: Reconnect the wiring and or hoses you disconnected in Step 4.
Step 17: Test the dishwasher.
At this point you should run the dishwasher to make sure it works correctly. Check for water leaks. The water line for our dishwasher had come loose where it connects under the sink and we had to tighten that fitting. We also found that the rubber gasket around the opening of the dishwasher door was leaking as well. I took the gasket out and cleaned it and then reinstalled it upside down, which made it be like a brand new gasket. The door shut a little more difficulty but it didn’t leak anymore.
Step 18: Slide the dishwasher back in place and reinstall the mounting screws.
Step 19: Reinstall the toe-kick panel.
Now you’ve saved yourself well over $100 doing it yourself!
Other Resources:
Amazon Associate Disclosure: As an Amazon Associate I earn from qualifying purchases. This means if you click on an affiliate link and purchase the item, I will receive an affiliate commission. The price of the item is the same whether it is an affiliate link or not. Regardless, I only recommend products or services I believe will add value to Share Your Repair readers. By using the affiliate links, you are helping support Share Your Repair, and I genuinely appreciate your support.

