If you aren’t using an adblocker in your web browser you don’t even know what you aren’t missing–like all those nasty advertisements that are designed to shock you and catch your attention. They are tasteless and often very inappropriate and I don’t want to see them. And you don’t need to be looking at them at all. Here’s an example of yahoo.com’s website with (left) and without (right) Adblock Plus:
 |
| Yahoo’s homepage with and without Adblock Plus |
This post comes in a series of posts all along the theme of blocking content you don’t want to see on the internet. Here are all the posts in this series:
I recommend AdBlock if you are browsing with Chrome:
- How to Install AdBlock for Chrome in Windows 8
- How to Install AdBlock for Chrome in Windows 7
- How to Install AdBlock for Chrome in Windows XP
Adblock Plus is required for Internet Explorer (AdBlock won’t run in I.E):
- How to Install Adblock Plus for Internet Explorer in Windows 8 (this post)
- How to Install Adblock Plus for Internet Explorer in Windows 7
- How to Install Adblock Plus for Internet Explorer in Windows XP
How to Install Adblock Plus for Internet Explorer in Windows 8
If you are running Windows 8 and Internet Explorer, here is how to install Adblock Plus and stop seeing all those ads…
Step 1: Go to the official Adblock Plus website.
Click on the following link to go to the Adblock Plus official website: https://adblockplus.org/en/internet-explorer
Step 2: Download the software for free.
Click on the green “Install for Internet Explorer” button.
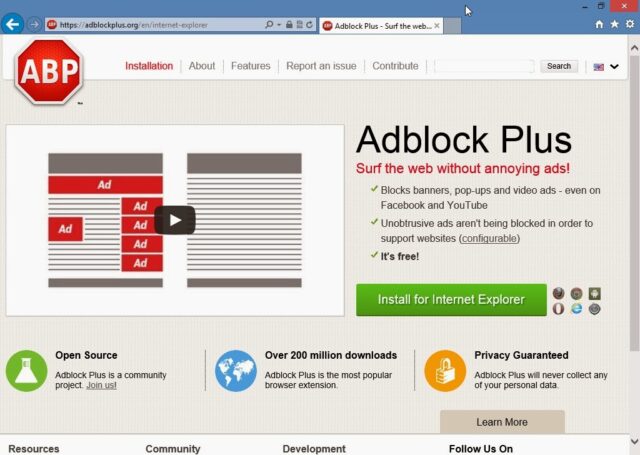 |
| The official Adblock Plus website |
Step 3: Run the Adblock Plus installer file.
A menu will pop up from the bottom of your browser window asking you what you want to do. Click the “Run” button.
 |
| Tell Internet Explorer to Run the Adblock Plus installer file when it is done downloading by clicking the “Run” button |
Step 4: Install Adblock Plus.
A window will pop up entitled, “Adblock Plus for IE Setup.” Click on the “Install” button.
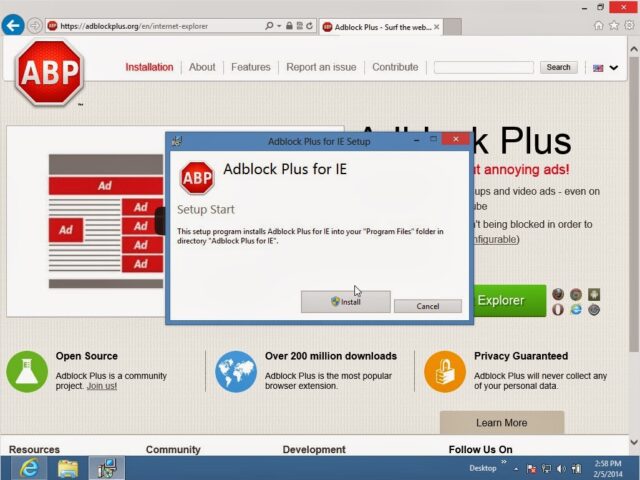 |
| Adblock Plus for IE Installer |
Step 5: Allow the Adblock Plus software to make changes to the computer.
A “User Account Control” window will pop up asking you “Do you want to allow the following program to make changes to this computer?” Click the “Yes” button.
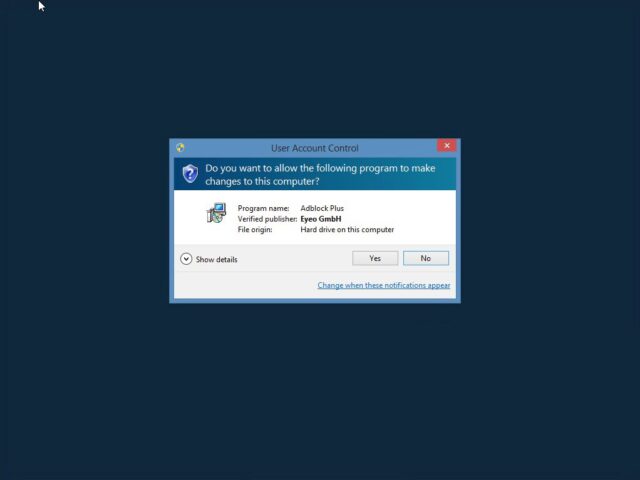 |
| Tell Windows to give the Adblock Plus installer program permission to make changes to this computer |
Step 6: Finish the installation.
You should then get a window that says, “Setup Successful.” Click the “Done” button.
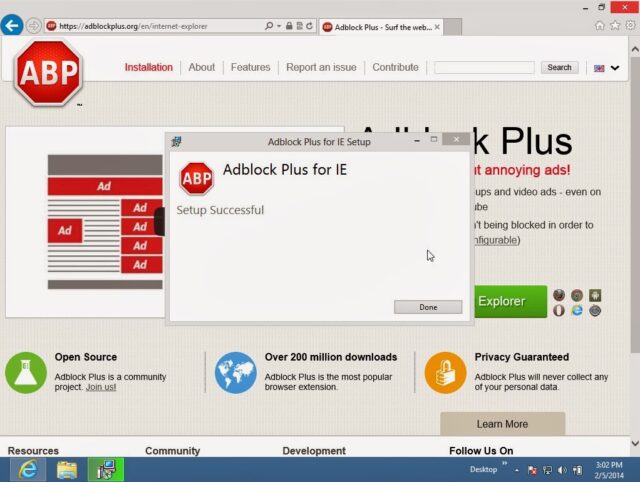 |
| Successful installation of Adblock Plus for IE |
Step 7: Close and re-launch Internet Explorer.
The Adblock Plus add-on will not try to load until you close and re-launch Internet Explorer.
Step 8: Enable the Adblock Plus add-on.
A menu will pop up from the bottom of the Internet Explorer window stating, “The ‘Adblock Plus for IE Browser Helper Object’ add-on from ‘Eyeo GmbH’ is ready for use.” Click the “Enable” button.
 |
| Enable the Adblock Plus Helper Object Add-On by clicking the “Enable” button |
Step 9: Close and re-launch Internet Explorer again.
Adblock Plus needs you to close and re-launch Internet Explorer one more time now that you’ve given it all the permissions it needs. Once you re-launch Internet Explorer the following window will pop up:
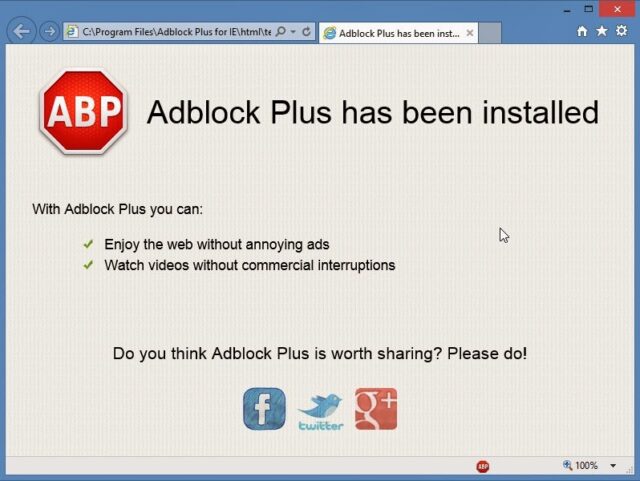 |
| Adblock Plus will show this window once you have re-launched Internet Explorer the 2nd time |
You can just click the red X at the top right of that window to close it.
Step 10: Show the “Status Bar” in Internet Explorer so you can easily access the Adblock Plus menu.
If you ever have a website that is not displaying properly it could be that more than just ads were being blocked and you can temporarily disable Adblock Plus via it’s red ABP stop sign icon in the status bar at the bottom of the Internet Explorer window. Note: to get the menu to show up at the top of the Internet Explorer window press the Alt key (just left of the spacebar).
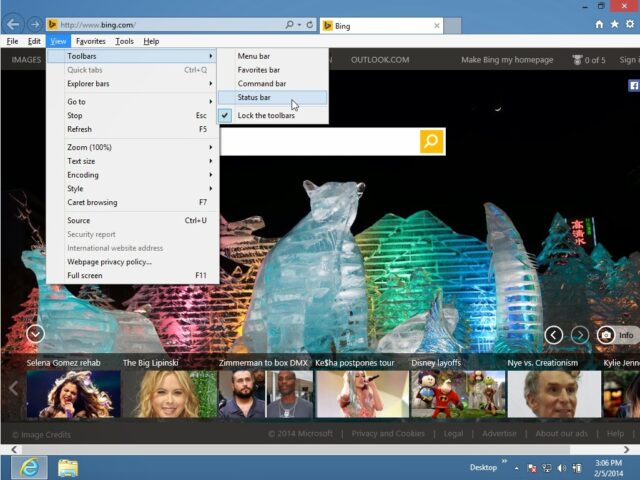 |
| Enabling the Status Bar tray so you can see the ABP Icon |
Here you can see the Red ABP stop sign icon in the status bar tray:
| The Adblock Plus Red ABP stop sign icon in the Status Bar |
Now you will be seeing a LOT less ads.
Amazon Associate Disclosure: As an Amazon Associate I earn from qualifying purchases. This means if you click on an affiliate link and purchase the item, I will receive an affiliate commission. The price of the item is the same whether it is an affiliate link or not. Regardless, I only recommend products or services I believe will add value to Share Your Repair readers. By using the affiliate links, you are helping support Share Your Repair, and I genuinely appreciate your support.

