Hardware:
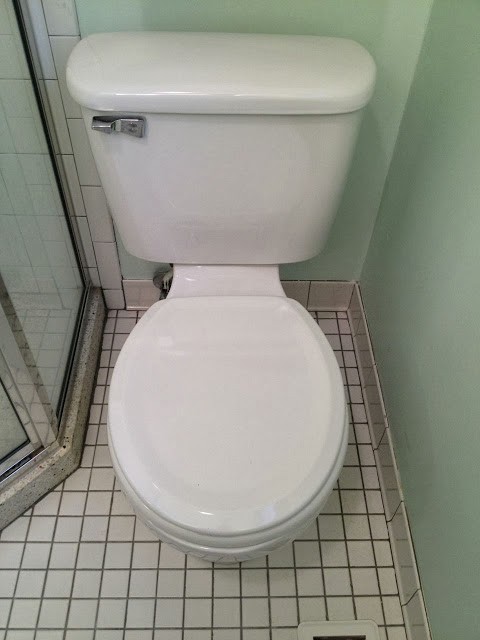
- Standard tank gravity-flush toilet
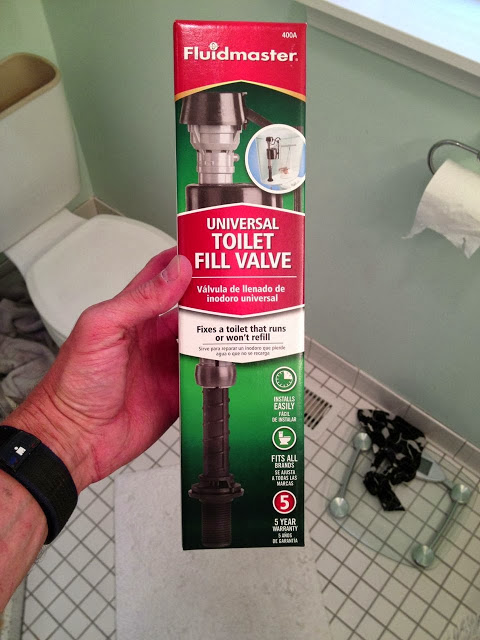
- Fluidmaster Universal Toilet Fill Valve
Tools Required:
- Bare hands
- Possibly a channel lock wrench
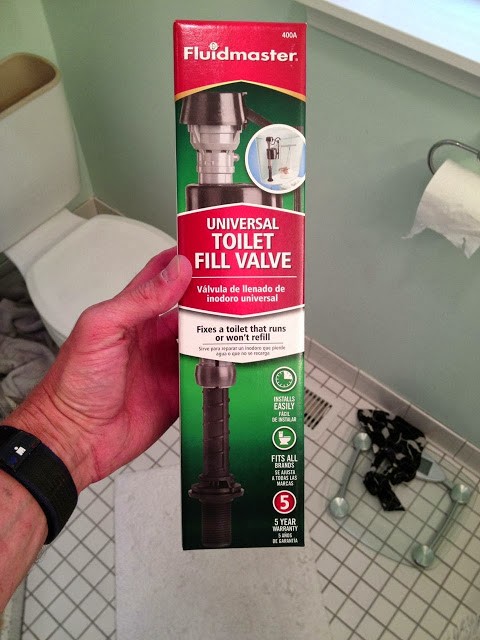 |
| Fluidmaster Universal Toilet Fill Valve Kit |
If you have a toilet that has any of the following symptoms, you most likely need to replace your toilet tank fill valve:
- Your toilet makes a high pitch noise (humming or screaming) after you flush it and when the tank is filling
- Your toilet is always running (this may only be a tank flapper issue though)
- When the old style ball and float arm just wears out and rusts apart
If you have any of those issues you don’t need to replace the entire toilet, you don’t need to call your plumber, you can fix it yourself. Here’s the steps to replace your toilet tank fill valve:
Step 1: Buy a replacement toilet fill valve kit. You can get them at virtually any hardware store or my favorite store,
amazon.com. I suggest the valve style I have pictured above, where the float wraps around the fill valve pipe, it is the best kind. No one uses the old style with the rod with a float ball on the end of it anymore. If you have one of those then it’s time to swap it out. I also suggest that you buy the kit that includes the flapper. Somehow, this last time I accidentally purchased one that didn’t include it and I was disappointed when I discovered what I’d done.
Step 2: Shut off the toilet’s water supply. You don’t need to shut off the entire house, only the valve below the toilet tank. Regardless of the water valve style, you’ll be turning it clockwise to turn the water off. If it is a round knob you may need to turn it many times clockwise to get it to turn off. If your valve is like the one I have and shown below, you only need to turn it a quarter turn:
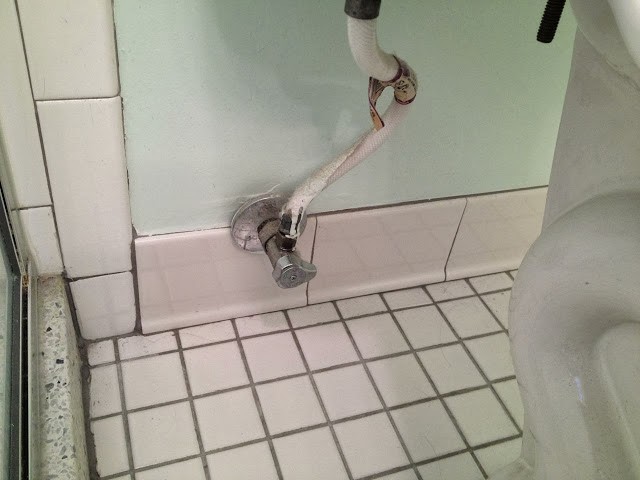 |
| The toilet water supply valve |
Step 3: Flush your toilet to drain out the water from the tank. There will be a little water remaining but you definitely will have a mess if you don’t flush your toilet before moving forward (and you’ll have a bigger mess if you skip Step 2!).
Step 4: Put something down to catch the remaining water that will drain from your tank once you remove the tank valve. Depending on your tank’s design, and the height of the lip that the flapper rests against, there may be up to an inch of water remaining in your tank even after you have turned off the water and flushed the toilet. It’s best to put a bucket underneath where the hose connects to the tank. I underestimated the amount of water I was going to deal with and only put down a towel and I wish I would have used a bucket. I had to get another towel!
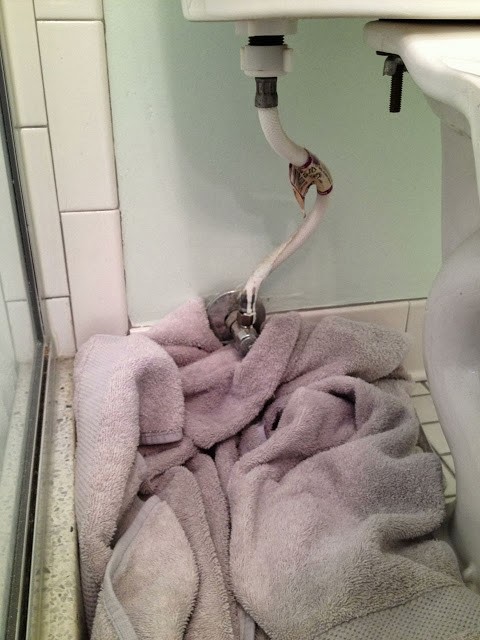 |
| I only used a towel but I recommend using a bucket! |
Step 5: Disconnect the water line from the bottom of the tank. Most modern toilets will have a butterfly coupling nut on the water line to connect the hose to the tank and you will be able to loosen it with your bare hands. Once in a while I use a channel lock pliers if it is too tight for me. You may need to use a crescent wrench if it doesn’t have a butterfly nut on it. Turn the nut counter-clockwise to loosen it (an easy rhyming way to remember: lefty loosey, righty tighty) See the picture below to see the nut you need to loosen:
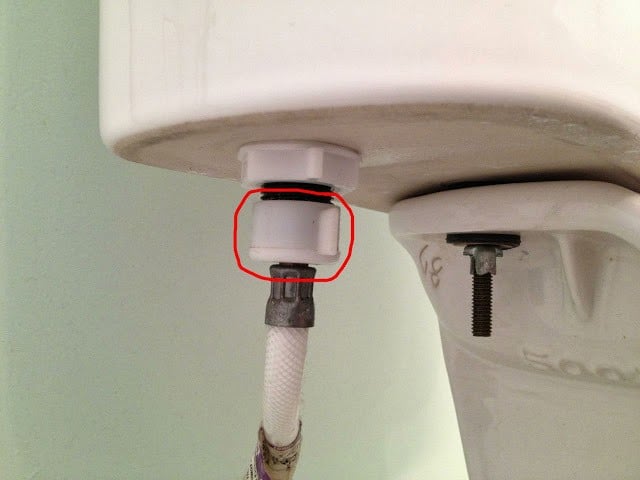 |
| Butterfly coupling nut on the tank side of the water supply line to the toilet’s tank |
Step 6: Remove the tank valve’s locking nut on the bottom of the tank. This is right above where you just removed the water supply line. Turn counter-clockwise to remove.
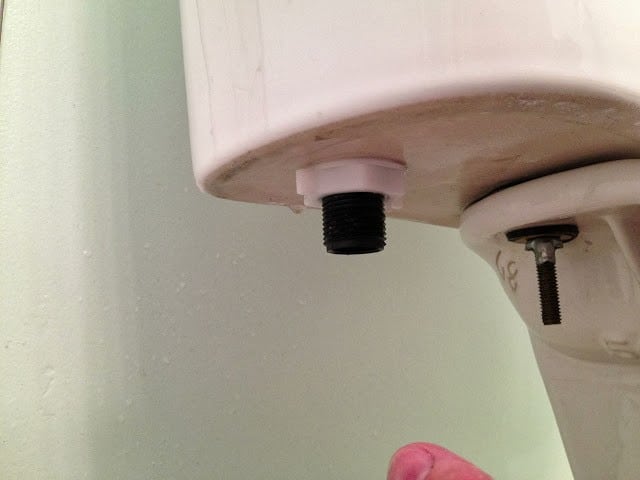 |
| Completely remove the tank valve’s locking nut. |
Step 7: Slide the angle adapter up and off the overflow pipe and then remove the tank fill valve from the tank. The angle adapter is the part circled in red below. It also serves as a silencing mechanism because it sprays the water down the edge of the tube versus spraying the water into the filling tank. Lift the old fill valve up and out of the tank and set aside.
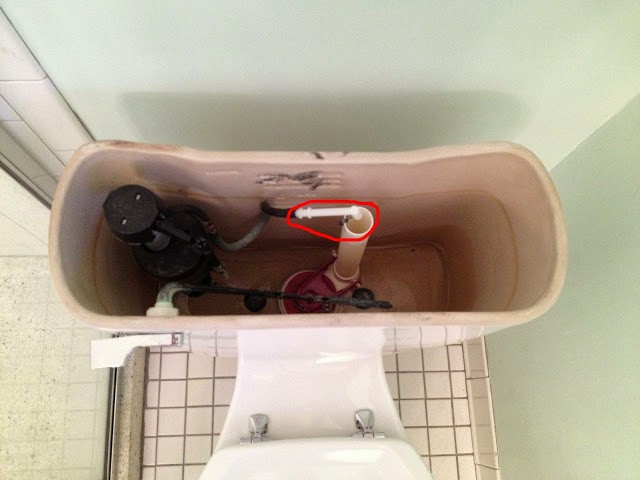 |
| The refill tube is connected to the angle adapter, which must be disconnected. |
Step 8: Separate the shank washer from the cone washer. They will probably be connected as shown below, with the cone washer in the middle:
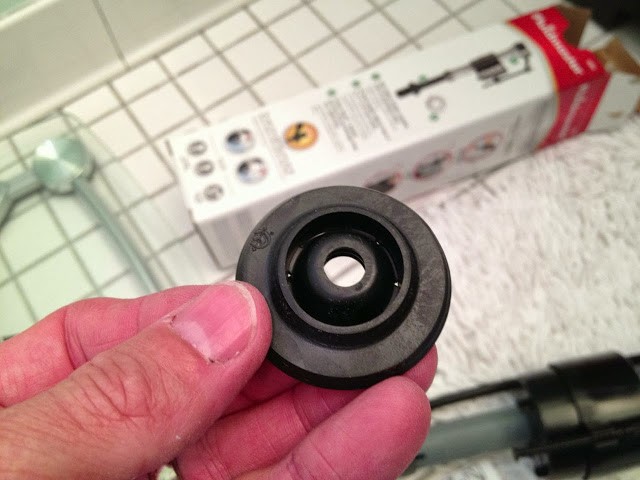 |
| The shank washer and cone washer are molded into one piece with tabs connecting the two separate parts |
Using a knife carefully cut the two parts apart:
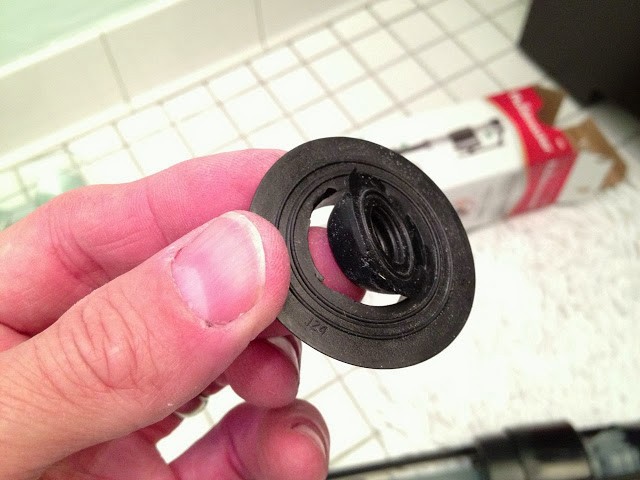 |
| Separating the shank washer and cone washer |
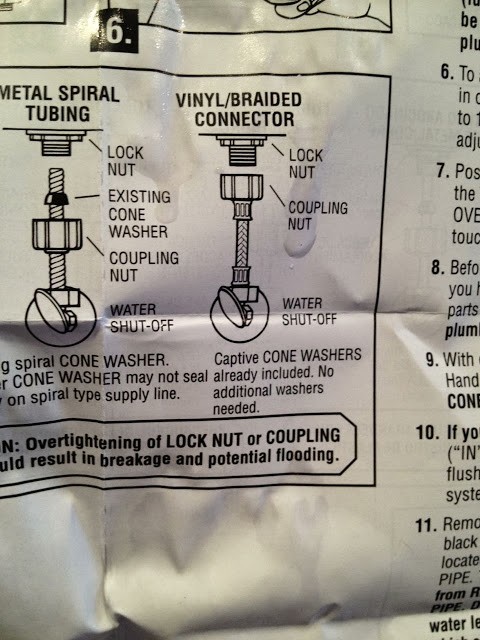
In my case all I need is the shank washer. Depending on the type of hose connection you have, you may need to use different parts. I’m going to assume you are using a vinyl or braided connector as shown in the diagram below, on the right:
Step 9: Install the Shank Washer on the bottom of the valve body. Note that the flat side of the shank washer goes towards the top and the lip goes down through the hole in the tank on the bottom:
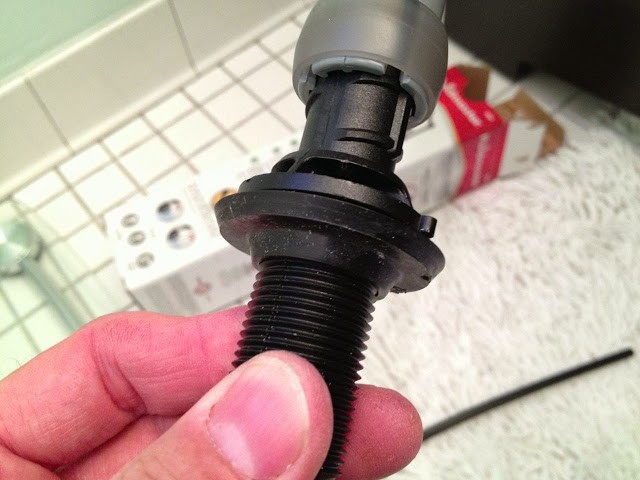 |
| The Shank Washer Installed |
Step 10: Insert the Valve down into the tank and reinstall the lock nut on the outside of the bottom of the tank. The lock nut goes flat side up (toward the tank).
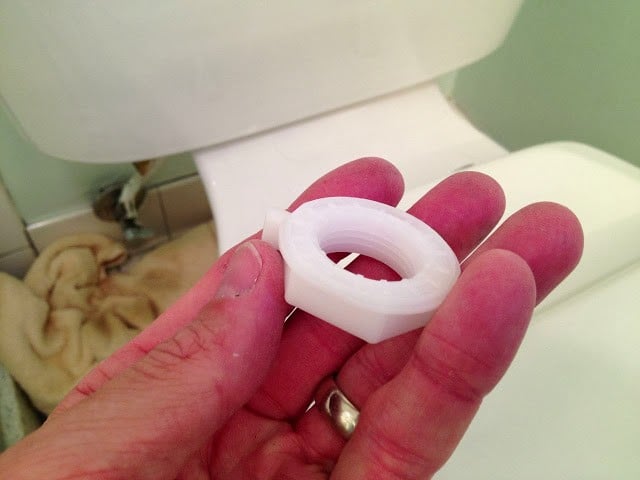 |
| The side facing up is the side that touches the bottom of the tank. |
All you need to do is hand tighten the lock nut. If you use a wrench, since the nut is plastic, you may accidentally over tighten and damage the nut. I usually tighten it as tight as I can possibly tighten it with my hand.
 |
| The tank valve lock nut reinstalled. |
Step 11: Reinstall the water line. Again, all you should need to do is tighten it by hand.
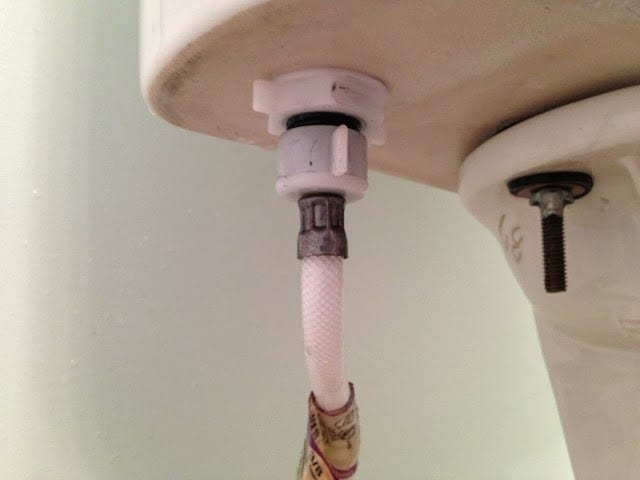 |
| The water line reinstalled. |
Step 12: Locate the water fill tube and angle adapter. They will look something like these:
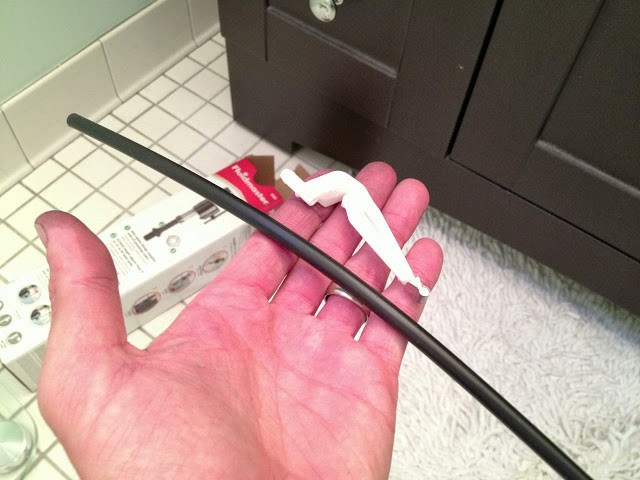 |
| The new water fill tube and angle adapter. |
Step 13: Install the water fill tube onto the angle adapter. You can do this simply by pushing the fill tube onto the tip of the angle adapter:
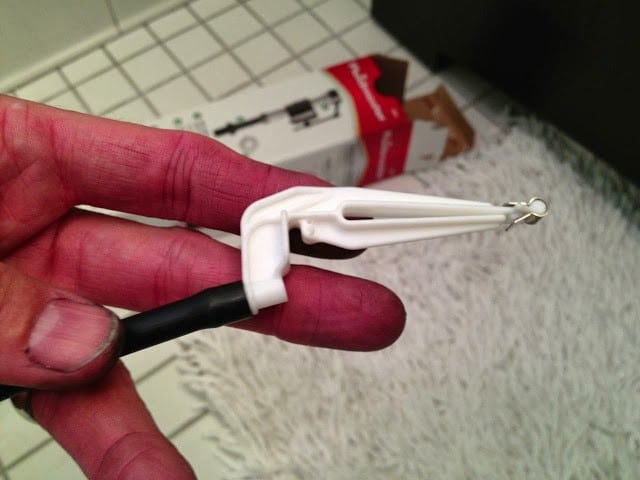 |
| Fill tube installed on the angle adapter. |
Step 14: Install the angle adapter on the overflow tube and determine the length to cut the tube. This tube and angle adapter will cause the water filling the tank to spray at a very shallow angle against the side of the fill tube and reduce the noise of the water running into the tank. Once you have installed the angle adapter onto the overflow tube hold the refill tube approximately where it will run all the way to the fill valve nipple as shown:
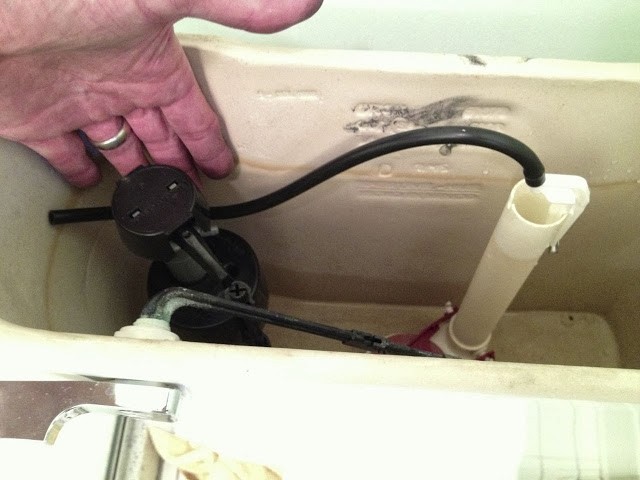 |
| Running the refill tube to the fill valve nipple to estimate the length to cut it. |
Step 15: Cut the refill tube to length. I used my pocket knife but you can use a scissors or carpet knife.
Step 16: Install the other end of the refill tube onto the fill valve nipple. Hold the valve with one hand to support it while you push the hose on the valve nipple. You’ll need to hold the refill tube closer to the end than I was in this picture or the hose will bend when you are pushing.
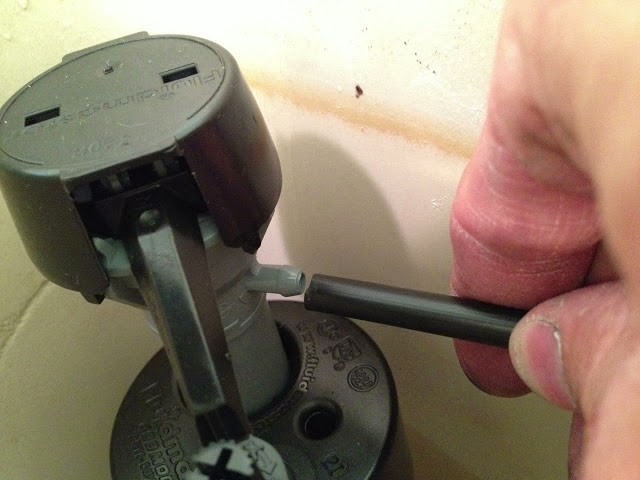 |
| Inserting the refill tube onto the fill valve nipple. |
Step 17: Turn the water back on. Once you turn the water on the tank should immediately fill. Watch for any water leaks below the tank where the water line connects to the fill valve. At this point I noticed that the water level was quite a bit lower than it was before. See the difference between the stain on the side of the tank and the water level:
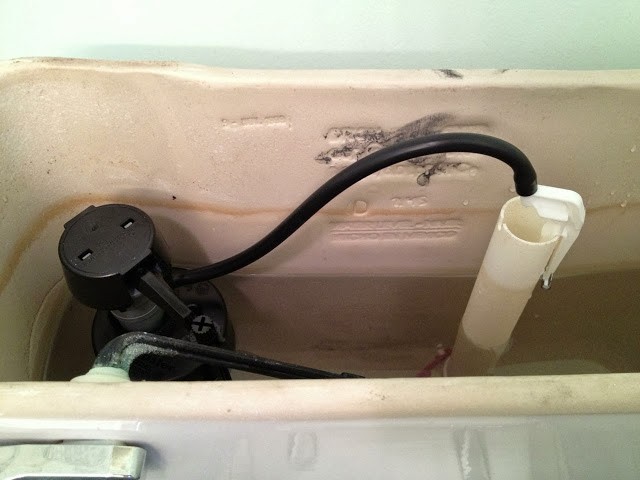 |
| The water level is about 1.5″ lower than before. |
Step 18: Adjust the water level. By having the water lever lower you will use less water for each flush but you will loose flushing power as well. In our family we need all the flushing power we can get so it’s time to raise the water level back up. You can easily raise the water level by the following steps:
Step 18a: Shut off the water again and flush the toilet. Unless you want to reach your hand into the tank full of water first shut off the water below the tank and flush the toilet to empty the tank.
Step 18b: Slide the grey plastic lock ring up to adjust the height. Once you have slipped it up you can turn the top of the valve back and forth and raise up the valve tower, effectively raising the water level as well. Remember that the tank lid must go back on and you cannot raise the top valve any higher than where the tank lid will rest.
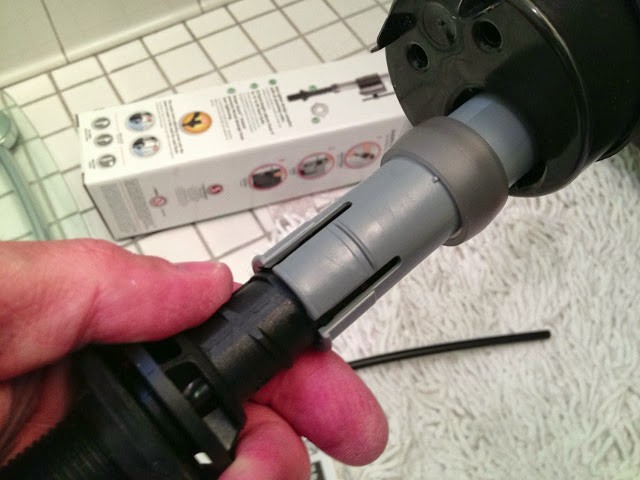 |
| Here the lock ring is released (or pushed up). |
Here is the location of the lock ring when the valve is installed:
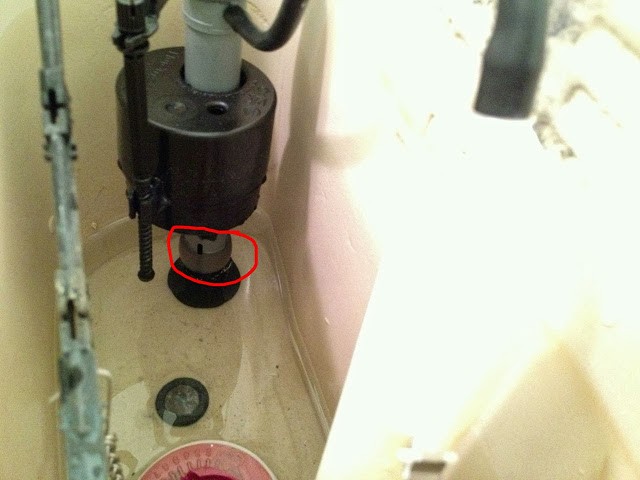 |
| Location of the height adjustment lock ring, in the locked position. |
Step 18c: Re-Lock the locking ring. Once you have made the height adjustment, slide the locking ring back down.
Step 18d: Turn the water back on. The tank will fill up and you’ll be able to see higher water line:
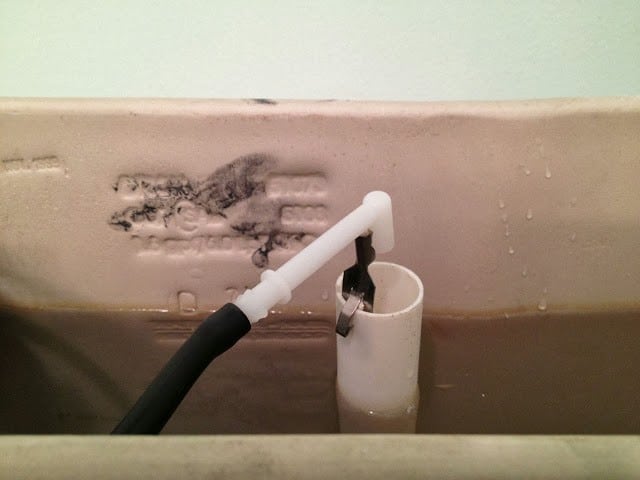 |
| The water line is back where it was with the old valve. |
Note: When I raised the water level it made me realize that the original angle adapter was better suited for my tank and I switched back to the original one as seen in the picture above.
Finally you can take a seat:
Amazon Associate Disclosure: As an Amazon Associate I earn from qualifying purchases. This means if you click on an affiliate link and purchase the item, I will receive an affiliate commission. The price of the item is the same whether it is an affiliate link or not. Regardless, I only recommend products or services I believe will add value to Share Your Repair readers. By using the affiliate links, you are helping support Share Your Repair, and I genuinely appreciate your support.
Related


