Here are instructions on how to build a custom Arduino hamster pedometer, including the Arduino code. My daughter wanted to track how far her hamster was running in a night so I decided to build a hamster wheel pedometer. I felt the Arduino platform would be the perfect platform to use. I wanted to build it so my daughter could use it and see for herself how far her hamster was running, so I decided to add a LCD display. This was a good combination of engaging my daughter and getting to work with technology! Follow along to see how you too can build an Arduino Hamster Wheel Pedometer and see for yourself how far your hamster runs at night…
Parts Needed
- Hamster Wheel (which can be mounted on a bearing–I used a Kaytee brand wheel which easily snapped apart)
- Arduino Uno
- Adafruit 772 16×2 Blue/White LCD Shield Kit
- Adafruit PowerBoost 500 Shield – Rechargeable 5V Power Shield (Optional: only if you want your count to survive a power failure)
- Lithium Battery–required for the above power shield (2 Options: here or here)
- Stackable Shield Headers (required if you use the battery shield–allows you to sandwich the battery backup in the middle)
- Magnetic Reed Switch
- 8mm Bore Diameter Ball Mounted Pillow Block Insert Bearing
- neodymium disk magnet
- Electrical Solder
- Solid Oak Board for mounting the bearing to the cage
- Electrical Tape
- 5/16″-18 x 4″ bolt (you’ll need to pick the correct size bolt for your wheel)
- 5/16″-18 course thread nut
- 5/16″ washers
- 1 1/4″ fine-threaded drywall screws (to mount the bearing on the board)
- 1 5/8″ fine-threaded drywall screws (to screw the two boards together)
- high-temp hot glue (to affix the reed switch in place)
Tools Needed
- Soldering Iron (here’s a link to my favorite soldering iron)
- Wire Nippers
- Wire Stripper
- Cordless Drill
- Drill Bits
- Dremel
- Dremel Router Bit
- Miter Saw
- Hot Glue Gun
- Crescent wrench
- Tape Measure (for measuring your hamster wheel’s inner circumference)
Software and Library Files
Videos
Here’s my first version of the software with Humphrey running away in the background. In this version it only displayed the number of revolutions:
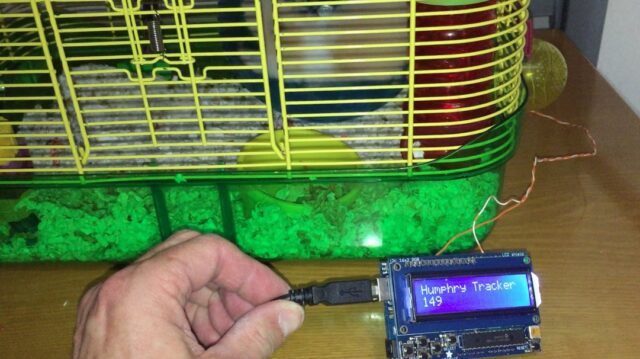
In the current version (code pasted at the bottom of this article) I have it displaying the revolutions on the first line and the mileage on the second line. Below is a video of me demonstrating the startup menu and the counting of the wheel revolutions:
Instructions
Step 1: Mount the hamster wheel on the bearing.
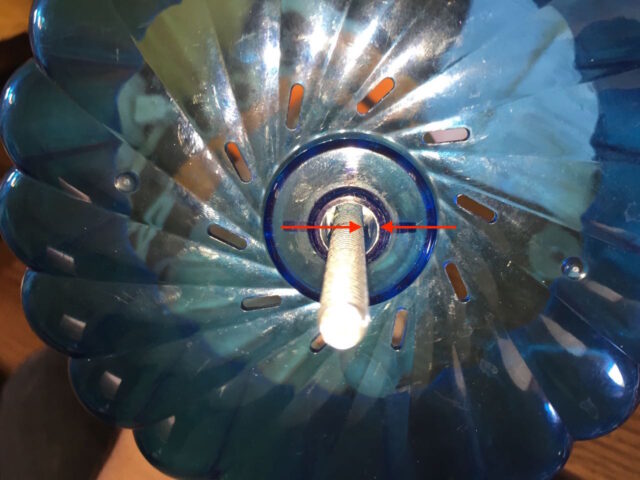
It would not be critical to mount the wheel on a bearing but you do need to have a stable, smooth-running platform, which you can mount both the wheel and the reed switch to. You will need to figure out the individual challenges of mounting your specific wheel. I simply started out with what we had–one of the wheels that came with our Kaytee hamster cage. It turned out that it could be easily un-snapped from the mount. A 5/16″ bolt can be inserted through the center of the wheel. One issue I ran into was the hole in the wheel was a different size from the 8mm bearing I purchased. This causes the bolt to fit loosely through the wheel:
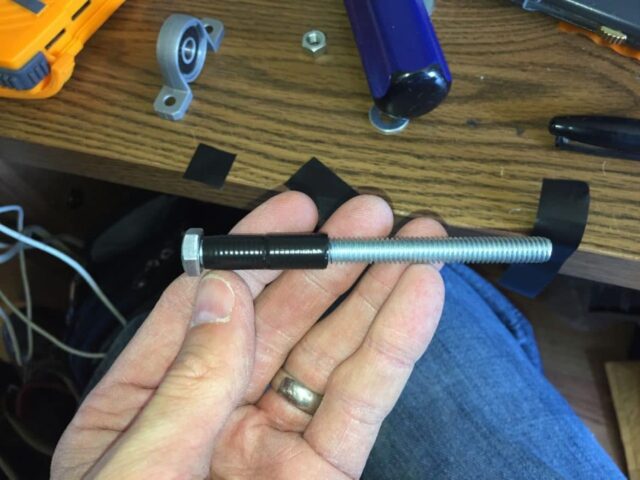
To keep the bolt centered in the wheel I carefully wrapped electrical tape around the bolt, to make it thicker. You’ll need to play with the number of wraps to get the thickness right. This worked nicely and the tape is completely concealed inside the wheel so the hamster cannot chew on it:
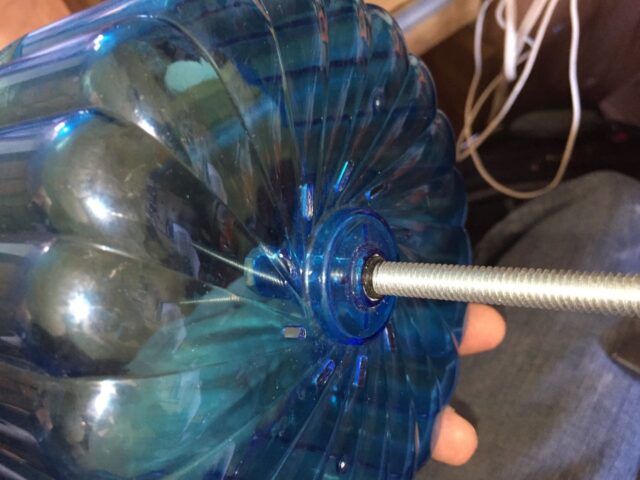
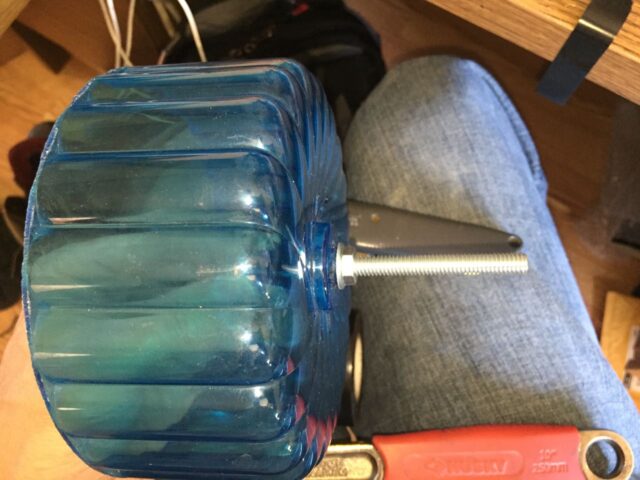
I then installed a washer and a nut and tightened it down:
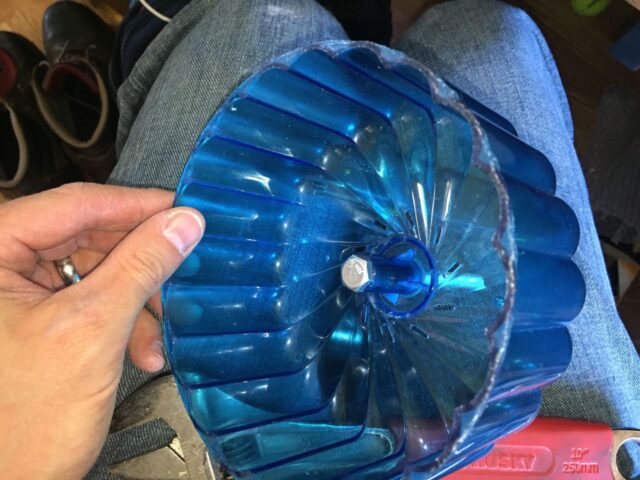
Here’s the inside view of the head of the bolt:
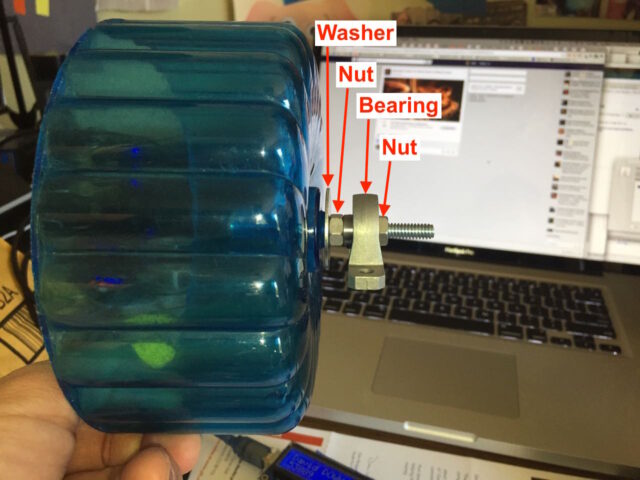
And here is the arrangement of how I bolted the bearing to the hamster wheel:
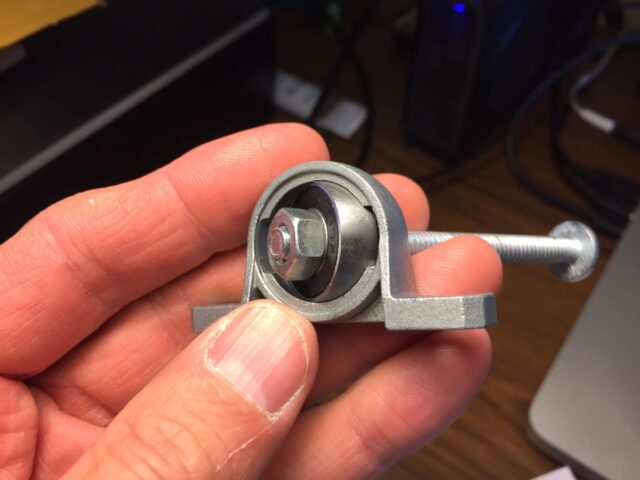
Note: The bearings I purchased (called “ball mounted”) can actually swivel within their mount. When I got them they were so stiff that they would stay in place but if it starts swiveling, as seen in the image below, you may need to put a drop of super glue on the seam where it swivels to keep it from sagging:
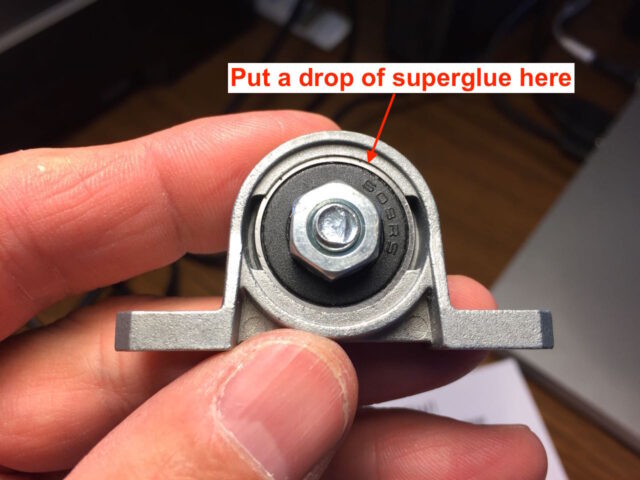
It may be beneficial to turn the bearing to the side and place the superglue on the “ball” part of the mount and then turn the bearing back straight. Below is the location of the seam where you want the glue placed:
Step 2: Cut a mounting block.
One thing I’ll note is that you DO NOT want to use pine, cedar, or any kind of treated wood in your hamster cage (to mount the wheel, for chew toys, or for bedding). I chose a 2″ piece of oak I picked up at Home Depot. This piece of wood will be used to mount the reed switch and to mount the wheel on the cage–so it must be long enough to reach the outside of the wheel and mount on the bearing. Important: Make sure to wear safety glasses when operating power equipment like a miter saw.
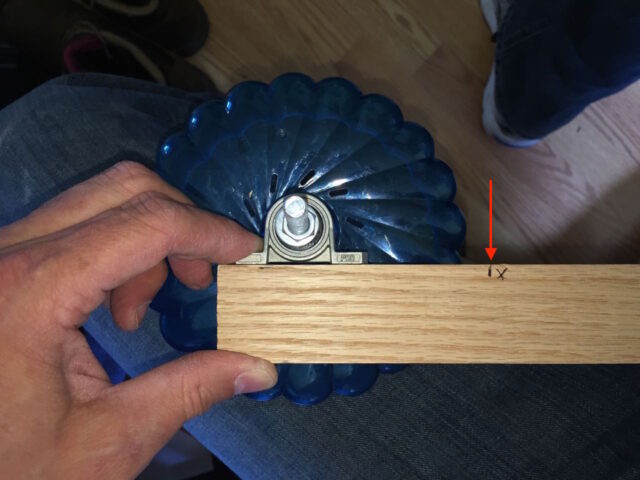
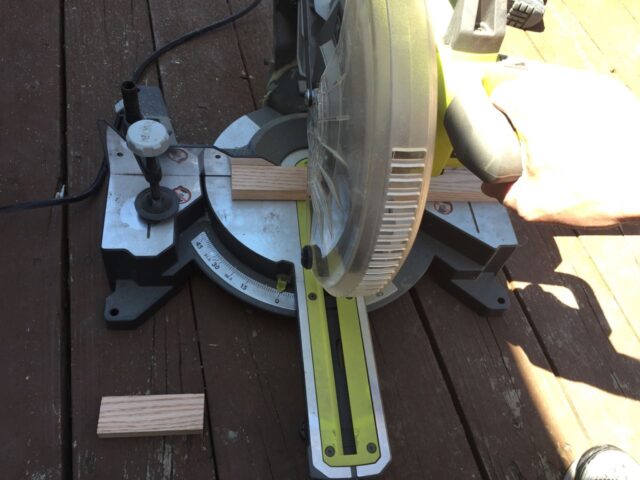
Step 3: Glue the magnet on the wheel.
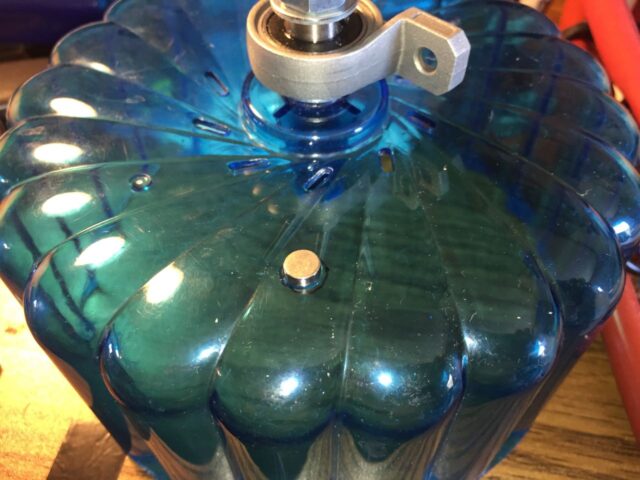
I decided it was time to mount the magnet on the wheel as I wanted to make sure to have a small gap between the face of the magnet and the face of the block. I would suggest placing the magnet on the wheel as far from the center as possible where it can be mounted on a flat area where the face of the magnet will be parallel with the reed switch. I used a 0.25″ diameter, 0.10″ thick neodymium disk magnet. I marked the location on the wheel as shown below:
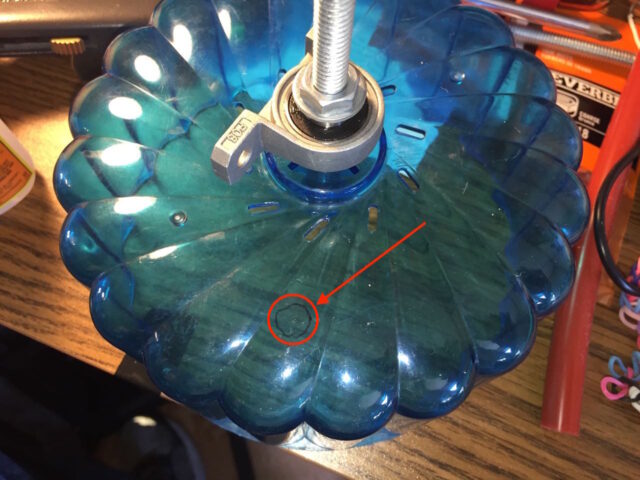
I used “gel” superglue which is easier to control:
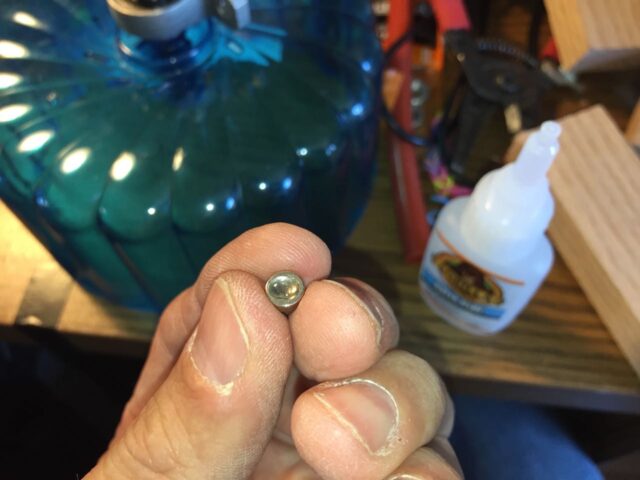
Place the magnet and then allow to dry:
Step 4: Mount the bearing on the board.
I planned on mounting the reed switch below the surface of the wood block so I adjusted the block so the magnet was about 1/8″ from the surface of the block. I lined up the board and then marked the holes:
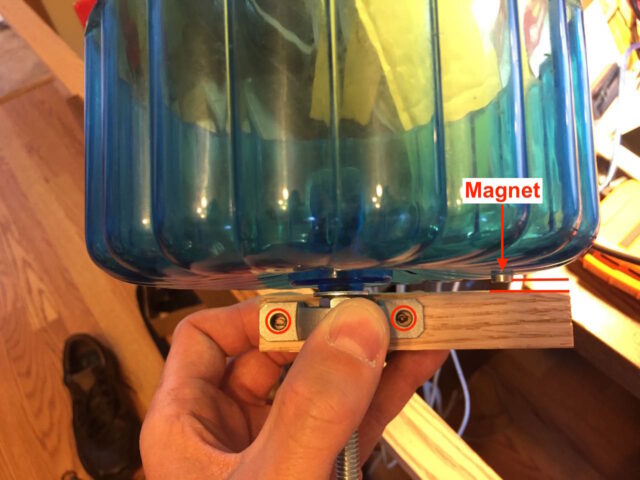
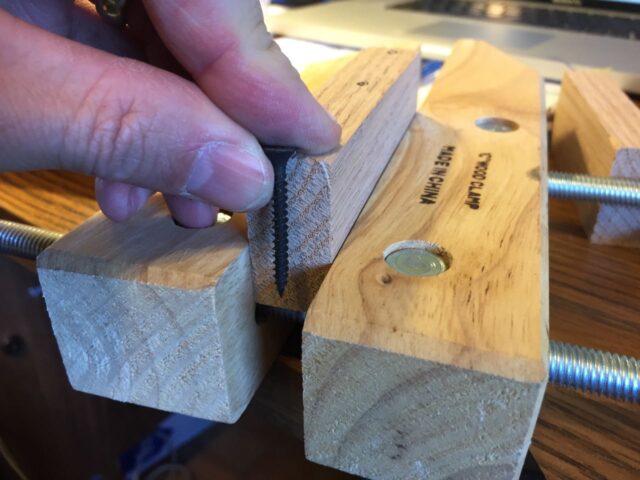
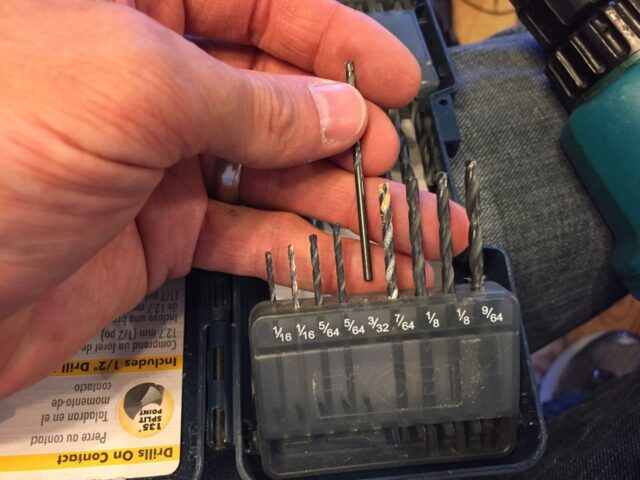
After marking the holes, drill a pilot hole in the mounting block so you do not split the wood with the screw.
Step 5: If you have a Single Pole Double Throw (SPDT) Reed Switch.
If you have the choice, purchase normally open (NO) reed switches and your wiring will be straight forward and there will be only one terminal on each end of the reed switch. I purchased single pole double throw (SPDT) reed switches, because they were the ones Amazon.com had that would ship the fastest. They will work fine but they take a bit more understanding to get them wired correctly. This is the symbol used for a SPDT switch:

A SPDT connects the common to one of the terminals when not in the present of a magnet and switches to the other terminal when in the presence of a magnet. In this case we will want to use the common (COM, which is the end that only has one wire) and L2 connections (which will be one of the two legs on the other end). To determine which of the two leads is the L2 (normally open) you will need a multimeter. Set your multimeter to resistance. Connect your multimeter to the common and one of the other leads and then place a magnet on the reed switch. If you are connected to the L2 terminal, the multimeter will read nearly zero ohms when the magnet is on the switch as the switch will be closed and an open-circuit when the magnet is removed. In the case below it measured 1/2 ohm (0.5), which is essentially a short-circuit or “closed”:
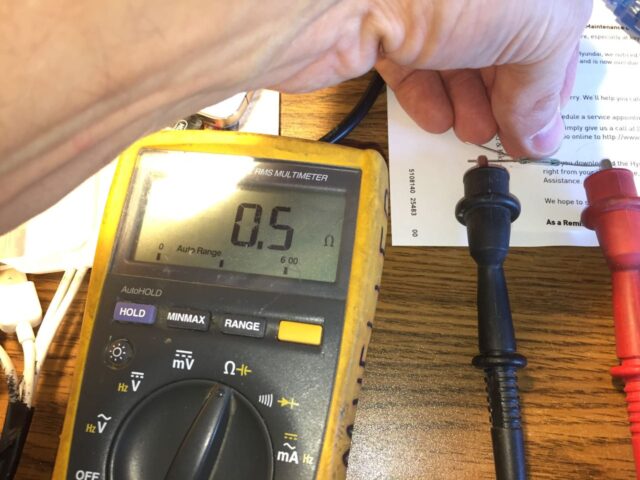
Once you find the normally open leg (which is a short-circuit when exposed to the magnet), clip off the other leg (don’t clip too close to the glass or you may break it):
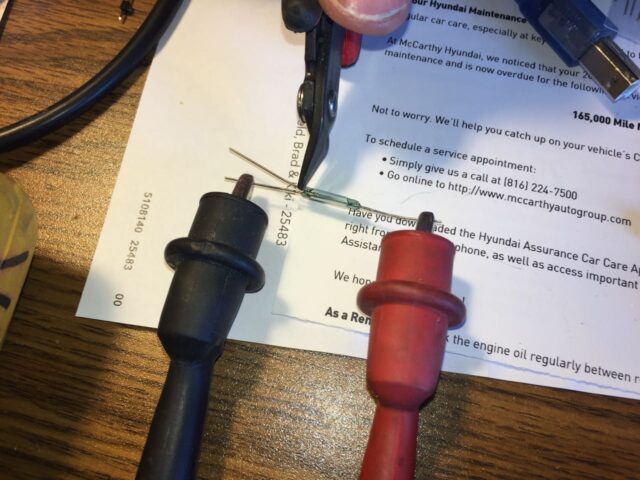
Step 6: Mount the reed switch on the board.
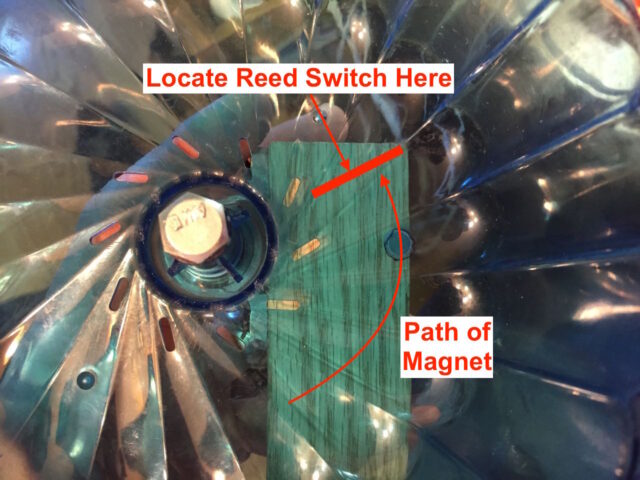
After I mounted the wheel to the bearing, the bearing to the board, and the magnet to the wheel, I chose the location to place the reed switch. I found the best location for the reed switch is to make it perpendicular to the path of the magnet, for the magnet to pass over the middle of the reed switch, as diagrammed below:
I made at least two different revisions of the wheel mount and adjusted the orientation of the reed switch a couple of times too. Below are the general steps I went through. When reading about reed switches I also discovered that the polarity of the battery can affect the performance of the reed switch. I played around with which face of the reed switch should face my magnet, which I don’t even know which pole faced the reed switch. Do some testing to verify the proper activation of your reed switch before you glue anything in place.
Note: You don’t want to place the reed switch perpendicular with the path of the magnet as I found the switch will actually activate twice when the magnet passes by.
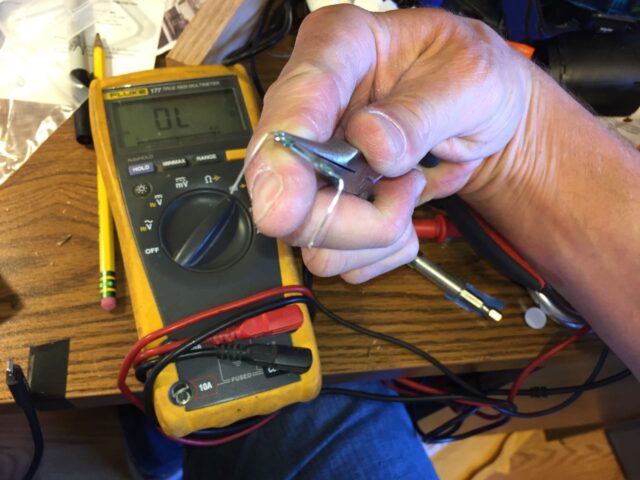
Caution: Reed switches are made of glass, are very fragile, and break easily. The best way to bend the legs it to grab the wire legs with a needle-nose pliers close to the end of the glass tube, and then bend the leg on the outside of the pliers as seen below:
Here I have marked the location where I will Dremel a little channel for the reed switch to sit in:
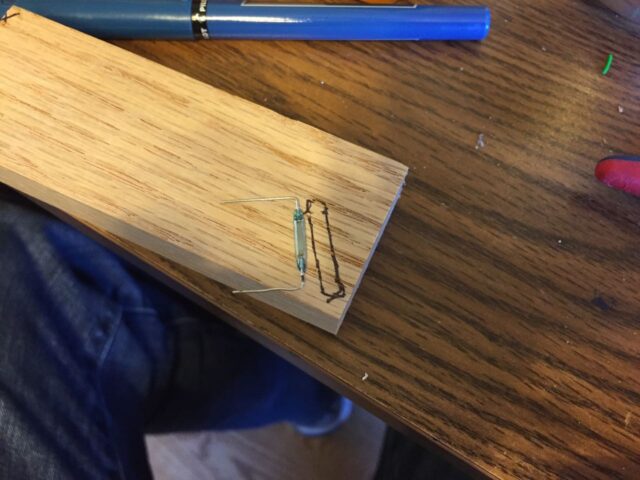
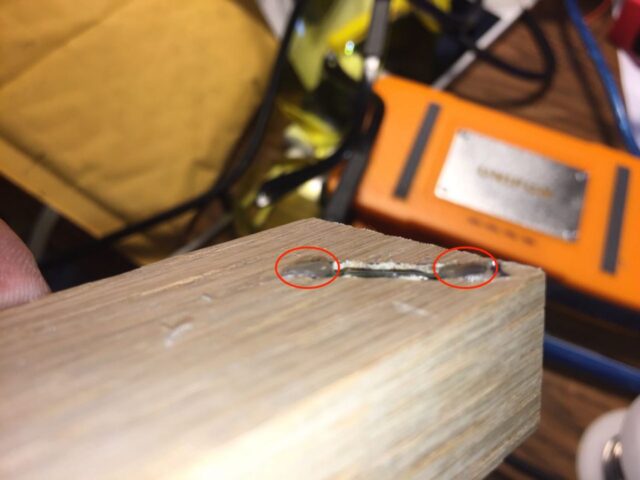
Trench down into the wood until the reed switch will be slightly below the surface of the wood. Here I’m testing the depth of the trench and showing you where to drill holes straight through the board for the legs of the reed switch:
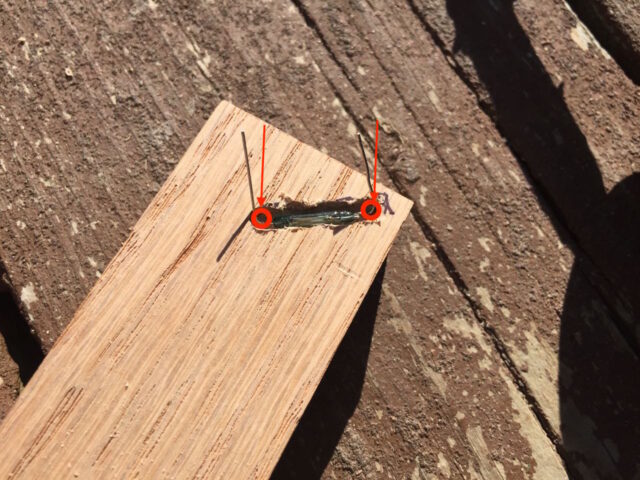
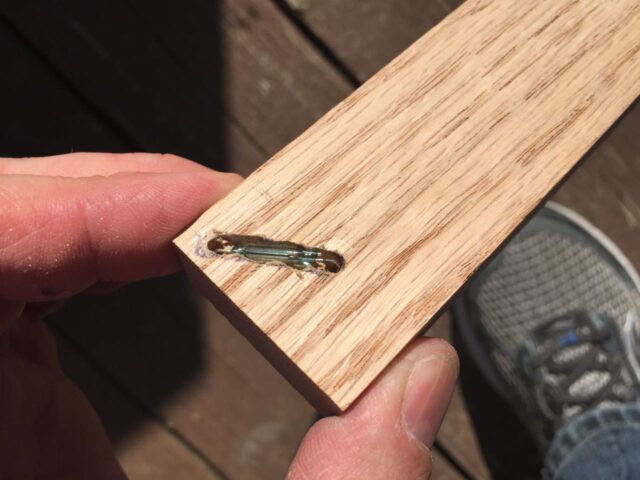
The legs of the reed switch were not long enough to stick out of the board so I needed to solder a wire to each one:
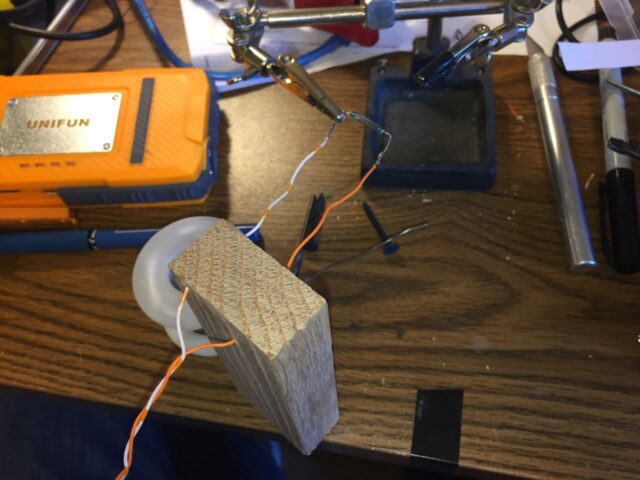
I then pulled the reed switch into place and put some hot glue on each end of the reed switch, and some down into the holes where the legs protruded, to hold the reed switch securely in place. If you don’t have it affixed, the strong neodymium magnet will pull the switch out.
Step 6: Mount the bearing/wheel/reed system on the hamster cage.
Because the nut would protrude into the cage I opted to double the thickness of the mounting board to make room for it. I will cut off the bolt in a bit. Here I have drilled the pass-through holes to screw the two boards together. I also pre-drilled the lower board so I won’s split the oak when I drive the screws. You can also see that I drilled a large hole to feed the two wires that run to the reed switch. This will also keep the wires out of reach from the hamster who would love to chew on them if he could.
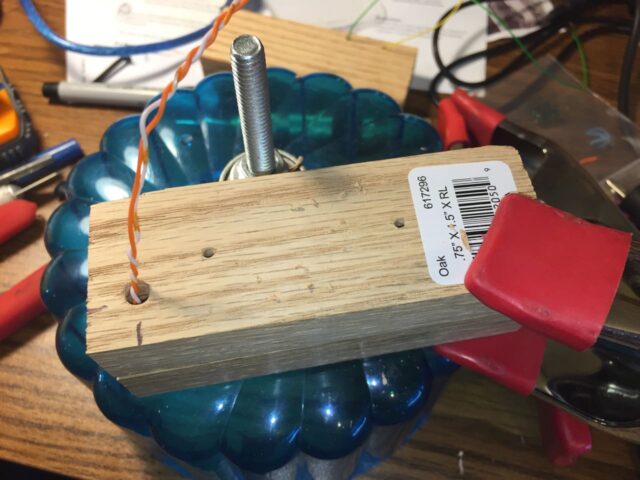
Once you have drilled the pilot holes and pre-drilled into the lower board, drive a couple screws to hold the blocks together.
Cut the excess bolt off below the surface of your mounting blocks. I forgot to take a picture of that step but I used a Dremel tool and a cutting wheel. CAUTION: MAKE SURE to wear safety glasses when using a Dremel. I know a guy who is having his third eye surgery after taking off his safety glasses–do not be that guy!?!?!
Cut another block of wood, the same size as the other two, drill a hole where your reed switch wiring comes out and pull the wires through the hole and mount on the cage. Here is how it should look just before screwing it in place:
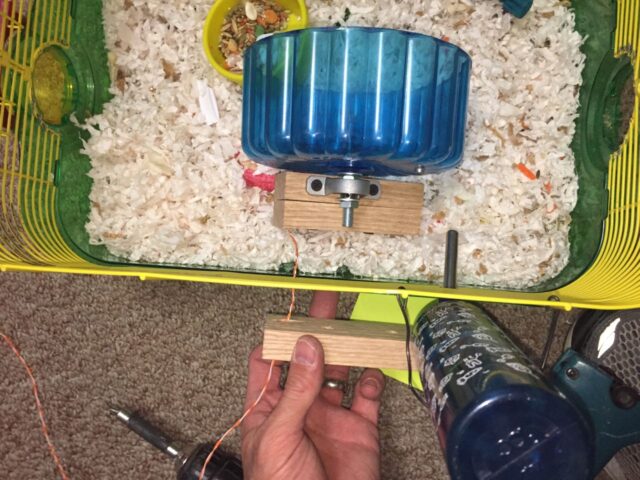
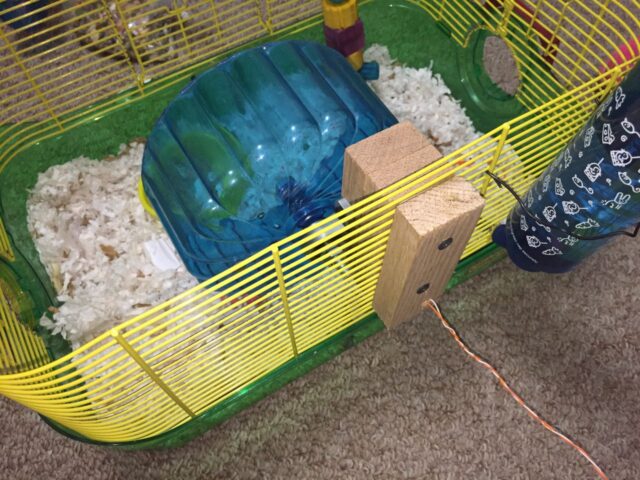
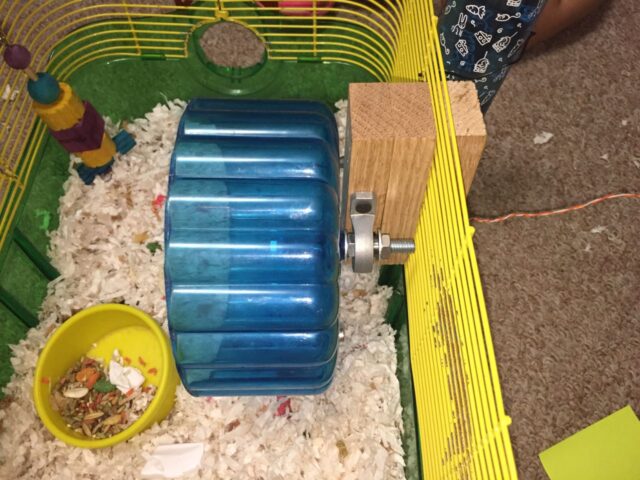
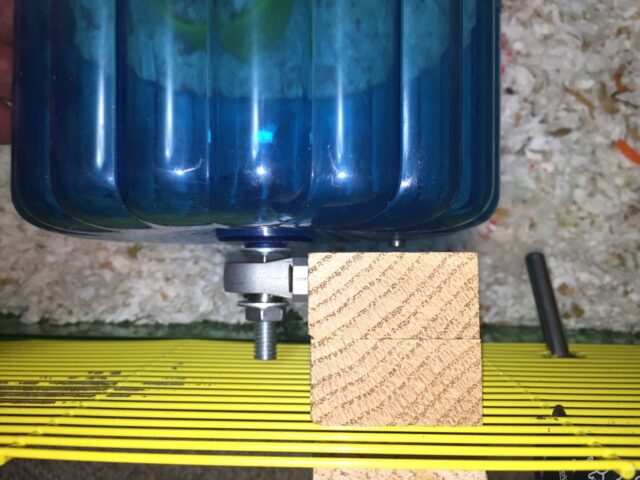
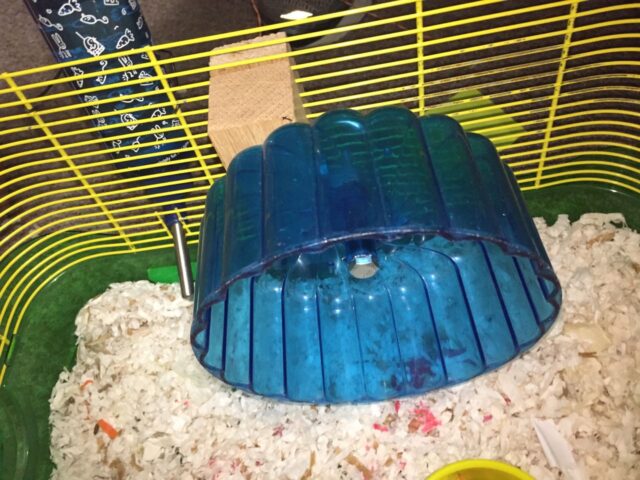
I used 1 5/8″ drywall screws to sandwich the mount in place. Note that the wiring is totally inaccessible to the hamster:
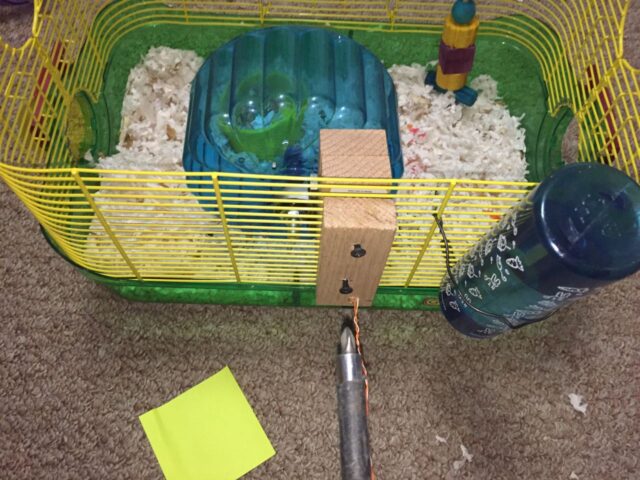
Here are some different views of the mounted hamster wheel pedometer:
Step 7: Connect the reed switch to your Arduino.
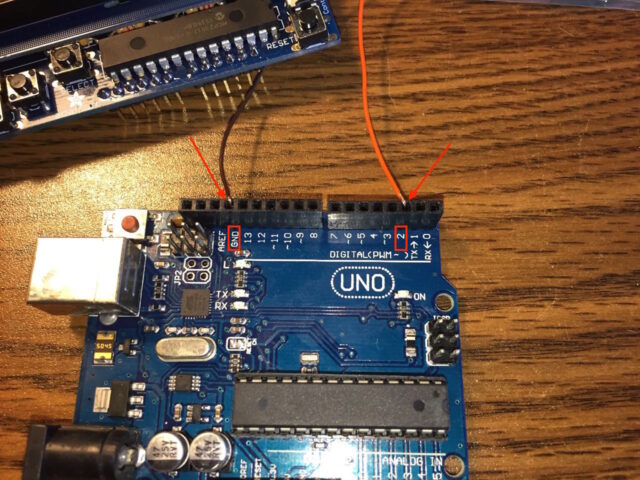
We are going to use one of the digital input pins for reading the state of the reed switch and the other end of the reed switch will be connected to ground. The Arduino has a built-in pull-up resistor which we can use to detect the state of the switch. When the switch goes high then the digital input will go high. Connect one end of the reed switch to ground (GND) and the other to digital pin 2. I simply inserted the wire down into the connector on the Arduino and then seated the LCD shield on top of it. Here you can see the reed switch wires inserted into the connectors on the Arduino:
Step 8: Install the Adafruit 772 16×2 Blue/White LCD Shield on top of the Arduino.
I bought the kit, which was pretty easy to put together as long as you are good at soldering. If you aren’t experienced at soldering I would buy the pre-assembled version. By installing the LCD on top of the inserted wires, you will lock the reed switch wires into the Arduino:
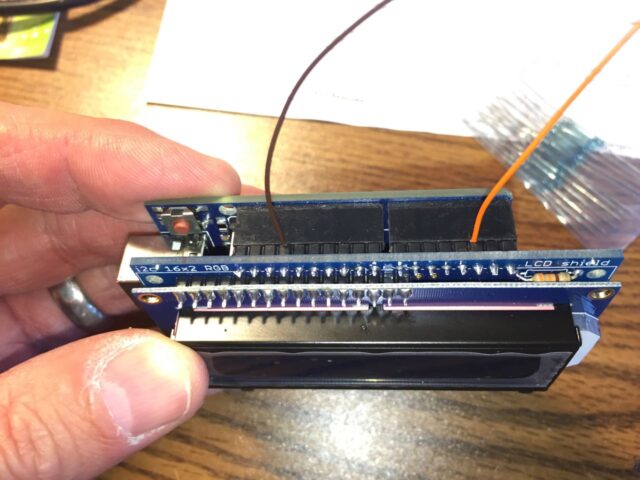
Step 9: Measure the internal circumference of your wheel
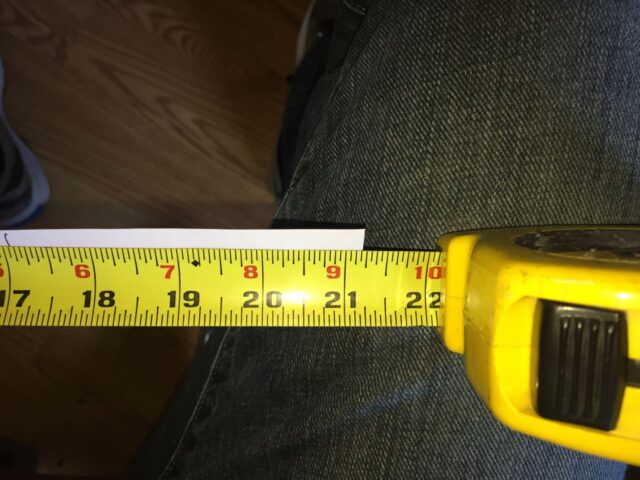
To calculate the hamster pedometer mileage you’ll need to know the inner circumference of your hamster wheel. The way I measured mine was to first cut a 3/4″ strip of paper (actually two pieces taped together) and then laid it on the inside of the wheel and marked where it overlapped:
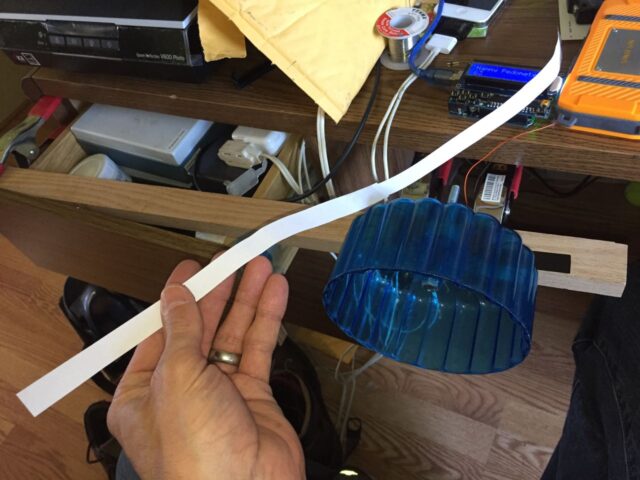
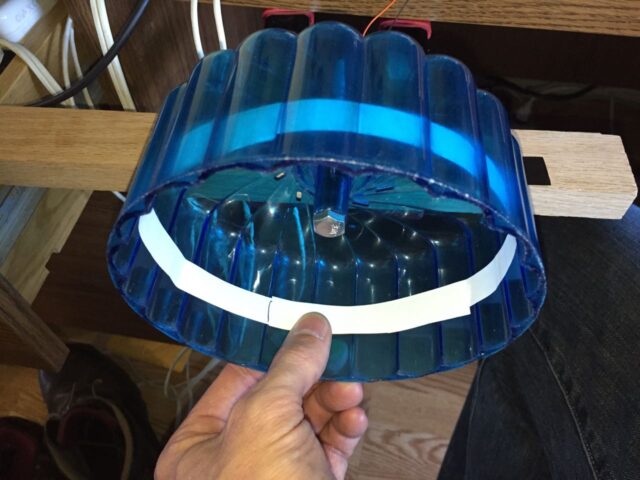
My hamster wheel inner radius: 21 3/16″ = 21.1875″
I did the math by hand to start and here is how I converted my wheel circumference to mileage:
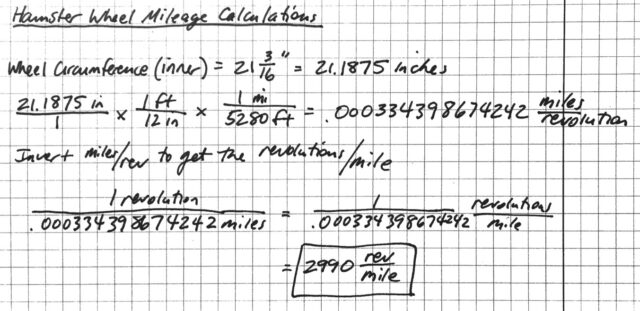
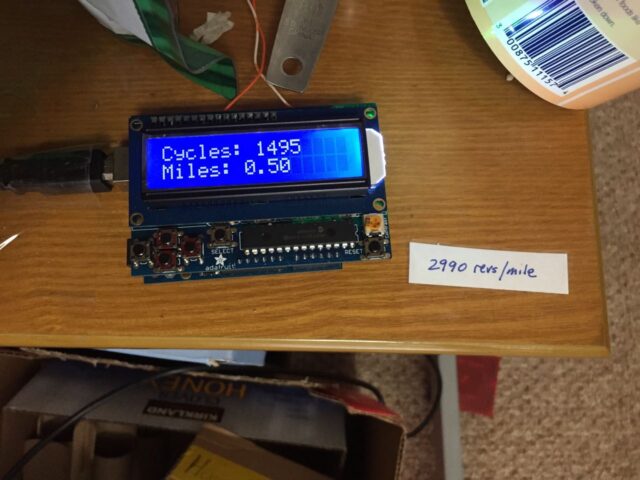
I will have the Arduino do this same math all over again but I wanted to figure it out for myself and as you can see, when I manually turned the wheel 2990/2 = 1495 laps, well the Arduino measured a half mile (see image below).
Step 10: Arduino Hamster Wheel Pedometer Code
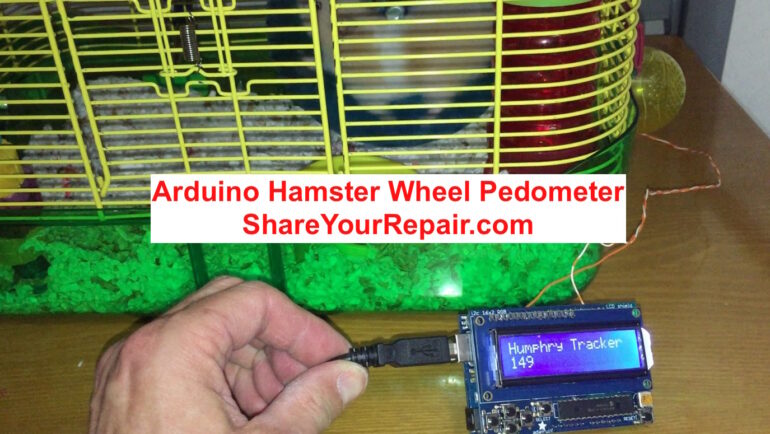
When I was researching this project I was really encouraged by Harry Mackay’s project Mouse Running Wheels (2016). I contacted Harry and asked him about his project and if he would share his code with me. He was very generous to share his code with me, which was very useful for me to use to learn how to use the button read functionality of the Arduino. His project differed from mine quite a bit in that he was tracking multiple wheels simultaneously (10!) and was writing the data to a SD card. I still may add SD functionality to my hamster wheel pedometer, but for now I just wanted my daughter to be able to see the data on the LCD screen. I want to thank my friend Patrick Elam, who writes code for a living, and helped me out by pointing out the reason why my software was running so slow on one of my early revisions. Initially I only displayed the revolutions but now I’ve modified the code to display revolutions on the top line and the mileage on the bottom line, as seen below:
Here is the code I used for my Arduino Hamster Wheel Pedometer:
/*********************
Hamster Wheel Pedometer, By John D. Mueller, http://www.ShareYourRepair.com
This code began with the example code for the Adafruit RGB Character LCD Shield and Library which displays
text on the shield, and also reads the buttons on the keypad. I referenced Harry Mackay's Mouse Running Wheels (2016)
code to learn how to implement the button read functionality of the Button.h Arcuino library. (see
http://harrymackay.com/?royal_portfolio=mouse-running-wheels-2016 to read more about his project where he tracks
10 mouse wheels simultaneously). Thanks also to Patrick Elam who generously reviewed my code and pointed out an
issue I had which was greatly slowing down my code. See his website at http://www.patrickelam.com/

**********************/

// include the library code:
#include <Wire.h>
#include <Adafruit_RGBLCDShield.h>
#include <utility/Adafruit_MCP23017.h>
#include <Button.h>

// The shield uses the I2C SCL and SDA pins. On classic Arduinos
// this is Analog 4 and 5 so you can't use those for analogRead() anymore
// However, you can connect other I2C sensors to the I2C bus and share
// the I2C bus.
Adafruit_RGBLCDShield lcd = Adafruit_RGBLCDShield();

#define WHITE 0x7 // My Adafruit sceen is a Blue and White screen so there's really no color to set
const int REED_PIN = 2; // Arduino Pin connected to the magnetic reed switch
const float Wheel_Circ_Inches = 21.1875; // Set this number to the inner circumference of your hamster wheel in inches
int REV_COUNT = 0; // Initializing the Total Wheel Revolution Count to zero
int STARTED = 0; // boolean for tracking whether the screen should be cleared after writing the initial display
float MILES = 0.0; // Initializing the Mileage
float Circumference_Feet = Wheel_Circ_Inches/12; // Calculating the inner wheel circumference in feet
float Circumference_Miles = Wheel_Circ_Inches/12/5280; // Calculating the Inner Circumference of Wheel in Miles
Button wheel(REED_PIN); // use the button debouncing library to read when the magnet passes the reed switch

void setup() {
 // Debugging output
 Serial.begin(9600);
 // set up the LCD's number of columns and rows:
 lcd.begin(16, 2); //(columns, rows) on the LCD

 lcd.setBacklight(WHITE); //this is a b&w display so there are no other colors
 wheel.begin(); // initiate the wheel "button"

 // Startup Display -- Note, because of the way I've written this code, this initial text will disappear immediately once the reed switch passes the
 // the magnet. If the reed switch and the magnet are lined up when you power up or reset, the initial display will appear and immediately be cleared
 lcd.setCursor(0,0);
 lcd.print("Arduino Hamster");
 lcd.setCursor(0,1);
 lcd.print("Wheel Pedometer");
}

void loop()
{
//Checking for the reed switch to be closed
if(wheel.pressed())
 {
 // checking to see if the startup display needs to be cleared
 if(not(STARTED)) {
 lcd.setCursor(0, 0); //column 0, top line
 lcd.print(" "); // Clear Top Line
 lcd.setCursor(0, 1); //column 0, bottom line
 lcd.print(" "); // Clear Bottom Line
 STARTED=1; // switch the boolean because the screen has been cleared now
 }
 REV_COUNT++; //Increment the wheel count
 // Writing the revolutions on the first line
 lcd.setCursor(0, 0); // column 0, top line
 lcd.print("Revs: "); // Printing the label
 lcd.print(REV_COUNT); //Print wheel count to screen
 // Writing the Miles on the second line
 lcd.setCursor(0, 1); // column 0, bottom line
 lcd.print("Miles: ");
 lcd.print(float(REV_COUNT)*Circumference_Miles, 4);
 }
}
Step 11: Install the appropriate library files.
You will need to makes sure you have all the library files installed in your Arduino called at the beginning of my code:
#include <Wire.h>
#include <Adafruit_RGBLCDShield.h>
#include <utility/Adafruit_MCP23017.h>
#include <Button.h>
Step 12: Modify the Button.cpp File
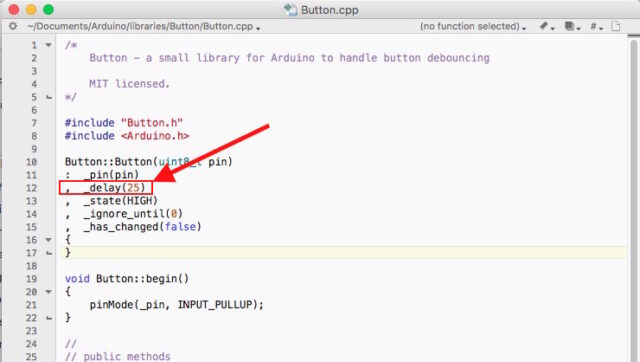
One problem I ran into was that sometimes when I was testing the setup, the Arduino would miss a revolution–I could hear the reed switch close but the display would not increment. While investigating, I found a 500 ms (millisecond) delay built into the Button.h library, which caused the Arduino not to read a revolution if it occurred less than 500 milliseconds (1/2 second) after the last one. I modified the Button.cpp file as seen below:
On a Mac, this file is located in the following directory:

You can edit in Notepad on a PC and TextWrangler on a Mac (download for free). One thing to note is that you will then need to re-compile and upload your software to your Arduino. If you have other projects that use the button.h library, you may need to change the delay back to 500 ms before compiling those sketches.
Step 13: Compile and Upload your software to the Arduino

Now you are ready to track your hamster!
Step 14: Track your hamster’s running habits
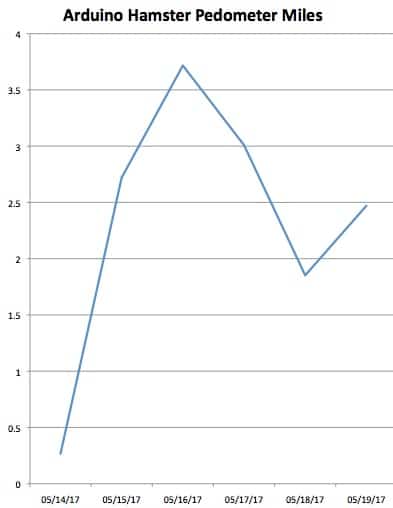
I made a log sheet for my daughter to log each day’s run and we have some data in…
Step 15: Install a battery backup on your pedometer
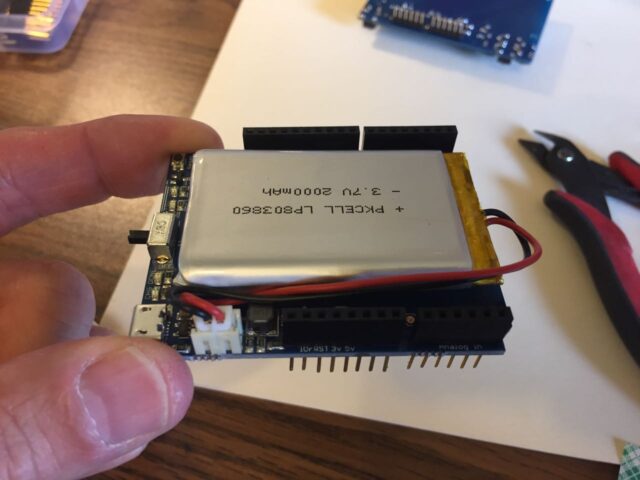
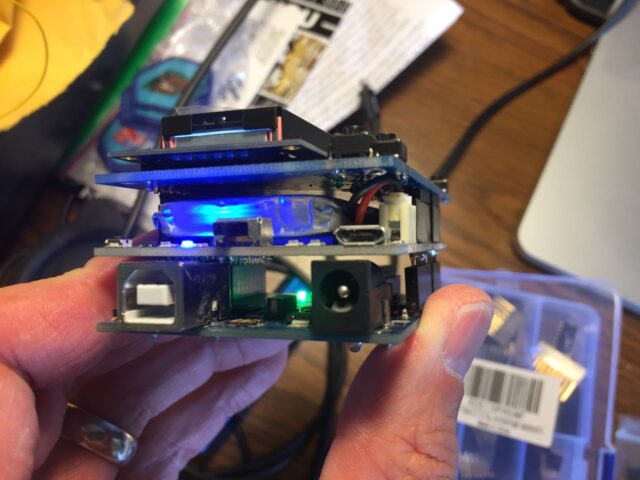
This is optional but you gotta know that if someone unplugged your hamster wheel pedometer, or if the power went out, the count would be lost. You can avoid this by adding a battery shield to your build. First you’ll need to buy the Adafruit Adafruit PowerBoost 500 Rechargeable 5V Power Shield and a compatible battery (see the parts list at the top of the article). Here’s the battery shield assembled:
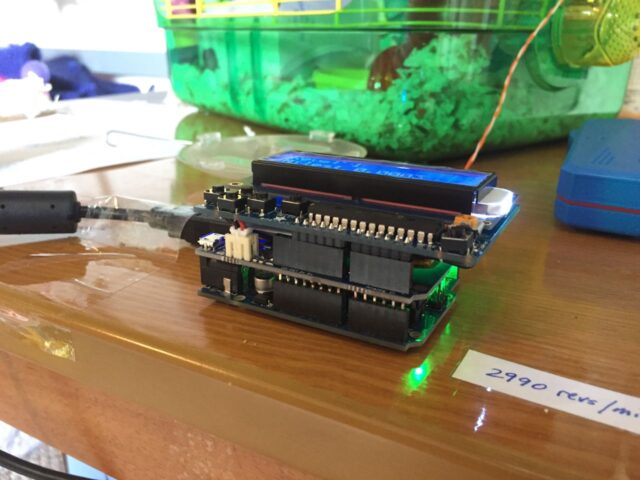
Important: You’ll need to make sure to install stackable shield headers on your battery shield so you can have the Arduino on the bottom and the LCD shield on the top. With the stackable shield headers, you can sandwich the battery shield in the middle, like this:
Step 16: Share Your Arduino Hamster Wheel Pedometer Build
Do you have questions? Did you figure out a better way to build this project? Were you successful in building an Arduino Hamster Wheel Pedometer too? Please leave a comment!
Amazon Associate Disclosure: As an Amazon Associate I earn from qualifying purchases. This means if you click on an affiliate link and purchase the item, I will receive an affiliate commission. The price of the item is the same whether it is an affiliate link or not. Regardless, I only recommend products or services I believe will add value to Share Your Repair readers. By using the affiliate links, you are helping support Share Your Repair, and I genuinely appreciate your support.


Hello, I am having trouble sending speed to the sd card, you have the code of Harry Mackay? I’ve got a project and I need school store hamster speed on a sd card.
Hello, I would encourage you to reach out to Harry Mackay via his website. He was very helpful and generous in sharing code with me.
Hi.
It seems a pretty cool ideia, however I got stuck due some errors…could you please help?
Thanks
: In function ‘void setup()’:
HAMSTER:30: error: ‘class Button’ has no member named ‘begin’
wheel.begin(); // initiate the wheel “button”
^
In function ‘void loop()’:
HAMSTER:43: error: ‘class Button’ has no member named ‘pressed’
if(wheel.pressed())
^
exit status 1
‘class Button’ has no member named ‘begin’
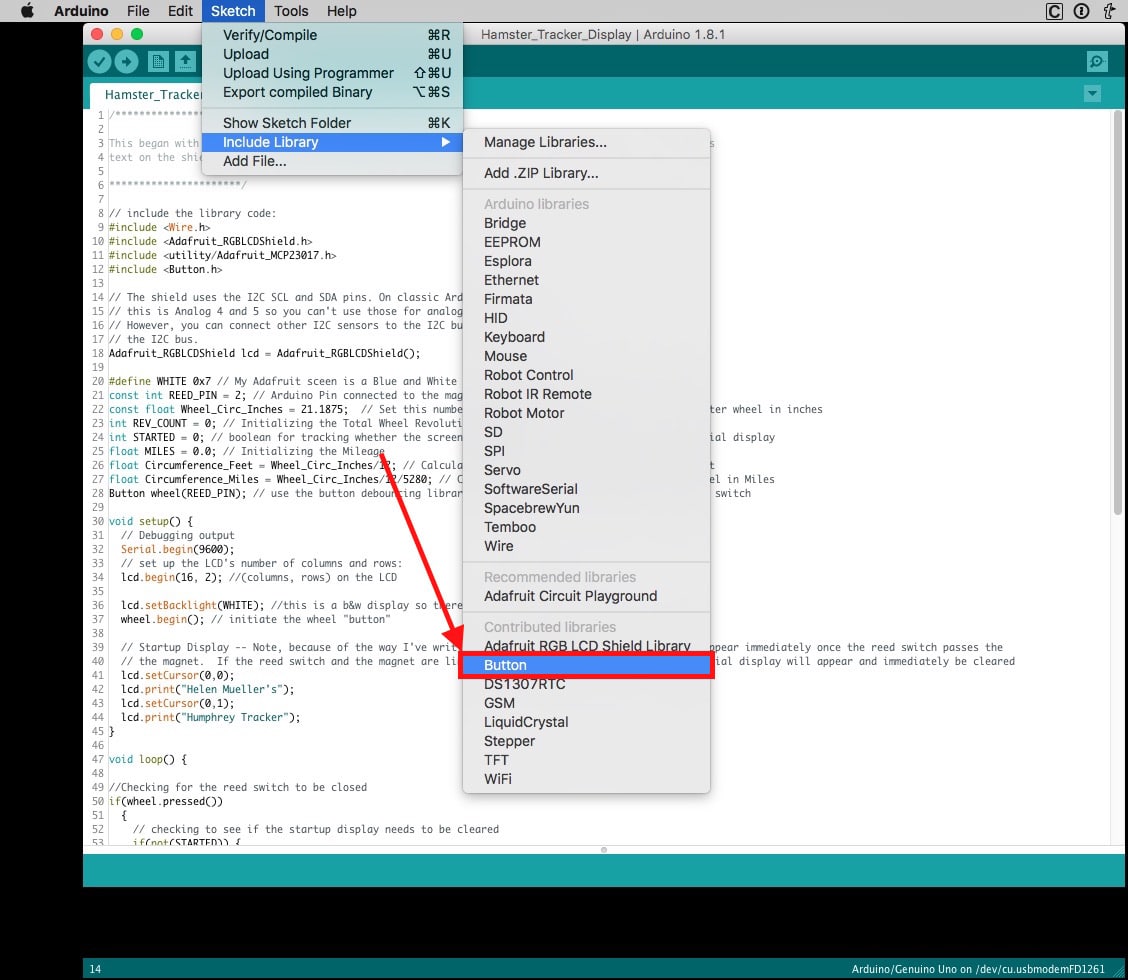
Have you included the Button library? It is possible that you included a different button.h library as there are multiple ones. On a Mac here’s how you include one in your sketch:
Yes, LOL, fair enough with the over-engineering. About that reed switch and the hamster eating it. If it’s behind the wheel the hamster can’t get to it. It can always be put in a very small plastic capsule. For inaccuracies in wheel spin, you could use two magnets to make the positioning of the switch less critical.
I also maintain that it’s not fair to house a Syrian hamster like that in such a tiny cage ( that the over-engineered solution reduced in size considerably ).
Sometimes we make things in a certain way because it’s cost-effective and uses materials to hand. In this case I’d say that simplicity should have won out. Sorry.
Despite my criticism I admire anyone that can do this stuff. Anyone following in your footsteps can make a more refined version.
Paul
I’m really impressed!
However.. ..I think this is massively over-engineered.
There was no need for the wooden mount or bearing, the reed switch could have been mounted on the bars behind the wheel. There are plenty of hamster wheels that run smoothly.
You could probably have used a bicycle sensor .
I’d also say that the wheel is too small for the hamster and that the cage is really too small for the hamster. Please consider getting the poor thing a larger cage and wheel.
Thank you for the feedback Paul, you are on to me, and you are 100% right about the over-engineering!! I INTENTIONALLY over-engineered this project for the pure joy I feel when I’m designing a project, interacting with my daughter, and creating new solutions to problems. Who really needs a custom Arduino hamster wheel pedometer!?!?!? I love being a dad who can make custom electronics for his daughter, to engage and interact with her, technology, and science at the same time–what an opportunity! One of the specific reasons I did this project was that I had an extra Arduino Uno on hand and wanted the experience and fun of learning and building something new that interacts with the environment via sensors.
There are surely an infinite number of ways I could have done this project. As for why I chose the wooden mount–you must affix the reed switch somewhere where the hamster will not be able to chew on it. You also need to have a way to conceal the wires running to the switch. The wheel and the reed switch must be physically stable so the wheel is always passing with the magnet at a close proximity to it, but not touching. If you glue the reed switch to the bars, the hamster will chew on the glue and/or the wires AND the reed switch is fragile glass, which I don’t want it chewing on either. My wheel wasn’t that stable on its own as it would slide back and forth on its shaft and its mount wasn’t that stable either. The bearing mounted on the wood block solved both of these problems nicely as it allowed the wires to run out of the cage in a way inaccessible to the hamster and the wheel and the reed switch were held nicely in place in two planes in close proximity. As for the bearing necessity, there may be millions of other wheels that run smoothly (and quietly) but the one we had (and I wanted to use stuff on hand) kept my kids up at night because it was noisy, so I added the bearing and now I don’t get bothered at night by small children who cannot sleep! I might have possibly used a bicycle sensor, if they were adjustable to a wheel of radius of 3.37 inches, but that wouldn’t have been any fun and it wouldn’t have had my daughter’s name on the display. Another example of my insistence on doing it myself is when I created a key for an old mechanical bank, from a picture, just for fun, when I could have bought one on ebay–I find it fun to make stuff. As for the size of the cage and wheel–we acquired this cage for free and that’s where we are starting. My daughter takes the hamster out around the house in a ball almost every day so he gets out and about. The wheel should be bigger too, you are right, but it is what we had on hand. Just wait for the completely over-engineered Arduino Hamster Wheel Pedometer 2.0 with a bigger wheel!!
This is pretty cool, but you left out the most interesting bit of information:
How far does your hamster run per night/week?
Greetings,
Andreas
Aaah yes, thanks for asking Andreas. Well, the data is finally rolling in (collected by my 8-year-old daughter) and I added a small chart of our hamster’s running habits, between 1.5 and 4 miles (2.4-6.4 km). Check out the new “Step 14: Track your hamster’s running habits” where I put together a small graph of the most recent data. I’ll update it when we have more! Thanks for asking!