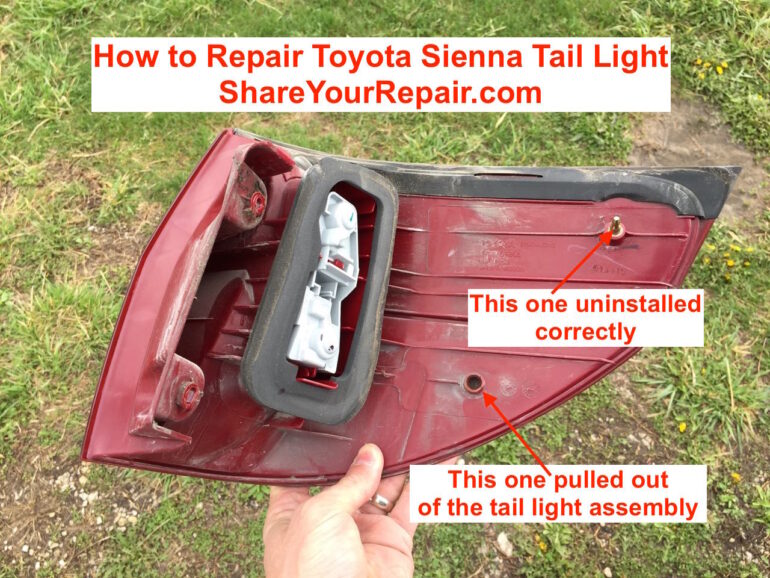
When I tried to replace the brake light bulb on my Toyota Sienna, one of the pins on the side of my tail light pulled out of where it was embedded in the plastic when I was removing the tail light fixture. You can read my article on how to replace tail light bulbs on your Toyota Sienna here:
How to Replace Toyota Sienna Brake Light Bulbs
I’m not about to purchase a new tail light! It is time for another REPAIR…
How to Repair Toyota Sienna Tail Light
Vehicle:
Parts Needed:
- J-B Weld Steel Reinforced Epoxy
- WD-40
(and I love the new can with the fold-down spray straw–never will I lose another straw)
- Wood Shims
(I use them for mixing JB Weld)
- Toyota Sienna Tail Light (Left, Driver side) 2004-2005
(if you decide you cannot fix yours and want to by an after-market replacement)
Tools Needed:
Step 1: Pull the pin out of the side of the van.
As you can see below, one of the pins didn’t pull out of the hole it was snapped into but pulled out of the plastic:
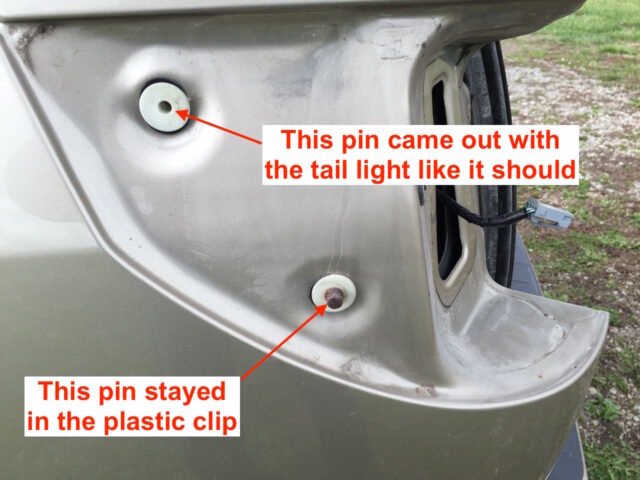
I probably should have sprayed some WD-40 on the pin before I tried removing it but I just pulled it straight out as seen below. I would try to carefully twist the pin in a circle to free it from the plastic clip it is snapped into.
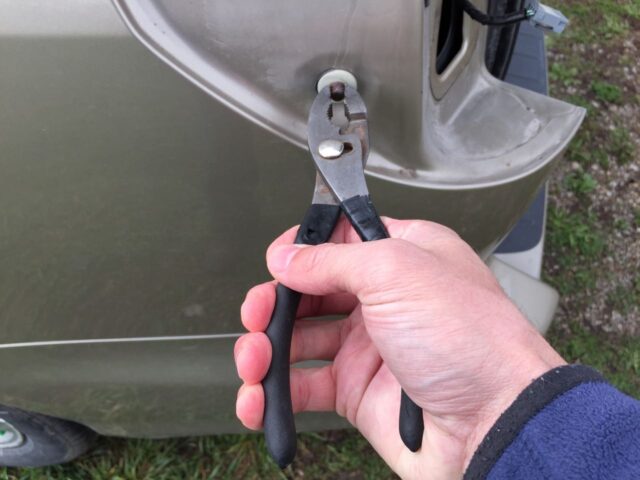
The clip and the pin came out together:

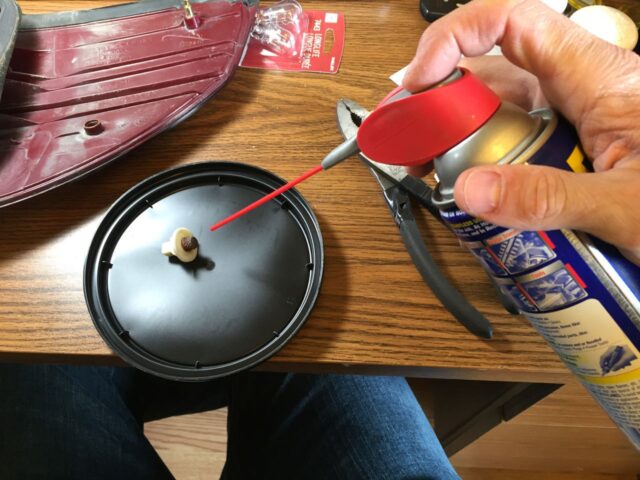
Step 2: Soak the pin in WD-40 to loosen it up.
I soaked the pin in some WD-40 in the lid of a coffee can:
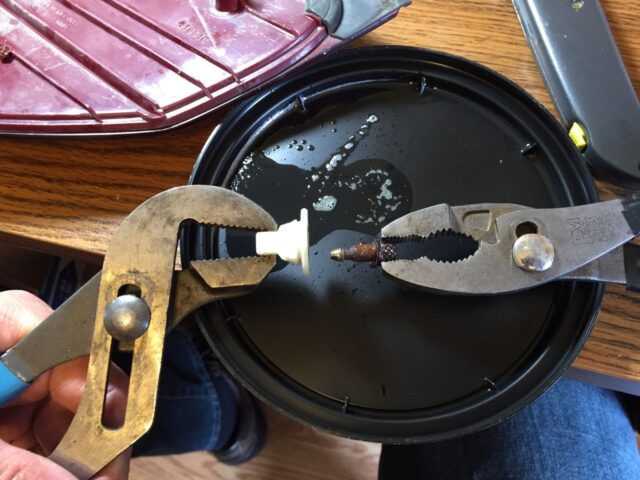
I carefully held the clip in some channel lock pliers and then pulled the pin out with a pliers:
Step 3: Clean up the pin.
The pin will not stick very well to glue if you have it coated in WD-40 so I carefully wiped it off with a paper towel.
Step 4: Clean up the plastic clip.
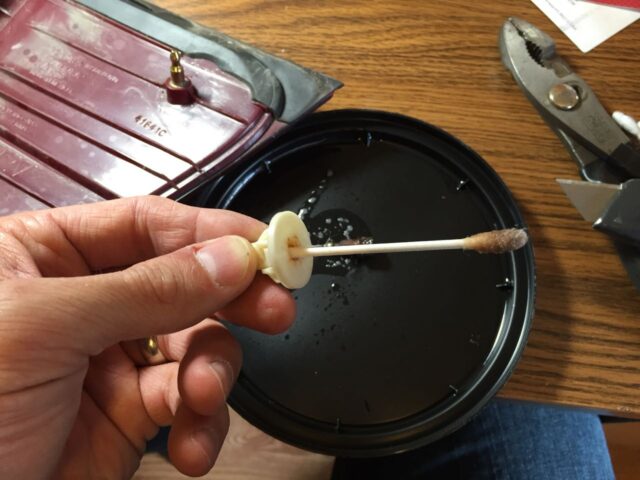
I sprayed some WD-40 in the hole and then cleaned it out with a cotton swab:
Step 5: Prepare the tail light to be repaired.
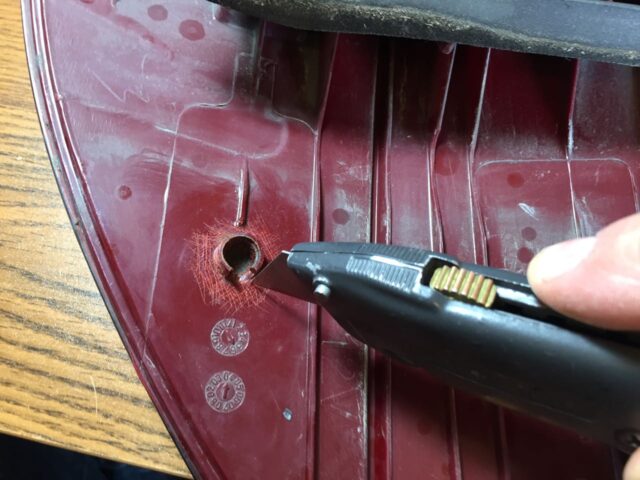
We are going to be using an epoxy called JB Weld. Any adhesive will stick better to a roughed up surface than a smooth surface. I took my utility knife and scored the surface around where the pin was embedded so the epoxy will stick better. You could also use sand paper. My goal was to not break off any more of the plastic as I wanted what remained to guide me in placing the pin where it should be located:
Step 6: Put the pin back in place.
Carefully push the pin back into place. I turned the pin ever so slightly to make sure the checkered pattern on the outside (which is meant to give the plastic something to grab onto) sits down into the mould as tightly as it can:
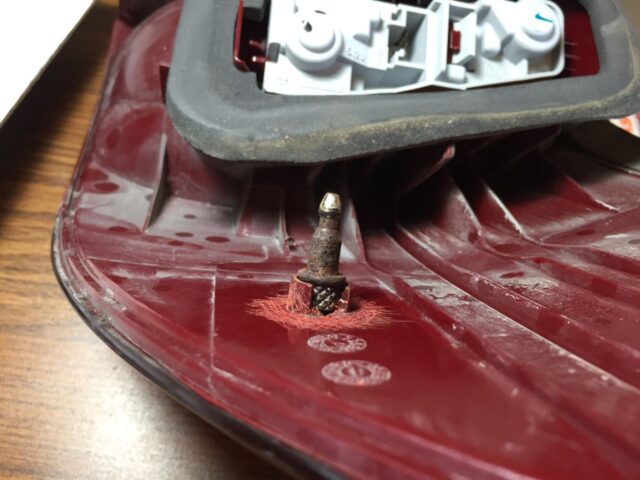
Step 7: Mix up the JB Weld.
Mix equal parts of each of the two tubes of JB Weld. I keep shims on hand and they make good stir sticks if you (carefully) take your utility knife and shave a quarter inch off the edge of one:
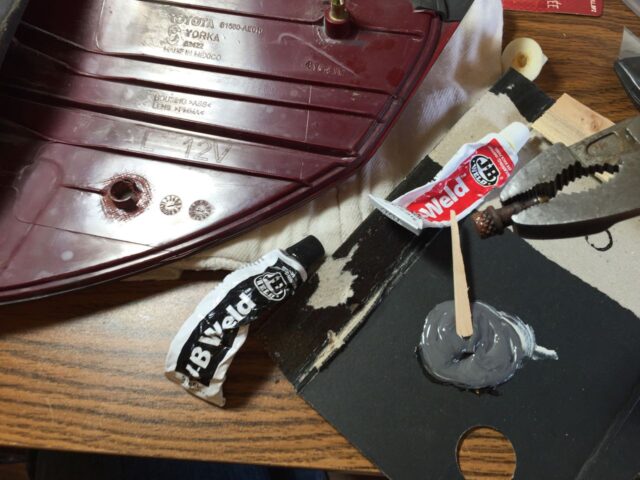
Step 8: Apply the JB Weld to the pin and re-assemble.
First put a generous coating on the pin:
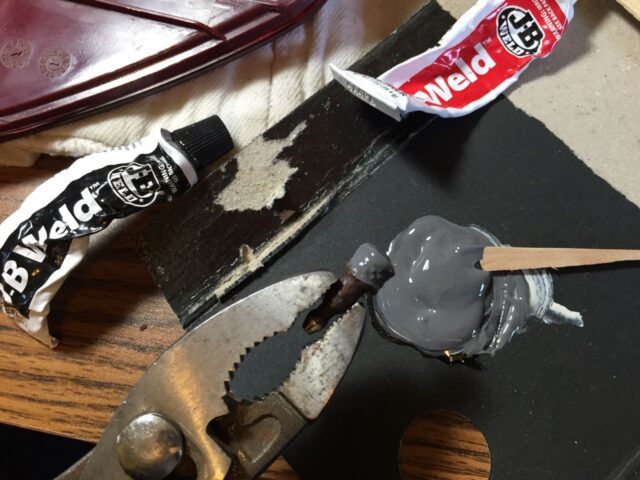
Re-insert the pin being careful to keep it straight and parallel to the other pin:
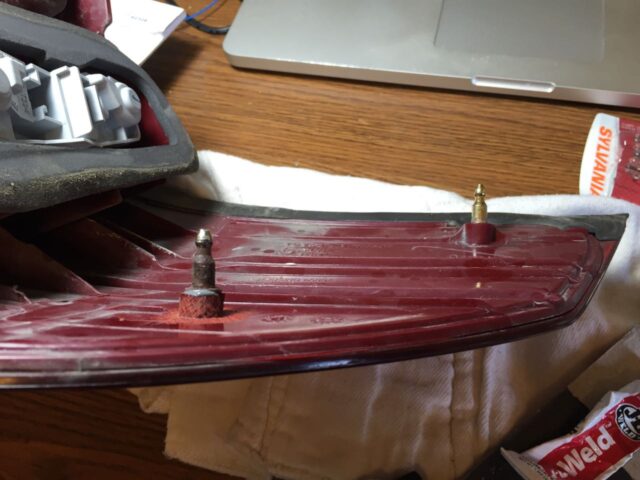
Build up the area around the plastic lip with JB Weld but try not to get it up on the shaft of the pin:
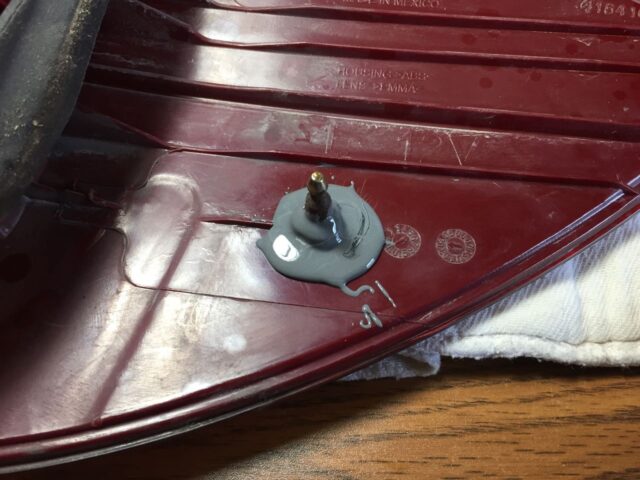
Step 9: Let the epoxy dry overnight.
The JB Weld will run (and settle) so be careful to have the surface level. I actually put a fan blowing on it to aid in the curing. That fan came from a projection screen tv that I tore apart and powered with a power supply I scavenged too. Read about how to do that here: How to Power a Scavenged Fan with a Used Wall Plug
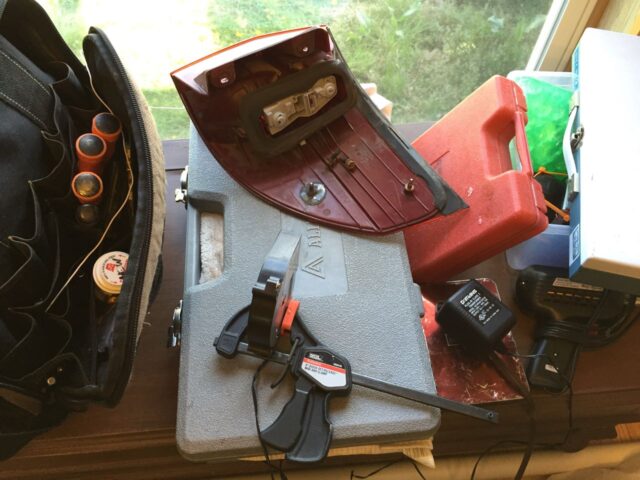
Step 10: Clean up the epoxy.
If you got any of the epoxy on the shaft of the pin then scrape it off with your utility knife so it won’t make it difficult to reinstall. This is what my pin looked like after I cleaned it up:
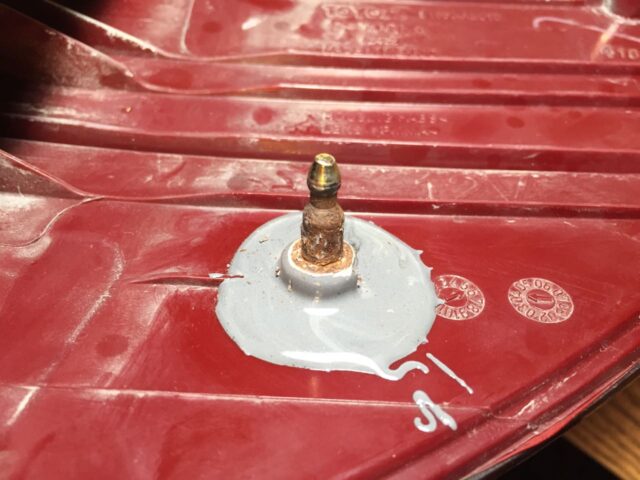
Step 11: Reinstall the plastic clip.
If your clip came out like mine did then snap it back into place:
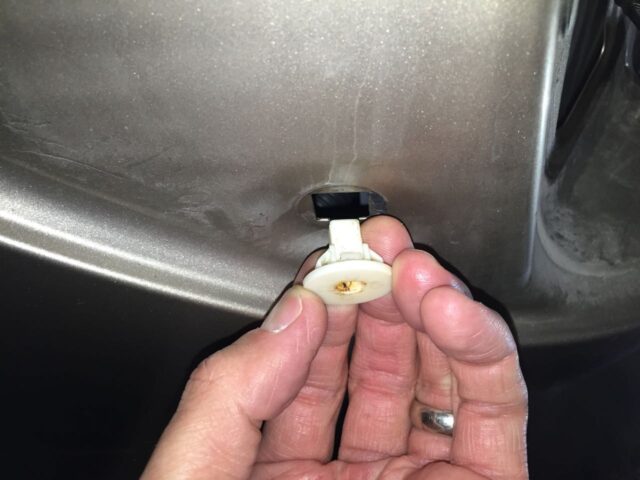
Here the clip is snapped back in place:
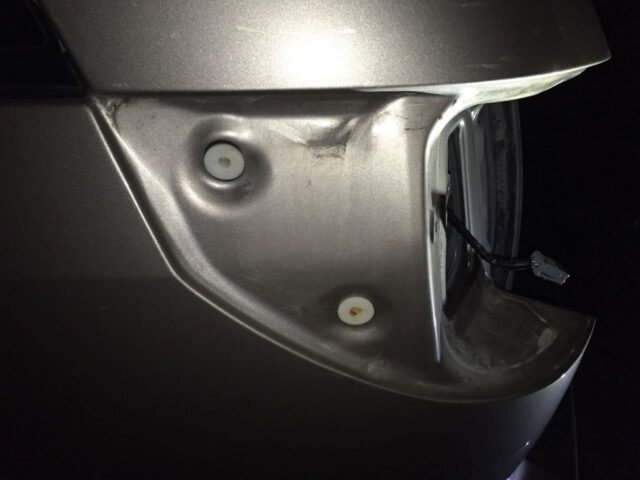
Step 12: Reinstall the tail light assembly.
I’ll have you jump over to Step 8 on my other article to reinstall this tail light: How to Replace Toyota Sienna Brake Light Bulbs
Now you have salvaged a tail light that the dealer surely would have thrown away and charged you for a brand new one!
Amazon Associate Disclosure: As an Amazon Associate I earn from qualifying purchases. This means if you click on an affiliate link and purchase the item, I will receive an affiliate commission. The price of the item is the same whether it is an affiliate link or not. Regardless, I only recommend products or services I believe will add value to Share Your Repair readers. By using the affiliate links, you are helping support Share Your Repair, and I genuinely appreciate your support.

