How to Install AdBlock for Chrome in Windows XP
Here are all the posts in this series:
I recommend AdBlock if you are browsing with Chrome:
- How to Install AdBlock for Chrome in Windows 8
- How to Install AdBlock for Chrome in Windows 7
- How to Install AdBlock for Chrome in Windows XP (this post)
Adblock Plus is required for Internet Explorer (AdBlock won’t run in I.E):
- How to Install Adblock Plus for Internet Explorer in Windows 8
- How to Install Adblock Plus for Internet Explorer in Windows 7
- How to Install Adblock Plus for Internet Explorer in Windows XP
How to Install AdBlock for Chrome in Windows XP
Step 1: In Chrome visit the AdBlock page in the Chrome Web Store.
You can do that by visiting this link here.
Step 2: Click on the blue “+ Free” button on the top right of the web page to download AdBlock.

Step 3: Confirm the installation of the Extension.
A menu will drop-down from the top of the page. Click the “Add” button.
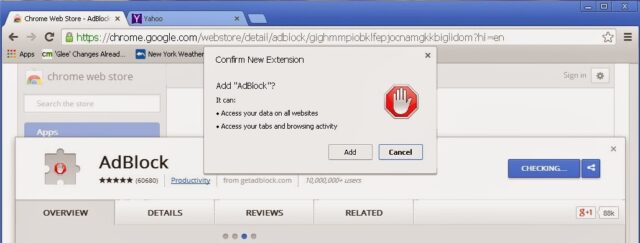 |
| AdBlock’s “Confirm New Extension” menu– click “Add” |
After you have clicked the “Add” button a new tab will open up showing you the status of the install and then you will see the following page, giving you the opportunity to donate if you wish (not required though):
 |
| Now you have AdBlock installed |
Step 4: Customize your AdBlock installation.
You can add Ad’s to block if they aren’t blocked by default and this can include sections of websites. You must be careful not to block to general of a section because it can block content that you do want to view but I’ll give an example of how to block the section of Foxnews.com’s website that I don’t ever want to see, the “Features and Faces” section.
Step 5: Visit foxnews.com.
 |
| foxnews.com website |
Step 6: Scroll down so you can see the Features and Faces Section on the screen.
 |
| The Features and Faces Section of Foxnews.com, block it |
Step 7: Click on the AdBlock icon on the top right of your browser and click on “Block an ad on this page.”
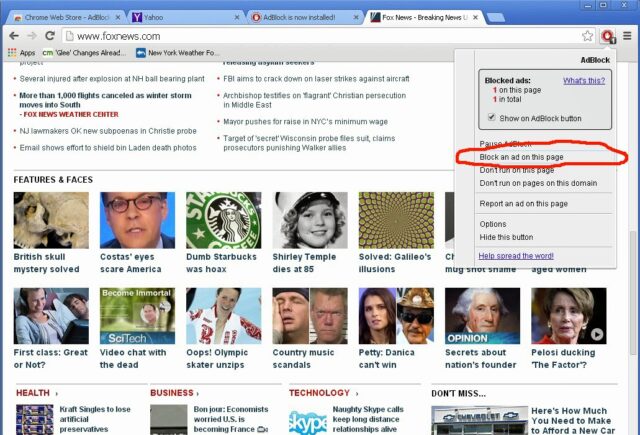 |
| AdBlock menu–click “Block an ad on this page” |
A small “Block an ad” window will pop up. You will also now notice that as you move your cursor over the webpage the sections will highlight, showing you how AdBlock sees the website.
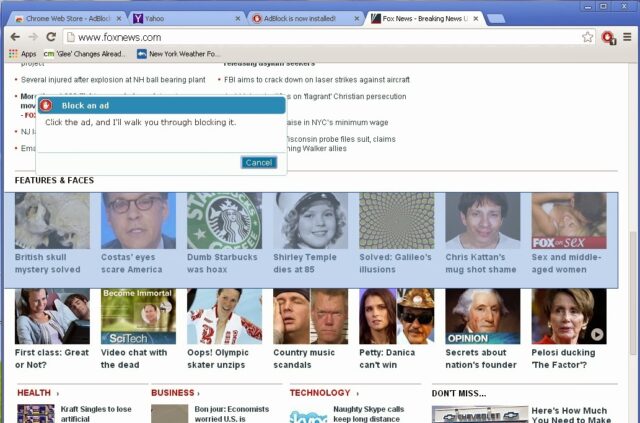 |
| Sections highlight as you move the cursor over them |
Step 8: Click on the section you wish to block.
The full section doesn’t need to be highlighted and in the next step you’ll see why. Move the cursor between the images in the first row of the “Features & Faces” section and click once. This is what you’ll then see:
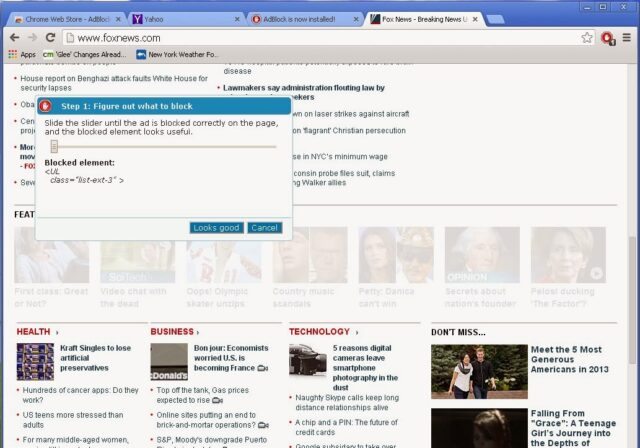 |
| The section greys out once you have clicked on it |
Note that the blocked element says:
<UL class=”list-ext-3″ >
That text is part of the html script language websites are written in. We want that to say something very unique, specific to this section so it doesn’t accidentally block other portions of the web page. For example, if the script said something along the lines of <b>, it would block all the bold text, which you won’t want to do. You can click and drag the slider to expand the section. Drag the slider until you see this (you may need to Cancel and start over if you didn’t click in the correct place the first time):
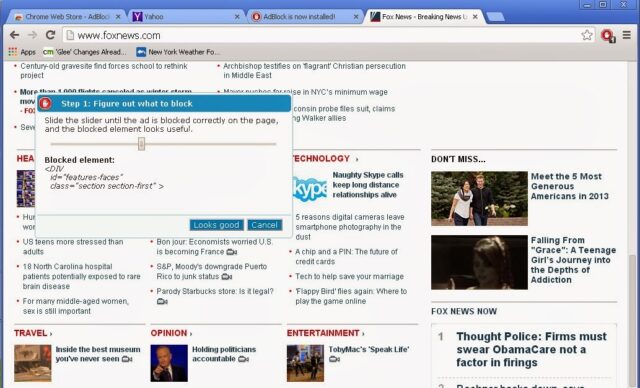 |
| Adjusting the AdBlock slider to cover the entire Features and Faces section |
Note that the code says the following:
<DIV id=”features-faces” class=”section section-first” >
Because the code that AdBlock is looking for includes the words “features-faces” we know it won’t block parts of the page we want. Now you can click the “Looks good” button to go ahead and block the section moving forward. No more Features and Faces raunchy articles!
Amazon Associate Disclosure: As an Amazon Associate I earn from qualifying purchases. This means if you click on an affiliate link and purchase the item, I will receive an affiliate commission. The price of the item is the same whether it is an affiliate link or not. Regardless, I only recommend products or services I believe will add value to Share Your Repair readers. By using the affiliate links, you are helping support Share Your Repair, and I genuinely appreciate your support.


