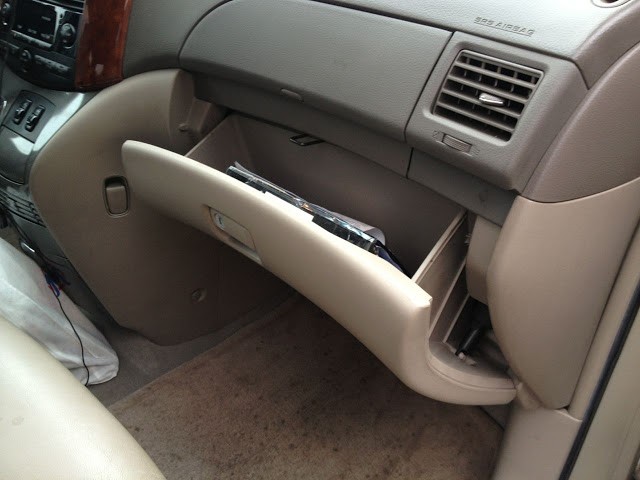
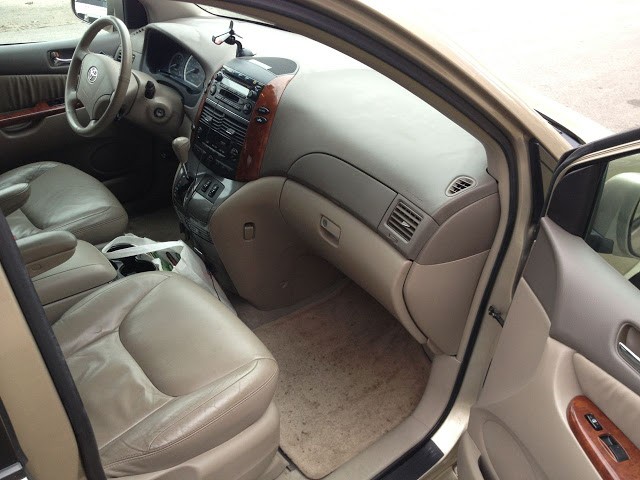
This tutorial is more about answering the question, “Where is the cabin air filter located on a 2004 Toyota Sienna?” Once you know where it is, it’s not hard to get to it and replace it. The answer to that question is “behind the large glove compartment.”
How to Change the Cabin Air Filter on a 2004-2010 Toyota Sienna
Hardware:
- 2004-2010 Toyota Sienna XLE (FWD)
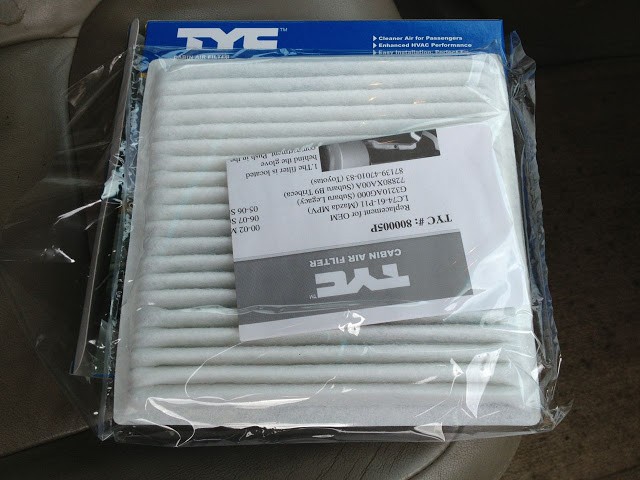
- TYC 800005P Toyota Replacement Cabin Air Filter
- OEM Toyota Cabin Air Filter Part Number 87139YZZ05 (or also written as 87139-YZZ05 or 87139-47010-83)
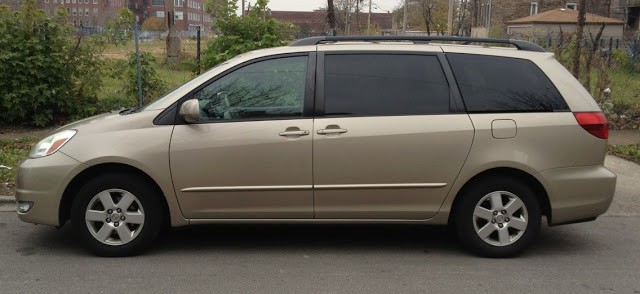 |
| 2004 Toyota Sienna XLE |
Step 1: Dislocate the two “catches” on either side of the glove compartment to open it all the way and therefore expose the cabin air filter tray.
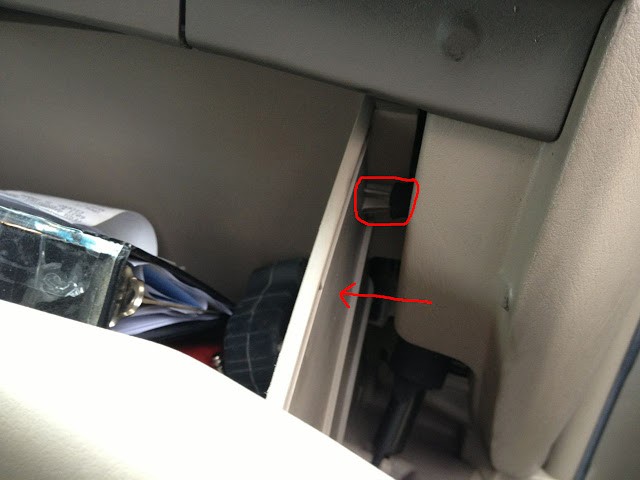
The catch is circled below. Press in on the sides of the glove compartment drawer to flex the plastic and make room for the catches to clear the sides of the dash.
You’ll have to press in on both sides simultaneously, wiggling the entire glove compartment back and forth, and play around with it a bit by dislodging one and then the other, to get them to release. Below is what they will look like once you get them out. Note: The rubber grommet that fits over the end is so that their is some cushion when the door opens and hits the stoppers. Make sure that they do not come off. They stayed on for me though.
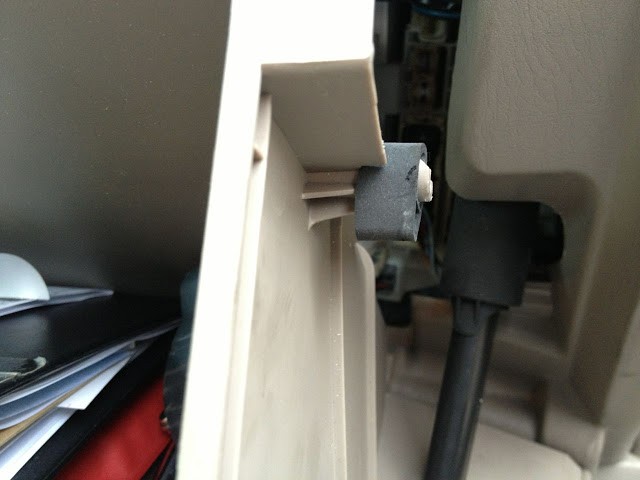 |
| Right glove compartment “catch” |
Important note: There is a shock on the lower right side of the glove compartment (that makes it open slowly and gradually) that will stay connected. Don’t force the glove compartment open more than it allows or you may break something. The black (vertical) cylindrical tube is the shock and is connected to the dash and the lower right corner of the glove compartment:
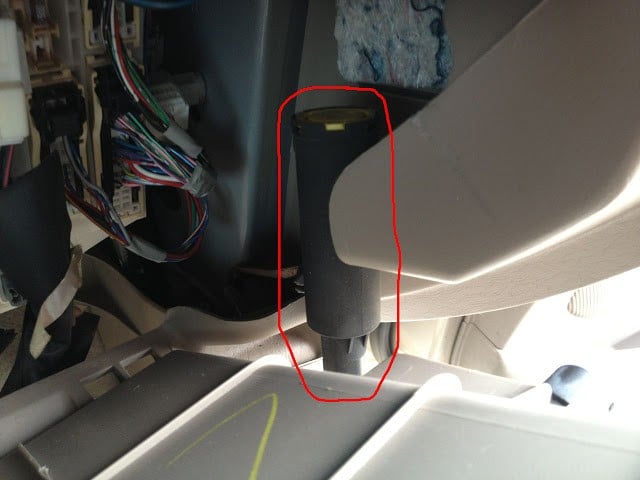 |
| Glove compartment shock that dampens its opening |
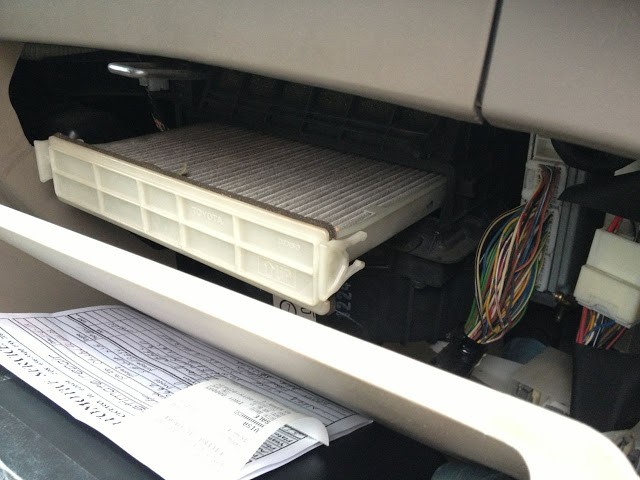
Once you have the glove compartment all the way open you can see the white cabin air filter tray (actually called the “air filter cover plate” in the technical manual).
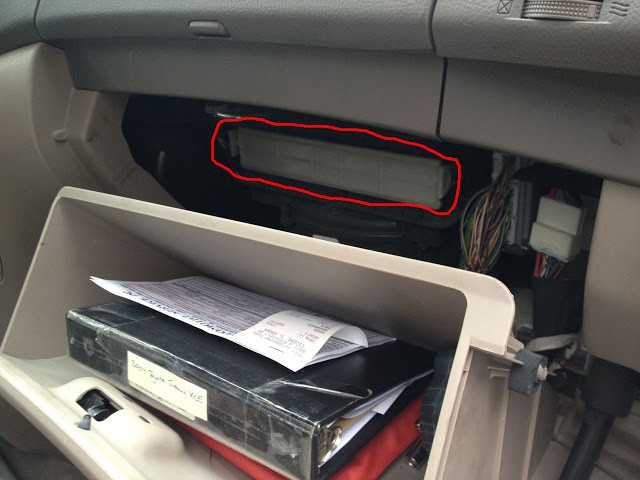 |
| Cabin air filter tray/holder circled in red |
Step 2: Remove the cabin air filter tray.
Grab it by the front edge and pull it straight out. There are catches on each side but they don’t require anything special to remove it.
Step 3: Remove the old air filter from the tray.
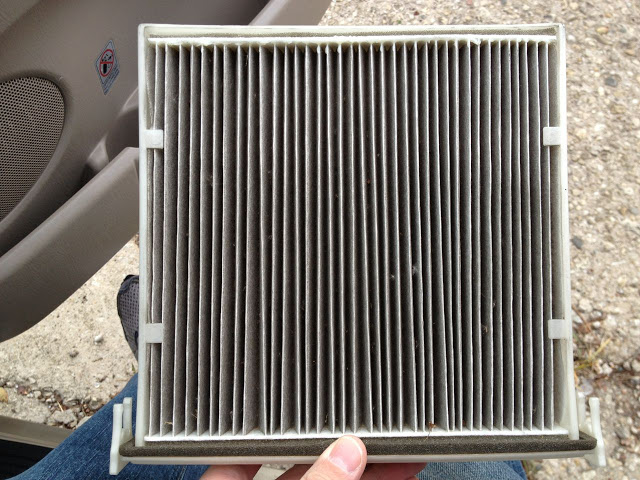
There are little notches that hold the filter in place–simply flex and maneuver the filter around the tabs and out of the tray.
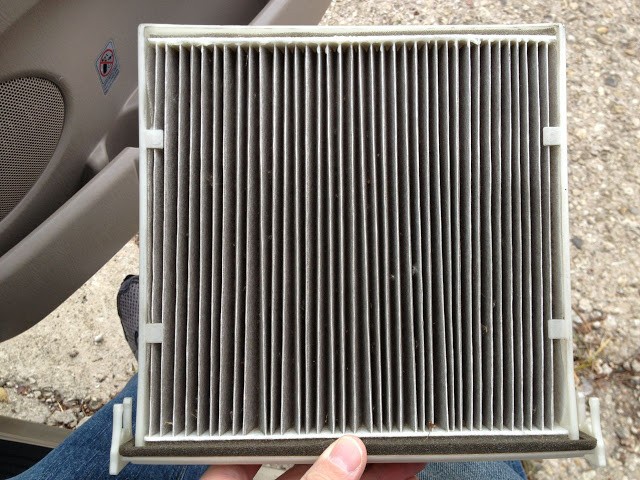 |
| The original cabin air filter being held in the tray by the four tabs |
The new (generic) filter I purchased is not nearly as well built as the original (figure that one out) but given most cars don’t even have cabin air filters, it should do just fine.
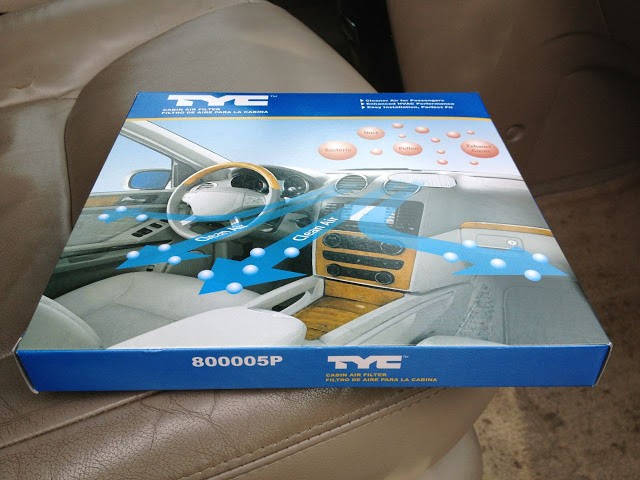 |
| TYC 800005P replacement (generic) Cabin Air Filter for a 2004 Toyota Sienna XLE |
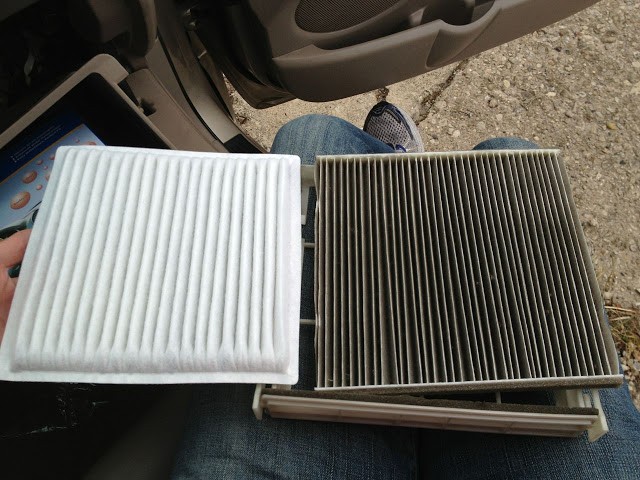 |
| Comparison between the generic filter and the one previously installed, probably an OEM filter |
Step 4: Install replacement filter.
I was pleasantly surprised that the tray is designed to hold this type of replacement filter and has little notches for the edge to tuck under:
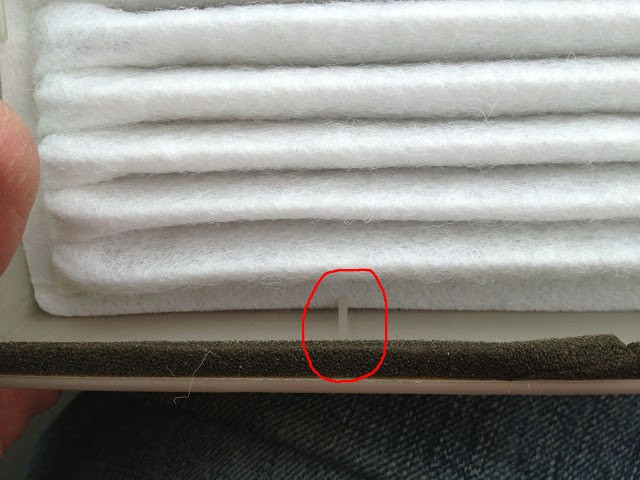 |
| There are 4 notches like this that the filter should be tucked under. |
FYI: The filter will be held into place by the pressure of air pushing the filter against the tray so it’s not like it will come out of there.
Step 5: Reinstall the filter tray with the new filter in it.
The tray is marked with an up arrow so you know which side goes up:
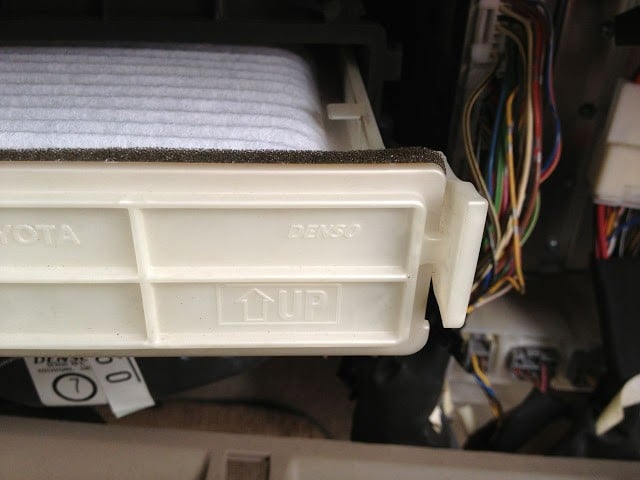 |
| Right side up arrow on cabin air filter tray |
Step 6: Reinstall the glove compartment so the catches are back in place.
The opening for the glove compartment is wedge shaped (as are the catches as well) so it is pretty easy to get the glove compartment closed again. I wouldn’t pound on it but just ease it back into place and they will hop back into their place as you shut the door. Done!
All My Toyota Sienna Posts:
- How to Change the Air Conditioner Display on a 2004 Toyota Sienna From Metric to English
- How to Replace the Front Struts on a FWD 2004 Toyota Sienna
- How to Change the Air Filter on a 2004 Toyota Sienna
- 2004 Toyota Sienna XLE DVD Entertainment System Does Not Display Video After Turning Vehicle Back On
- How to Fix Sienna Dome Lights Randomly Coming On And Alarm Going Off
- How to Replace the Rear Liftgate Shocks on a 2004 Toyota Sienna
- How to Change the Cabin Air Filter on a 2004 Toyota Sienna
- How to Program the Door Lock Transmitter on a 2003 Toyota Sienna
- How to Replace the Power Sliding Door Cables on a 2004-2007 Toyota Sienna XLE
- How to Prolong the Life of Your Toyota Sienna Sliding Door Cables
- How to Replace the Stereo on a 2004-2010 Toyota Sienna
- How to Fix The Spring on the Cassette Door on a 2004-2010 Toyota Sienna Stereo
- How to Program a Keyless Entry Remote for a 2004-2010 Toyota Sienna
- How to set the Time/Clock on a 2004-2010 Toyota Sienna
- Horn Won’t Work-How to Troubleshoot The Horn on a 2004-2007 Toyota Sienna
- How to Remove the Front Bumper on a 2004-2007 Toyota Sienna
- How to Replace the Starter on a 2004-2007 Toyota Sienna
- How to Replace the Thermostat on a 2004-2007 Toyota Sienna
- How to Replace the Radiator on a 2004-2007 Toyota Sienna
Amazon Associate Disclosure: As an Amazon Associate I earn from qualifying purchases. This means if you click on an affiliate link and purchase the item, I will receive an affiliate commission. The price of the item is the same whether it is an affiliate link or not. Regardless, I only recommend products or services I believe will add value to Share Your Repair readers. By using the affiliate links, you are helping support Share Your Repair, and I genuinely appreciate your support.

